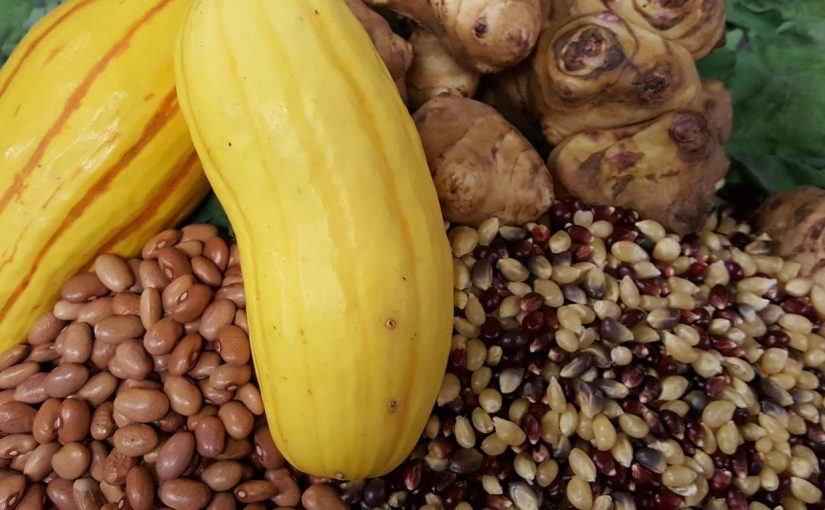
Sex and the Single Squash: A study in plant sex, sexuality, reproduction, and seed saving

In the 1960s, author and future Cosmopolitan magazine Editor Helen Gurley Brown scandalized the country with her book about independent single women called “Sex and the Single Girl.”  Taking a page from Ms. Brown, we can have a discussion about “Sex and the Single Squash.”  Here, we can talk about plant floral structure and reproduction and its effect on fruit production and even seed saving.  A true discussion of the “birds and the bees” if you will. This is especially important in the vegetable and fruit realm, since reproduction is why we get tomatoes, peppers, apples, plums and such in the first place.  It also is important for producing seeds, as those arise from the reproductive process as well.

Whether you knew it or not, flowers are not just different in appearance from plant to plant, but the ways in which they are pollinated and turn into fruit are different as well.

Some plants have what are called “perfect” flowers where both male and female parts are present, such as roses, apples and dandelions. In a way of speaking, you could say that these flowers are hermaphroditic.  These flowers may or may not be self-pollinated.  Depending on species genetics, some plants can self-fertilize (like tomatoes and beans) and others require cross-pollination (like apples).

Other flowers are “incomplete,” meaning that they have separate male and female flowers.  Some plants with “incomplete” flowers are called dioecious (Greek, meaning “two households”), and have distinct male and female plants such as ginkgo trees, holly bushes and kiwi vines. Some “incomplete” plants are monoecious and have distinct but separate male and female flowers on one plant — like squash, cucumbers and corn.

So, here’s where the vegetable garden comes in — one of the questions that I get every year without fail has something to do with why most of the flowers on a squash or cucumber or other cucurbit (that’s what we call plants in this family) plant do not produce fruit.

There are a few explanations – high heat causing aborted flowers or fruits or improper pollination, absence of pollinators, or, most likely, the fact that some of those flowers were never going to set fruit because they were male.  In answer, I have to explain that about half or more of the flowers on the plant are male and are, unfortunately, anatomically incapable of producing fruit.

There are a few ways to tell male and female flowers apart when it comes to members of the cucurbit family.

First, look at the base of the flower. If the base is swollen and looks like it is a tiny version of the mature fruit, then it is a female flower.

If the base is just a straight stem (in flowers, this stem is called a peduncle), then it is a male flower.

The second method is to look inside the flower. If there is one large central structure, called the pistil, that indicates the flower is female.

Male flowers will have several, smaller stamens inside. Female flowers also tend to be larger than male flowers.

Image result for squash flower male female

In the world of the single, available female squash blossom, life revolves around attracting honey and other native bees that have also recently visited male flowers to assure pollen transfer.

All members of the cucurbit family require this pollination tango to make sure that the female flowers produce fruit.

Each species and even variety of squash have a different ratio of male to female flowers. The ratio is usually about 1-to-1, but it is not unusual to see varieties with many more males than females.

Many of the plants also produce an abundance of male flowers early in the season, sort of as a teaser to make sure bees are attracted to the plant later on to pollinate the female plants.

So if a majority of flowers die early in the season without setting fruit, or about half of the flowers die throughout the season, there is nothing to worry about.

If female flowers are dying throughout the season without producing fruit, though, there is a definite problem. This means that there are no bees available to pollinate the plants.

If fruits have shrunken parts or misshapen, then there could be an issue of incomplete pollination from not having bees around. This could result from not having enough food for them in the area to encourage their presence, or from weather being too cool or wet for bees to get out and pollinate.

The lack of bees could also be the result of improper use of pesticides in the area.

If it seems like the birds and the bees aren’t happening in your garden, there are ways that you can ensure fruitfulness by taking matters into your own hands.

Transferring pollen from male flowers to female flowers can be accomplished using a small artist’s paintbrush or by simply pulling off a male flower and using it to apply pollen directly.

Gardeners who want to save seeds from plants in this family should also pollinate flowers by hand, and actually go so far as to protect the female flower from outside pollen using some sort of cover.

In fact, this method is often used by plant breeders or those who want to save seeds of crops that easily cross-pollinate.  Hand pollination followed by bagging the flower to keep pollen or pollinators away to avoid accidental unwanted pollen is often used to produce.

Believe it or not, several members of the squash family that look or taste nothing alike are the same species and can cross-pollinate. For example: Zucchini, summer squash, pumpkins, scallop squash, decorative gourds and acorn squash are all in the species Cucurbita pepo and can cross with each other.

A few years ago, one of my Master Gardeners came up to me at the end of a meeting and asked me what was wrong with her zucchini. She handed me an object roughly the shape of a zucchini, only a bit larger and splotched with orange. She had saved the seeds from the year before.20151104_200712

I immediately answered that her zucchini had crossed with a pumpkin. Both of these plants are the same species and can easily cross pollinate. Even if you don’t have pumpkins in your garden, bees can travel 2 miles or more in search of food.  So she was left with what I would call a Puccini.

Easy cross-pollination of varieties is why the most common heirloom crop varieties you’ll find are tomatoes and beans. Both of these crops have closed flowers that help resist cross-pollination.

They are most likely to be self-fertile, meaning that the flower will pollinate itself without outside assistance. This helps the plant breed true — so next year you end up with something that’s roughly the same as what you had this year. These plants can be just a few feet away from a different variety and they will not cross pollinate.

If you want to save something that is bee-pollinated, like your squash, pumpkins or cucumbers, you might want to do the brush and bag technique. Otherwise you might end up with a surprise in the garden next year.

The heirloom varieties that we often save are open pollinated, meaning that when they cross with themselves their genetics are relatively stable and you won’t see a lot of difference from year to year. (There will still be some difference, so if you save seeds for a long time you can end up with your own strain of a variety suited to your garden and location.)

Hybrids, on the other hand, have less stable genetics than the open pollinated varieties. With the way genetics work, some of those offspring will have traits of the mother plant, some will favor the father and some will be similar to the plant you are trying to save (and some might look like the milkman).

When seed companies sell hybrid varieties, they have to maintain a population of the mother plant and father plant to cross them every year to get the specific hybrid variety.

While the results of saving seeds from hybrids will be unpredictable, it can also be fun. My friend, plant breeder Joseph Tychonievich, points out in his talks and his book, “Plant Breeding for the Home Gardener,” that you can save the seeds from plants most closely resembling the desired plant over several years.

Just keep planting your selected seeds and harvesting the closest one to what you want. After about three or four years, you can end up with a relatively stable, perhaps even open-pollinated variety, that is your very own based on that hybrid variety you love.

And if you end up with a cross-pollination, either purposeful or accidental, you won’t see a difference in the fruit from this growing season (except maybe in corn, but that’s another story)  Those changes won’t be apparent until you grow out the seeds you saved.  So you won’t know until next year if you have one of those pucchinis.

And don’t forget: If you do have an overabundance of male squash flowers, they are edible too. You can put them in a casserole, fry them, stuff them, and more.

It’s all about location, location, location

Whenever we (the Garden Professors and our community) answer garden questions, we almost always will ask the location of the garden.  I’m sure this frustrates some people who think that plants act the same wherever they are.  However, this is not the case.  There isn’t a one-size-fits-all to most garden questions.

For example, I work on the east side of Nebraska in Omaha, along the Missouri river.  The environment (weather, soil, etc) here is vastly different than where I’ve spent most of my life in West Virginia.  I had to re-learn how to answer questions when I moved.  The soil pH is different (I’m still lamenting the fact that I can’t grow blueberries in Nebraska), the precipitation is much lower.  Even now when I appear on the statewide gardening show Backyard Farmer, I have to keep in mind the location of the incoming question.  The western side of the state is even drier than the eastern side, the growing season much shorter, and recommendations are vastly different.

The difference of where plants can grow and can’t is even more apparent when you travel to vastly different climates.  I recently came back from a trip to the tropical paradise of Costa Rica.  Many of my traveling partners and friends back home were blown away with the abundance of plants growing in yards, farms, and even in the wild that cannot grow “back home.”

The most common bedding plant in lawns were a popular holiday favorite here in the states – amaryllis.  They were planted in abundance along sidewalks and driveways.

Amaryllis prolific in a Costa Rican yard

I visited a diversified coffee farm that was using Dracena (a common houseplant) as living fence posts in their vegetable garden. (And did I say coffee farm – nothing like drinking a farm fresh cup of coffee right on the farm).

Living Dracena fence posts at a Costa Rican coffee and vegetable farm

Tillandsia air plants were growing like weeds (which is basically what they are) on the trunks of trees.

These are all tropical plants that won’t survive in colder or drier climates of the US.  (The southern US states can grow more tropical stuff, but is is a small portion of the country.)

Many of the plants we grow both indoors and out here in the states come from different areas and grow differently in those areas than they do here.  Our vegetables come from all over the world.  So do our flowers and houseplants.

Plants from warmer areas either have to be grown indoors or as annuals even if they are perennial or evergreen in their native environments.

This is why the location of your garden, environment, and even the microclimate in your yard is important to know when selecting plants.  Aside from the difference of what can grow, plants grow much differently in Florida than they do in Minnesota or Virginia. And why it is important information when you’re asking questions about how to grow plants or control insects and diseases – because its all about location, location, location.

Bonus: Cashew apples!


Arbor Day of Horrors

Happy Arbor Day!  What, you aren’t celebrating?  As a recent transplant to the state of Nebraska, I was amazed to learn that the Cornhusker State is the birthplace of the day we set aside to celebrate trees.  (Since most people associate the state with corn, football fanatics, and steak).  And since Arbor Day is near and dear to Nebraska, it is the only state that celebrates it as a civic holiday (most state offices were closed – no drivers license for you!).

The holiday got its start in 1872 when J. Sterling Morton of Nebraska City, Nebraska (just 40 miles south of Omaha) organized the planting of one million trees in the state of Nebraska on April 10.  Morton had been a newspaper editor, acting governor of the state, and after he founded Arbor Day was the 3rd US Secretary of Agriculture, having been appointed by President Grover Cleveland.

He built a mansion in Nebraska City that was later remodeled by his son Joy Morton (who had lots of money since he founded a little company called Morton Salt – maybe that’s where the anecdotal info of using salt to kill tree stumps/weeds started!).  These days the mansion is part of the Arbor Lodge State Historical Park.  The Arbor Day Farm is also part of the park, where locals and tourists alike stop for apple orchards, a tree playground, and wine tasting.

The modest Arbor Lodge, as captured when we were being tourists in our new state.

But if you haven’t planned a trip to Nebraska City for Arbor Day and you want to celebrate it at home by planting your own tree….well, there are some definite right and wrong ways to do things.  So I thought we’d invite people to share their tree horror stories.

What have you seen that just makes you go huh?  Do you have stories or pictures that are worthy of the carnage over at Crimes Against Horticulture?

Like the always frightening Mount Treesuvius?  (down with Tree Volcanoes!)

A tree volcano (source: extension.msstate.edu)
Mt. Treesuvius Erupts (source: bygl.osu.edu)

Or how about the girdling root stanglehold of slow death?

Image result for tree girdling roots

Have you seen poorly planted, improperly pruned, damaged, or scary trees? Share your stories, pictures, and laments with us.

A Raised Bed Rebuttal: In defense of a common garden practice and soil health

One of the things I miss (and sometimes don’t miss) after my move from West Virginia to Nebraska is writing my weekly garden column for the Charleston Gazette-Mail newspaper.  It was a great way to always keep thinking about new things to talk about and a great way to connect with the public.

After I left, the newspaper replaced me with a team of 4-5 local gardeners who would take turns writing about their different gardening insights and experiences.  Some have been really good, like the ones who were my former Master Gardener volunteers.  However, sometimes I find the bad information and attitude of one of the writers off-putting and even angering.

Take for example this missive which equates sustainable agriculture (a term which is pretty well defined as a balance of environmental stewardship, profit, and quality of life) solely to permaculture and biodiversity while espousing an elitist attitude about “no pesticides, no fossil fuels, no factory farms, growing all you need locally and enhancing the land’s fertility while you’re at it.”  He got all this from an old photo of dirt poor farmers who were apparently practicing “permaculture” – which I’m sure was foremost on their minds while they were trying not to starve to death.  The fact is that our food system (and the food that today’s low income families) depends on comes from a mix of small and large farms. And most of those “factory farms” are actually family owned, and not everyone can afford to grow their own food or pay the premium for organic food (which still has been treated with pesticides and is in no way better or healthier than those conventionally grown).

Now, I know I no longer have a dog in that fight, but when I see bad information, especially when it is aimed toward an audience that I care deeply about I just have to correct it.  So two weeks ago when I saw his latest gem of an article berating a woman (and basically anyone) for using lumber (and those who work as big box store shills to promote them) to build raised bed gardens and should instead till up large portions of their yard for the garden I was aghast.  Putting aside the horrible advice to till up the garden (which we’ll talk about in a minute) or the outdated recommendation of double digging (proven to have no benefit), that advice is just full of elitist assumptions toward both the gardener and toward the technique. It is especially ridiculous and ill-informed to suggest that tilling up a garden and destroying the soil structure is much better ecologically speaking that using a raised bed (and we’ll talk about why in a little bit).

Don’t want to do a raised bed?  Fine, it isn’t for everyone.  But that doesn’t mean you should go out and till up a large patch of land that will degrade the soil, lead to erosion and runoff, and reduce production.  It does not do anything to improve drainage nor aeration.

So let’s do a breakdown of why I find this article, its assumptions, and bad science so distasteful:

Bad Assumptions (and you know what they say about assuming)

The gardener didn’t have a reason for a raised bed other than she had been told that’s the way you do it.

This assumption fails to take into account the many different reasons why a gardener may prefer to use a raised bed.  Does she or a family member have mobility limitations where a raised bed would provide access to be able to garden?  Or does she have space limitations for a large garden patch?  Would a raised bed make it easier for her to manage and maintain the garden?  Making a blanket pronouncement against the technique fails to use empathy to see if it actually would make gardening more accessible or successful for the gardener. Is she wanting a raised bed because the soil in the ground at her house is too poor or contaminated?  West Virginia is notorious for having heavy clay, rocky soil that is pretty poor for growing most crops.  It can take years of amending to get it even halfway acceptable for gardening.  Or perhaps she lives on a lot that had some sort of soil contamination in the past and she’s using raised beds to avoid contact with the contaminated soil.

Raised beds also have some production advantages – the soil heats up faster in the spring, allowing for earlier planting.  A well-built soil also allows for improved drainage in areas with heavy soil or excess moisture.

The gardener has access to equipment to till up a garden space, have the physical strength and endurance to hand dig it, or is she able to afford to pay someone to do it for her?

Raised beds can often be easier for gardeners to build and maintain, often not needing special equipment or heavy labor.  If the gardener isn’t supposed to benefit from these efficiencies, how will she go about tilling up the soil for her new garden.  Does she or a friend/neighbor have a rototiller or tractor she can use?  Is she physically capable of the often back-breaking work of turning the soil by hand?  Or does she have money to pay someone to do it for her?  So these “cheaper and easier” methods he describes could actually end up costing more and being harder than building a raised bed.

The raised bed has to be built out of lumber, which apparently only comes from the Pacific Northwest and is a horrible thing to buy. First off, raised beds can be built out of a number of materials.  The list usually starts with lumber.  Some people tell you to use cedar (which does primarily come from the PNW), since it is more resistant to decay, but plain pine that’s treated with a protective oil or even pressure treated is fine (it used to be not OK back before the turn of the century when it was treated with arsenic, but most experts now say it is OK since it is treated with copper).  The dig against the PNW lumber industry is as confusing as it is insulting, since there’s lots of lumber produced on the east coast, and even a thriving timber industry right in West Virginia.  Most lumber these days is harvested from tree farms specifically planted for the purpose or by selective timbering that helps manage forest land for tree health and sustainability.

The list can go on to include landscaping stone, concrete blocks, found materials like tree branches, and on and on.  These days, you can even buy simple kits you can put together without tools and with minimal effort that are made of high-grade plastic or composite lumber.  They’re getting cheaper every year, and can be especially affordable if you find a good sale or coupon.

Heck, a raised bed doesn’t even require the use of a frame at all….just a mound of well amended soil in a bed shape will do.  No need to disturb the soil underneath, just get some good topsoil/garden soil in bulk or bags from your favorite garden center, mix it with a little good compost, and layer at least 6 inches on top of the soil.  Use a heavy mulch on top if you are afraid of weeds coming up through the new soil.

The soil she’d buy is trucked in from Canada.

I’m guessing this has some sort of assumption that the soil a gardener should be putting a raised bed is like a potting mix composed primarily of peat moss. While many gardeners are trying to decrease the use of peat moss, which is a non-renewable resource harvested from Canadian peat bogs, the recommended soil for a raised bed is not potting mix or one that even contains a large amount of organic material.  The recommended composition of raised bed soil is largely good quality top soil, which is usually sourced locally, mixed with a bit of compost which could be from home compost, a local municipal composting facility or producer, or from a bagged commercial product that is likely from a company that diverts municipal, agricultural, and food wastes into their product.

Bad Advice based on Bad Science (or lack thereof)

Tilling or disturbing the soil is a common and acceptable way to prepare a garden.

More and more evidence is emerging that tilling or disturbing the soil is actually one of the worst things you can do in terms of both production and environmental impact in agricultural production.  First, tilling disturbs and in some cases destroys the soil structure.  Destroying the soil structure allows for increased erosion, especially when the bare soil is washed away during heavy rains or blown away in heavy winds.  Excess tillage and wind is what actually led to the dust bowl, which actually led to the early promotion of conservation tillage practices through government programs like Conservation Districts (and also gave us some great literature, thanks to John Steinbeck).  Aside from the soil particles that erode, having open, tilled soil leads to nutrient runoff that contribute to water pollution.

 One other structure negative is the production of a hardpan or compressed layer of soil that occurs just below the tilled area.  This results from the tines of a tiller or cultivator pressing down on the soil at the bottom of where it tills and can drastically reduce the permeation of water and gasses through the soil.

Alt
Soil Aggregates and microbes

The aggregates in the structure of un-disturbed soil provide myriad benefits to soil health, especially in providing the capacity for the growth of good microorganisms.  Studies have shown that the population of soil microbes is drastically higher in agricultural soils that haven’t been tilled.  Therefore, tillage reduces soil biodiversity.

One of the reasons for increased soils microbes in no-till soil is an increase in soil organic matter.  No-till allows for some crop (roots, etc) to remain in the ground and break down.  Tillage also incorporates more air into the soil, which does the same thing that turning a compost pile does – it allows the decomposition microbes to work faster in breaking down organic matter.  This increased activity then decreases the amount of organic matter.  So tilling the soil actually reduces organic matter.  The structure and organic matter also allows no-till soil to have a higher Cation Exchange Capacity, or ability to hold nutrients.

When the carbon in the organic matter in the soil is rapidly depleted after tillage, it doesn’t just disappear.  The product of the respiration from all those bacteria and fungi is the same as it is for all living creatures – carbon dioxide.  The organic matter held in the soil therefore provides a great service (we call this an ecosystem service) in that it sequesters carbon from the environment.  This can help mitigate climate change   and even effect global food security.

Source

Double digging does a garden good.

Look through many-a garden book and it will tell you to start a garden bed by double digging, which is a term used to describe a back breaking procedure where you remove the top layer of soil, then disturb a layer beneath it and mix up the layers.  While it may not be as drastic as running a tiller or tractor through the soil, it still destroys the structure with the same negative outcomes as above.  Additionally, while many gardeners swear by it, there is evidence that the only benefit to come from it is to prove to yourself and others that you can do hard work.   It has no benefit for the garden and usually negative effects on the soul, psyche, and back of the gardener.

Large tilled up gardens are easier to maintain. One of the benefits of gardening in a bed, raised or otherwise, is that the close spacing allows you to grow more stuff in a smaller area. By reducing the area under production, you also reduce the labor and the inputs (compost, fertilizer, etc) that are used.  Using the old in-ground tilled up garden method where you grow in rows means that you have more open space to maintain and will be using inputs on a larger area that really won’t result in more production (it is really wasted space and inputs).

So, how do you start a garden if you don’t want to build a raised bed and know that you shouldn’t disturb the soil?

So you realize that tilling up the soil is really bad from both an ecological and production standpoint, but you don’t want to build a raised bed structure? That’s perfectly fine.  Gardening in a bed, raised or not, is a great, low-impact gardening practice.

To get started, you don’t have to disturb the soil at all.  Simply adding a thick layer of compost and topsoil on top of the soil in the general dimensions of the bed is a good way to start a bed.  No need to till or disturb.  And over time, the organic matter will eventually work its way down into the soil. If you have really heavy (clay) soil, you’ll probably want to start with a fairly deep (at least 6 to 8 inches) layer of soil/compost.

Just cover with your favorite mulch to keep it in place and reduce weeds (I prefer straw and shredded newspaper, but you can use woodchips as long as you don’t let them mix in with the soil – something I never can do in a vegetable garden where I’m planting and removing things on a regular basis). Keep in mind that a good width for a vegetable bed is about four feet and you want a walkway of at least two feet between them.  This allows you to not walk on the good soil, which can cause compaction.

If the spot where you want to put your bed is weedy, use your favorite method to remove weeds before laying down the layer of compost/soil.  This could be through herbicide usage (keeping in mind most have a waiting period to plant, though some are very short) or mulch.  If you are planning ahead (say at least a year), our Garden Professors head horticulturalist suggests a layer of woodchip mulch 8-12 inches deep that can turn a lawn patch into a garden patch.  They reduce the weeds and build the soil as the break down.

Starting Seeds with Success: Best Practices

As we edge closer to spring it is time to start getting ready for the active growing season.   Many gardeners kick off their gardening year early with indoor seed starting to prepare for the upcoming season.

Starting your own seeds is an excellent, and often economical way to prepare for your year of gardening. Whether you grow vegetables or flowers (or both), starting from seeds can offer many benefits. Of course, there are some dos and don’ts for getting the most mileage from your seed starting endeavors.

I recently connected with Joe Lamp’l, host of the Growing a Greener World show on public television and the more recent The Joe Gardener Show podcast to talk about advanced seed starting techniques and technology.

You can follow the link below to listen to the show on your computer, or find it on Stitcher or iTunes (links included on the show page, too).  In addition to the podcast, the show page features extension notes on everything we chatted about with links to good reading materials.

Seed Starting Indoors: The Joe Gardener Show featuring GP John Porter

Here are a few of my best seed starting tips:

  • Be economical. One of the great benefits of starting plants from seeds is saving money. A packet of several (even hundreds) of seeds is often around the same price you’ll pay for one plant at the garden center. Of course, if you go out and splurge on the fancy (and expensive) seed-starting systems you see in your garden store or favorite catalog you may end up investing more than you planned. Instead of fancy seed starting trays or peat pellets and pots, use low-cost or recycled items such as takeout containers or shallow disposable aluminum baking pans to start your plants.  Remember that if you are reusing containers, especially ones that have had plants grown in them before, that sterilization is key in reducing disease.  Thoroughly wash the containers, then dip in a solution of 10% household bleach (1 part bleach : 9 parts water) to disinfect.  There are some horticultural disinfectants out there, but bleach is usually the easiest for home gardeners to get since you can pick it up at the local store.
  • Start seeds in clean, sterile seed-starting mix. This is one area where I don’t skimp. You’ll want to use a sterile mix that is primarily made of peat or coconut coir. It is lightweight and pathogen free and also low in fertility, so you will be less likely to lose plants to such issues as damping off (a fungus that rots the seedlings off at the base). Using regular potting mix may work, but increases your chances of such issues. Plus, seeds are equipped with enough nutrients to make it to their first set of true leaves before they need anything from the soil. I know that some sources say to use mixes with compost in them, but unless you know 100% that the compost got hot enough to kill all pathogens (140 degrees plus for several days) you could be introducing diseases to your plants that could affect them in the seedling stage or in the future.
  • Once the seedling has its first set of true leaves (the second leaves that appear), you should transfer it to an individual container/cell/pot with regular potting soil. At this point, the plant will need to have nutrients from the soil to grow healthy. You’ll want to loosen the plant from the seedling mix (I use a chopstick) and lift it by the leaves (not the stem). Temperature control is key.
  • Heat is usually the most important factor in coaxing your seeds to germinate, so placing your newly sown seeds in a warm (around 75 degrees F) place will help them germinate faster. Fast germination is key for making sure you get the optimal number of seeds sprouting. However, moving the seedlings to a cooler place (around 65 degrees) after they’re germinated will make them grow sturdier and keep them from getting thin and leggy. Most people laugh when I tell them, but one great warm place to start seeds is on top of the refrigerator.
  • Light is necessary for good plant growth. Most seeds don’t require light until they get their first true leaves, but after that you’ll want light to keep your plant healthy. Some people are lucky to have a good, sunny (usually south facing) window with plenty of light. Otherwise you’ll need to invest in some lighting. The most economical option is a basic shop light fixture from the hardware store. You can buy plant lights, or full spectrum lamps for it, but if they prove too difficult (or expensive) to find, use a regular warm fluorescent and cool fluorescent bulb to get the right light spectra. You’ll want light on for about 16 hours per day. If you are using a window, be sure to turn the plants regularly to keep them from

    Image result for led plant lights
    Blue and Red LEDs Source: Wikimedia Commons

    growing in one direction.  As LED lights become less expensive, many home gardeners are checking them out for home seed starting.  You can use a full spectrum white LED bank, but plants primarily use red and blue light so you can also find high-intensity LED banks for plant production that are blue and red (makes purple!).  Some research is emerging that a tiny bit of green light helps growth, so some newer systems are incorporating a touch of green, too.

  • Don’t get started too early.  Look at the packet for the number of days/weeks before last frost to start your seeds.  If you start them too early, you could end up with spindly, leggy plants or ones that have grown too large for their containers. Even if you have good lighting, your plants will not thrive being cooped up in the house too long.
  • What about fertilizer? Up until the first set of true leaves, seedlings don’t need much in the way of fertility.  When they’re put in larger containers or cells, a good potting mix (usually containing some type of fertilizer or nutrients) will get you most everything you need….to a point.  If you’re growing in small containers, say those cell packs where you have very limited soil, you may find that you need to provide supplemental fertility after a few weeks.  There’s only so many nutrients in that potting mix in small amounts, so if you are holding your plants for longer than, say, six weeks you may need to apply a water-soluble fertilizer or start off with a slow-release fertilizer.  Larger containers, say a 3 or 4 inch pot, may have enough soil to have sufficient nutrients to get you to the point of transplanting.

Translating the Language of Seed Packets: Hybrid, Heirloom, non-GMO, and more

Hybrid, heirloom, organic, non-GMO, natural….there’s lots of labels on those seed packets or plants you pick up at the garden center or from your favorite catalog.  Since the seed-starting season is upon us, let’s take a minute to look at some of the information – and mis-information – you might find on those seed packets.

For a brief overview, here’s a short video segment I recently shot for the Backyard Farmer Show, a popular public TV offering for Nebraska Extension:

Hybrid vs. Heirloom vs. Open Pollinated

Just what is a hybrid anyway?

Source: http://www.biology.arizona.edu

Simply put, a hybrid is a plant (or any living organism, technically) with two different parents. Take for example the Celebrity variety of tomato, which is very popular among home gardeners. In order to get seeds of Celebrity tomatoes, whoever produces the seeds must always cross two specific parent plants to get those specific seeds, called an F1 hybrid.

These parents have been developed through traditional breeding programs (read: the birds and the bees — no genetic engineering here) from many different crosses. Hybridization has occurred naturally ever since there were plants. Man has been directing this process throughout most of his agricultural history to get better crop plants. How else would we have many of the vegetables and fruits that we take for granted today?

Crops like corn have very little resemblance to its wild counterpart, many thanks to selection and even crossing of superior plants by humans over the centuries. University researchers and seed developers use this natural ability of plants to cross to direct the formation of new varieties that improve our ability to produce food.

What is an heirloom?

Perhaps the first question we should ask is, what is an open-pollinated seed? An open-pollinated variety is one whose genetics are stable enough that there is no need for specific parent plants, because the seeds produced from either self-pollination (as in the case of beans and tomatoes) or cross-pollination with the same variety will produce the same variety.

An “heirloom” plant is basically an open-pollinated plant that has a history, either through age (50-plus years) or through heritage (it has a family story).

Take for example the Mortgage Lifter tomato.

Mortgage Lifter Tomato Source: https://www.flickr.com/photos/blewsdawg

It was developed by a gentleman living in West Virginia (my native state -there are two competing stories as to who developed it). For all intents and purposes, the Mortgage Lifter started out as a hybrid, since the gardener in question developed the tomato by crossing many different varieties to find one that he liked.  He sold so many of them to his neighbors that he was able to pay off the mortgage…thus its interesting moniker.

It just so happened that the genetics of this tomato were stable enough that its offspring had the same characteristics, so seeds could be saved.  Therefore, it was technically an Open-Pollinated variety. Over time, the tomato became considered an heirloom because of both its age and unique story. This story has played out many times, in many gardens and in many research plots at universities.

There are some trying to revive the practice of plant breeding for the home gardener. If you’re interested, check out the book “Plant Breeding for the Home Gardener” by Garden Professor emeritus Joseph Tychonievich. Who knows? Maybe in 50 years we will be celebrating your plant as a distinctive heirloom.

So which is better – Heirlooms or Hybrids?

There are pros and cons to hybrid plants and heirlooms both, so there really isn’t an answer as to which one you should plant. It really boils down to personal choice. Hybrid plants tend to have more resistance to diseases and pests, due to the fact that breeders are actively trying to boost resistance. This means that there will be higher-quality produce fewer inputs. This is why hybrids are popular with farmers — nicer, cleaner-looking fruits with fewer pesticides. Many times hybrids are also on the more productive side, thanks to a phenomenon called hybrid vigor.

Heirlooms, on the other hand, help preserve our genetic diversity and even tell our cultural story. Heirlooms do not require a breeding program, so there is built-in resilience, knowing that we can produce these seeds well into the future with little intervention. But we do have a trade-off with typically less disease-resistance and less consistency on things like yield.  Since they are open-pollinated, they are often a good choice for people who enjoy or rely on saving seeds from year to year.

GMO-Free or Non-GMO

As we have pointed out several times before, when it comes to seeds for home gardeners, the label of GMO-Free is largely meaningless and sometimes mis-leading.  Whether or not you believe the prevailing science that shows that genetically engineered plants are safe for human consumption, you can rest assured that there are currently no genetically engineered seeds or plants available to home gardeners.  Not on the seed rack at the box store nor your local garden center.  Not in a catalog or online.

Here are two assurances to that statement:  A majority of the things that you grow in the home garden don’t have a genetically engineered counterpart. Only

Source: USDA Animal and Health Inspection Service

12 genetically engineered crops have been approved in the US, and only 10 of those are currently produced.  Most of these are commodity crops that home gardeners would not even produce, such as cotton, sugar beet, canola, and alfalfa.  A few more have counterparts that are grown by home gardeners, but are vastly different from those grown by commodity producers (soybeans vs. edamame soy).  And some just aren’t that very widespread (there are some GE sweet corn cultivars and squash cultivars, but they aren’t widespread on the market).

So for the most part, there aren’t any “GMO” counterparts to the crops you’d grow in the home garden.  They don’t exist.

The other assurance is that genetically engineered crops are not marketed or sold to home gardeners as a matter of business practice or law.  In order to purchase genetically engineered seeds or plants, it is current practice in the United States that you must sign an agreement with the company that holds the patent stating that you will not misuse the crop or propagate it (and before we get into the whole intellectual property argument – plant patents and agreements like this have been around since the early 1900s – it isn’t new).  So you know that you aren’t buying genetically engineered seeds since you aren’t being asked to sign an agreement.  Plus, these companies make their money by selling large quantities of seeds, they just aren’t interested in selling you a packet of lettuce seeds for $2.

So since there aren’t any GMOs available to home gardeners, why do all these seed companies slap that label on their packets?  Marketing, my dear!  It started off with just a few companies, mainly using the label to compete in a crowded market.  And fear sells.  The label has spread to more and more companies as this fear and anti-science based marketing ploy has spread…both by companies who jumped on the fear bandwagon and by those who took so much harassment from the followers of the non-GMO crowd or they lost sales to people sold on the non-GMO label that they finally gave in.  Unfortunately for some companies, slapping the non-GMO label on a product seems to give them permission to charge more, even if has no real meaning….so buyer beware.

Treated vs Non-Treated

Image result for treated seed
Treated seed Source: pesticidestewardship.org

Seed treatment usually involves the application of one or more pesticide such as a fungicide or insecticide to protect against pathogens or pests, mainly in the early stages of growth.  A good example would be if you’ve ever seen corn, pea, or bean seeds at the local feed or farm store that are bright pink or orange in color.  These seeds have been treated with a fungicide to offer short-term protection against damping off.  Some crops are also treated with systemic insecticides, such as imidacloprid, to protect against insect damage. There’s been a big emergence of organic seed treatments, so treatment doesn’t necessarily mean the crop can’t be labeled organic.

Treated crops are most-commonly found at farm supply stores and aren’t generally marketed directly to home gardeners. You’ll likely not find them at most box stores or garden centers catering exclusively to gardeners. Many packets will specify whether they are non-treated or treated.

Organic and Natural

In seeds, the term Organic largely refers to seeds harvested from plants that were certified organic.  Generally speaking, these seeds were produced on plants that received no synthetically produced fertilizers or pesticide sprays.  However, it does not mean that the plants were not treated with pesticides.  There’s a great misunderstanding about organic production – there are a number of pesticides and even seed treatments approved for use on organic crops.  Typically, they are produced from a plant or microorganism extract, naturally occurring mineral, or other organic derivative.  So organic does not equal pesticide free (on the seed rack or on the grocery shelf).

There are a few different levels of “organic,” too.

Sometimes small producers use the label in a general sense to mean that they follow organic practices, but aren’t certified.  The process for certification is often onerous and costly for small producers, so they often opt to not get it.  This is especially true for producers that market exclusively to a local clientele, like at the farmers market, where they can rely on their relationship with customers and reputation to speak for their practices. Some food companies may also use a simple “organic” label – either as a design choice, or because their product wouldn’t qualify for a certification.

"Certified Organic" Label“Certified organic” means that the producers practices have been certified to meet the requirements laid down by a certifying agency.  A certifying agency could be a non-profit or a state department of agriculture.  The requirements and practices vary from entity to entity.

Image result for certified organicUSDA Certified Organic” means that the producer has been certified by the USDA as a follower of the guidelines set forth by the National Organic Program (NOP).  This is usually seen as the most stringent of the certifications, and is standardized nation-wide.


For certified organic producers, a requirement for production is that all seeds or plant sources are organic.  For home gardeners, I often question the need for organic seed, even if organic methods are followed.  A quick literature search turned up no evidence that garden seeds contain pesticide residues.  There’s been no evidence that plants translocate systemic pesticides to their seeds or fruits(Though it is impossible to prove a negative).  Since seeds are located inside some sort of fruit, there would be little chance of residue on the seed from a pesticide application.  And even if there was some sort of residue, it would be such a small amount in the seed that it would be so dilute in the mature plant that it would likely be well below any threshold of threat to human or wildlife health…or even measurability.

Personally, I may opt for the organic seed at home if it were the same price of the “conventional” on offer…but that organic label often includes a pretty good price differential.  Knowing that there likely isn’t a huge difference in what is in the packages….my penny-pinching self will reach for the conventional, cheaper option.

And what about “natural.”  That one’s easy….there is no recognized definition of natural by the USDA or any other body.  Companies use that term to mean whatever they want it to mean….meaning that it is relatively meaningless in the grand scheme of things.

Where to find me on the web:

Twitter

Facebook

Personal Blog

Work Blog: GROBigRed

Love notes of genetics and physiology for Valentine’s Day

A St. Valentine meme compliments of my "friend" the self-styled Rev. Apostle, and Bishop to the Stars, Joel L. Watts.
A St. Valentine meme compliments of my “friend” the self-styled Rev. Apostle, and Bishop to the Stars, Joel L. Watts.

Ahhh….’Tis the time of year when we celebrate romantic love in homage to a 3rd Century priest who came up a head short for performing unsanctioned Christian weddings.  (It is also of note that St. Valentine, or Valentinius as his friends called him, is the patron saint of bee keepers but, strangely, not of birds, flowers, or trees).

In celebration, many suitors, partners, spouses, fling-seekers, and woo-wishers will flock to florists, grocery floral counters, and even gas stations to purchase flowers, namely roses, that have likewise been beheaded.

Those roses, with all of their tightly wound petals, look nothing wild-type roses. Modern roses are the product of many centuries of breeding that started independently in China and the Mediterranean region.

So if the wild-type rose has a single row of five petals, how do breeders get all of those extra petals?  They can just come from nowhere, you know.

The simple answer is that tissue that turns into stamens in the wild-type flower are converted to petal tissue.  While early (and even contemporary) plant breeders may not understand the mechanism responsible for the doubling (gene expression), research is showing that the same gene is responsible for the doubling in both the Chinese and Mediterranean set of species/subspecies.

In a nutshell, what happens is that the different regions of the flower – sepals, petals, stamens, carpel – develop in response to the expression of a set of genes.  It isn’t just the genes acting alone, though; it is their interaction in the tissues that makes the difference.  These genes are grouped by the floral part they affect and are grouped as A-Function, B-Function, C-Function, and E-Function.

If you want to learn a whole lot more about it than I can ‘splain (it has been a few years since my last plant physiology class), this paper thoroughly explains the gene expression and evolution of the flower.  Their figure depicting the flower model is informative, yet simple.  I’ve included it (and its accompanying caption) below.

The ABCE model of floral organ identity. Sepals are produced where A function acts alone, petals where A and B functions overlap, stamens where B and C functions combine, and carpels where C function acts alone. In the eudicot genetic model Arabidopsis thaliana, APETALA1 (AP1) and APETALA2 (AP2) are the A-function genes, APETALA3 (AP3) and PISTILLATA (PI) together specify B function, C function is specified by AGAMOUS (AG), and multiple SEPALLATA genes provide E function
The ABCE model of floral organ identity. Sepals are produced where A function acts alone, petals where A and B functions overlap, stamens where B and C functions combine, and carpels where C function acts alone. In the eudicot genetic model Arabidopsis thaliana, APETALA1 (AP1) and APETALA2 (AP2) are the A-function genes, APETALA3 (AP3) and PISTILLATA (PI) together specify B function, C function is specified by AGAMOUS (AG), and multiple SEPALLATA genes provide E function.  http://www.pnas.org/content/107/52/22570


In the paper “Tinkering with the C-Function: A Molecular Frame for the Selection of Double Flowers in Cultivated Roses” researchers show that in lines from both regions of the world produced double flowers as a result in a reduction of expression of the C-Function gene AGAMOUS (RhAG) leads to double flowers.  In Arabidopsis (every plant lab bench jockey’s favorite model plant), this reduction shifts expression of the A-Function genes toward the center of the plant, turning stamens into petals and carpels into sepals.

Now, one question I get from time to time is “why don’t these roses smell like the old-fashioned roses?”  One answer is that as we breed for looks, we are breeding out genes responsible for scent oil production.  So Shakespeare was actually wrong when he said that “a rose by any other name would smell as sweet.”  That isn’t true these days.

So, I wish you a perfectly lovely Valentine’s Day, no matter how you celebrate. Just remember to whisper sweet nothings of floral gene expressions in your sweetheart’s ear.  And remember to stop and smell the roses – if it is a variety that has a decent scent.

Of potatoes and blue roses: be a mad plant tinkerer

A few weeks ago, I saw an interesting article in the Wall Street Journal (of all places) talking about people who are bioengineering plants at home to develop, among other things, a true blue rose.   I love to see this.  “Tinkerers” have long been a proud tradition of people who make true impacts and discoveries.  I think of the ultimate plant “mad tinkerer” Luther Burbank who established himself as a foremost expert on developing new plants all from his crazy tinkering that developed the potato that you’ll find at nearly every fast food joint and created plants such as the shasta daisy and the wonderberry.  I also think of a contemporary plant tinkerer – my friend and fellow GP Joseph Tychonievich.  I love seeing all of his new plants and envy his creativity.

I can only hope that more and more people, and younger people especially, have an interest in amateur plant science. We live in a time when science education has reached a fervor, with about every school and youth program focused on STEM education.  We even have 4-H clubs that meet in our office that are completely focused on robotics and coding.  While this focus on science is great, my issue is that it focuses mainly on the “sexy” disciplines (engineering, chemistry, physics, etc) and little on life sciences like plant biology.

I’m heartened to see many many schools adding gardens to incorporate into the curriculum.  Here in my county we’ve helped build and advise over two dozen school gardens.  I’ve also seen some new tools to inspire young plant scientists, including an online community of scientist mentors who give guidance to budding plant science students (Planting Science). Who knows, maybe we’ll inspire a new generation of Luther Burbanks.  We can only hope.

Not raking leaves: Too good to be true?

Rejoice, gardeners and homeowners, for your deliverance from the drudgery of raking leaves has arrived. Or so goes the proclamation from a viral article that popped up on social media this past fall.

The article in question was posted on the Woman’s Day magazine website based on information from the National Wildlife Federation As the article points out, leaving piles of leaves on the lawn are good “habitat” and homeowners should just let the leaves fall where they may for the sake of supporting critters in the lawn. Of course, you can always believe everything you see online, right?  Let’s take a look at what research can tell us.

Not so fast. There are a few issues with this new proclamation. Not that I am a great fan of the rites of autumn that dictate that we remove leaves from the lawn. It is one of my least favorite garden tasks, as evidenced by the fact that I wait until every last leaf has fallen before I get the leaf blower out so I’m certain that I don’t have to do it more than once.

Many people rake up leaves in the lawn because of aesthetics — we don’t want our neighbors to see a messy lawn. But there are lots of other issues that leaving leaves on the lawn can cause. Let’s take a look at all the reasons why leaving a layer of leaves on the lawn may not be the best idea.

First, the claim that leaving leaves where the fall on the lawn provides “habitat” for wildlife. What wildlife? The original source suggests small mammals, butterflies, and moths — specifically providing a place for overwintering. While I’m sure that there are some perfectly nice little critters that will make their home in the leaf litter, I have a name for what a lot of those things that find their home in your new “habitat” may be— pests.

Plant debris provides excellent overwintering opportunities for many garden pests. I also suspect that some of the wildlife that would find a comfy abode in the leaf litter would be small rodents, like mice and voles, that would enjoy nothing more than to snack upon some of the woody plants in your landscape. I also found some research that says removing leaf litter from residential areas reduces populations of ticks (article). Definitely something I wouldn’t want to welcome with open arms to my lawn.

Now let’s think about how plants make their food — they use sunlight for the process of photosynthesis. The article in question advocates letting leaves pile up where they fall on the lawn.  This means piling up on the grass (or in my case, whatever passes for green).  A layer of leaves on top of the grass will inhibit the plants from making their own food. While grass may not be actively growing in the winter, as long as it is green, it can still perform photosynthesis and store the food for spring. Even if you have a species of grass that turns brown in the winter, a pile of leaves would become an issue when things warm up in the spring.

It also turns out that a thick layer of matted leaves on top of the soil can create a barrier that reduces oxygen in the soil — thus creating an anoxic condition that will reduce or damage roots. Not only do the leaves create a barrier, but research has shown that the rapid consumption of oxygen by leaf litter bacteria lead to anaerobic conditions in the leaf litter itself (article).

Give the reduction in sunlight and soil oxygen, grass can have a difficult time thriving in areas of heavy leaf litter. Some other research results I found indicate a layer of leaf litter reduces the amount of herbaceous plants (in woodland) (in a field study). If you think about it, you don’t see many small herbaceous understory plants in forests with lots of trees — it isn’t just the shade from the trees that causes a problem.

I’ll also point out that for dog owners, leaving a layer in the yard can make it much easier to fall prey to what we refer to as “yard bombs.” I’m sure other dog owners have felt this pain.

Now, I’ll be the first to tell you that leaves are a valuable resource for lawn and gardener, so don’t think that I’m anti-leaf. I put all of the leaves that fall in my yard to work for me. While leaving the leaves to pile up into layers on the lawn is not a good idea, using a mower to chip them up and leave them in place will provide valuable organic matter and nutrients for the soil. So if you don’t want to rake them up, run over them with the lawnmower so they will break down quickly into the soil (and don’t smother out the grass).

If you do rake up (or vacuum up) the leaves, there are a few things you can do with them. First, the shredded leaves make a good winter mulch for landscape beds (put the plant suppressing power to work controlling weeds). You can also bag them up and store them for use in composting next spring and summer when you have fresh green plants to add to them.

This article originally appeared in the Charleston Gazette-Mail on November 15 (sans citations).  

You can find my other articles online at wvgardenguru.com

@wvgardenguru

Allelopathy Helps Black Walnuts Compete

A walk through the woods can be one of the most peaceful and calming experiences — a place where you can find quiet for reflection and marvel at the beauty of nature. Little do most people know that some plants, especially one specific tree, wage chemical warfare against other plants to keep away potential neighbors that would compete for nutrients and sunlight. In the Appalachian Mountains, the tree most skilled at chemical warfare is the black walnut.

The black walnut tree (Juglans nigra) is a useful, yet often misunderstood tree. Prized for its excellent wood qualities for lumber and furniture, the nuts it produces are either loved or reviled by those who try them.

The flavor of black walnuts is hard to describe. I would say that they have an almost astringent flavor, mainly due to the high level of tannins in them. They aren’t my favorite, but I don’t mind them either. I’ve learned to accept them, unlike during my childhood when you knew which church lady’s cake to avoid at the potluck because you knew that she put black walnuts in everything she baked.

My appreciation for black walnuts grew the year that I was the official nut judge (no joke) for the Black Walnut Festival in Spencer, WV. It was quite an experience — examining and weighing all the entries with a team of high school FFA students who cracked more than a few inappropriate jokes about the situation.

You could tell when someone was picking or cracking black walnuts, thanks to the tannin stains on their hands that just wouldn’t wash off. Black walnuts are a tough nut to crack (literally), so I also remember my grandmother cracking them “the easy way.” She would just pile them up in the driveway and run over them a time or two with her behemoth of an Oldsmobile (you know, the one that had full seats front and back and could hold half the neighborhood).

Black walnut trees have the interesting ability to excrete a chemical called juglone, which makes it nearly impossible for a number of plants to grow anywhere in its root zone. Juglone works by damaging the tiny root hairs on roots that are responsible for taking up a great majority of the water and nutrients the plants use. Research shows that it also interferes with the interaction of the roots with mycorrhizal fungi that aid the plant in taking up nutrients.

This process is not just specific to black walnuts. There are several other plants that do this. The phenomenon, called allelopathy, occurs when an organism excretes something that inhibits the growth of other things around it. You could equate it to the Penicillium fungus excreting a chemical that kills bacteria around it. We harness that chemical to use as penicillin.

Some plants are especially sensitive to the chemical. Many vegetable plants, especially tomatoes, are sensitive. Some plants, mainly those that would grow wild in the woods, are not susceptible. Many grasses also have a hard time growing beneath black walnut trees (tall fescue and Kentucky bluegrass being the exception, except during periods of drought).

Publication with lists of plants tolerant and damaged by juglone

All parts of the tree produce the juglone chemical, so the effects could spread beyond the perimeter of the tree from fallen leaves and branches. I would also suggest that you make sure any fresh woodchip mulch that you use (specifically that from local tree cutters) is free of black walnut. The juglone may break down after composting the wood chips for six months to a year, but I would still be cautious about its use. The wood will release the chemical, killing susceptible plants for a few years in the area where it is applied. Studies suggest that juglone will break down during the composting process, but I would check to make sure by starting a few tomato seeds on the batch of compost to see what happens.

—Garden Professor John Porter is a county extension agent for West Virginia University and writes the weekly Sunday garden column for the Charleston Gazette-Mail Newspaper.  This article was originally published October 2, 2015.

You can find John’s writing at wvgardenguru.com and on Facebook and Twitter.