The weed apocalypse

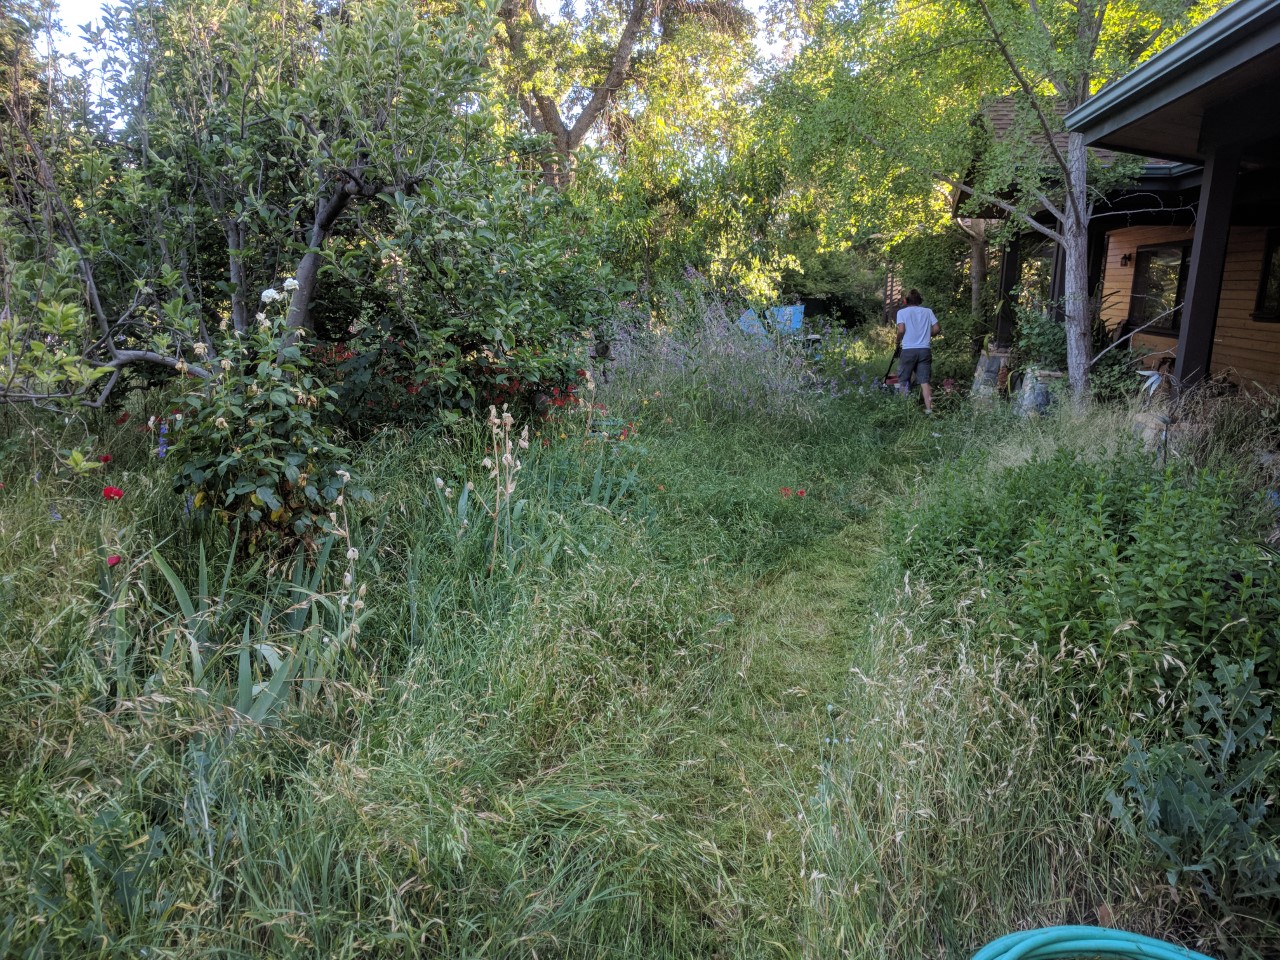
I have been hiding from COVID-19 in Arizona, but I had to return to Ojai, Ca because I was “noticed” by the local fire department to abate my weeds. I returned to find the Weed Apocalypse (WA 2020). Late spring rains were spaced nicely in California supporting rampant weed growth. So, why did this happen? What can I do about it now? How could I have better prepared for WA 2021 next year?

The Ojai “Weed apocalypse”. This is what happens when you leave and do nothing in your garden for two months.

In May, the days are getting noticeably longer and moving closer to the longest day of the year (June 20–the summer Solstice). Longer days add more photosynthetically active radiation and put plants on a rapid growing phase at this time of the year. If water and soil nutrients are not limiting, this is the fastest growth period for most plants. Weeds have the unique quality that they will grow faster than many garden plants even with less resources. When resources are plentiful, they grow  faster still.

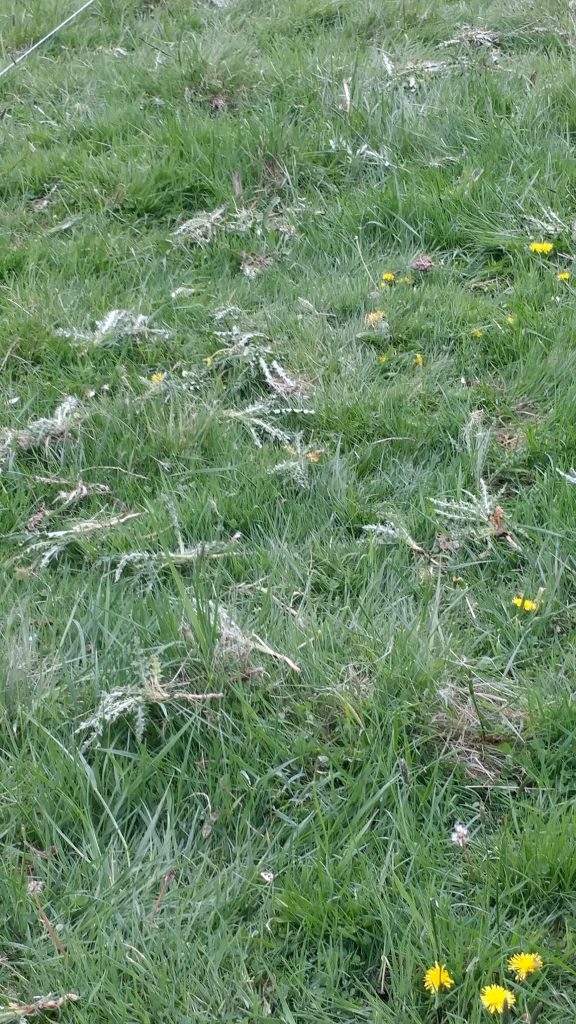
One way to prevent the weed apocalypse is to deteriorate the weed seed bank . The “weed seed bank” (WSB) is the amount of seeds stored in soil that are viable. The seed bank is restored each year when weeds set seed and drop them on or into the ground. In some cases the seed bank also includes plant parts such as Bermudagrass (Cynodon dactylon) stems and rhizomes (underground stems) that can lie quiet but, once sufficient moisture is available, they spring into life! So once the weeds set seed, just “whacking” or mowing and leaving the mulch behind does not usually solve the problem as viable seed is added to the WSB. Annual weeds can be reduced substantially if they are controlled prior to seed set.

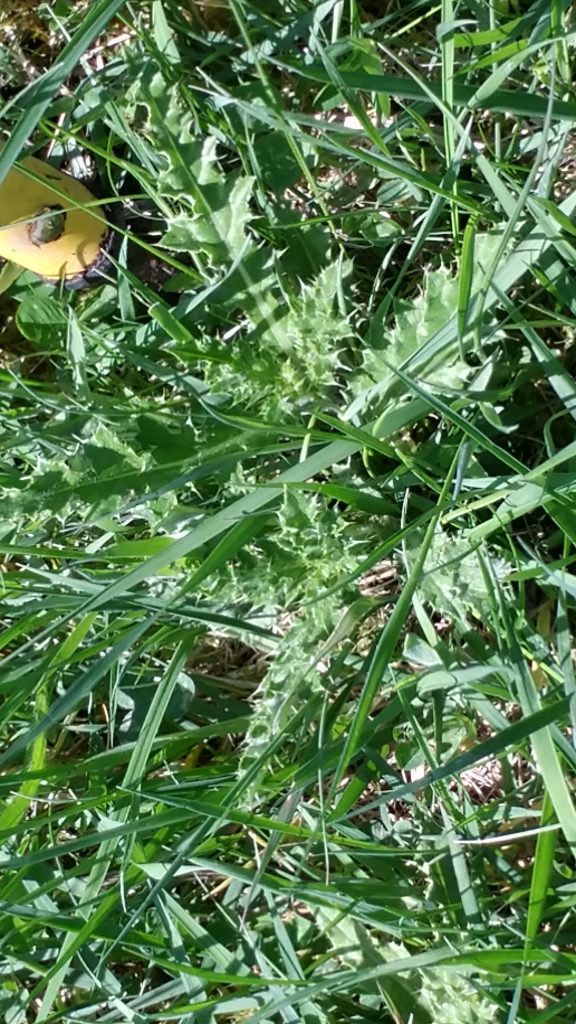
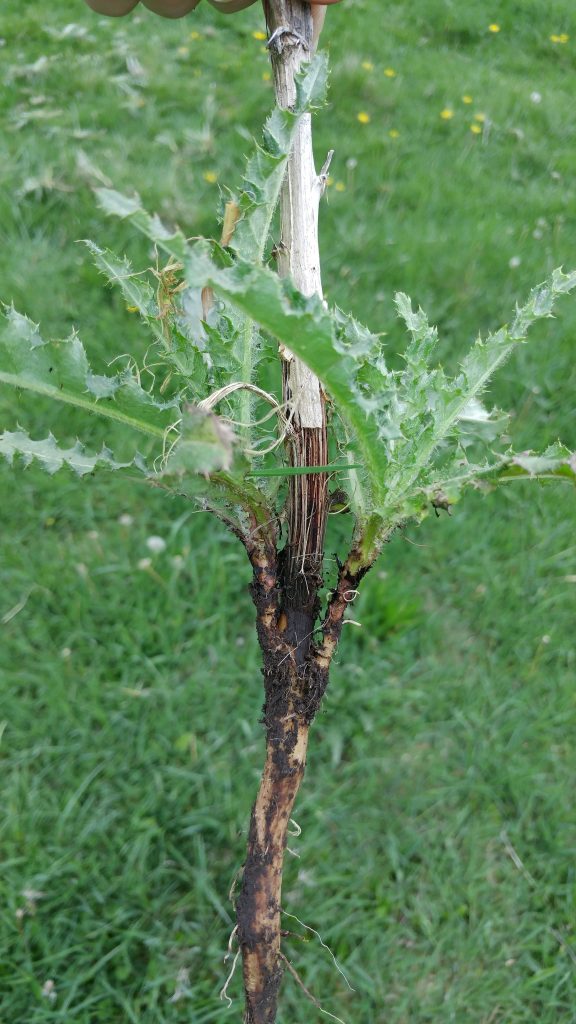
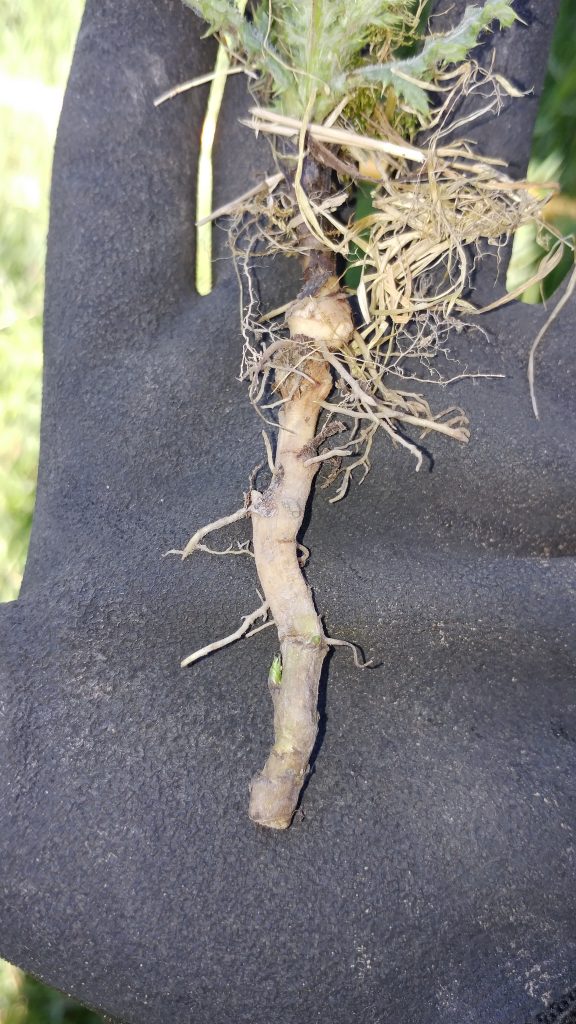
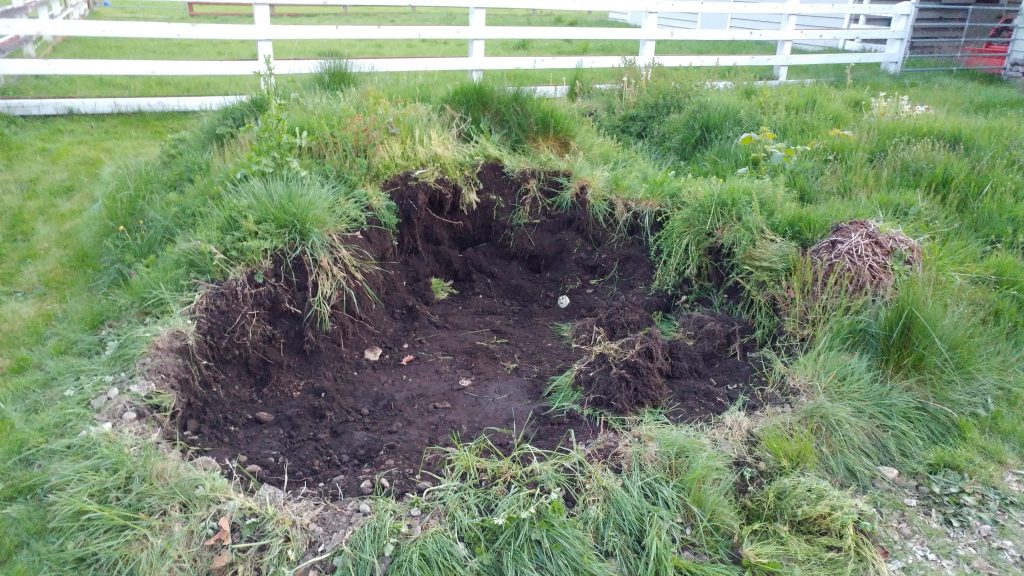
Weeds are sneaky buggers. They imbue their progeny with germination inhibitors or dormancy factors that delay germination. Some seeds complete their maturation even when they have been cut away from the main plant. This is why weeds always seem to be there for you. When dormancy factors wear off, or are washed away seeds will germinate. So after a strong rain event or irrigation weeds emerge that were previously dormant. Some of the seeds remain dormant in the WSB as a back up opportunity to grow. In the case of Slender wild Oat, Avena barbata, it has two maturation ‘stages’ that take advantage of both early spring and late fall rains, with seed ripening at both of those seasonal times. Light is also necessary for many weeds to germinate. When weeds are removed by tilling or digging, new seeds are brought to the surface and may now germinate. Additionally, many weeds have the capacity to regenerate if the entire root is not removed. One tenacious weed, Field bindweed (Convolvulus arvensis), is known to regenerate from each node and root as deep as four feet. Cutting the plants into pieces makes more of them!

Weeds can be annual biennial or perennial . Some weeds such as Poa annua or annual bluegrass complete their life cycle (seed to seed) in only a few to several weeks, others grow for years. Annuals survive drought or cold winters as seeds while perennials as roots, tubers or dormant stolons or stems. Biennial weeds usually grow their vegetative body in the first year and reproductive structures in the second year, they are often rosette forming plants that grow close to the ground in the first season and develop tall stocks in the second. Knowing how to identify weeds helps to understand their biology and ultimately control strategies.

Many gardeners are herbicide averse. However, herbicides will often give the most economic and effective control of weeds. Some weeds like field bindweed are only well controlled with herbicides. Herbicides are broken down into two categories: pre-emergent herbicides and post emergent herbicides. Pre-emergent herbicides inhibit seed germination or kill emerging seedlings before they can develop. Post emergent herbicides kill weeds after they emerge from their seeds. Almost all weeds are better and more easily controlled at juvenile life stages. This is true for mechanical or chemical control. Regardless of how you choose to deal with the WA in your garden starting when weeds are small will give you a tremendous advantage.

Like all pesticides, herbicide labeling must be followed carefully to apply the right amount of product at the right time to the target weed (which also must be listed on the label). There are some amazing herbicidal tools that can save hours of labor. Some drawbacks of herbicides are that they may be expensive, may require multiple applications, require equipment to apply as well as personal protective equipment. Herbicides can be selective or broad spectrum. For instance, Fluazifob-P-butyl (active ingredient of Fusilade II) will control warm season grasses in many ornamental broadleaved plants. This is immensely useful since you can apply Fluazifop-P-butyl “over the top” of a flower garden and free it of bermudagrass (Cynodon dactylon) without harm to your ornamental garden plants or other non-grass landscape plants. Other herbicides containing plant growth regulators such as 2,4-D are broad-spectrum and will kill or harm many kinds of broad-leaved plants in turfgrass without harming the turfgrass. There are also some broad spectrum contact herbicides made of soaps or acids that will kill both broad leaved and grass weeds on contact. While these products do not have systemic action they can be very effective on both cool and warm season young weed seedlings. Herbicides when used carefully and following labeled instructions can save hours of hand weeding labor.

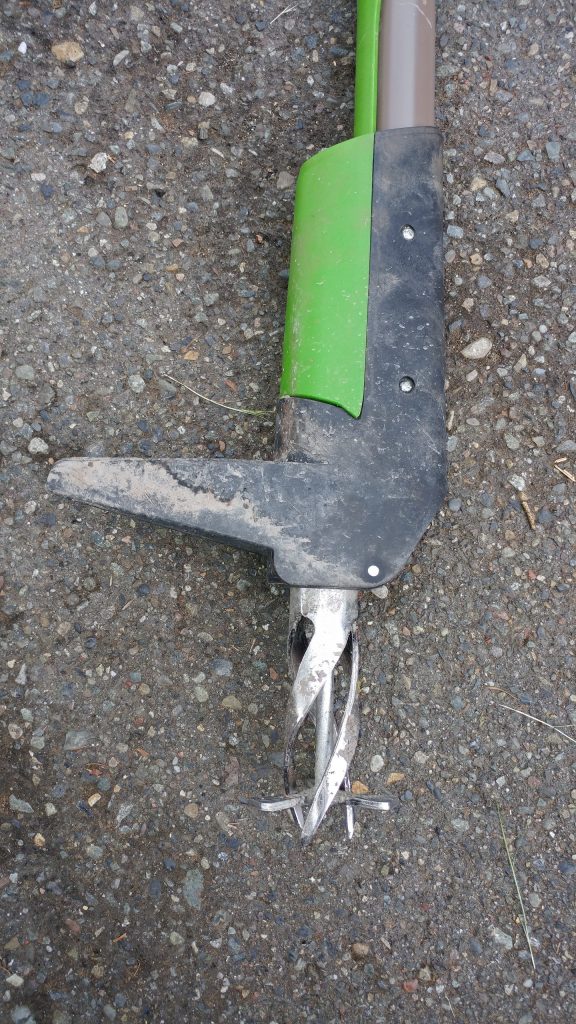
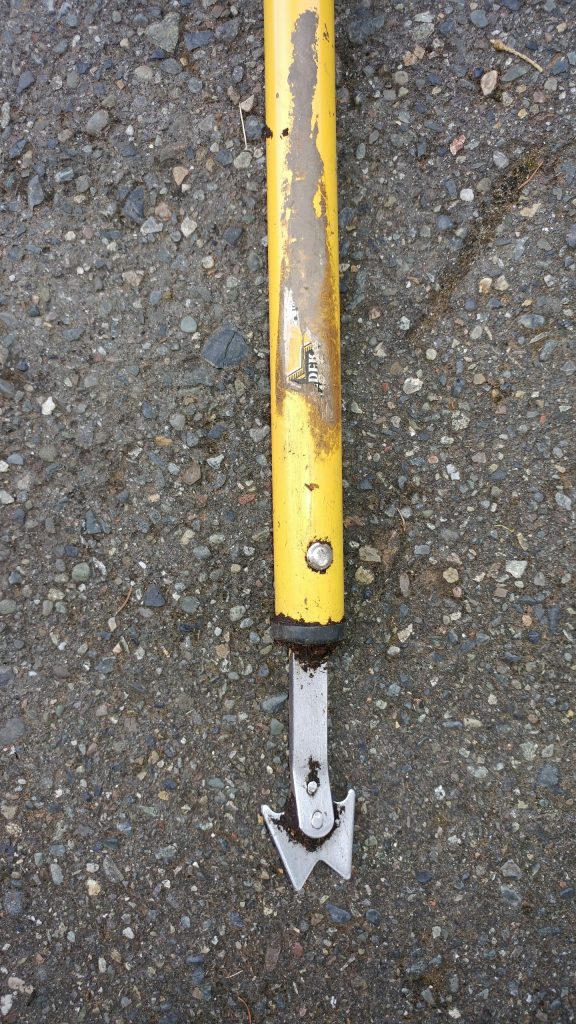
In my own yard I have chosen not to use herbicides because I have so many plants that are sensitive to the kinds of products I would need to use. I am pretty much down for other types of control. This month my city council decided to ban the use of gasoline powered lawn mowers–my chief weapon for the WA! We took a chance and used it anyway because our weed issues are so bad. As mentioned earlier the best time to use mechanical control of weeds is when they are in the cotyledon or two leaf stage of growth. A quick attack with a scuffle hoe will wipe them out. When they grow to adult weed size, larger and larger machinery become required.

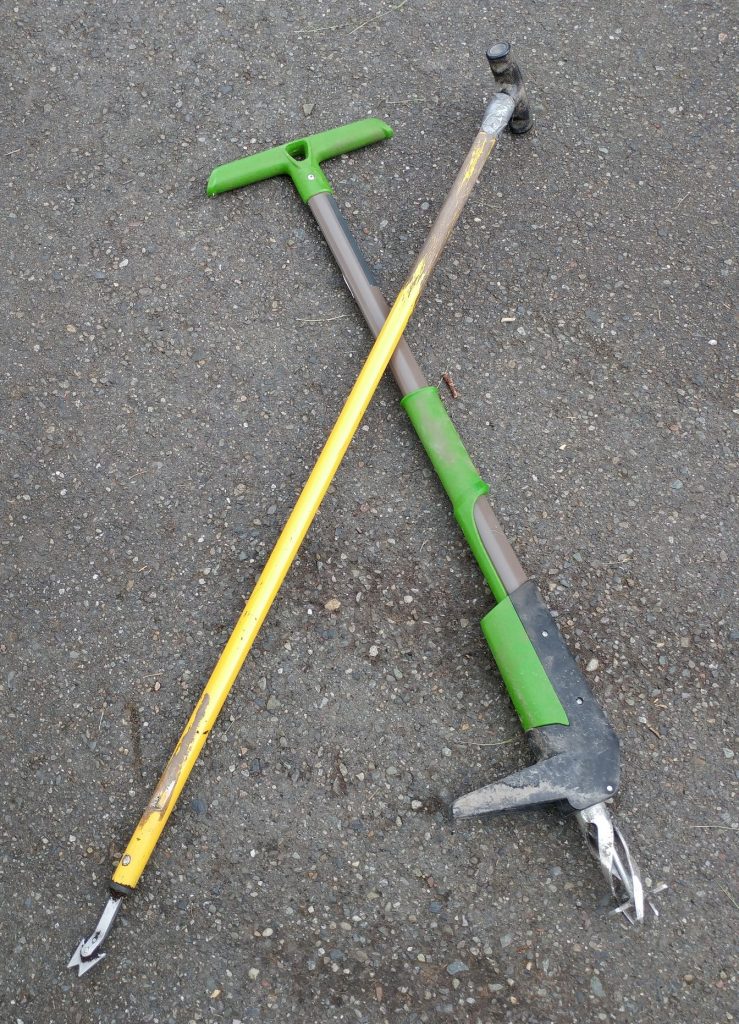
Once perennial weeds such as bindweed grow a bit they become impossible to control with hoeing because they will grow back from roots. String line trimmers are used for weeding in many apocalypses but have their limitations. Bits of plastic trimmer line break off and pollute your landscape. Biodegradable plastics are usually used, but the idea of littering your yard with plastic bits is bothersome. Limiting the use of oil consuming machines is a great idea, but using battery powered machines has limits. Buying extra batteries so you can destroy while you charge is helpful.

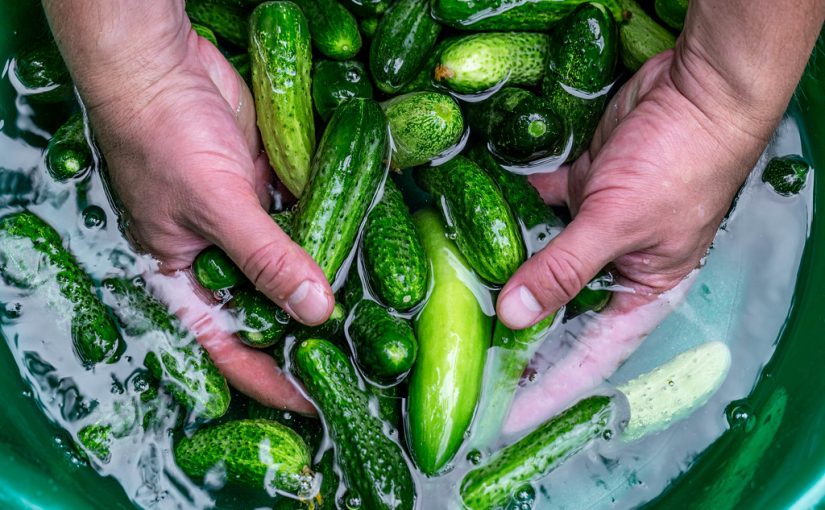
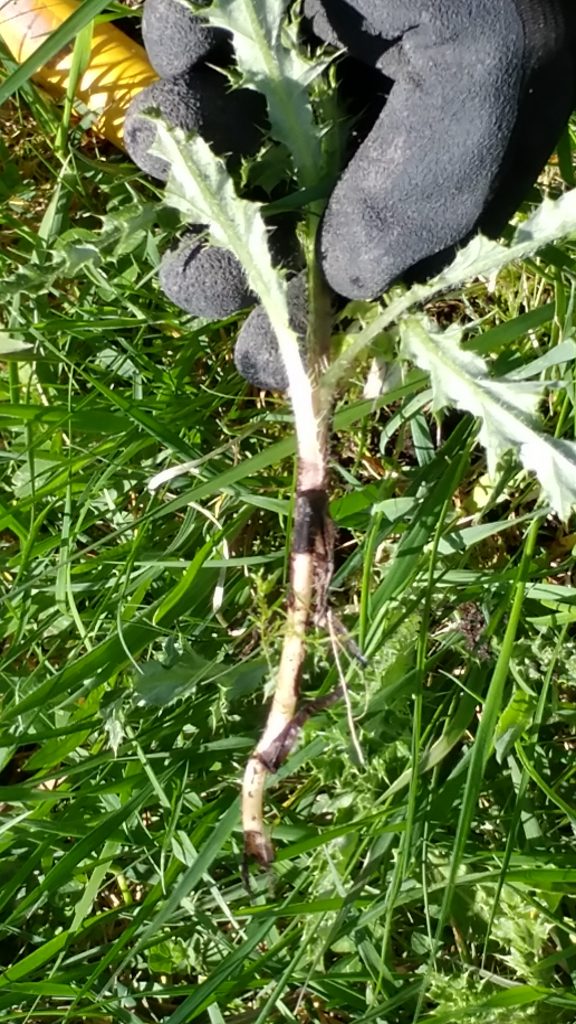
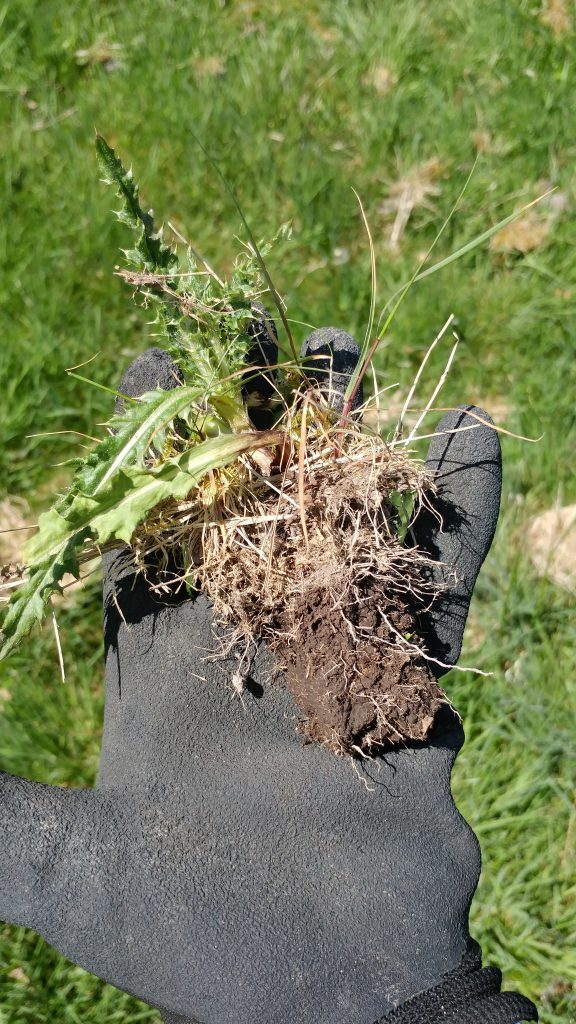
Hand pulling is a great way to release pend up stress (of the human not the weed), get exercise, and rid the garden of apocalyptic pests. However, for some weeds like yellow nutsedge (Cyperus esculentus) you will only increase the problem as nutlets are released from dormancy when you pull the “mother” plant. By the time you see the emerging nutlets they have formed more nutlets so you can never get ahead of the problem. If you decide hand pulling will work, irrigate the day before you want to weed and they will come out much easier.

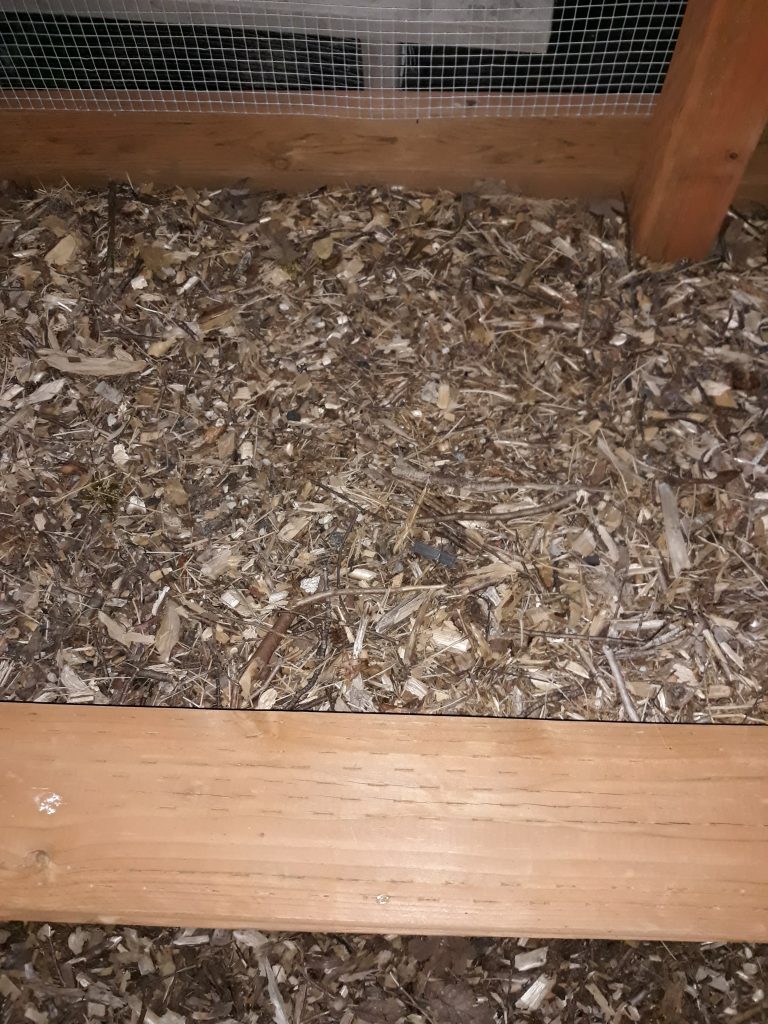
Mulching with fresh coarse arborist chips is a great way to prevent annual weeds from getting the light they need to germinate. Mulches also break down to improve soil. We have been mulching for a couple decades on my driveway but have not added any mulch for a few years. The broken down mulch and improved soil are now the most apocalyptic weed garden. If you use mulches for weed control fresh chips need to be applied at least annually in a thick layer to be effective. Also constant application of mulches can make soil! This soil builds up without you realizing that the root collar of perennials or trees may be getting buried. If you mulch consistently around trees be sure to keep the root collar exposed.

Not all weeds germinate in the early winter. There are winter and spring or summer germinating weeds. The differing timing of their emergence can happen unexpectedly. Just when you thought you had weeds in control, another set seems to appear requiring your attention. Look for summer emergent weeds when night temperature lows are above 60F.

Using an old glass shower door to solarize the soil and kill weeds. Note some yellow nutsedge is surviving near the edge of the doors.

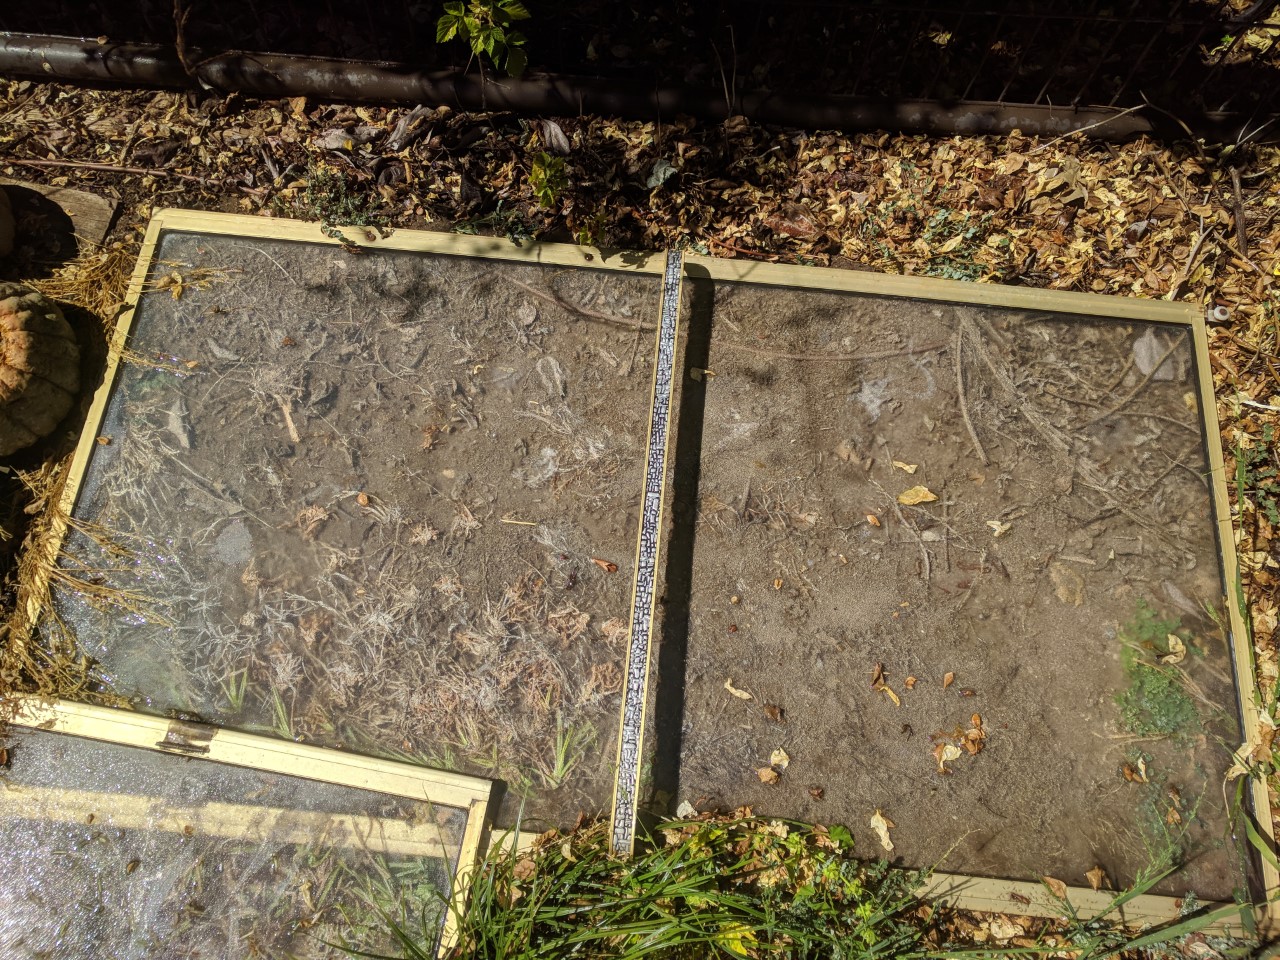
Solarization is another way to kill weeds. This is the old greenhouse effect used as a weed weapon. Clear plastic laid on the soil surface and sealed at the edges will if exposed to full sun heat the contents to the point of their death. The solarization effect does not penetrate deeply into soil, so if perennial weeds are solarized, they may survive and regrow from root pieces. If you want to try solarizing your weeds purchase thick UV resistant plastic otherwise you will have bits of plastic everywhere as the sun breaks it down into pieces… Warning, this does not work with Field bindweed! In my own yard I have used old glass shower doors to solarize the soil.

Finally if all else fails and the WA is bearing down, you can just eat them. Many weeds are edible and can make good food. Nettle, Sonchus (sow thistle), purslane, dandelion and many of the Mustard family are edible at various stages of their development. Some folks have even collected mustard seeds and made their own condiments. Of course, you should always exercise caution when consuming wild foods. Some contain toxins or other chemicals that individuals may be sensitive to. The Sow thistle and wild lettuce (Lactuca spp.) contain latex which many are sensitive to. The stinging nettle has hairs on its surface that contain an irritant (oxalic acid) that causes skin burning and welts. Others, such as black elderberry may contain cyanide alkaloids in the green tissues-stems, fruit and other parts. Research the risks of consuming or contacting some plants before attempting to eat or handle them.  There is hope, because even the nutlets of one of the worst weeds (yellow nutsedge) are edible…

Viral Vegetables? Growing (and Buying) Produce in the age of COVID-19 (and reducing fear with facts)

Now that much of the world’s attention is focused on limiting the spread of pathogens, well one pathogen, it seems like a good time to talk about some of the questions or concerns we’ve seen regarding vegetable gardens, community gardens, and farmers markets.  It’s a good time to talk about some of the practices that we should be doing to prevent other human pathogens from handling produce, like E. coli and Salmonella, and how those might fit into preventing the spread of COVID-19. 

First things first

First off, we have to remember that SARS-CoV-2, which is the virus that causes COVID-19, is not a food borne illness.  I repeat: COVID-19 IS NOT A FOOD BORNE ILLNESS. This means that it is not spread through the consumption of contaminated food like E. coli and Salmonella.  I’ve seen many instances of people spreading fear about food online, with many suggesting using soap or bleach on food to minimize risk.  Those steps are both unnecessary an actually pose a poisoning risk.  There is currently no evidence to suggest that COVID-19 is transmittable by food or food packaging.

The risk from food (which is considered minimal by experts) is from cross-contamination from food or packaging onto hands or onto surfaces that are then touched by hands.  The virus would then have to go from a persons hand to mucous membranes in the respiratory system by something like touching your face or picking your…..well, we won’t go there.  The best defense against this isn’t necessarily sanitizing all the food you buy, but washing your hands after you handle it and sanitizing any surfaces that packaging or shopping bags touch. 

Factsheet: Is Coronavirus a concern on Fresh Produce?

But while we’re on the topic of pathogens and food safety, it’s a good time to talk about some general guidelines that can not only help stop that potential SARS-CoV-2 cross contamination but also food borne illness in general.

Minimizing the risk from produce even further

Whether you grow it in your own garden, buy it at a local farmers market, or purchase it at the grocery store, produce has a minimal risk when it comes to COVID-19. 

Factsheet: COVID-19 and Food Safety – Shopping and Handling Groceries

To minimize the very small risk of cross-contamination even further and (probably more importantly) to also reduce any risk from common food borne illnesses, proper washing of the produce should be practiced.  But do you know how to do that?  Maybe…and maybe not.  Here are some steps to help out. 

  1. Wash your hands. The most common pathway of contamination for produce is from human touch.
  2. You should use clean water that you would use for drinking (like out of the tap) and not use any bleach or soap. 
  3. Providing gentle friction with your hands or a produce brush or by rubbing the produce together is sufficient. 
  4. If you’re washing a lot of produce at once, say from a large harvest, and you’re using a tub full or sink full of water to wash multiple “loads” of produce, keep an eye on how dirty the water gets and refresh it when it gets discolored.  Remember that washing produce in a tub or sink of water can also present a cross-contamination issue where contaminated produce contaminates the water. 
  5. When in doubt, discard produce you may think is contaminated or wash it separately. 
  6. To reduce risk of cross-contamination, consider a “single pass” washing technique where you spray the produce with water and it doesn’t sit in water with other produce. 
Image

Food Safety in the Garden

There are a few things we can do in the garden to help stop the spread of human pathogens.  Most of them are common sense things that most people don’t even think about.  Devout GP readers may remember my little missive around this time last year about the food safety risks of using manure in the vegetable garden (See: The Scoop on Poop).  Beyond those musings on manure, though, gardeners can take some additional steps to reduce potential contamination.  Those are:

  • Wash your hands.  I know it sounds simple, and maybe even more so now that it has been drilled into our brains, but washing your hands before you garden is one of the best ways to reduce the spread of pathogens.  It is especially important to wash your hands before you harvest produce or handle harvested produce.
  • Use clean containers for collecting and storing produce.  Using harvest baskets, tubs, and totes is common, but the ones that are best in terms of food safety are those that can be washed and sanitized.  This is one tactic that many farmers are encouraged to use as well.  Plastic tubs, totes, trugs, and crates are probably best as they can withstand washing and the use of a sanitizer like bleach.  Wooden or woven baskets may be cute, but they’re harder to clean and can hold on to pathogens. 
  • Look for signs of wildlife in the garden.  Aside from eating more than their fair share of produce, wild animals can also present a food safety risk especially from their droppings.  Look for signs of animals in the garden and especially take note of any droppings.  Don’t harvest produce that has signs of droppings on them.  Many of the big produce recalls over the last decade have been a result of wild animals like birds or wild hogs. 
  • Keep pets out of the garden.  As much as you like to have Fluffy or Fido in the garden, they present a risk just like wild animals do. 
  • Wash produce using proper techniques (previously discussed).

Best practices for minimizing COVID-19 risks at Community Gardens (and Farmers Markets)

You can practice handwashing anywhere. You can buy portable hand washing stations or build this DIY Model. Plans: https://www.youngfarmers.org/fsma_resources/portable-handwashing-stations/

One other aspect of gardening that could provide some risks for the spread of COVID-19 are the more social aspects of gardening, such as community gardens.  I’ve had several local gardens reach out for best practices relating to minimizing risks in the garden – from handwashing stations to shared tool use.  Thankfully, NCSU Extension was quick on the draw with resources for lots of aspects of the food system in terms of reducing risks from COVID-19 and they graciously allowed other universities to distribute these resources.  Below are some links to the resources that would be helpful to gardeners:

COVID-19 FAQ for Community Gardens

And since some gardeners may sell at (or at least visit) farmers markets:

COVID-19 FAQ for Farmers Markets

Click here for all the resources developed by NCSU

A tale of two weeders – lessons in managing aggressive, perennial weeds

Choose your weapon in your war against weeds!

Nearly every afternoon for the last two months, curious drivers have noticed two people meandering through a pasture, following a narrow pathway formed by two lengths of string tied to fenceposts. It’s us! Thanks to COVID 19, we are no longer able to go the gym for a workout so like many other gardeners we have put that unexpended energy into our gardens and landscapes. And in this case, cattle pasture.

The herd

The lettuce from hell

My family has raised free-range, grass-fed beef cattle for over 50 years, and with our move to the family farm in 2017 we now oversee much of that business concern.  Managing pasture weeds is just one of the battles associated with providing quality browse for the cattle. Inedible plants like bull thistles (Cirsium vulgare) and tansy ragwort (Senecio jacobaea) are taprooted species, easily removed with a single weeding. But not Canada thistle (Cirsium arvense), colorfully and accurately described as the “lettuce from hell” thistle. Though it’s highly nutritious, the prickles are so unpleasant to sensitive muzzles that cattle avoid it.

This aggressive, herbaceous perennial (native to Eurasia, not Canada!) has an extensive underground root system, consisting of thick, propagative roots which give rise to more roots (which grow vertically and horizontally), and shoots which pop up seemingly everywhere. They do NOT have rhizomes, and they do NOT have stolons. Apparently, Canada thistle has a unique, hellish morphology allowing it to spread rapidly – 6 meters per year in the U.S. – if not managed (you can read more about this topic here).

Applying plant physiology in the field – literally

But there is a weakness in this aggressive root system – and that weakness is the need for resources provided by the aboveground thistles. The perennial root system stores resources over the winter, then pumps them into new shoots in the spring. This is the chink in the armor – these shoots are USING resources, not providing them, until they slow their own expansion. So the trick is to remove the shoots as soon as they appear, forcing the roots to expend more resources to make more shoots, and so on.

So this is why we are in the field, every day, removing those shoots, systematically clearing areas and then repeating in another week or so as new stems appear. And it’s working. But here is the lesson we are learning that gardeners can apply to their own gardens and landscapes.

Dueling weeders

We have two weeding implements: the “winged weeder” and the “uproot weeder.” The first is my choice, though it is NOT a solely a “stand up tool” for this purpose. My husband prefers the uproot weeder, which twists and pulls out a core of soil along with the root. I don’t like this latter method, as it creates a hole through which sunlight can penetrate, activating both photodormant seeds and stem regrowth. But to each their own.

However, we found another reason that the coring method doesn’t work well: those cores can stay moist and guess what? The stems generate new roots, and left alone could easily re-establish if conditions were cool and moist. Just what we need.

Done properly, this is a quick and effective means of removing the entire root crown of new plantlets

My preferred method, using the winged weeder, is to break the underground stem off as deeply as possible and then work it out as seen int he video. For this you need protective gloves, but not thick ones. You need to be able to feel what you’ve got a hold of.

These gloves are thick enough to protect against most thistle prickles, but thin enough so you can feel what you are holding

Hold onto the base of the thistle gently and as you work the weeder under it move your fingers down BELOW the crown. It feels like a tough bulge and you want to hold onto the smooth stem below it. Otherwise it is likely to break off, leaving the crown viable. You will hear, and possibly feel, a satisfying pop as you dislodge the stem from the underground system. Pull it up carefully. The remaining hole is tiny, and easily covered by pressing on it gently with one’s boot.

My chicken boots close the small holes left by the winged weeder

The advantages to physical removal of perennial weeds

  1. I’m getting out into the fresh air and have lost more weight in the last month than I lost going to the gym in the past year.
  2. I’m controlling a noxious weed population without the use of chemicals.
  3. I’m developing a technique that can be applied to ANY herbaceous perennial in ANY garden or landscape. That’s the great thing about plant physiology – the pattern of resource allocation is not species dependent. Think horsetail and bindweed, for instance.
Our battleground – the enemies are well hidden

Do keep in mind that perennial weeds are perennial problems! We aren’t EVER going to have a thistle-free field, but it will become a more manageable problem as the infestation will have been dramatically reduced this year. I’ll try to do some updates over time.

Tools, tips, and terrible traditions for raised beds – Part 2

Native topsoil – with native rocks.

Last month I started a series on raised bed gardens, focusing on materials and designs. Today I’ll mention some of my favorite tools and materials for putting everything together and getting ready to plant.

Getting your soil ready for raised bed use

Tools and materials: shovel, wheelbarrow, tarp, soil screens

If you’ll recall from my previous post, I like using native soil for raised beds (assuming it is not contaminated with heavy metals or other undesirable chemicals). We have glacial till soil, which means it has a LOT of rocks of various sizes. The bigger ones are easy enough to lift out, but what about all the other ones?

First, realize that SOME rocks are no big deal. In fact, they are important in reducing soil compaction. Finely sieved soil, especially clay soils, will be more prone to compaction than a soil with small pebbles scattered throughout. But the larger rocks are a nuisance.

Small rocks in your raised beds won’t interfere with vegetables but help prevent compaction of heavy soils.

For the first pass through, I have found a plastic crate to work really well. It’s lightweight and the holes are large enough to let soil move through quickly, while retaining larger rocks. I like the milk crate size as it’s easiest to handle. Just set the crate in a wheelbarrow or on a tarp, fill it full of rocky soil, pick it up and shake.

These plastic crates are sturdy and easy enough to lift when filled with soil.

The rocks left in the soil for the most part are easy to work around, and you can always pick out the larger ones as you go (my personal choice). Or if you want to give it another screening, you can build wooden frames with different gauges of hardware cloth, or chicken wire, to remove more of the rocks.

This is a simple soil screen built with 2×4 boards and hardware cloth.

This is a time-consuming process, but the benefit is that you don’t have to top off your beds every year. Your native soil will not be subject to high levels of decomposition and subsidence as will many commercial topsoils with their high organic content.

When you’re ready to fill your beds, be sure to add more soil than you think you will need. It is going to settle, and you may need to add a little more the second year to bring it back to your desired level. But you shouldn’t have to add any more in the future.

Water and time will help soil settle to its final level.

Throughout the soil preparation process, be sure to work when the soil is dry, or no more than just damp. Working wet soil is difficult, and wet soil compacts.

But what about heavy clay soils?

Unless you’ve done a soil texture test, you really don’t know what you have. So before you take another route, make sure you really have a heavy clay soil. If it’s just compacted, then proper mulching will solve that problem too. If it’s truly a heavy clay – let’s say over 40% – then yes, this soil might not be best for a raised bed. In that case, I would suggest finding a different topsoil mix, where clay is no more than 30%. Lay down a membrane to keep this soil separate from your native clay soil. Your raised beds will now function more like giant containers, and you will have to make allowances for drainage along the sides of the beds.

You can estimate how much clay you have in any soil type using this chart.

Your beds are ready – how to keep them that way before planting

Tools and materials: coarse organic mulch, wheelbarrow, mulch fork or shovel, rake, soil temperature probe

A mulch fork will make your life so much easier!

Once your beds are filled, it’s important to get them planted as quickly as possible to prevent continued erosion of that bare, loose soil by wind and rain. If you aren’t immediately planting, then you need to cover the soil with a protective mulch. The only choice you have, if you wish to keep your soil environment hydrated and aerated, is to use a coarse organic mulch. Sheet mulches are not advised since they will interfere with water and air movement. Even if you don’t have plants in the soil, there are microbes and beneficial animals that need a constant influx of oxygen and water. A coarse organic mulch, installed to a depth of at least 4 inches, will facilitate water and air transfer and also keep weed seeds from germinating.

Keep unplanted beds protected with coarse organic mulch.

If you’ve been following my posts over the years, you already know I’m going to recommend using a wood chip mulch. Its benefits to soils and soil life is well established and it is easily moved once it’s time to plant. But you can use pine needles, straw (not hay!), and other coarse organic materials for this purpose. Fine textured organic materials like compost should never be used as a mulch, as thick layers of compost are more restrictive to gas and water movement and also facilitate weed growth. Save compost for a thin topdressing when your soil anywhere on your property is in need of organic matter, and be sure to cover it with woody mulch to keep those weeds out.

This thermometer will help you plant seeds at their optimum time.

While waiting for the right time to plant, consider purchasing a soil thermometer. They are inexpensive and easy to use.  Good publications on growing vegetables will tell you what the soil temperature should be when you plant: planting too early can lead to reduced seedling survival. And while you are waiting you can install a rain gauge nearby, so you can monitor irrigation needs throughout the growing season.

What’s next?

Next time we’ll discuss the dos and don’ts of raised bed maintenance during the growing season and before planting the following year. Most of these practices are adaptable to traditional vegetable gardens, so be sure to check it out!