Why soil tests matter: lessons from my vegetable garden

Regular blog readers will remember that we moved to my childhood home a few years ago. With an acre or so of landscape I finally have enough room to put in a vegetable garden. My husband built a wonderful raised bed system, complete with critter fencing, and we’ve been enjoying the fresh greens and the first few tomatoes of the season.
Jim puts on the finishing touches to our first raised bed garden.

We filled these raised beds with native soil. During a porch addition I asked the contractor to stockpile the topsoil near the raised beds. The house was built almost 100 years ago and at that time there were no “designed topsoils” (thank goodness) – soil was simply moved around during construction. Some of this soil had been covered by pavers and the rest had been covered with turf. [You can read more about designed topsoils in this publication under “choosing soil for raised beds.”] There had been no addition of nutrients for at least 7 years so I was confident that this was about as natural a soil as I could expect.
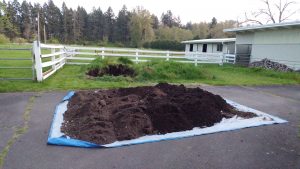
Our native soil, ready for adding to our raised beds.

I’ve always advised gardeners to have a soil test done whenever they embark on a new garden or landscape project, so before I added anything to my raised beds I took samples and sent them to the soil testing lab at University of Massachusetts at Amherst (my go-to lab as there are no longer any university labs in Washington State for the public to use).

What I already knew about our soil was that it’s a glacial till (in other words it’s full of rocks left behind by a receding glacier). The area is full of native Garry oak (Quercus garryana), some of which are centuries old. The soil is excessively drained, meaning it’s probably a sandy loam. And that’s about all I knew until my results came back.

Some of our massive, centuries old Garry oaks.

Because nothing has been added to this soil for several years, and because I had removed all of the turf grass before filling the beds, I assumed that the organic matter (OM) would be quite low. Most soils that support tree growth have around 3-7% OM. Hah! Ours was over 12%! All I can figure is that centuries of leaf litter has created a rich organic soil.

I never expected this level of OM.

So here’s lesson number one: Don’t add OM just because you think you need it. Too much OM creates overly rich conditions that can reduce the natural protective chemicals in vegetation. This means pests and diseases are more likely to be problems.

I think these may be the lowest P levels I’ve seen in home garden soils.

I was pleased to see our P level was low. First soil test I’ve ever seen in my area where P was below the desirable range! Does that mean I’m adding P? No – because there is no evidence of a P deficiency anywhere in the landscape. And my garden plants are growing just fine without it.
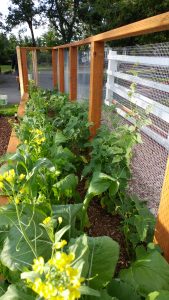
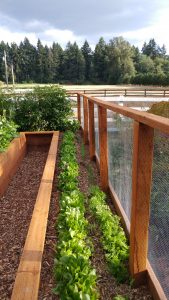
No sign of any nutrient deficiencies here (though the mesclun mix got out of control).
Or here either.

Lesson number two: Just because a nutrient is reportedly deficient, look for evidence of that deficiency before you add it. It’s a lot easier to add something than it is to remove it.

Likewise, our other nutrient values are just fine, and I was pleased to see that lead levels were low. Given that this is an older house that had lead paint at one time, and given the fact that the soil being tested was adjacent to the house, I was prepared for lead problems.

Surprisingly low lead given the original location of this soil next to an older house.

However – we do have high aluminum in the soil. Exactly why…I don’t know. Perhaps the soil is naturally high in aluminum? There’s no evidence that aluminum sulfate or another amendment was ever used. In any case, that was an unexpected result that does give us some concern for root crops. I’ll be doing some research to see what vegetables accumulate aluminum.

The aluminum levels may bear some watching if I’m growing root crops.

Finally, note our pH – 4.9! This is completely normal for our area, which is naturally acidic. In addition, the tannic acid accumulation from centuries of oak leaves has undoubtedly pushed the pH even lower. Are we going to adjust it? Again, no. There is no evidence of any plant problems, and even our lawn is green. Why would we adjust the pH if there is no visual evidence to support that?

No, this is not a typo.

Which leads to lesson number three: Don’t adjust your soil pH just because you think you should. If your plants are growing well, the pH is fine. Plants and their associated root microbes are pretty well adapted to obtaining the necessary nutrients. If you have problems, don’t assume it’s a pH issue. Correlation does not equal causation! You’ll need to eliminate all other possibilities before attempting to change your soil chemistry. And remember it is impossible to permanently change soil pH over the short term. Permanent pH changes require decades, if not centuries of annual inputs (like our oak leaves).
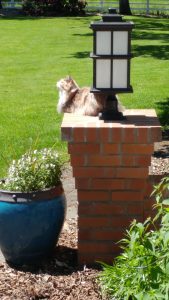
The cat agrees – no pH issue with this lawn.

Will I test my soil again? Probably not. I have the baseline report and since I don’t plan to add anything I don’t expect it to change much. If I had a nutrient toxicity I would retest until the level of that nutrient had decreased to normal levels. But with everything growing well, from lawn to vegetables to shrubs and trees, there really is nothing to be concerned about.
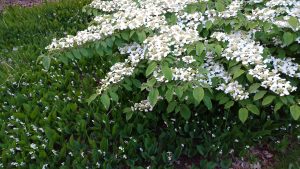
Viburnum plicatum (I think) is one of many established shrubs on the property.

Lesson number four: Unless you have something in your soil to worry about, don’t.
Keep the fabrics in your closet and off of your soil

One of the “advantages” of being in the same office suite as me is hearing (a) that arborist wood chips are about as close to a miracle product as you can get and (b) that landscape fabric is hell on (the) earth. So my office mate Liz, either because she was convinced of the above or just wanted to shut me up, decided to rip out the landscape fabric in her ornamental bed and replace it with wood chips. She even made it a family project, somehow convincing her two young daughters that this was “fun.” Here’s her pictorial essay of the process.

Before the switch

Yes, there is “weed block” underneath all those weeds

Why on earth does anyone still believe that “weed block” fabric actually does anything remotely related to controlling weeds?  It provides a great substrate for all those weed seeds blowing around, which find themselves the recipients of any rainfall or irrigation. They germinate and grow like crazy – because they are WEEDS. It’s what they do.

Worse yet for the soil – all of those pores in the fabric that supposedly allow water and oxygen to move through are soon filled with bits of soil. The resulting mat is anything but permeable. But weeds love it!

The process

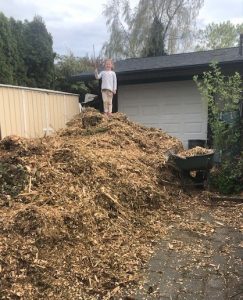
First  Liz had to score some woodchips, which as you can see pretty much filled her driveway. The girls, however, thought they were a great addition.

Georgie scales Mt. Mulch
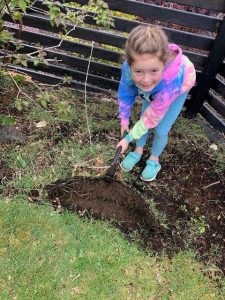
Next, all of that fabric had to come out. This is not an easy process, because the surface of the fabric was completely colonized by weeds. A mattock is a great tool for getting this done.
Viv tackles the landscape fabric with its weed colony.

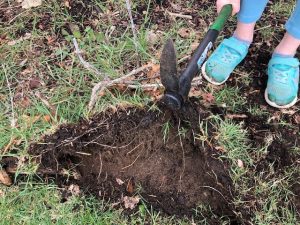
Now, let’s look at the soil underneath the fabric. You can see how dry it is. That’s because even during our rainy springs in the Pacific Northwest all of the rainfall stays on top of the fabric, allowing lush weed growth. The roots of all of the landscape plants get virtually none of this, and in the summer that’s a source of chronic drought stress.

Close up of soil under the fabric

Fortunately, the soil underneath, while dry, looks pretty good. Once the shrubs and perennials are able to take advantage of the increased water and oxygen they will thrive.

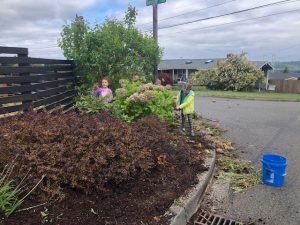
The girls still hard at work while Liz cleverly avoids it by taking pictures.

The results

A well-mulched ornamental bed

Maybe you don’t like the look of arborist wood chips, but it’s certainly better than the weedy mess that used to be there. Plus, the soil benefits from the increased water and oxygen, the beneficial microbes in the wood chips, and the slow feed of nutrients as those chips slowly decompose.

If you are ready to switch from “fabric fail” to “wood-chip win,” you can start with this fact sheet which will guide you through the process.

Rethinking the monocultural lawn (again)

Over the last couple of weeks I’ve been in London having some unforgettable garden experiences. Thanks to the generosity of my UK colleagues Glynn Percival and Jon Banks I was treated to Kew Gardens, RHS Wisley Gardens, and Windsor Castle. I hope to construct several blog posts from these visits, but today’s post is an homage to the English garden meadow. Instead of monocultural turf lawns, mowed and sprayed into submission, why not consider a more biodiverse and visually pleasing approach to groundcover?

RHS WIsley meadow. Photo by Charlotte Scott.

As the title of this post suggests, this is not a new topic in our blog. (You can read other related posts here, here, and here.) What was so stunning about these garden meadows (meadow gardens?) was the scale and effortless beauty. For instance, consider this tree-lined parkway at Kew, covered with English daisies.

Kew Gardens parkway. Photo by Charlotte Scott.

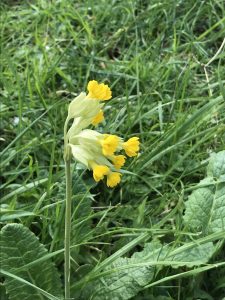
I saw my first honest-to God cowslip in a meadow garden at the British Museum of Natural History.

Primula veris (cowslip). Photo by Charlotte Scott.

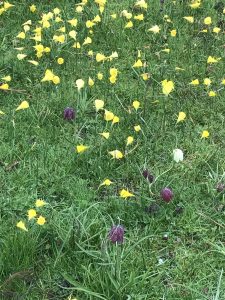
How about these adorable tiny daffodils and checker lilies?

Daffodils and Fritillaria. Photo by Charlotte Scott.

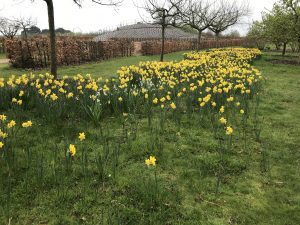
And here they are en masse.

Masses of spring bulbs transform this lawn. Photo by Charlotte Scott.

This isn’t to say that the formal lawn isn’t a thing in England, It is.

Windsor Castle. Photo by Charlotte Scott.

But unless you have a castle, a baseball diamond, or a putting green to manage, why not consider something more appealing, not only to the eye but to your beneficial wildlife?

Rivers of daffodils bisect more traditional grass lawn. Photo by Charlotte Scott.


Your New Year’s resolution : No “alternative facts” or “fake news” in 2019!

From the Bad-Ass Teacher’s Association – a group after my own heart.

Welcome to 2019! In keeping with the tradition of a new year, I’m hoping you will join me in resolving to promote good gardening science among your friends, relatives, colleagues, and customers. One of the most important tools you’ll need is a collection of resources that are not only science-based, but are relevant to gardens and landscapes (not agricultural production). With that in mind, here’s my list of authors and institutions who are credible resources.

First off, of course, I’ll have to start with the Garden Professor faculty. While this blog is a great archive of information from all of us, some of us have also published books and articles, recorded podcasts, webinars, and DVDs.

Print and digital media – individual authors
Dr. Jeff Gillman has a nice list of books to consider, in addition to those by Joseph Tychonievich and one by Dr. Holly Scoggins. And I’ve got my collection of books and DVDs as well. Dr. Lee Reich, while not officially part of our GP faculty, has published more books for the home gardener than any of the rest of us.

So many good books!

These are popular publications rather than peer-reviewed journal articles. But the authors have solid credentials and years of experience in teaching and research. That makes them reliable sources of information, and while no one is infallible, these authors are active learners and educators. You can be sure that they present the information in their disciplines as accurately and objectively as possible.

Print and digital media – university Extension publications
Ideally, university Extension publications undergo stringent peer review and are updated regularly. In reality, not all Extension publications are equal in quality. I’m on the faculty at Washington State University and one of my jobs is to keep our Home Garden series of articles current (http://gardening.wsu.edu/). I can confidently say that the fact sheets and manuals on our site have been through peer review and are as accurate as possible. Some are getting near the end of their shelf life (five years at WSU) and need to be revised or removed.

Many of these peer-reviewed publications are relevant outside of Washington State.

Are there other universities that have peer-reviewed, current, and relevant Extension publications for gardens and landscapes? If so, please add them to the comments and I will check them out. (To save time and aggravation, please check these out yourself first. Don’t just list them and wait for me to go through them with a critical eye.)

Social media, including blogs and Facebook

The Informed Gardener website – where it all began.

I first got into social media with the construction of my Informed Gardener web page. The white papers, podcasts and other materials housed here are all science based, but they have not been through peer review. Many of them have been adapted into peer-reviewed Extension fact sheets but all of them represent a collection of relevant information that remains accurate despite being dated. Hey, there’s only so much I can do…

The Garden Professor blog – 10 years old!

The Garden Professors blog was born in 2009, followed in 2011 with our Facebook page and discussion group. Both of these have the distinction of being the first (and possibly only?) exclusively science-based gardening groups on Facebook.

The Garden Professors page, where new tidbits are shared daily.
The Garden Professors discussion group, where anecdotes and home remedies are left at the door.


And yes, I’ve probably left someone or something out
By now you’re probably saying “What about Dr. X’s Facebook page or Professor Y’s blog?” This post is admittedly narrow, because I only know the people that I know. I’d like to expand the recommendations in this post to include other discipline experts who have information directly relevant to the mission of the Garden Professors. (This means we are NOT including information more relevant to farming or other types of agricultural production.)

So feel free to add your suggestions as comments, keeping in mind the criteria I mentioned above. Hopefully what we can create together is a really nice resource list for all us to use.

“Fun-guy” in your Mulch

By Jim Downer

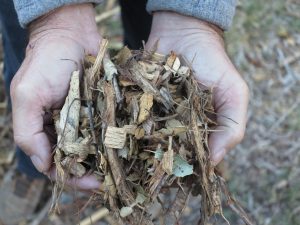
Fresh wood chips!

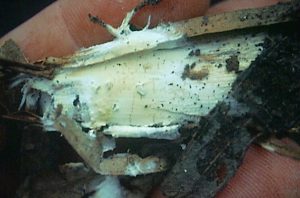
As many avid GP readers are aware, mulches are a common horticultural tool that help gardeners maintain soil moisture, nutrient content, weed suppression and assist in disease prevention.  The best mulch is made from chipped tree trimmings wastes and has a large wood content.  Coarse “arborist chips” mulch is fast becoming one of the most frequently sought after mulches for residential landscapes.  It is very effective and contributes to significant soil improvements over time.  As chip mulches decompose, the fruiting bodies of fungi are often seen growing up through mulch.  Sometimes, as gardeners work in previously mulched beds, they see mycelium or cordons (rhizomorphs) of mulch fungi growing through the mulch.  Some gardeners are not fond of finding mushrooms growing in their mulch and have termed these as “nuisance fungi”.  There have even been extension leaflets on nuisance fungi and how to rid them from your garden!!  Fungi are a natural part of mulch breakdown and their presence in mulches is desirable!

Phanaerochaete chrysorhiza invading Eucalyptus globulus mulch

The first encounter many gardeners have with mulch fungi is when they see “mold” growing in the chips or at the interface of mulch and soil.  Mold gets a bad rap with many homeowners when they find it after water damage in their house, so perhaps they assume it is also bad for their gardens.  Mold abatement in homes has become a specialized industry, and while the spores of some fungi can be human pathogens, fungi are not to be feared in gardens unless your immune system is damaged or otherwise compromised.   Unlike houses, gardens are a good place for fungi to grow and thrive.

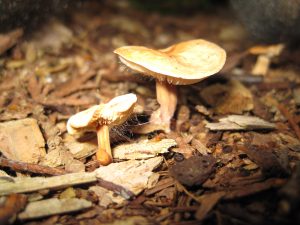
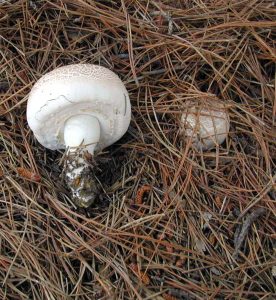
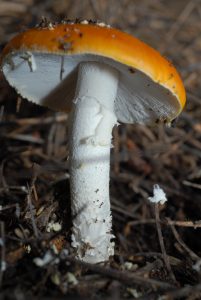
Fungi absorb water and nutrients from their hyphae which grow into their food (mulch particles).  The absorptive lifestyle of fungi is unique.  Since fungi have no internal digestive systems, they rely on excreting enzymes outside their bodies and into their food which breaks down the substrate so they can absorb it.  By doing so, they also release minerals, sugars, amino acids and many other compounds for other microbes and plants to utilize.  Fungi are mostly saprophytes or decomposers, and their role is to release organic nutrients to soil so they can be recycled.  This is why mulches are so beneficial to woody plants.  Without fungi, forest litter would pile up largely undecomposed because bacteria and other microbes are less efficient in breaking down cellulose.   Some fungi are mutualistic partners with woody plant roots.  Ectomycorrhizal (EM) fungi rely on interactions between trees themselves and the litter or mulch layers under trees.  Fruiting bodies of EM fungi may appear as mushrooms or puff balls in or next to mulches.

Lepiota spp. an ectomycorrhizal species
Amanita muscari , another ectomycorrhizal species. Just don’t eat it.


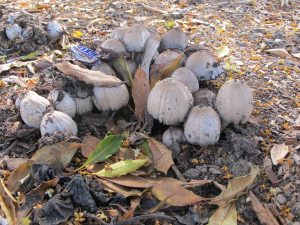
Sometimes fruiting bodies (mushrooms) push through mulch, but are not the result of mulch presence.  Pathogens such as Armillaria mellea (oak root fungus) can form through mulch layers or turfgrass, but they are fruiting off the dead roots of their tree host.  Similarly, the inky cap mushrooms (Coprinus spp.) often grow saprophytically on dead roots (they are not the cause of root death) and will push through litter layers.  Coprinus are good indicators that a tree has dead roots.  Coprinus is not a plant pathogen, and mulch does not increase prevalence of pathogens in landscapes.  As we have discussed many times in the blog, mulches are unlikely to spread or support plant pathogenic fungi.

Coprinus spp., which feed on dead roots

Another way to view the role of fungi is the chemistry that they facilitate in soil.  Mulch is organic matter, which has a high concentration of carbon.  Carbon is transformed from a solid form into a gas – carbon dioxide – through the action of microbes (mostly fungi).  So oxidation of carbon is driven by fungi growing through their substrate (forest litter in forests or mulch in gardens).  In mulching systems this is a slow process taking a few years.  In composting systems it is rapid, taking months with the added energy of mechanical turning etc.   Slow decomposition of organic matter is useful, as the benefits of mulch in suppressing weeds, slowing evaporation from soils etc. are maintained over time. Slowly oxidizing carbon means that it will be around longer, creating less greenhouse gasses than in the composting process.

In publications that recommend ways for “dealing with nuisance fungi” it is suggested to let mulch dry out, which stops the action of the fungi.  This is one of the most harmful things that can be done for active mulch zones.  Killing the fungi in mulch also stops their oxidation of carbon, subsequent nutrient release and support for the high microbial activity in mulches that benefit both plants and disease suppressing fungi that plants rely upon to maintain their health.  While fungi can reactivate when dry mulches are moistened, their biomass is damaged by severe drought which also injures plant roots as well.

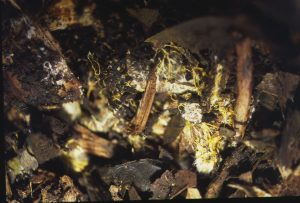
All good things come to an end or as our physics friends say, “Entropy increases!!”  So as labile (easily metabolized) carbon is used up in fresh mulches, fungi go into spore bearing or reproductive phases and begin to make fruiting bodies.  As long as there is labile carbon, fungi will thrive and grow mycelium and hyphae into their food.  When carbon is being used up (or when there is sufficient mycelium), fruiting bodies start to form.   To maintain these processes, it is important to add fresh mulch over the old decaying mulch.  Once or twice a year depending on temperature and moisture levels.  Along the way, some mulch may develop fungal fruiting bodies.  Fruiting bodies may resemble mushrooms, puff balls, earth stars, bird nest fungi, or simply resemble paint that has been splashed on the wood chips.  They are only trying to survive by developing spores which will later spread onto fresh mulch materials.  Most mulch fungi have very ephemeral fruiting bodies, so even if they are seen to be a “nuisance”, they will only be around for a very short time before they also decompose and become part of the remaining mulch layer or soil.

Ceraciomyces tessulatus, a paint-like fungus

One very common group of organisms seen in mulch and mistaken for fungi are the slime molds.  They are not related to fungi, but do develop spores and have a mobile (plasmodium) phase where they can be seen to slowly move from one spot to another.  Eventually, when the plasmodial stage is done feeding, the sporangial phase is made and they turn into spores.  The most commonly encountered slime mold in mulch beds is the dog barf fungus, a slime mold called Fuligo speticaFuligo is dramatic because it can appear overnight and is large (a patch of the sporangium can be several inches across).  When kicked, Fuligo bursts into dark spores that will fly up into the air.  Slime molds are also saprophytes and live on the decomposing organic matter in mulch.  They pose no threat to humans or garden plants.

Yellow slime mold, aka dog vomit fungus (photo from Wikimedia)

Fungi in the mulch are a good thing and indicate that moisture, temperature and organic matter are at the correct levels for high microbial activity!  This is what creates a healthy soil and ensures healthy garden plantings.

My cucurbits won’t stop having sex.

Not really a botanically-correct statement, but you know what I mean. John Porter’s previous blog post did a great job of explaining cucurbit reproduction (loved the Pucchini). Though I was surprised to learn “not getting any fruit” is actually a problem. Can’t say I’ve had an issue with that, ever. We have a really vibrant bee population and they’ve been super busy.

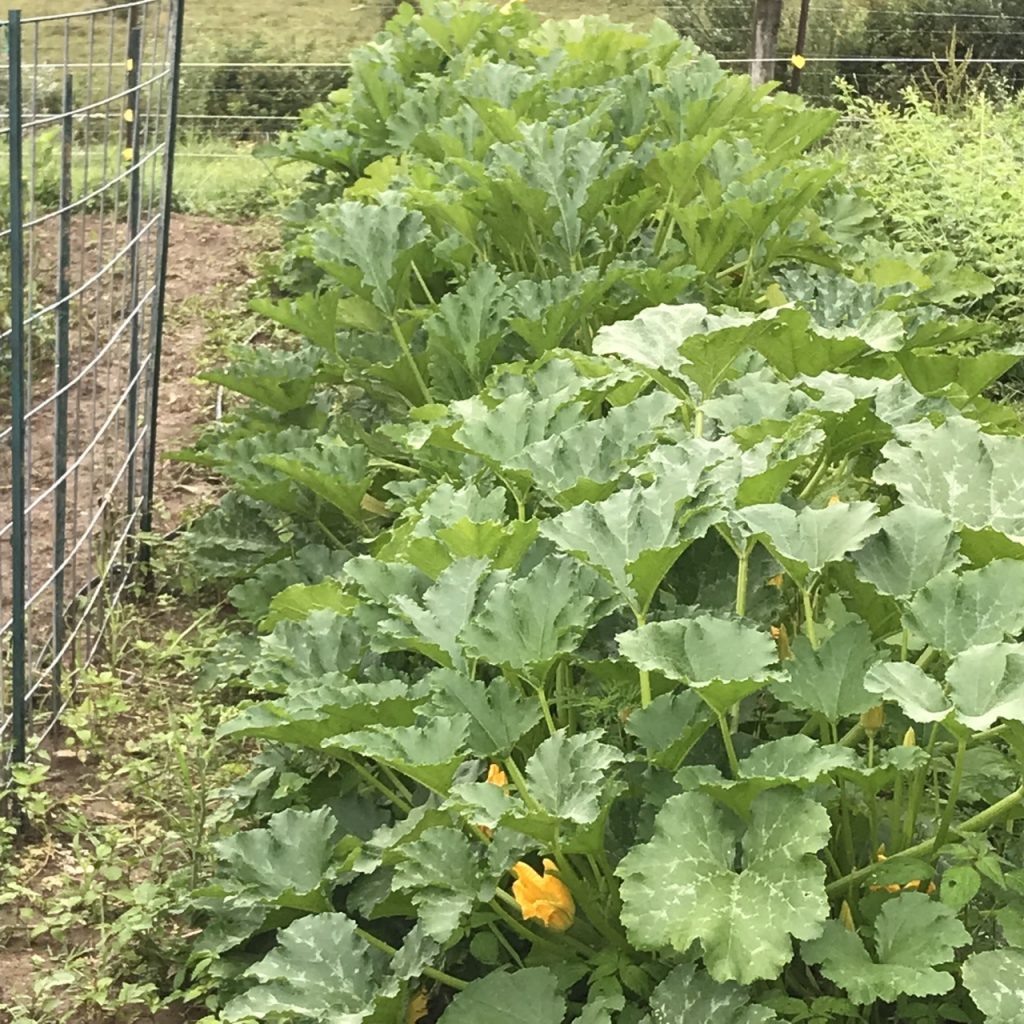
I love growing squash of all sorts, despite not being a terribly gifted vegetable garder. Past Garden Professors posts have addressed this issue. One might ask, why on earth would a two-person household need a 60-foot-long row of zucchini? Because we can!  Though if I recall, I intended to go back and thin the row. Whoops.

The zucchini hedge. And those aren’t weeds, they’re *biodiversity*.

By late summer, we usually end up with gummy stem blight, powder mildew or squash stem borer  No sign yet, though any of these goodies could show up next week. The plants are all healthy and ridiculously enormous. It’s been very warm and dry, but we have a nice drip irrigation system in place.

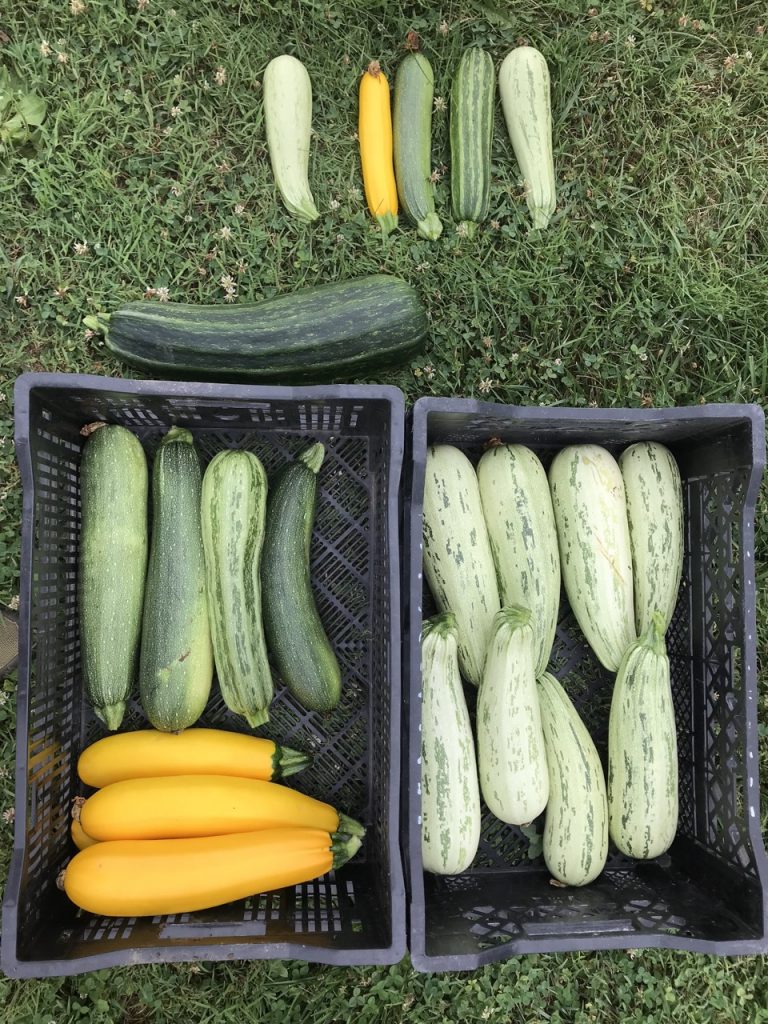
So guess what happened when we got too busy to check on them for three days?   Many more were still on the plants when I snapped this pic. I’ve worked zucchini in some form into every meal except breakfast. Joel’s still being a good sport. Next step is anonymous *gift* bags to folks at the office. Though I think I’m getting a reputation.

Normal-sized zucchini at top of photo for reference.  Aargh.

Not all zucchini taste alike, as true fans know. The pale hybrid Bossa Nova, right, has very creamy and tender flesh with seeds that are really only noticeable when it gets, er, hefty. Bossa Nova is a recent All-America Selection and perfect for use with those spiralizer thingies.  The ribbed/striped variety is Costata Romensco – an heirloom variety with really wonderful flavor. Humongous plants though, probably not the best choice for square foot gardening fans. Tigress is the white-flecked green selection, allegedly more disease resistant than most. Bright and sunny Gold Rush, an old-school AAS selection, adds some color and is a bit sturdier/keeps longer than yellow summer squash.

I won’t be trying to save seeds – as John noted, can be very tricky/futile when there are other cucurbits about. Plus it’s too much fun to pick out next year’s selections from the winter seed catalogs, when the prospect of bountiful zucchini stacked like firewood actually sounds appealing.


Set your roots free on this Independence Day week!

We’ve discussed barerooting/rootwashing trees before, and research on this controversial topic continues. But what about smaller shrubs and woody perennials? What about herbaceous perennials? Basically, what about PERENNIALS???

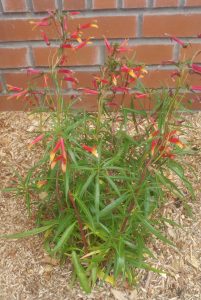
Lobelia laxiflora

I’ve always made a practice of rootwashing everything except for annuals. They don’t last long enough to suffer the perils of potbound plants. But many gardeners are nervous about disrupting more fragile root systems. Let’s see what happens when we do.

Lavandula ‘Winter Bee’

A little context: we’ve just moved to our family farm, which has AMAZING spring flowers that the bees love. But once those are gone…there’s nothing. I was desperate to provide some food for bees and butterflies, so it was off to the nursery to shell out a few hundred bucks for the beginnings of our south-facing pollinator garden – a previously barren spot left after construction of our porch.

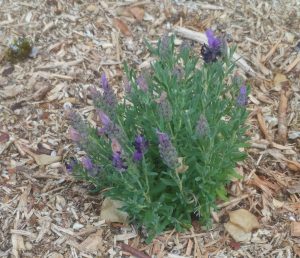
Lavandula ‘Bandera Purple’

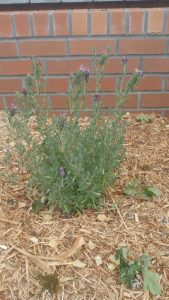
So I bought Lavandula stoechas ‘Bandera Purple’ and ‘Winter Bee’, Salvia ‘Caradonna’, Agastache ‘Acapulco Deluxe Red’ and ‘Blue Boa’, Erysimum ‘Winter Passion’, Verbena ‘Homestead Purple’, and Lobelia laxiflora. I depotted and soaked them in a water bath, using a gentle hose setting to loosen up media in the center. For most of these plants, a massive root disk at the bottom of the pot had to be cut off like a giant slice of salami. If necessary, I “tickled” the remaining rootball to work out the rest of the media.

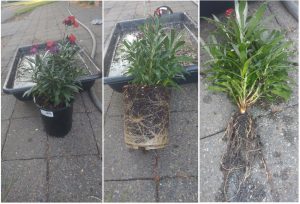
Here is Erysimum ‘Winter Passion’ potted, depotted, and washed.

Not too bad…

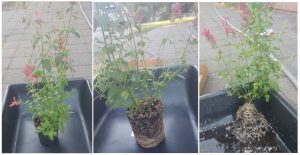
The Agastache and Verbena cultivars were also in pretty good shape, much like the Erysimum. Just a gentle washing and tickling was enough to remove all the media and reveal the roots.

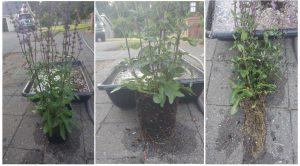
Here is Salvia ‘Caradonna’ potted, depotted, and washed, and Lobelia laxiflora potted, depotted, and washed.

Apart from the root Frisbee on the bottom of each pot, the roots were confined to the center of the pot, pretty much where they had been in their previous container.  So question number one for all of you gardeners – why would you want to dig a hole to plant all of that media (which is nothing like your soil)? My answer – you don’t! Keep that good organic material as part of your topdressing.

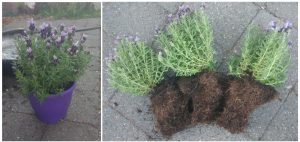
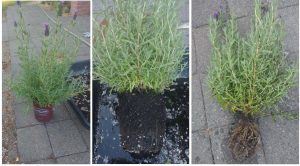
Here is Lavandula stoechas ‘Bandera Purple’ potted, depotted, and washed;

and here is Lavandula stoechas ‘Winter Bee’ potted, depotted, and washed.

I have to take time out for a special rant about the lavenders (retailing at $19.99 and $12.99). Look at the root mass of the ‘Winter Bee’. It’s entirely unacceptable. The woody roots are in the shape of the liner pot from transplants past. News alert: these systems do NOT self-correct. They must be straightened or pruned to regain a natural structure. The ‘Bandera Purple’ – the more expensive of the two – was actually three plants in one color-coordinated bowl (“Go ‘Colour Crazy’ with matching pots and flowers”!). Fine by me – I just got 2 free plants. (By the way, this is nothing new for me – I’ve written about it previously here and here.)

Another upside is that hole digging was short and sweet. Holes were just deep enough to accommodate the root mass and wide enough to allow roots to be spread. Soil was added and watered in. The leftover organic media was used as the first layer of topdressing, followed by a fresh woodchip mulch. And then irrigation to soak the mulch well.

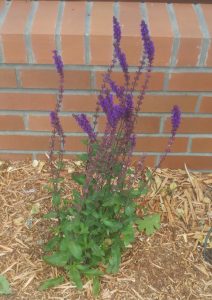
Salvia ‘Caradonna’

It’s important when you rootwash plants to provide optimal soil water every day, particularly when it’s hot and sunny (as this south-facing garden is). Even with the gentlest root washing there will be a loss of fine roots. But the continuity of the soil system means that the soil around the roots will be just as moist as the rest of the bed. Roots left in soilless media quickly dry out. Yes, I had afternoon wilt on many of the taller plants during the first week or so, but they recovered every evening. The wilt has become less noticeable since then.

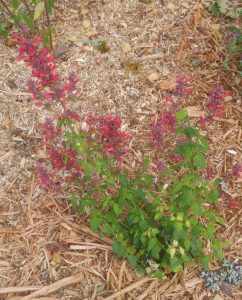
Agastache ‘Acapulco Deluxe Red’

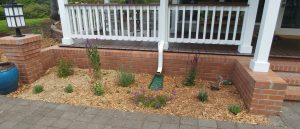
So here’s how they look 3 weeks after planting (sunny day, about 80°F). And I’m happy to report that not only birds and butterflies but hummingbirds have been visiting our pollinator oasis garden. And all those single photos scattered through the post? They are all close-ups from this garden – taken just minutes ago.

South-facing pollinator garden

(Question number two for gardeners – what are you waiting for?)


Do your homework before hiring landscape help!

(A guest post by Rich Guggenheim. You can see Rich’s bio at the end of this post.)

When it comes to shopping, my friends all know it takes me a long time to make a decision. I methodically research out what I want. Then I narrow it down to a few items. After I look over my choices carefully, I may go home to get on the internet and look at consumer reviews; I may go from store to store and check out prices. I look for quality and I look to make sure I am getting a product that is worth the money I am spending on it. I want to make sure my investment will last. Sometimes, my shopping experience will last hours, days, or in the case of a car or computer, it could be months.

My yard is no different. When I need yard work done, such as lawn aeration or tree trimming, I am insistent on high quality work. As a homeowner you are the first and the last line of defense when it comes to making sure that a quality job is done, and done correctly! Knowing what to expect in landscape maintenance and being armed with a small amount of knowledge as a consumer can play in your favor.

Always hire a certified professional to do your work. Would you seek medical advice from an individual who was not licensed to practice medicine? Of course not! Why then would you do it with your yard? I recommend that you check into the individual or company before hiring them. Do some homework. How have they been trained? Where is their certification from? Are they insured, licensed, and can they provide you documentation? Are they registered with the Better Business Bureau? If so, what is their rating? Drive around and check on some of their previous work. Is it the kind of quality you would want in your own yard? Ask for references. Ask questions! This is, after all, a job interview for the contractor. Just because they are the cheapest does not mean they should get the job, and just because they slap a business magnet on the side of their pick-up truck does not mean they know what they are doing!  In the following I will be talking with you about what to look for when hiring a contractor to do yard work and how certain procedures should be done. Armed with this knowledge, you will be better able to ensure the work done in your yard is of the quality you deserve for the money you pay.

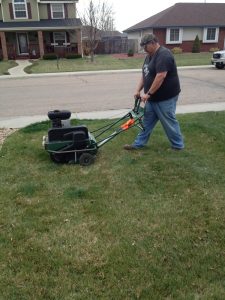
Lawn aeration is perhaps one of the best things that you can do for your lawn. Done twice a year, once in the spring and once in the fall, core aeration combats soil compaction. Soil compaction is a problem in nearly 80% of all landscapes. In addition, aerating your lawn helps combat thatch accumulation and reduces the amount of water you need to apply to your lawn. The reason for this is because when your soil is compacted oxygen and water can’t penetrate into the soil. Fertilizer can’t get penetrate the soil either. As a result, roots are often shallow, and the lawn will need more frequent irrigation. (1, 2, 3, 4)

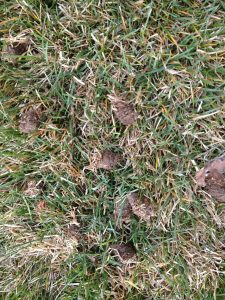
Core aeration removes small plugs, about 1-3 inches long from the soil. A single aeration using a machine with 1/2-inch diameter tines removes as much as 10 percent of the thatch if enough passes are made to achieve average 2-inch spacing between holes. Remember the key is 2-inch spacing. This may mean that multiple passes on the lawn are required. This small investment of an extra $10 will pay dividends in the end.

What do you do with the cores after you have had the lawn aerated? That really is a personal decision. Some people do not like the little plugs being left on their lawn, although there may be benefits to allowing them to disintegrate into the lawn again.

If you do decide to remove them, they are great for the compost bin. Other options may be to power rake the lawn after aeration, watering, or simply running a lawn mower over the lawn after you aerate (although this practice will cause the blades on your lawn mower to dull). Once you have aerated your lawn if you need to reseed, this is the optimum time to do it. The best part of reseeding now is there is no need to top dress the lawn, as the lawn seeds will have nice little holes in which to germinate!

Another type of aeration being marketed by many lawn care companies these days as a replacement for core aeration is liquid aeration. While different ingredients make up this popular lawn service, the main ingredients seem to be liquid humates (organic matter) and sodium lauryl sulfate (soap). These are nothing more than snake oil remedies and are no substitution for the real deal of removing the plugs from your lawn by core aerating. There is no scientific research which has shown chemical aeration to be effective. You may as well throw dirty dish water out on your lawn. (5)

The thing to remember from all of this is that you want to have your lawn aerated twice a year; in the spring, and again in the fall. The plugs removed should be 2-3 inches long, and on 2 inch centers, which may require multiple passes on your lawn.

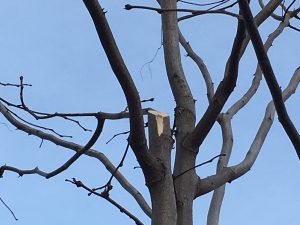
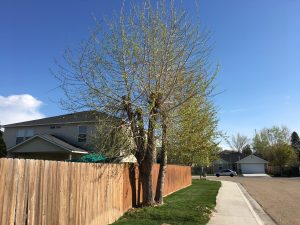
Tree pruning is something I take seriously. It is a science which should not be left to a novice and is far more than could be covered in one article. For me, spotting a bad tree pruning job is as easy as spotting a bad haircut. The only difference is a bad hair cut grows back and has no adverse side effects on your health. However, a pruning job can have enormous effects on the health of a tree, either for good, or for bad. When you hire an arborist, make sure they are ISA certified, licensed, and insured. To find an ISA certified arborist, visit their website.


The key points for a good pruning job really come back to structurally pruning the tree correctly when the tree is young. Improper or lack of pruning when the tree is young can greatly increase the likelihood of tree failure when the tree is older. Cuts on branches larger than 4 inches increase the possibility of decay and disease. If possible, prune trees when the branches are smaller than 4 inches in diameter.

When pruning trees, it is important to prune the branch back to the branch collar. Don’t leave stubs, or what I call “hangars” where you can hang your coat. Leaving these nubs will cause decay and disease to move into your tree.

The last key component to pruning is to always remove a smaller branch back to the parent branch, never the other way around. When you remove a parent branch, unless the wood is dead, you greatly increase the risk of beginning the downward spiral of death and decay in the tree. While this is great for less reputable tree-trimming companies who will have to come back year after year to remove an ever-increasing amount of dead wood from the canopy of the tree, it is hard on your pocketbook; more importantly, your tree’s life is shortened! By knowing some pruning basics, you can ensure that you are hiring a professional who knows what they are doing, and will extend the value and life of your landscape.

  1. Carrow, R. N., B. J. Johnson, and R. E. Bums. 1987. Thatch and quality of Tifway bermudagrass turf in relation to fertility and cultivation. Agronomy Journal, 79: 524-530.
  2. Dunn, J. H., D. D. Minner, B. F. Fresenburh, S. S. Bughrara, and C. H. Hohnstrater. 1995. Influence of core aerification, topdressing, and nitrogen on mat, roots, and quality of “Meyer” zoysiagrass. Agronomy Journal, 87: 891-894.
  3. Erusha, K. S., R. C. Shearman, and D. M. Bishop. 1989. Thatch prevention and control. Turfgrass Bulletin, 10(2): 10-11.
  4. Murray, J.J., & Juska, F.V. (1977). Effect of management practices on thatch accumulation, turf quality, and leaf spot damage in common Kentucky bluegrass [Poa pratensis]. Agronomy Journal,(3), 365-369.
  5. Lloyd M. Callahan, William L. Sanders, John M. Parham, Cynthia A. Harper, Lori D. Lester and Ellen R. McDonald.Cultural and chemical controls of thatch and their influence on rootzone nutrients in a bentgrass green.Crop Science, 1998 38: 1: 181-187. doi:10.2135/cropsci1998.0011183X003800010030x

————————————————————————————————————

Rich Guggenheim is a consumer horticulture educator with the University of Idaho in Canyon County and is the program director for the University of Idaho Extension Master Gardener volunteer program. Rich is also working on a Ph.D. in plant pathology. Rich has been an horticulture extension agent for Colorado State University, horticulturalist for Disney Parks, and is the host of the weekly “Avant Gardener” radio program in Boise. He can be reached at richg@uidaho.edu

When spring is delayed

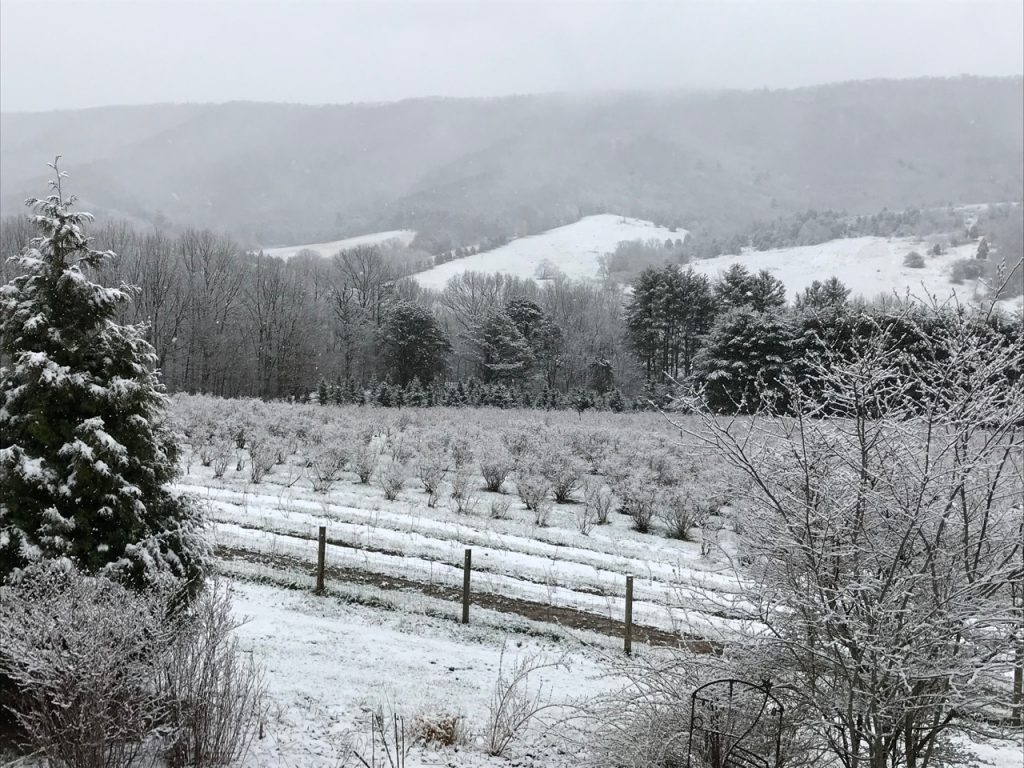
Enjoying our first day above 55 F in quite a while here in mountains of Southwest Virginia. We’ve had far-below-average temperature and three significant snow events over the past four weeks.

Saturday, April 7, 2018 at our farm (Newport, VA).  Not making me want to garden.

For much of the Mid-Atlantic, Northeast, and Midwest, spring has been very slow to arrive. The jet stream has been riding mighty low, and is taking another dive next week. For gardeners, this is frustrating (see above), though here in USDA Hardiness Zone 6b, we’re still well within the “last freeze” window.

For ornamental plant nurseries, greenhouses, and retailers/garden centers in these regions, this is darn close to devastating (the South has fared much better).  For growers and retailers, spring is the busiest time of the year – many see 70-80% of their annual sales between March and early June.  Of that amount, at least 50% of retail garden center sales will happen over the weekends.  IF it is nice.  Folks stay away in droves when the weather stinks. And this has repercussions down the supply chain.

Chris Beytes, the editor of GrowerTalks and GreenProfit (two highly subscribed-to publications within the greenhouse and garden center sector), has been keeping track of spring sales for years.

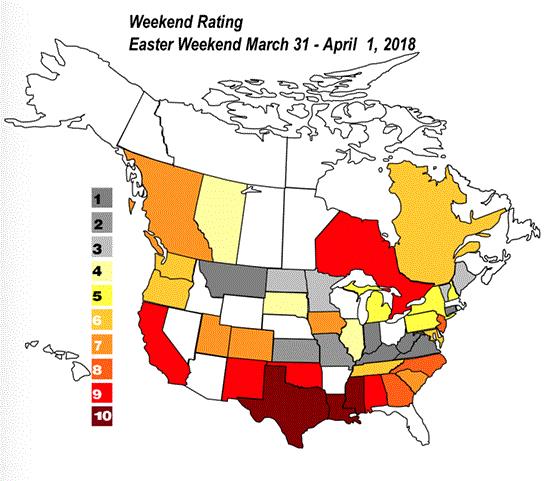
Growers and garden centers self-report a weekend rating on a scale of 1 (dreadful) to 10 (can’t keep product on the shelf, happily exhausted, planning vacation in Tahiti).  Not all states end up represented – either they’re too busy selling (Florida!) or too depressed to report (possibly Ohio!).

Here’s last week’s map (click for a link to Chris’s newsletter column)

Lots, lots of gray.

Closer to home: I took my Ornamental Plant Production and Marketing students on a field trip last Friday. We toodled up I-81 to visit a container nursery (woody plants) and a wholesale greenhouse focused on quality bedding plants and baskets for the independent garden center (IGC) market.

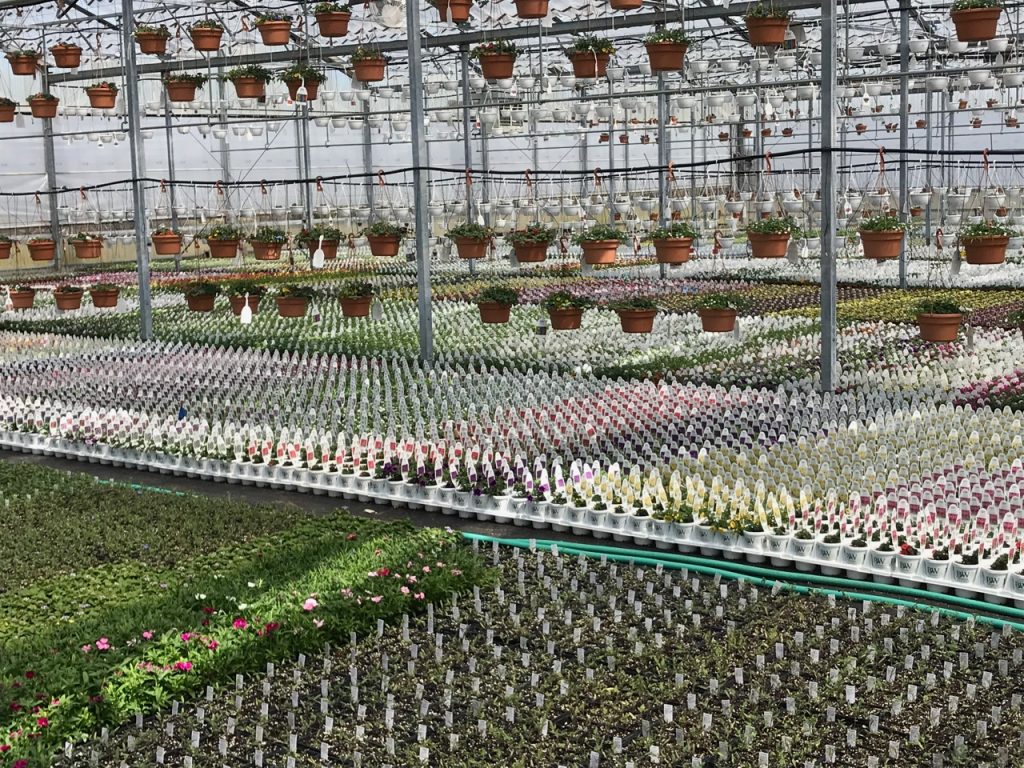
The greenhouse was absolutely packed to the gills with market-ready annuals, herbs, veggie transplants, and hanging baskets.

And it was eerily quiet.

A Friday afternoon in April, and the only folks in a wholesale greenhouse…were the owners. THIS IS NOT NORMAL.  There should be workers, carts, trucks, beeping, yelling, transplanters cranking, etc.

Weather over the previous weekend and early week had been spectacularly crappy. Because the garden centers across the region had not moved enough product to restock, there was no shipping. Because there was no shipping, there was no space freed up to put anything else.  Because there was no space, no transplanting could occur, and seedlings/liners were still in their trays.  Calls were probably being placed to the propagation greenhouses that grow the plugs/liners, asking them to hold off on shipping until the finishing grower could clear out the backlog of plug trays.  Plus perfect plants stay perfect only so long. Pesky things tend to grow/flop/get pests and pathogens.

I love for students to see the real-world hustle/bustle/insanity of spring that growers face each year. The act of growing plants is what sparks the interests of the students – but  understanding the supply chain and market behavior is just as important. We did get great tour – along with a  lot of fodder for class discussions.

Hopefully things will warm up; garden centers across the regions will be jam-packed, and all will be well. If this paralysis continues much longer, the window of opportunity will start closing.  It gets warm/hot, schools let out, folks go on vacation…and lose that got-to-garden feeling.

You can help repair this logjam (yes you can!). Regardless of the weather this weekend (because you’re a tough cookie/Garden Professors reader), get thee to your favorite garden center or retail greenhouse this weekend. And buy! Buy! Buyyyyy!

An idea worth stealing: Mesh pots for bulb collections

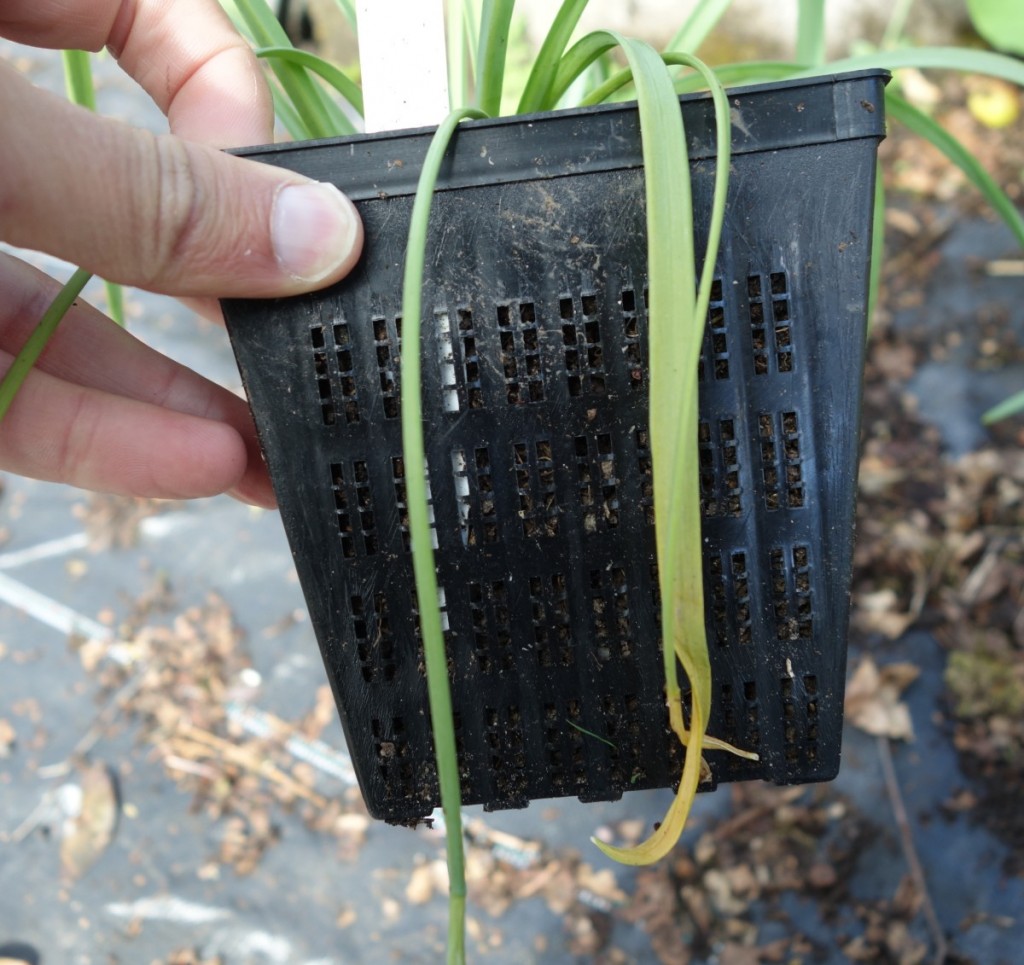
Last year I was in England, and a snowdrop obsessive there (aka, a Galanthophile) showed me this cool trick, using mesh pots to keep her vast collection of different varieties organized.

meshpot

She puts her bulbs in these pots (designed for use in hydroponic systems, I believe), and then sinks the entire pot down in the ground, so that the pot is invisible. The pot keeps the bulbs contained and easy to find so you can dig them up to divide or share even when dormant, and keeps different varieties growing next to each other from getting mixed up. But unlike a regular solid-sided pot, the open mesh allows roots and water to move freely so the bulbs grow just as easily and with as little care as if they were planted directly in the ground.

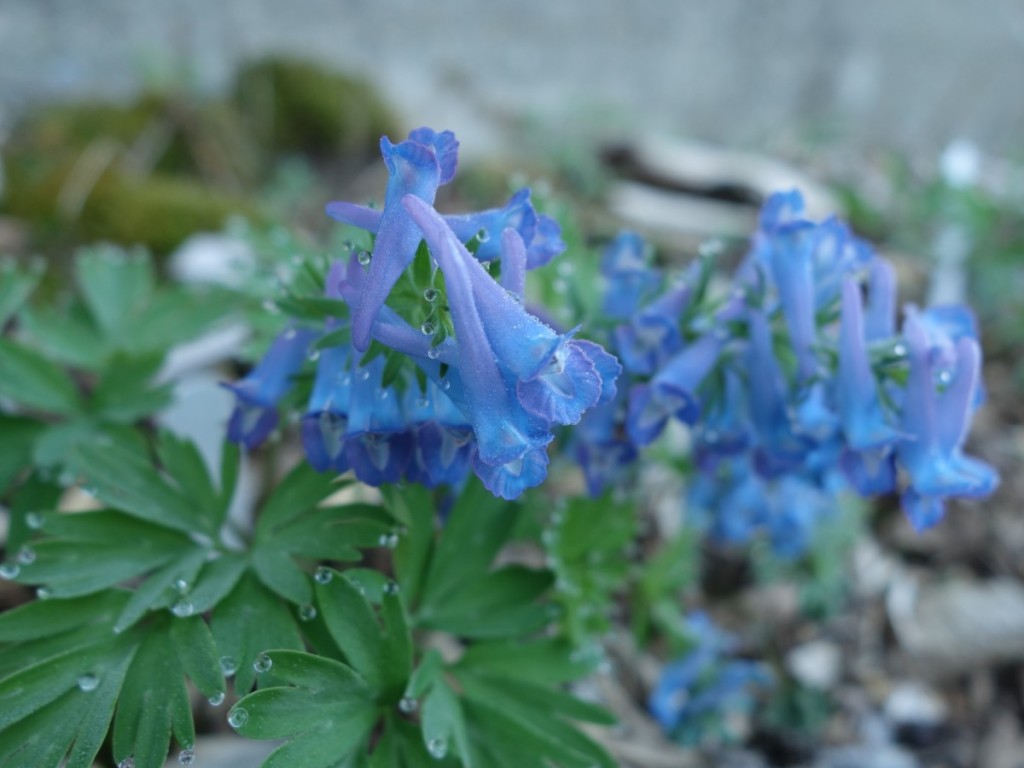
Corydalis turtschaninovii

I’m not a snowdrop lover, they frankly bore me, but I have been getting more and more obsessed with bulbous corydalis, selections of C. solida and the amazing true blue Corydalis turtschaninovii. The tiny bulbs are impossible to find once they get dormant, and my collection is already beginning to get mixed up as the different varieties begin dividing and encroaching on each other… I’m going to start planting new editions in mesh pots to keep everything organized.

Joseph Tychonievich