Feel the Heat: Temperature and Germination


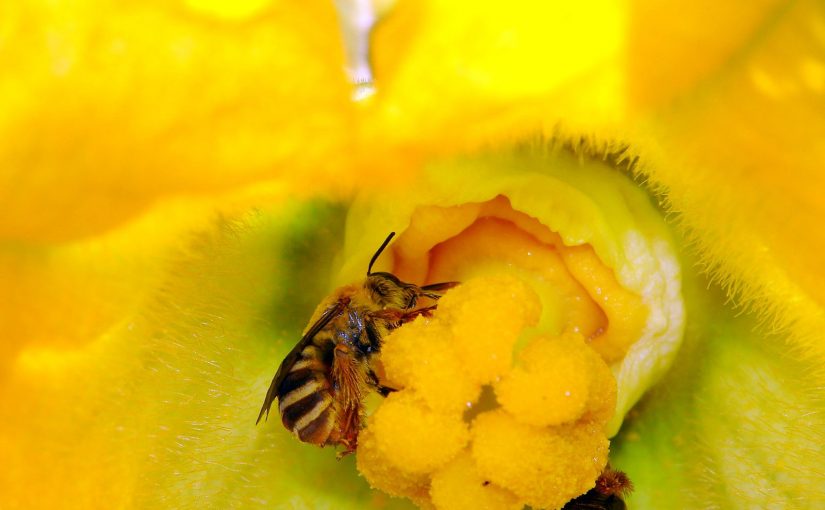
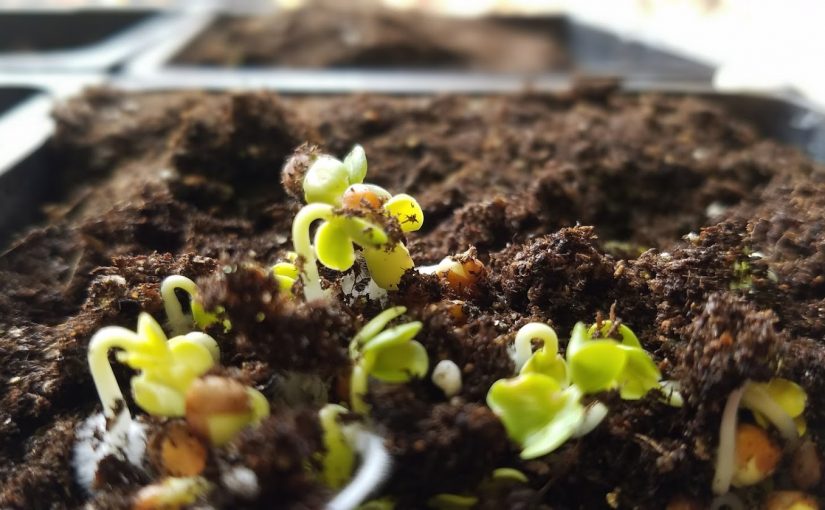
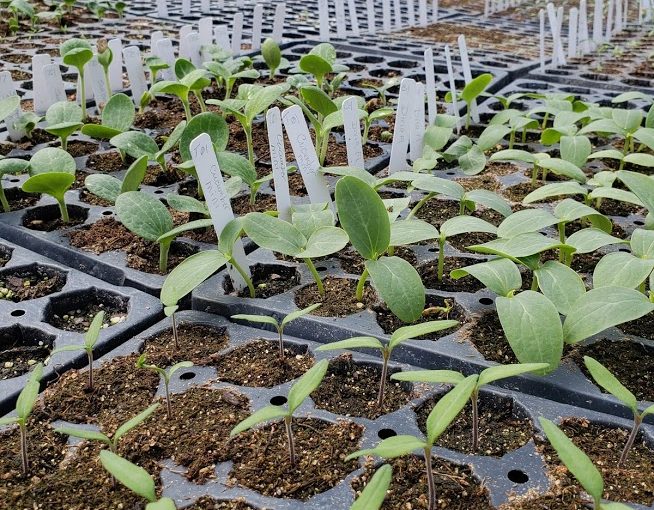
In most parts of the country it is time to dust off the seed starting trays, pick out your favorite seeds, and get a little plant propagation going on.  There’s definitely a lot of science (and perhaps a bit of art) to successful seed starting.  While the process starts (and relies on) the imbibition of water, one of the biggest factors that affects the success, efficiency, and speed of seed germination and propagation is temperature.  Germination relies on a number of chemical and physical reactions within the seed, and the speed and success of those reactions is highly temperature dependent. Respiration, where the seed breaks down stored carbohydrates for energy, is probably the most notable process involved that is temperature dependent (source).   Think of it in terms of a chemical reaction you might have done back in your high school or college chemistry class – there’s an optimum temperature for the reaction and any lower and higher the reaction might slow down or not happen at all.

Thinking of it this way, seeds and germination are just like Goldilocks and her porridge – there’s too hot, too cold, and “just” right.  Seeds are the same way – there’s a “just right” temperature for germination. The seeds of each species has a different optimal temperature for germination with a range of minimum and maximum temperatures for the process.

Why is important that seeds are started at their optimal temperature?

The optimal temperature is the one at which germination is the fastest. This may seem to only have consequences for impatient gardeners, but slower germination speeds increase the days to emergence for the seeds, which in turns means that the seeds and seedlings have a greater chance of failure. The early stages of germination are when seedlings are most susceptible to damping off, which can be caused by a number of fungal pathogens (Fusarium spp., Phytophthera spp., Pythium spp., etc.) that basically cause the seedling to rot at the soil level. These pathogens (as well as decomposers in some cases) can cause seeds to rot or decompose before emerging as well.  That’s why you’ll sometimes see seeds that are slow to germinate (or traditionally direct sown like corn, beans, and peas) treated with those colorful fungicides.  The fungicide gives the seed and seedling a little bit of protection (for a week or so, depending on the product), which is handy if you accidentally sow them before soil temperatures are optimal or if the species is slow to germinate.

If emergence is really slow, there’s also the possibility of stunting or failure due to exhaustion of the stored carbohydrates that the seed relies on until it begins photosynthesis.  So the closer to the optimal temperature the seed is, the faster the emergence and the highest percentage of germination success.

Image of graph showing relationship between soil temperature and seed germination.

What does this mean for home gardeners?

Whether you are starting seeds indoors or direct sowing outdoors, knowing the germination temps can help increase your likelihood of success.  You can find a variety of resources for the optimal germination temperature for your selected crops.  In general, most warm season plants, like tomatoes, peppers, and summer flowers are in the 70-80 °F range.  This is why most of the warm season crops are started indoors – so temperatures can be controlled to higher levels.

For vegetable crops, here’s a good resource for basic germination temperatures.  And here’s one for a few annual flowers.

Many of the cool season crops germinate at much lower temperatures, which means many of them can be directly sown early in the season rather than started indoors.  Crops such as spinach, lettuce, and other leafy greens have these lower germination temps and typically perform better if germinated at lower temps.

Germinating a variety of plants for our 2018 All-America Selections trials

It should be noted that this is for the soil temperature, not the air temperature. If you’re starting seeds in your home, most people don’t keep their homes in the 75 – 80 degree range in the winter.  Many commercial operations use warmed tables or beds for seed starting, rather than heating the whole facility to the necessary temp – it would be expensive.  For home growers, supplemental heat mats can help increase soil temp without having to heat a whole room.  In a pinch, you can even clean off the top of your fridge and keep seedlings there.  It is higher up in the room (heat rises) and most refrigerators create some amount of external heat as they run.

For any seeds that you’re direct sowing outdoors, whether they require higher or lower germination temperatures, you’ll have more success if you plan your sowing around soil temperatures rather than calendar dates (planting calendars can be good for estimation, though).  Investing in a soil thermometer can offer detailed information on the specific temperatures in your garden soil.  Or, if you have a good weather station nearby many of them have soil temperature probes that could give you a good idea of what the soil temperatures are in your region.

Direct-sown lettuce germinating for a fall crop

But don’t let the cool/warm season crop designation fool you – the Cole crops like cabbage and broccoli actually have an optimal germination temperature on the warmer side, but grow better in cooler temperatures to keep them from bolting (flowering).  This is why they need to be started indoors for spring planting, but you can start them outdoors (even trying direct sowing) for fall crops – they germinate in the heat and then slow growth as the temperatures drop.

Sex and the Single Squash: A study in plant sex, sexuality, reproduction, and seed saving

In the 1960s, author and future Cosmopolitan magazine Editor Helen Gurley Brown scandalized the country with her book about independent single women called “Sex and the Single Girl.”  Taking a page from Ms. Brown, we can have a discussion about “Sex and the Single Squash.”  Here, we can talk about plant floral structure and reproduction and its effect on fruit production and even seed saving.  A true discussion of the “birds and the bees” if you will. This is especially important in the vegetable and fruit realm, since reproduction is why we get tomatoes, peppers, apples, plums and such in the first place.  It also is important for producing seeds, as those arise from the reproductive process as well.

Whether you knew it or not, flowers are not just different in appearance from plant to plant, but the ways in which they are pollinated and turn into fruit are different as well.

Some plants have what are called “perfect” flowers where both male and female parts are present, such as roses, apples and dandelions. In a way of speaking, you could say that these flowers are hermaphroditic.  These flowers may or may not be self-pollinated.  Depending on species genetics, some plants can self-fertilize (like tomatoes and beans) and others require cross-pollination (like apples).

Other flowers are “incomplete,” meaning that they have separate male and female flowers.  Some plants with “incomplete” flowers are called dioecious (Greek, meaning “two households”), and have distinct male and female plants such as ginkgo trees, holly bushes and kiwi vines. Some “incomplete” plants are monoecious and have distinct but separate male and female flowers on one plant — like squash, cucumbers and corn.

So, here’s where the vegetable garden comes in — one of the questions that I get every year without fail has something to do with why most of the flowers on a squash or cucumber or other cucurbit (that’s what we call plants in this family) plant do not produce fruit.

There are a few explanations – high heat causing aborted flowers or fruits or improper pollination, absence of pollinators, or, most likely, the fact that some of those flowers were never going to set fruit because they were male.  In answer, I have to explain that about half or more of the flowers on the plant are male and are, unfortunately, anatomically incapable of producing fruit.

There are a few ways to tell male and female flowers apart when it comes to members of the cucurbit family.

First, look at the base of the flower. If the base is swollen and looks like it is a tiny version of the mature fruit, then it is a female flower.

If the base is just a straight stem (in flowers, this stem is called a peduncle), then it is a male flower.

The second method is to look inside the flower. If there is one large central structure, called the pistil, that indicates the flower is female.

Male flowers will have several, smaller stamens inside. Female flowers also tend to be larger than male flowers.

Image result for squash flower male female

In the world of the single, available female squash blossom, life revolves around attracting honey and other native bees that have also recently visited male flowers to assure pollen transfer.

All members of the cucurbit family require this pollination tango to make sure that the female flowers produce fruit.

Each species and even variety of squash have a different ratio of male to female flowers. The ratio is usually about 1-to-1, but it is not unusual to see varieties with many more males than females.

Many of the plants also produce an abundance of male flowers early in the season, sort of as a teaser to make sure bees are attracted to the plant later on to pollinate the female plants.

So if a majority of flowers die early in the season without setting fruit, or about half of the flowers die throughout the season, there is nothing to worry about.

If female flowers are dying throughout the season without producing fruit, though, there is a definite problem. This means that there are no bees available to pollinate the plants.

If fruits have shrunken parts or misshapen, then there could be an issue of incomplete pollination from not having bees around. This could result from not having enough food for them in the area to encourage their presence, or from weather being too cool or wet for bees to get out and pollinate.

The lack of bees could also be the result of improper use of pesticides in the area.

If it seems like the birds and the bees aren’t happening in your garden, there are ways that you can ensure fruitfulness by taking matters into your own hands.

Transferring pollen from male flowers to female flowers can be accomplished using a small artist’s paintbrush or by simply pulling off a male flower and using it to apply pollen directly.

Gardeners who want to save seeds from plants in this family should also pollinate flowers by hand, and actually go so far as to protect the female flower from outside pollen using some sort of cover.

In fact, this method is often used by plant breeders or those who want to save seeds of crops that easily cross-pollinate.  Hand pollination followed by bagging the flower to keep pollen or pollinators away to avoid accidental unwanted pollen is often used to produce.

Believe it or not, several members of the squash family that look or taste nothing alike are the same species and can cross-pollinate. For example: Zucchini, summer squash, pumpkins, scallop squash, decorative gourds and acorn squash are all in the species Cucurbita pepo and can cross with each other.

A few years ago, one of my Master Gardeners came up to me at the end of a meeting and asked me what was wrong with her zucchini. She handed me an object roughly the shape of a zucchini, only a bit larger and splotched with orange. She had saved the seeds from the year before.20151104_200712

I immediately answered that her zucchini had crossed with a pumpkin. Both of these plants are the same species and can easily cross pollinate. Even if you don’t have pumpkins in your garden, bees can travel 2 miles or more in search of food.  So she was left with what I would call a Puccini.

Easy cross-pollination of varieties is why the most common heirloom crop varieties you’ll find are tomatoes and beans. Both of these crops have closed flowers that help resist cross-pollination.

They are most likely to be self-fertile, meaning that the flower will pollinate itself without outside assistance. This helps the plant breed true — so next year you end up with something that’s roughly the same as what you had this year. These plants can be just a few feet away from a different variety and they will not cross pollinate.

If you want to save something that is bee-pollinated, like your squash, pumpkins or cucumbers, you might want to do the brush and bag technique. Otherwise you might end up with a surprise in the garden next year.

The heirloom varieties that we often save are open pollinated, meaning that when they cross with themselves their genetics are relatively stable and you won’t see a lot of difference from year to year. (There will still be some difference, so if you save seeds for a long time you can end up with your own strain of a variety suited to your garden and location.)

Hybrids, on the other hand, have less stable genetics than the open pollinated varieties. With the way genetics work, some of those offspring will have traits of the mother plant, some will favor the father and some will be similar to the plant you are trying to save (and some might look like the milkman).

When seed companies sell hybrid varieties, they have to maintain a population of the mother plant and father plant to cross them every year to get the specific hybrid variety.

While the results of saving seeds from hybrids will be unpredictable, it can also be fun. My friend, plant breeder Joseph Tychonievich, points out in his talks and his book, “Plant Breeding for the Home Gardener,” that you can save the seeds from plants most closely resembling the desired plant over several years.

Just keep planting your selected seeds and harvesting the closest one to what you want. After about three or four years, you can end up with a relatively stable, perhaps even open-pollinated variety, that is your very own based on that hybrid variety you love.

And if you end up with a cross-pollination, either purposeful or accidental, you won’t see a difference in the fruit from this growing season (except maybe in corn, but that’s another story)  Those changes won’t be apparent until you grow out the seeds you saved.  So you won’t know until next year if you have one of those pucchinis.

And don’t forget: If you do have an overabundance of male squash flowers, they are edible too. You can put them in a casserole, fry them, stuff them, and more.

Starting Seeds with Success: Best Practices

As we edge closer to spring it is time to start getting ready for the active growing season.   Many gardeners kick off their gardening year early with indoor seed starting to prepare for the upcoming season.

Starting your own seeds is an excellent, and often economical way to prepare for your year of gardening. Whether you grow vegetables or flowers (or both), starting from seeds can offer many benefits. Of course, there are some dos and don’ts for getting the most mileage from your seed starting endeavors.

I recently connected with Joe Lamp’l, host of the Growing a Greener World show on public television and the more recent The Joe Gardener Show podcast to talk about advanced seed starting techniques and technology.

You can follow the link below to listen to the show on your computer, or find it on Stitcher or iTunes (links included on the show page, too).  In addition to the podcast, the show page features extension notes on everything we chatted about with links to good reading materials.

Seed Starting Indoors: The Joe Gardener Show featuring GP John Porter

Here are a few of my best seed starting tips:

  • Be economical. One of the great benefits of starting plants from seeds is saving money. A packet of several (even hundreds) of seeds is often around the same price you’ll pay for one plant at the garden center. Of course, if you go out and splurge on the fancy (and expensive) seed-starting systems you see in your garden store or favorite catalog you may end up investing more than you planned. Instead of fancy seed starting trays or peat pellets and pots, use low-cost or recycled items such as takeout containers or shallow disposable aluminum baking pans to start your plants.  Remember that if you are reusing containers, especially ones that have had plants grown in them before, that sterilization is key in reducing disease.  Thoroughly wash the containers, then dip in a solution of 10% household bleach (1 part bleach : 9 parts water) to disinfect.  There are some horticultural disinfectants out there, but bleach is usually the easiest for home gardeners to get since you can pick it up at the local store.
  • Start seeds in clean, sterile seed-starting mix. This is one area where I don’t skimp. You’ll want to use a sterile mix that is primarily made of peat or coconut coir. It is lightweight and pathogen free and also low in fertility, so you will be less likely to lose plants to such issues as damping off (a fungus that rots the seedlings off at the base). Using regular potting mix may work, but increases your chances of such issues. Plus, seeds are equipped with enough nutrients to make it to their first set of true leaves before they need anything from the soil. I know that some sources say to use mixes with compost in them, but unless you know 100% that the compost got hot enough to kill all pathogens (140 degrees plus for several days) you could be introducing diseases to your plants that could affect them in the seedling stage or in the future.
  • Once the seedling has its first set of true leaves (the second leaves that appear), you should transfer it to an individual container/cell/pot with regular potting soil. At this point, the plant will need to have nutrients from the soil to grow healthy. You’ll want to loosen the plant from the seedling mix (I use a chopstick) and lift it by the leaves (not the stem). Temperature control is key.
  • Heat is usually the most important factor in coaxing your seeds to germinate, so placing your newly sown seeds in a warm (around 75 degrees F) place will help them germinate faster. Fast germination is key for making sure you get the optimal number of seeds sprouting. However, moving the seedlings to a cooler place (around 65 degrees) after they’re germinated will make them grow sturdier and keep them from getting thin and leggy. Most people laugh when I tell them, but one great warm place to start seeds is on top of the refrigerator.
  • Light is necessary for good plant growth. Most seeds don’t require light until they get their first true leaves, but after that you’ll want light to keep your plant healthy. Some people are lucky to have a good, sunny (usually south facing) window with plenty of light. Otherwise you’ll need to invest in some lighting. The most economical option is a basic shop light fixture from the hardware store. You can buy plant lights, or full spectrum lamps for it, but if they prove too difficult (or expensive) to find, use a regular warm fluorescent and cool fluorescent bulb to get the right light spectra. You’ll want light on for about 16 hours per day. If you are using a window, be sure to turn the plants regularly to keep them from
    Image result for led plant lights
    Blue and Red LEDs Source: Wikimedia Commons

    growing in one direction.  As LED lights become less expensive, many home gardeners are checking them out for home seed starting.  You can use a full spectrum white LED bank, but plants primarily use red and blue light so you can also find high-intensity LED banks for plant production that are blue and red (makes purple!).  Some research is emerging that a tiny bit of green light helps growth, so some newer systems are incorporating a touch of green, too.

  • Don’t get started too early.  Look at the packet for the number of days/weeks before last frost to start your seeds.  If you start them too early, you could end up with spindly, leggy plants or ones that have grown too large for their containers. Even if you have good lighting, your plants will not thrive being cooped up in the house too long.
  • What about fertilizer? Up until the first set of true leaves, seedlings don’t need much in the way of fertility.  When they’re put in larger containers or cells, a good potting mix (usually containing some type of fertilizer or nutrients) will get you most everything you need….to a point.  If you’re growing in small containers, say those cell packs where you have very limited soil, you may find that you need to provide supplemental fertility after a few weeks.  There’s only so many nutrients in that potting mix in small amounts, so if you are holding your plants for longer than, say, six weeks you may need to apply a water-soluble fertilizer or start off with a slow-release fertilizer.  Larger containers, say a 3 or 4 inch pot, may have enough soil to have sufficient nutrients to get you to the point of transplanting.