“Save the planet, (learn how to) plant a tree”

I like catchy memes as much as the next person. They’re easily memorized and passed on. But “Save the planet, plant a tree” has always bugged me for two reasons. First, and probably most importantly, this simplistic mantra absolves people of doing MORE to improve our environment. It’s a “one and done” approach:  “Hey, I planted a tree today, so I’ve done my part.” That’s hardly a responsible way to live in a world where climate change is a reality, not a theory. Planting trees (and other woody plants) needs to become part of a personal ethic dedicated to improving our shared environment, and that includes reducing our carbon footprint in MANY ways.

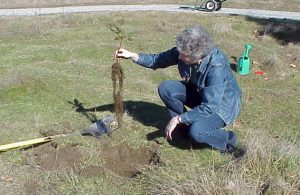
Second, and more germane to this blog, is that most people don’t know how to plant trees (and that includes an awful lot of professionals who should know better). Planting trees properly requires an understanding of woody plant physiology and applied soil sciences. Otherwise, newly planted trees are likely to die due to one or more problems:

  • Poor plant species selection
    • Mature size too large for site.
    • Species not adapted to urbanized conditions. This includes insistence on using native species whether or not they tolerate environmental conditions far different from their natural habitat.

  • Poor/improper soil preparation
    • Working amendments into the soil before, during, or after planting. Your goal is to keep a texturally uniform soil environment.
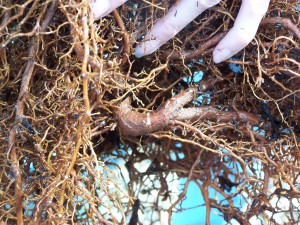
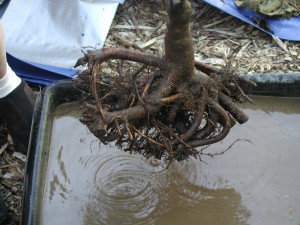
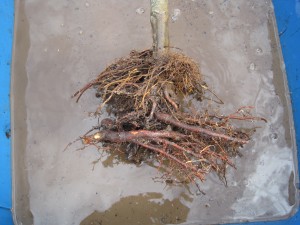
    • Digging a hole before seeing what the roots look like. It’s like buying a pair of shoes without regard to their size.

  • Poor quality roots
    • Most roots found in containerized or B&B trees are flawed through poor production practices. If you are using bare root stock, you don’t have to worry about this problem.
    • Can’t see the roots? Well, that leads to the next problem.

  • Improper root preparation
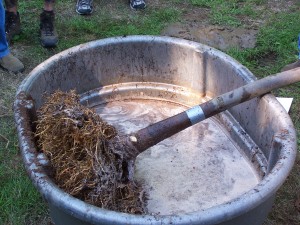
    • No removal of burlap, clay, soilless media, or whatever else will isolate the roots from its future soil environment. Take it all off.
    • No correction of root flaws. Woody roots don’t miraculously grow the right direction when they are circling inward. They are woody; it’s like trying to straighten a bentwood chair.
Just try to straighten those circling, woody roots.

  • Improper planting
    • Planting at the wrong time of year. It’s best to plant trees in the fall, when mild temperatures and adequate rainfall will support root establishment and not stress the crown.
    • Not digging the hole to mirror the root system, especially digging too deep.
    • Failing to place the root crown at grade (which means the top of the root crown should be visible at soil level). Look at forest trees if you are not familiar with what a root crown looks like.
    • Stomping or pressing the soil around the roots. That just eliminates the air space in soil pores.
    • Adding “stuff” like transplant fertilizers, biostimulants, etc. They are not needed and you risk creating nutrient imbalances when you add “stuff.”
The tape marks where the burlap ended – a good 10″ above the root crown.

  • Poor aftercare and long-term management
    • Failing to add arborist wood chips as a mulch on top of the planting area. Regardless of where you live, natural woody material as a mulch is critical for root, soil, and mycorrhizal health.
    • Failing to irrigate throughout the establishment period and seasonally as needed. Trees will continue to grow above and below ground, and without a similar increase in irrigation the trees will suffer chronic drought stress during hot and dry summers.
    • Adding fertilizers of any sort without a soil test to guide additions. Trees recycle most of their nutrients; don’t add anything unless you have a documented reason for doing so.
There is nothing better for roots, soil, and beneficial microbes than fresh arborist chips.

That’s a lot to think about when you are planting a tree – but when you understand the science behind WHY these actions should be avoided, then you can devise a better plan for planting. And if it all seems to be too much, I have created a twelve-step planting plan that might be useful. Please feel free to share it widely!

Do your homework before hiring landscape help!

(A guest post by Rich Guggenheim. You can see Rich’s bio at the end of this post.)

When it comes to shopping, my friends all know it takes me a long time to make a decision. I methodically research out what I want. Then I narrow it down to a few items. After I look over my choices carefully, I may go home to get on the internet and look at consumer reviews; I may go from store to store and check out prices. I look for quality and I look to make sure I am getting a product that is worth the money I am spending on it. I want to make sure my investment will last. Sometimes, my shopping experience will last hours, days, or in the case of a car or computer, it could be months.

My yard is no different. When I need yard work done, such as lawn aeration or tree trimming, I am insistent on high quality work. As a homeowner you are the first and the last line of defense when it comes to making sure that a quality job is done, and done correctly! Knowing what to expect in landscape maintenance and being armed with a small amount of knowledge as a consumer can play in your favor.

Always hire a certified professional to do your work. Would you seek medical advice from an individual who was not licensed to practice medicine? Of course not! Why then would you do it with your yard? I recommend that you check into the individual or company before hiring them. Do some homework. How have they been trained? Where is their certification from? Are they insured, licensed, and can they provide you documentation? Are they registered with the Better Business Bureau? If so, what is their rating? Drive around and check on some of their previous work. Is it the kind of quality you would want in your own yard? Ask for references. Ask questions! This is, after all, a job interview for the contractor. Just because they are the cheapest does not mean they should get the job, and just because they slap a business magnet on the side of their pick-up truck does not mean they know what they are doing!  In the following I will be talking with you about what to look for when hiring a contractor to do yard work and how certain procedures should be done. Armed with this knowledge, you will be better able to ensure the work done in your yard is of the quality you deserve for the money you pay.
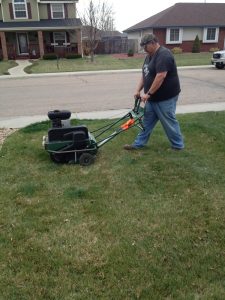
Lawn aeration is perhaps one of the best things that you can do for your lawn. Done twice a year, once in the spring and once in the fall, core aeration combats soil compaction. Soil compaction is a problem in nearly 80% of all landscapes. In addition, aerating your lawn helps combat thatch accumulation and reduces the amount of water you need to apply to your lawn. The reason for this is because when your soil is compacted oxygen and water can’t penetrate into the soil. Fertilizer can’t get penetrate the soil either. As a result, roots are often shallow, and the lawn will need more frequent irrigation. (1, 2, 3, 4)

Core aeration removes small plugs, about 1-3 inches long from the soil. A single aeration using a machine with 1/2-inch diameter tines removes as much as 10 percent of the thatch if enough passes are made to achieve average 2-inch spacing between holes. Remember the key is 2-inch spacing. This may mean that multiple passes on the lawn are required. This small investment of an extra $10 will pay dividends in the end.
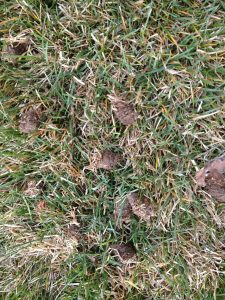
What do you do with the cores after you have had the lawn aerated? That really is a personal decision. Some people do not like the little plugs being left on their lawn, although there may be benefits to allowing them to disintegrate into the lawn again.

If you do decide to remove them, they are great for the compost bin. Other options may be to power rake the lawn after aeration, watering, or simply running a lawn mower over the lawn after you aerate (although this practice will cause the blades on your lawn mower to dull). Once you have aerated your lawn if you need to reseed, this is the optimum time to do it. The best part of reseeding now is there is no need to top dress the lawn, as the lawn seeds will have nice little holes in which to germinate!

Another type of aeration being marketed by many lawn care companies these days as a replacement for core aeration is liquid aeration. While different ingredients make up this popular lawn service, the main ingredients seem to be liquid humates (organic matter) and sodium lauryl sulfate (soap). These are nothing more than snake oil remedies and are no substitution for the real deal of removing the plugs from your lawn by core aerating. There is no scientific research which has shown chemical aeration to be effective. You may as well throw dirty dish water out on your lawn. (5)

The thing to remember from all of this is that you want to have your lawn aerated twice a year; in the spring, and again in the fall. The plugs removed should be 2-3 inches long, and on 2 inch centers, which may require multiple passes on your lawn.
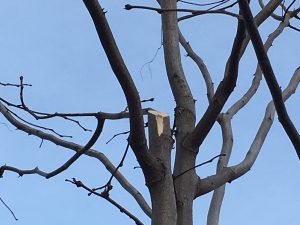
Tree pruning is something I take seriously. It is a science which should not be left to a novice and is far more than could be covered in one article. For me, spotting a bad tree pruning job is as easy as spotting a bad haircut. The only difference is a bad hair cut grows back and has no adverse side effects on your health. However, a pruning job can have enormous effects on the health of a tree, either for good, or for bad. When you hire an arborist, make sure they are ISA certified, licensed, and insured. To find an ISA certified arborist, visit their website.
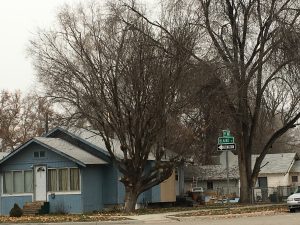

The key points for a good pruning job really come back to structurally pruning the tree correctly when the tree is young. Improper or lack of pruning when the tree is young can greatly increase the likelihood of tree failure when the tree is older. Cuts on branches larger than 4 inches increase the possibility of decay and disease. If possible, prune trees when the branches are smaller than 4 inches in diameter.
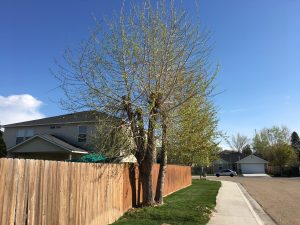
When pruning trees, it is important to prune the branch back to the branch collar. Don’t leave stubs, or what I call “hangars” where you can hang your coat. Leaving these nubs will cause decay and disease to move into your tree.

The last key component to pruning is to always remove a smaller branch back to the parent branch, never the other way around. When you remove a parent branch, unless the wood is dead, you greatly increase the risk of beginning the downward spiral of death and decay in the tree. While this is great for less reputable tree-trimming companies who will have to come back year after year to remove an ever-increasing amount of dead wood from the canopy of the tree, it is hard on your pocketbook; more importantly, your tree’s life is shortened! By knowing some pruning basics, you can ensure that you are hiring a professional who knows what they are doing, and will extend the value and life of your landscape.

  1. Carrow, R. N., B. J. Johnson, and R. E. Bums. 1987. Thatch and quality of Tifway bermudagrass turf in relation to fertility and cultivation. Agronomy Journal, 79: 524-530.
  2. Dunn, J. H., D. D. Minner, B. F. Fresenburh, S. S. Bughrara, and C. H. Hohnstrater. 1995. Influence of core aerification, topdressing, and nitrogen on mat, roots, and quality of “Meyer” zoysiagrass. Agronomy Journal, 87: 891-894.
  3. Erusha, K. S., R. C. Shearman, and D. M. Bishop. 1989. Thatch prevention and control. Turfgrass Bulletin, 10(2): 10-11.
  4. Murray, J.J., & Juska, F.V. (1977). Effect of management practices on thatch accumulation, turf quality, and leaf spot damage in common Kentucky bluegrass [Poa pratensis]. Agronomy Journal,(3), 365-369.
  5. Lloyd M. Callahan, William L. Sanders, John M. Parham, Cynthia A. Harper, Lori D. Lester and Ellen R. McDonald.Cultural and chemical controls of thatch and their influence on rootzone nutrients in a bentgrass green.Crop Science, 1998 38: 1: 181-187. doi:10.2135/cropsci1998.0011183X003800010030x

————————————————————————————————————

Rich Guggenheim is a consumer horticulture educator with the University of Idaho in Canyon County and is the program director for the University of Idaho Extension Master Gardener volunteer program. Rich is also working on a Ph.D. in plant pathology. Rich has been an horticulture extension agent for Colorado State University, horticulturalist for Disney Parks, and is the host of the weekly “Avant Gardener” radio program in Boise. He can be reached at richg@uidaho.edu

Let’s be rational about roots

One of my colleagues alerted me to a blog post on tree myths currently making the rounds on social media. As a myth debunker myself I was particularly intrigued by the last myth “Root Pruning Stimulates Root Branching:”

“When planting a tree’s root ball, It is very tempting to cut back on roots that are circling the ball. It is very often thought that a dense root ball will stimulate new feeder root growth…but that is not the case.

“Don’t worry about encircling roots as they will correct that on a new site.

(Yeah right)

“Most new root growth occurs at the end of existing roots. Root pruning is often done at the nursery to accommodate packaging and to resume growth before the final sale. If you are planting the tree at its final site, it may be best that you gently break up the root ball but never prune root tips.”
Most surprising of all was the statement at the end of the post which cited an Extension publication by Dr. Ed Gilman at the University of Florida.

Let’s straighten this out (pun intended).

First of all, root pruning DOES stimulate new root growth. It’s just like the response you see when you prune the crown of a plant – the buds below the cut become active and develop into new shoots. There are growing points behind the cut ends of roots which act in the same manner.

Young root branching

Second, circling roots will NOT correct themselves after planting. If they are flexible, you can tease them out to radiate from the trunk. If they are woody, you will have the same luck straightening them as you would in straightening a dowel. If anything, it’s going to break. Not bend.

Seriously. You think this root is going to straighten out?

Finally, root elongation (growth) DOES occur at the end of existing roots – IF they are intact. If they’ve been cut, then we’re back to my first point.

This is basic plant physiology. The response of roots to pruning has been known for several decades. So how could the University of Florida publication be so wrong?

Excessively long roots can easily and safely be pruned before planting

I was able to track down the publication “Dispelling Misperceptions About Trees“. It was written in 1991 and has since been archived – meaning that it’s not considered to be a current source of information any longer. But let’s take a look at what it says, especially the underlined portion:

 Root pruning does not stimulate root branching all the way back to the trunk. Roots are often pruned before moving a tree in hopes of creating a denser root ball.However most root growth after root pruning occurs at the end of the root just behind the root pruning cut, not back toward the trunk. Therefore, dig the root ball of a recently root pruned tree several inches beyond the location of the root pruning. Root pruning should be conducted 6 to 10 weeks before moving the tree. Root pruning more than 10 weeks before moving the tree will reduce the advantages of pruning, because regenerated roots will quickly grow outside of the root ball.”

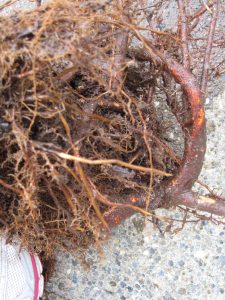
Root pruning when these trees were dug results in many new flexible roots

This says exactly what I stated in my first point: root pruning stimulates new root growth – which is root branching.

Dr. Gilman’s document goes on to say:

“Roots circling around a container do not continue to grow in a circle once the tree is planted in the landscape. Roots frequently circle within the perimeter of a container several times before the tree is planted into the landscape. The portion of the root which grew in the container does not straighten out, but new growth on this root will not continue to circle.”

So yes! You DO need to worry about those circling roots!

Circling roots turned this crape myrtle into a crap myrtle (Courtesy of Roger Duvall)

In 1991 Ed was an assistant professor at UF and went on to write hundreds of Extension publications and research articles during his career. And in 1991 he was well aware of how root pruning affects root growth.

The moral to this story: read your sources carefully and cite them accurately. And if what you read doesn’t jibe with the current state of science, ask questions!

Worst Gardening Advice – Video category

Here at the Garden Professors we try to focus on sharing the best applied plant and soil science information for gardens and landscapes. But sometimes we get sidetracked by information that is SO bad that we need to share it too. So the purpose of this occasional feature – Worst Gardening Advice – is not to poke fun, but to point out the real hazards to plants, people, and the environment by following scientifically unsound practices.

Without identifying which of my GP colleagues nominated this video, we now present how NOT to fix storm damaged trees.


Tree of Heck

We have about 3000 sq ft of mixed border surrounding (in multiple layers) our 1500 sq ft home.  We take care of everything ourselves, in our spare time (ha!!).  Thus, our maintenance schedule BARELY includes cutting back perennials and ornamental grasses Feb-March, plus any pruning needed for woodies…then some fits of weeding throughout the growing season.

Most of this stuff has been in the ground for five to eight years, and we have a high tolerance for nature taking its course.  We’re surrounded by deciduous forest, so of course trees pop up where they’re not supposed to, especially oaks and the occasional hickory, which I dearly love and hate to remove. But I do. Because seedling trees are about impossible to just yank out like a weed – a whip just a few feet tall will have a taproot as long.   With our stringent maintenance regime, they’re usually tall enough to poke up over the Panicum or loom over the Leucanthemum by the time I notice, so then digging becomes the only option.

Or, wait, maybe just cut it back really hard, like below the soil line.  That’ll kill it, right? Nope?  Back again? Chop, chop, hack, hack.  Most saplings will give up after a few years. Except this one:

Ailanthus altissima a.k.a. “Tree of Heaven.”

Most of you know this is a totally invasive doody-head of a tree.  Google for details if not familiar.  I thankfully have not had much experience with it, until the past few years – there must be a mature one in the area.  It would pop up here and there in our borders and blueberry field, but I didn’t think much of it. Grab the loppers, cut it back.  BIG mistake.

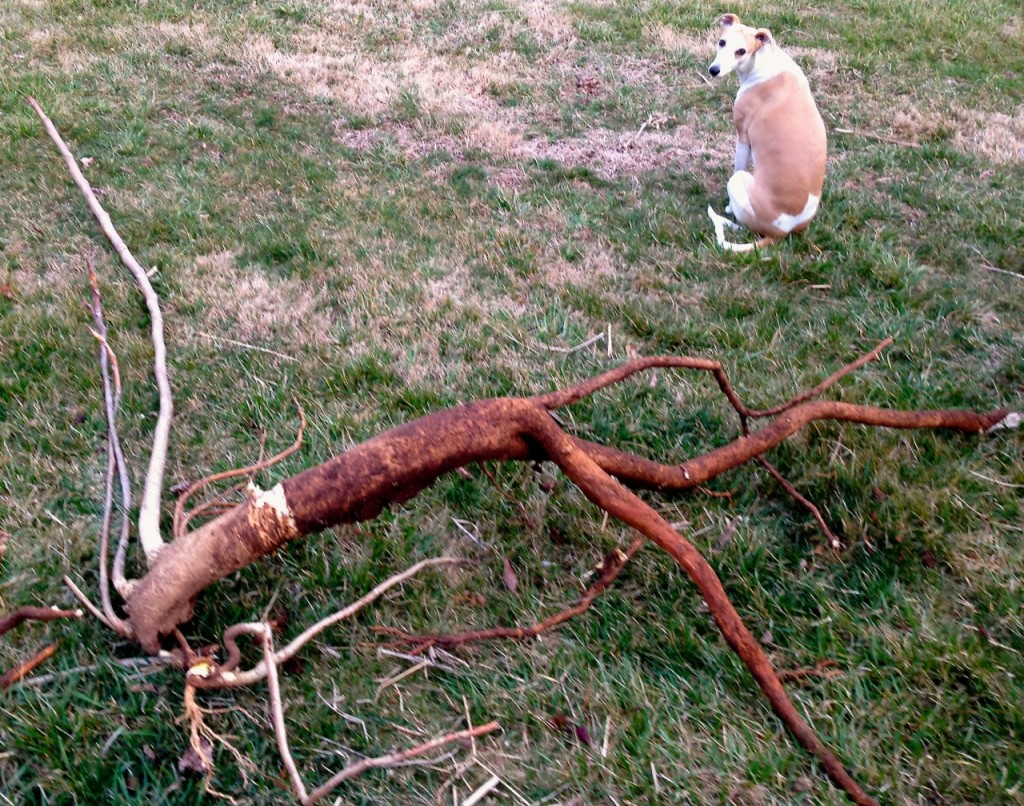
Behold, the most ridiculous root:shoot ratio ever:

ailanthusrootBunny, our pensive 40 lb whippet, for scale. 

I had lopped this individual back three years in a row. All I could see were the pale, unbranched shoots, not very imposing at all, so chop, chop.   But finally, after a heroic effort last evening, it was successfully ripped from the heart of our main perennial border. Joel had to use our John Deere 950 tractor with a brush grabber chain to get this out of the ground, even after 20 minutes of his digging around the root to get the chain attached.

Like some kind of sea monster, my repeated attempts to kill it apparently just made it angry.  And stronger.

It’s still out there, on our burn pile.
A dog barks in the night.
0_o.


Little ball of horrors

One of the great things about doing a multi-author science blog is that there will be topics about which colleagues will disagree. One of those topics revolves around the best way to prepare woody rooted plants (trees and shrubs) before planting them. This is an area in arboricultural science that is evolving. A search through our blog archives will find many of these posts and for convenience’s sake I’ve linked one from each of us here.

From Jeff (2009)
From Bert (2014)
From Linda (2013)

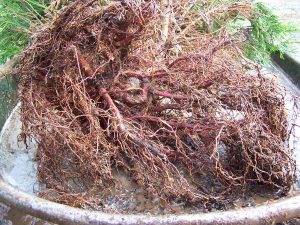
Rather than belabor the points that Jeff, Bert and I have already made in our posts, I think I can sum up our major difference here: I like to bare-root trees and shrubs completely before planting (so I can correctively prune all flawed roots) while Bert and Jeff prefer a less invasive approach. What we do agree upon, however, is the deplorable condition of the roots of many trees and shrubs that end up in the nursery. Because I do practice bare-rooting trees, I thought I’d use today’s post as a rogue’s gallery of trees that should never have made it to the retail nursery. (All of these trees were ones that I bare-rooted and root-pruned myself before planting – and all are thriving.)

Ginkgo "knee" root
Ginkgo “knee” root

Interlocking redbud roots

Junky Japanese maple

The duct tape around the trunk is where the burlap bag began. While the roots are in pretty good shape, only root-washing could find the root crown of this tree.
The duct tape around the trunk is where the burlap bag began. While the roots are in pretty good shape, root-washing revealed the root crown of this tree (which the “at grade” part of the tree) 10″ below the top of the bag

Another unnecessary tree failure

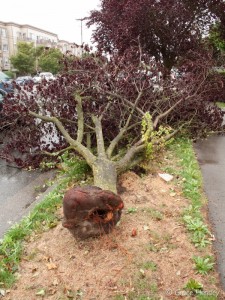
The end of August brought an unseasonable rain- and windstorm to the Puget Sound region. We had some spectacular tree failures which I missed seeing as I was out of town. But one of our Facebook group members, Grace Hensley, was on the ball and took some great photos of a fallen purple-leafed plum. The first thing you see is the complete lack of a stabilizing root system.

"Rootless" purple leafed plum
“Rootless” purple leafed plum

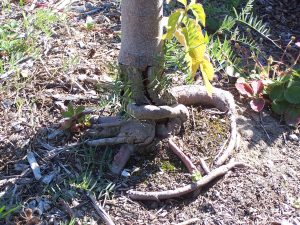
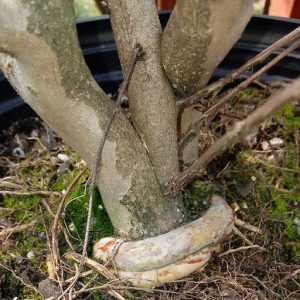
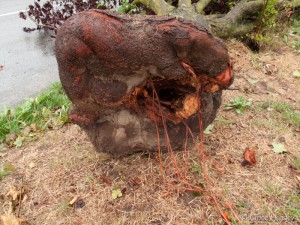
Now look at the base of the trunk, which is actually a massive circling root that has girdled the trunk over time.

A big wooden donut
A big wooden doughnut

By now you must be able to see the orange twine extending from the base of the tree to the soil. Yes, those are the remains of the balled-and-burlapped clay root ball that was planted many years ago. Commercial landscapers will assure you that tree roots can grow through the burlap and establish. And this is sometimes true, as in this case.

But what doesn’t happen when the whole B&B mass is plopped into the ground is that circling woody roots aren’t discovered and corrected. Over the decades what started as a small circling root grew bigger and bigger, slowly squeezing the trunk and preventing it from developing girth at that point. It’s kind of like a blood pressure cuff being pressurized but never released.

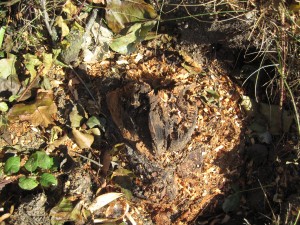
Trunk growth was prevented by the girdling root
Trunk growth was prevented by the girdling root. The broken part here used to be in middle of the wooden doughnut.

In time, the constricted point becomes so unstable that the tree breaks. Look are how small the trunk that’s still in the ground is compared to the trunk of the tree itself. Windstorms are often the final push these failing trees need.

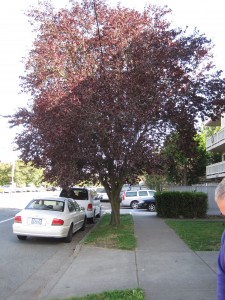
How long before this neighboring tree fails, too?

Commercial landscapers say it’s too costly to remove the twine and burlap and clay surrounding the roots, not to mention doing any of the corrective root pruning that might be needed. It’s easier to just plant the whole thing and cross your fingers that the tree lives past the warranty date. This is what happens when you consider a tree as just another design element rather than a living organism.

As a homeowner, however, you can insist that your trees are planted correctly (if you have someone else do the work). Or you can do it yourself. The bare-root method (sometimes called root washing) is an emerging science and it requires thoughtfulness, but it’s certainly better than the conventional approach in terms of long term tree health.

A new excuse for bad pruning

I spent last week in Orlando at the ISA annual meeting (that’s the International Society for Arboriculture). It’s a great venue for networking with colleagues and hearing about the latest tree research. And once in a while I’ll have a WTF moment. (That stands for Why Trees Fail in case you’re wondering.)

My WTF experience this year revolved around some new terminology and techniques. I learned there are now “environmental arborists” who practice “retrenchment pruning.” In the last few days I’ve tried mightily to find some standard definitions from reputable sources. I don’t know what an environmental arborist is, since it’s not a certification (like an ISA certified arborist) nor is it a university degree program (like urban forestry or environmental horticulture). It seems to be a self-anointed title.

This is what a mature oak should look like.
This is what a mature urban oak should look like.

But the real WTF issue is retrenchment pruning. I looked in vain for published research through my usual data bases and found nothing – other than two articles in Arboricultural Journal (which is not the same as ISA’s journal – Arboriculture and Urban Forestry). Neither of the articles presented experimental evidence to justify this radical approach to pruning trees. Instead, they are more philosophical in nature, with a smattering of ecological theory.

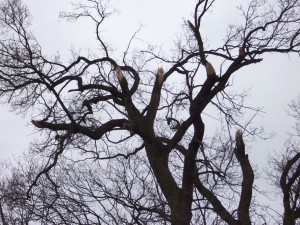
Fortunately, retrenchment pruning methods are easily found on the internet, along with horrific pictures illustrating the results. As described on various websites, retrenchment pruning imitates the natural process of aging. Practitioners remove live branches or partial trunks to reduce the size of the tree and prevent future failure. These aren’t clean cuts, either: they’re “coronet cuts” or “natural fractures.” The rationale described in one of the Arboricultural Journal articles is that these jagged broken branches and trunks “promote specialist habitats and enhance colonisation rates of niche species.” In other words, this technique creates large wounds that are easily colonized by various insects and microbes.

An example of natural fracture pruning (http://www.countytreesurgeons.co.uk/veteran.html)

So apparently we’re expected to ignore the well-established field of woody plant physiology (which happens to be my specialty) and related practical bodies of knowledge (e.g., formal and informal pruning techniques of said woody plants) and start hacking away at mature trees. In doing so, we’re removing live tissue and creating large wounds. This has the effect of both reducing photosynthetic potential of the tree as well as opening it up to possible pest or disease invasion. But nowhere are these possibilities discussed as part of the “natural aging process.” Nor was there mention about how to manage the epicormics shoots that result from improper pruning. And they do need to be managed.

These are epicormic shoots resulting from topping this tree.

I saw some very angry arborists at the ISA meeting who were incensed at the idea that we should deliberately malprune trees. But others seemed quite excited with this new philosophy. To paraphrase one of my plant physiology colleagues, “Give a bad arboricultural practice a catchy name and it magically becomes legitimate.”

Dogwood rescue – an update

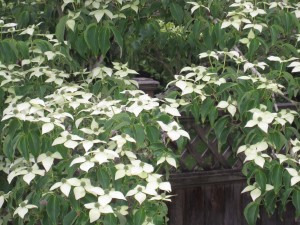
Long-time readers of this blog might remember a Friday quiz I gave back in 2010. It involved the slow but inexplicable decline of our dogwood (Cornus kousa). On the following Monday I revealed the reason for the decline and reported that we were moving this nearly dead tree to another location without the offending perched water table.

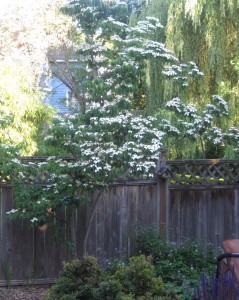
In 2011 I posted my first update along with photos of the new leaves and flowers. And today I reveal its obvious recovery to a fully functional if somewhat still spindly tree (several of its multiple leaders died as a result of the rotted root system).

The Lazarus dogwood
The Lazarus dogwood

A "grateful to be alive" floral display
A “grateful to be alive” floral display

There are several take-home lessons from this example:

1) Don’t assume that tree decline is due to a nutrient deficiency or pest/disease problems. The last thing a stressed tree needs is unnecessary additions of fertilizers or pesticides.

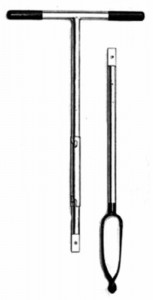
2) Explore soil conditions to find possible water movement disruptions. Our perched water table was discovered serendipitously with our pond installation. You can do the same with a good-sized soil auger. (I bought one of these bad boys, but haven’t had a need to use it yet. Some day…)

www.soil-net.com
www.soil-net.com

3) If a tree or shrub is failing, by all means move the poor thing to another location. In doing so, you may discover that the roots are still stuck in a clay ball and have not established into the native soil. Clean off all the burlap, twine and clay before replanting.

4) Be patient. If it took a while for your tree to reach its current sorry state, it will take a while for it to recover.

The Walking Dead: Christmas tree edition

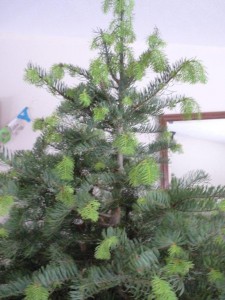
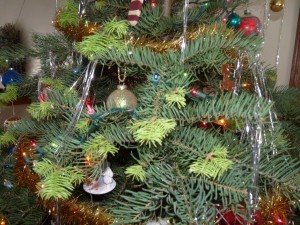
Zombies are big deal these days. Seems like you can hardly turn on the TV these days without seeing someone (or someTHING) coming back from the dead. Turns out Christmas trees are no exception. Every so often during the Holidays I will get a call or an e-mail that starts off, “My Christmas tree is starting to GROW!” And indeed they are. Under certain circumstances, conifers that are cut and brought indoors can break bud and begin to grow; sometimes putting on considerable new growth.

It's alive!  Concolor fir Chrsitmas tree pushing new growth. Photo: Doug Thalman
It’s alive! Concolor fir Chrsitmas tree pushing new growth. Photo: Doug Thalman

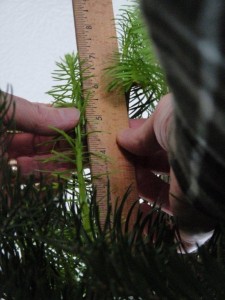
So what gives? Like the proverbial chicken running around with its head cut off, Christmas trees are dead they just don’t know it yet. After they are cut, conifers can continue physiological functions – photosynthesis, transpiration, respiration – for weeks. In some cases they can break bud and begin to grow like it’s springtime when a homeowner brings them indoors. There are a couple of key factors that come into play. First, the tree must be exposed to enough cold weather to meet its chilling requirement. This varies among species, but most conifers need to accumulate at least 6 weeks of chilling below 40 deg. F to overcome dormancy. So early cold weather where the tree is grown and harvested is step one. Second, the “Zombie tree syndrome” is most likely to occur in species that are adapted to high elevations or northern latitudes. The usual suspects are concolor fir (Abies concolor) and corkbark fir (Abies lasiocarpa var. arizonica). These trees have evolved in areas with a short growing season, so there is a selective advantage to breaking bud rapidly when weather warms in the spring – or if brought into a toasty 70 degree living room.

Walking dead - new growth on concolor fir Christmas tree. Photo: Doug Thalman
Walking dead – new growth on concolor fir Christmas tree. Photo: Doug Thalman

So what do you do if your tree turns into a Zombie and comes back from the dead? Don’t panic. It’s a natural phenomenon; just be sure to check and refill the water in the stand regularly so the new growth doesn’t desiccate. And lock your bedroom door at night – just in case…

If trees have met their chilling requirement the they can begin to growth when brought indoors. Photo: Doug Thalman