When Good Seeds Go Bad: How long can you store seeds?

Many gardeners, myself included, have that stash of old seed packets or saved seeds from garden seasons past, just waiting for the right time to be planted. They may be shoved in a drawer, a box, or in the fridge/freezer. Maybe you’re pulling some out of storage to start this spring – will they even germinate? Are those seeds good indefinitely? Do they ever expire? The answer to that really depends on what plant it is and how they are stored. While there isn’t a date where all the seeds go bad, they will eventually go bad over time. Why is this? And how can I make sure to use my seeds before they’re gone? Let’s find out!


Why Good Seeds Go Bad
While we think of seeds as perhaps inert, dormant, or in stasis they’re still very much alive and therefore are still undergoing processes like respiration, though at a much lower rate than a growing plant. During respiration, the seed (and plant within) are converting the stored sugars and starches in the endosperm to release energy. Once the germination process starts with the imbibition of water, the respiration rate increases drastically. A large amount of stored energy is needed to get through germination and sustain the seedling until it has its first set of true leaves and can photosynthesize on its own.

Seeds need to retain enough stored energy to sustain seedlings until they develop their first leaves and start photosynthesizing.

The shelf life of seeds is determined by the amount of energy that is stored, the amount used during storage, and the amount needed from germination to leaf development. This means that there’s a limit to how long a seed can stay in storage. After a while the seed loses viability if it doesn’t have enough energy stores to get it far enough along to photosynthesize on its own or to have that first burst of respiration at the initiation of germination. When searching for resources, keep in mind that viability refers to the ability of the seed to produce a robust seedling while germination refers to breaking of dormancy. The terms are inter-related, but the rates are not necessarily the same.

Some seeds have evolved to sit dormant for a long time, while others have a very short lifespan. It usually turns out that the seeds that last longest in storage are weeds that have evolved to wait long periods of time for an opportunity to germinate. Garden seeds tend to be on the shorter end of the storage time scale. A now 140-year old ongoing experiment at Michigan State University has given some interesting insight. In 1880, William Beal (one of the fathers of horticulture) buried 20 vials full of a variety of seeds (garden and weed) in secret locations around campus. The plan was to dig one up every 5 years and see what germinated. However, after the fist few rounds the cycle was bumped to 20 years. A vial was opened in 2000 and only one species, a weed, still germinated. This year is another germination year – we’ll have to wait and see if the mullein will germinate again this year.

How long will my seeds last?

Data from Nebraska Extension publication.

There are a few good sources that pull data from a variety of sources. The figure below lists some life expectancy times for common vegetable crops published by Nebraska Extension, using two common manuals on seeds as sources. You’ll also find some likes to other data, including average storage times for flowers, herbs, etc. in the references section (while we don’t typically promote commercial sites, the guide from Johnny’s Select Seeds has a good list of plants and has a variety of extension and academic sources listed). Like the MSU experiment, most of this research was done a while ago, but the data is still a good generalization. Most sources say that these time estimates are based on storage in optimal conditions. According to Johnny’s Select Seeds, “The actual storage life will depend upon the viability and moisture content of the seed when initially placed in storage, the specific variety, and the conditions of the storage environment”.

What are these “optimal” conditions? Generally the conditions are low humidity and low temperature. Low humidity ensures that the seed stays dry, avoiding potential initiation of germination. Low temperature reduces the respiration rate, slowing down usage of stored energy and increasing longevity. Optimal temperature for storage is below 42°F (15°C). Relative humidity should be between 20 and 40%.

The relationship between temperature and humidity seems to be inverse – meaning that as storage temperature goes lower, humidity can be higher and vice versa. However, storage times increase as both go down. Many sources state that seed longevity doubles for every one percent drop in humidity or five degree (F) drop in temperature. The relative humidity of the air affects the moisture level in the seeds. Germination usually starts at 25% moisture (and above). Ideal moisture levels for storage range between 8 and 12 percent and levels between 12 and 25 can lead to degradation of seeds, growth of fungi, etc. On the flip side, moisture levels below 5% can decrease vigor. Organizations like seed banks and germplasm centers that store seeds long term often will desiccate seeds to around 8% humidity to extend storage, but this isn’t usually needed for home gardeners.

Image result for seed vault
You don’t have to replicate conditions at the Global Seed Vault to have seed saving and starting success

Storage tips
Knowing that we need low temperatures and low relative humidity to extend seed life gives us some clues on how to store seeds to get the longest shelf life. This is key info if we’re trying to start seeds in spring that have been stored, or if we need to store extra or saved seeds. For the needed temperature levels, your standard home refrigerator is acceptable. Storage temps for cold foods are around the 40°F mark. However, humidity in a refrigerator is very variable. Humidity can skyrocket when doors are open, as condensation settles from warm room air settling on surfaces accumulates. Auto defrost cycles can also alter humidity. You’ll want to think about a desiccant like those silica packs to ensure that your seeds don’t get too moist. Store them in a plastic bag with the desiccant, and for added protection I always put mine in a sturdy container like a plastic box (or even a canning jar). Storing seeds in a freezer may help with the humidity issue, as any moisture that enters is frozen. You might also want to think about letting your bag or container warm up to room temperature before opening so that you don’t get condensation on the packets or the seeds themselves.

Sources:

Vegetable Garden Seed Storage and Germination Requirements – Nebraska Extension

Principles and Practices of Seed Storage – USDA

Seed Storage Guide – Johnny’s Select Seeds

Smith, R. D. (1992) Seed storage, temperature, and relative humidity. Seed Science Research 2, 113-116

120 Year Old Experiment Sprouts New Gardening Knowledge – MSU

Supplemental Lights for Home Seed Starting and Indoor Growing: Some Considerations

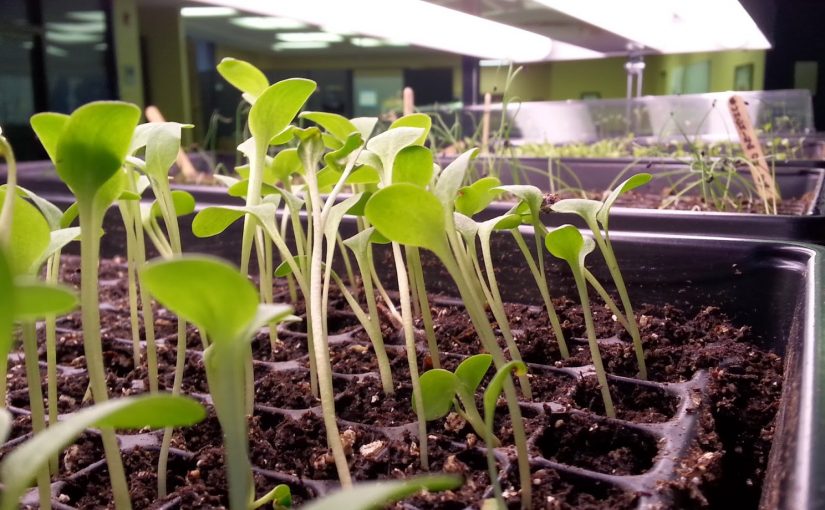
Whether you’ve already got seedlings growing away or getting ready to start your annual indoor seed starting, one of the important factors in seed starting is light.  (Last month I covered heat, which you can see here).  Questions like “Do I need to use supplemental light or can I use a window?” and “What kind of light do I need to use?” are ones we often get from gardeners – new and seasoned alike.  So I thought I’d take a little time to talk about light – the factors that are important for plant growth some ways that you can make sure you’re providing the right kinds and amounts of light to your new seedlings.  Keeping these ideas in mind can help you choose lights for your seeds starting (or other plant needs), whether it is a simple shop light ballast from the hardware store, a pre-fab light cart system, or even higher-tech LED system.

Plants require light for several of their functions, most importantly the process of photosynthesis.  The green pigments in plants (Chlorophyll A and B) act as receptors, gathering electrons from the light to use as an energy source to manufacture glucose, which is stored in the plant in a number of ways and then ultimately broken down in respiration to release energy to support plant functions.  There are three aspects to light that gardeners should keep in mind for supplemental lighting: quality (color), quantity (brightness/intensity), and duration (day/night length).

Duration is a relatively simple concept when it comes to seeds starting and light set-ups.  Gardeners will want to try to mimic the natural environment that will be provided by the sun.  For the most part, aiming for 16 hours of light and 8 hours of dark is standard.  This gives the plant sufficient light, but also provides a rest period which can be important for plant functions.  Most gardeners find it handy to invest in timers to turn lights on and off, rather than trying to remember to do it themselves.  This can be a simple on-off set up from the hardware store (after-holiday shopping can be a good way to pick them up on sale in the string light section) to something more elaborate from grower suppliers.  Duration could be more important if you’re doing longer term growing beyond seeds starting, as day length affects initiating of flowering in some plants.

Intensity refers to how bright the lights are.  Some lucky people have big windows with lots of bright light for starting seeds, but even for them intensity (and duration) may not be enough during the shorter, grayer days of winter. Growing in bright windows can sometimes be a challenge because the light is coming from the side rather than above, so plants often grow toward the window and need to be rotated.  Supplemental light can increase intensity and lengthen duration, even for plants grown in windows.

Most commonly, light bulbs are sold by wattage as a measure of their energy (light) output.  Standard tube florescent lights are generally around the 40 Watt level, but some of the full spectrum plant lights come in 54W options.  If you can find it, the higher wattage can make a big difference in the intensity of light and thus the production of your plants.  Even at the higher wattage, you’ll want to get a ballast that holds at least two bulbs (and some grow light ballasts hold more).  You can further control the intensity of light reaching your plants by increasing or decreasing the distance between the plants and the lights.  This is why the pre-made plant carts have a chain or other mechanism for you to raise and lower the lamps.  For fluorescents, lights are sometimes lowered to around an inch above the canopy of the plants.  For high intensity LEDs, the distance may need to be more.  (If you’re using lights for long-term growth of, say houseplants, you’ll have to experiment with the distance to meet the intensity needs of the plants – closer for high light plants and farther away for low light plants).

Light Quality: The Rainbow Connection

Sunlight, or white light, is composed of all of the colors of the spectrum. Think back to art class and our friend ROY G BIV – the colors of the rainbow.  There’s also parts of the spectrum that we don’t see like ultraviolet and infrared.  For photosynthesis, plants mostly use light in the red and blue spectrum (referred to as Photosynthetic Active Radiation, or PAR), though almost all of the colors have some sort of effect or function on plants.  Blue light has a role in promoting vegetative growth in plants, while red has a role in promoting flowering.

Image result for plant light spectrum

For most applications, supplemental light for seed starting or other indoor growing should be full-spectrum.  You can achieve this in a variety of ways – buying specific full-spectrum plant light bulbs is the best, but you can buy non-plant specific full spectrum bulbs as well.  For small-scale home growers and beginners, it can be as simple as buying a shop light ballast at the hardware/box store with a full spectrum bulb.  For more intensive or large-scale growers, there are lots of sources for higher-end, full spectrum grow lights that you can buy from specialty garden retailers, but these are often more than what home gardeners starting seeds indoors need.

Fluorescent vs LED

Image result for fluorescent shop light
Typical shop light ballast

These days you might be presented with a choice of lights – fluorescent vs. LED.  There are some positives and negatives to each.  While they have a higher up-front cost, LEDs use much less energy than fluorescents and can save money over several seasons of use.  The reduced energy usage also means there’s less energy loss in the form of heat, which can be a positive if you are always struggling with creating excess heat that burns your plants, but a negative if you’re relying on that heat to help keep the temperatures up (see my article from last month on heat and seed starting) or have issues with drying out your growing media.  Fluorescents on the other hand can be more affordable up-front, but have a higher energy usage that will result in higher electric bills over time.

understanding the basics of grow lights for indoor plants and indoor gardening
LED grow light via Shutterstock by nikkytok

You might have noticed in your searching or in visiting some growers that LED lights for plant growth come in either white (full spectrum) or a red/blue combination which end up giving a purple light.  Since LEDs give a larger control over the spectrum of light, growers, especially larger scale intensive operations, use these red/blue combinations as a means to add further energy efficiency since it is the blue and red spectra that are the photosynthetic. By eliminating the spectra that are largely reflected rather than absorbed, less energy is used.  This is useful in hydroponic and vertical farming systems where short-term crops are being grown quickly and where profit margins can be slim.

You can read (and listen to) more about light in the Joe Gardener podcast and article on seeds starting I was interviewed for last year with Joe Lamp’l.

However, research has emerged in the last few years that expanding the spectra of light in LED systems increases production. Research has shown that incorporating green LEDs significantly increases production over just red/blue LEDs (some of that research was by Kevin Folta, who is one of the leading science communicators on biotechnology). While green plants largely reflect rather than absorb green light, it does have some effect on plant functions.   (Research also shows that adding the green makes the light appear a little more natural to workers in facilities like greenhouses and makes it easier to see issues with the plants – the purple of the red/blue systems washes out the plants and makes it hard to see differences in leaves like diseases).

So if you’re looking at LEDs for seeds starting, and especially if you’re looking at them for longer term indoor plant growing, stick with full spectrum or explore one of the LED systems that incorporates green.  Though don’t be afraid to experiment with the colorful LED options – I have a small red/blue system to supplement light to my office potted lime.  The key is to experiment and shop around – every gardener’s need for supplemental light is different and the solutions to those needs are different.  Don’t be afraid to start small with that shop light from the hardware store before working your way up – especially if you’re just starting a small amount of seeds in the spring.

Feel the Heat: Temperature and Germination


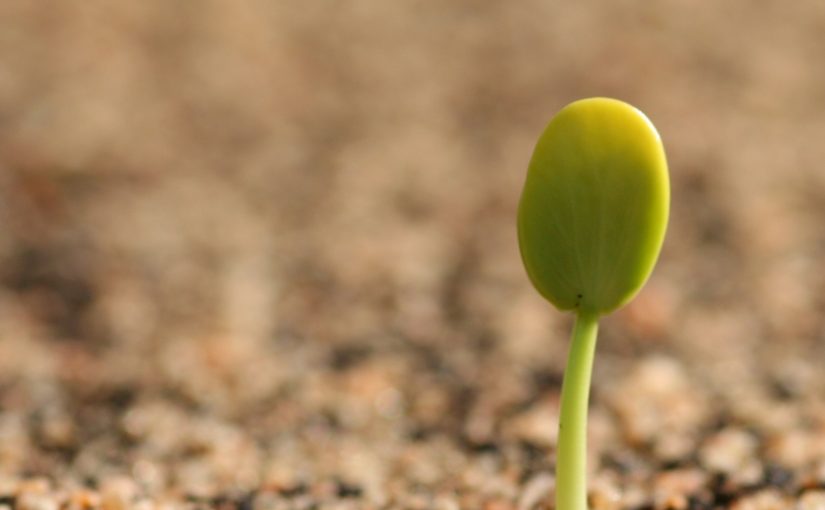
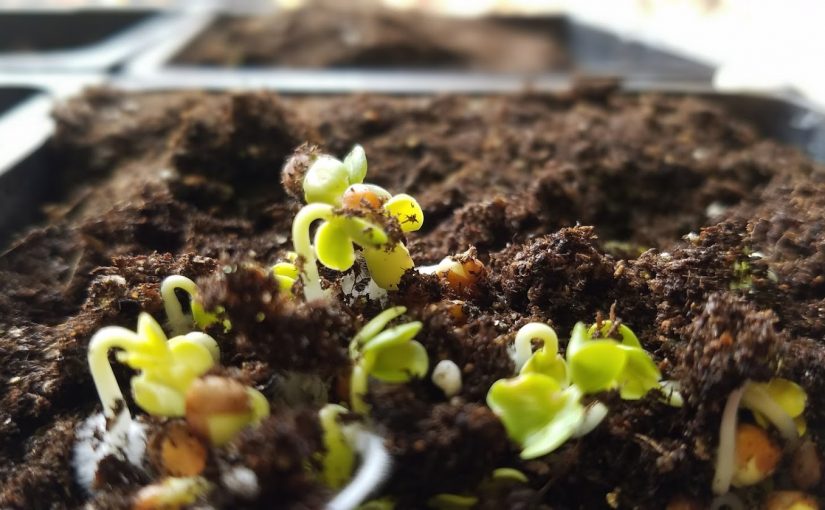
In most parts of the country it is time to dust off the seed starting trays, pick out your favorite seeds, and get a little plant propagation going on.  There’s definitely a lot of science (and perhaps a bit of art) to successful seed starting.  While the process starts (and relies on) the imbibition of water, one of the biggest factors that affects the success, efficiency, and speed of seed germination and propagation is temperature.  Germination relies on a number of chemical and physical reactions within the seed, and the speed and success of those reactions is highly temperature dependent. Respiration, where the seed breaks down stored carbohydrates for energy, is probably the most notable process involved that is temperature dependent (source).   Think of it in terms of a chemical reaction you might have done back in your high school or college chemistry class – there’s an optimum temperature for the reaction and any lower and higher the reaction might slow down or not happen at all.

Thinking of it this way, seeds and germination are just like Goldilocks and her porridge – there’s too hot, too cold, and “just” right.  Seeds are the same way – there’s a “just right” temperature for germination. The seeds of each species has a different optimal temperature for germination with a range of minimum and maximum temperatures for the process.

Why is important that seeds are started at their optimal temperature?

The optimal temperature is the one at which germination is the fastest. This may seem to only have consequences for impatient gardeners, but slower germination speeds increase the days to emergence for the seeds, which in turns means that the seeds and seedlings have a greater chance of failure. The early stages of germination are when seedlings are most susceptible to damping off, which can be caused by a number of fungal pathogens (Fusarium spp., Phytophthera spp., Pythium spp., etc.) that basically cause the seedling to rot at the soil level. These pathogens (as well as decomposers in some cases) can cause seeds to rot or decompose before emerging as well.  That’s why you’ll sometimes see seeds that are slow to germinate (or traditionally direct sown like corn, beans, and peas) treated with those colorful fungicides.  The fungicide gives the seed and seedling a little bit of protection (for a week or so, depending on the product), which is handy if you accidentally sow them before soil temperatures are optimal or if the species is slow to germinate.

If emergence is really slow, there’s also the possibility of stunting or failure due to exhaustion of the stored carbohydrates that the seed relies on until it begins photosynthesis.  So the closer to the optimal temperature the seed is, the faster the emergence and the highest percentage of germination success.

Image of graph showing relationship between soil temperature and seed germination.

What does this mean for home gardeners?

Whether you are starting seeds indoors or direct sowing outdoors, knowing the germination temps can help increase your likelihood of success.  You can find a variety of resources for the optimal germination temperature for your selected crops.  In general, most warm season plants, like tomatoes, peppers, and summer flowers are in the 70-80 °F range.  This is why most of the warm season crops are started indoors – so temperatures can be controlled to higher levels.

For vegetable crops, here’s a good resource for basic germination temperatures.  And here’s one for a few annual flowers.

Many of the cool season crops germinate at much lower temperatures, which means many of them can be directly sown early in the season rather than started indoors.  Crops such as spinach, lettuce, and other leafy greens have these lower germination temps and typically perform better if germinated at lower temps.

Germinating a variety of plants for our 2018 All-America Selections trials

It should be noted that this is for the soil temperature, not the air temperature. If you’re starting seeds in your home, most people don’t keep their homes in the 75 – 80 degree range in the winter.  Many commercial operations use warmed tables or beds for seed starting, rather than heating the whole facility to the necessary temp – it would be expensive.  For home growers, supplemental heat mats can help increase soil temp without having to heat a whole room.  In a pinch, you can even clean off the top of your fridge and keep seedlings there.  It is higher up in the room (heat rises) and most refrigerators create some amount of external heat as they run.

For any seeds that you’re direct sowing outdoors, whether they require higher or lower germination temperatures, you’ll have more success if you plan your sowing around soil temperatures rather than calendar dates (planting calendars can be good for estimation, though).  Investing in a soil thermometer can offer detailed information on the specific temperatures in your garden soil.  Or, if you have a good weather station nearby many of them have soil temperature probes that could give you a good idea of what the soil temperatures are in your region.

Direct-sown lettuce germinating for a fall crop

But don’t let the cool/warm season crop designation fool you – the Cole crops like cabbage and broccoli actually have an optimal germination temperature on the warmer side, but grow better in cooler temperatures to keep them from bolting (flowering).  This is why they need to be started indoors for spring planting, but you can start them outdoors (even trying direct sowing) for fall crops – they germinate in the heat and then slow growth as the temperatures drop.

Compost in Seed Starting Mix: Recipe for Success….or Failure?

A recent question posted to the Garden Professors blog Facebook group (a place where you can join and join in conversation of garden science) asked about the potential for compost added to seed starting media to cause failure in germination.  It is a good question, and one that seems to have several different camps – from garden hero author folks swearing by it in their (non-peer reviewed) books, to fact sheets saying it isn’t a good idea.

I’ve always promoted that the best practice for seeds starting is using a sterile media to avoid such problems as damping off.  Many of the problems I’ve heard associated with compost and seed starting are that improperly finished compost can introduce disease microorganisms to the media or cause phytotoxicity, it can make the mix too heavy and thus create anaerobic conditions that starve emerging seedlings of oxygen or cause decomposition, and there is the potential for residues of herbicides in composts using farm waste, manure, or lawn clippings as a feedstock. But does compost really pose a risk to seed starting?  I decided to take a very quick spin through the literature to weigh the possibilities.  Here are some of the potential issues and what a quick glance at the literature says.

Keeping the Germs out of Germination

Compost, even finished compost, has a high microbial activity.  For the most part, the fungi and bacteria in compost are good guys that pose no threats to plants: they are decomposers (that only break down stuff that is already dead) or neutral.  But incorrectly managed compost can also harbor fungi such as Pythium and Rhizoctonia that cause damping off or even other diseases such as early and late blight if diseased plants were added to the compost and sufficient heat levels weren’t maintained.  Composts that don’t reach 140°F and maintain that temperature for several days to kill off potential pathogens run the risk of introducing diseases into seedlings.

Many promote the use of compost and compost products for potential antagonistic effects on bad bacteria.  We’ve discussed compost tea and the lack of conclusive evidence that it has any effect on reducing disease here many times before, and this article found that there is no significant effect of compost tea on damping off.  Some other articles, such as this one, did find that commercially prepared composts added to media did suppress damping off.  However, it is to be noted that these are commercially prepared composts, which have a strict temperature requirement and often require testing for pathogen and bacterial populations.  Many home composters aren’t as proficient at maintaining temperatures suitable for pathogen elimination.

Even if the compost is pathogen free, introduction into a germination media could potentially increase the population of pathogens already present in the media (or that land on it from the air) by providing a source of food for bacterial and fungal growth.  The sterile mixes aren’t just sterile from a microorganism perspective, they’re also sterile from a nutrient perspective as well to help inhibit potential pathogen growth.  The seeds come with their own food, so it isn’t needed for initial germination – the seedlings should be moved to a more fertile mix once they’ve established their first set of true leaves.

Image result for damping off
Damping off, source hort.uwex.edu

You may be saying- “but we also direct sow seeds outdoors, where there’s lots of pathogens present in the soil.”  While this may be the case, damping off is still a definite problem in direct sowing and the loss of investment in materials, lights, and time is generally much lower (and less painful) than in indoor seedling production.  This is especially the case for large operations or for home gardeners who grow lots of stuff from seed.

This is the main issue that leads to the best practice recommendation to use a sterile seed-starting mix that doesn’t contain compost.  If a mix contains compost, it should be from a commercial enterprise that follows best practices or  pasteurized.

Maturity isn’t just for wines, cheeses, and people

Continuing to talk about proper composting, improperly finished compost that hasn’t properly matured (finished composting) can also lead to problems with seed germination.  Unfinished compost can still have woody material included, which has a high C/N ratio and also contain/release phytotoxic compounds during the decomposition process. The presence of decomposition microorganisms in a high C/N ratio means that there is still decomposition happening, which requires nitrogen for the process.  With absence of nitrogen in the media, the nitrogen from the seed or the seedling can be leeched out, effectively causing mortality after or even before germination.  The tender seedling serves as a source of N for the decomposing fungi.

We’ve had this discussion before when it comes mulch.  While mulch is perfectly fine on top of the soil, if it gets mixed into the soil there could be potential implications on N availability.

A germination bioassay is one tool commonly used to test for compost maturity.  Quickly germinating (and inexpensive) seeds are germinated on the compost (or on filter paper soaked with an extract from the compost in some commercial operations).  The rate of germination vs germination failure can give some insight into the maturity of the compost.  This paper discusses the use of the technique for commercial sawdust compost used for potting media.

You can use a bioassay of your own to test for compost maturity (or herbicide persistence, discussed later) for applications in your garden.  Sow an equal number of inexpensive, fast-germinating seeds like radish or lettuce sown on the compost with a control sown on moist paper towel in a bag.  Compare the number of germinated seeds and thriving seedlings after several days to see if there is an issue with the compost.

Keeping Things Light

One other quality required for seed starting media is a good level of porosity (pore spaces) for the media to hold air.  Air (oxygen) is important as it is needed by the roots for respiration.  If the media is too heavy or holds too much water you run the risk of hypoxia, or lack of oxygen, in the roots.  This can result in root die off and subsequent seedling failure.  Most seed starting media are composed of very light materials such as peat moss, coir, vermiculite, or perlite for this very reason.  Compost, by nature, is a more dense material with less porosity and has a higher water holding capacity.  Therefore incorporation of too much compost can create the potential risk of compaction or excessive water holding in the mix.

When Persistence Doesn’t Pay Off

Most herbicides break down during the composting process through a variety of physical and biological interactions.  However there have been reports of some herbicides that are persistent after the composting process, resulting in a residue that could damage plants grown using the compost (see this paper for some examples).  Many of the reports show the damage manifesting in mostly large applications of compost to gardens.  However, the more fragile nature of germinating seeds and young seedlings make them especially susceptible to herbicide residue damage.  For further discussion (and examples of bioassays used to detect herbicide residues), check out this paper.

So the potential for pathogens, risk of improperly matured compost, effect on porosity, and potential for herbicide persistence present some significant risks to germination if they are incorporated into seed starting media.  These are the risks that cause many sources to promote using sterile seeds starting media, and I think the advice is well founded.  While some may not experience these possible issues, the potential is still there.

Starting Seeds with Success: Best Practices

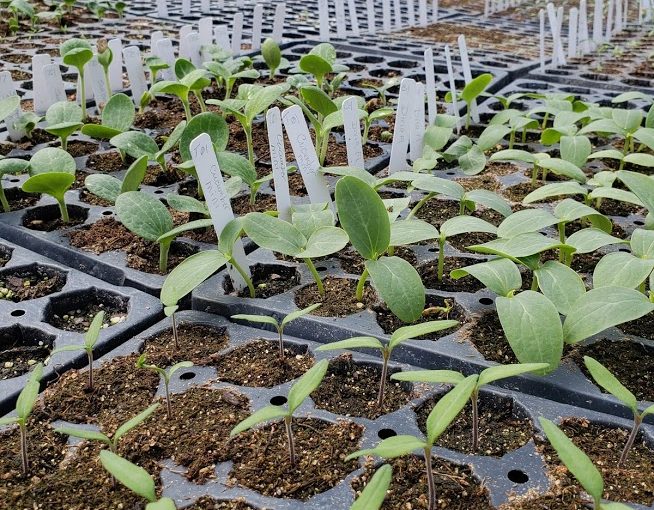
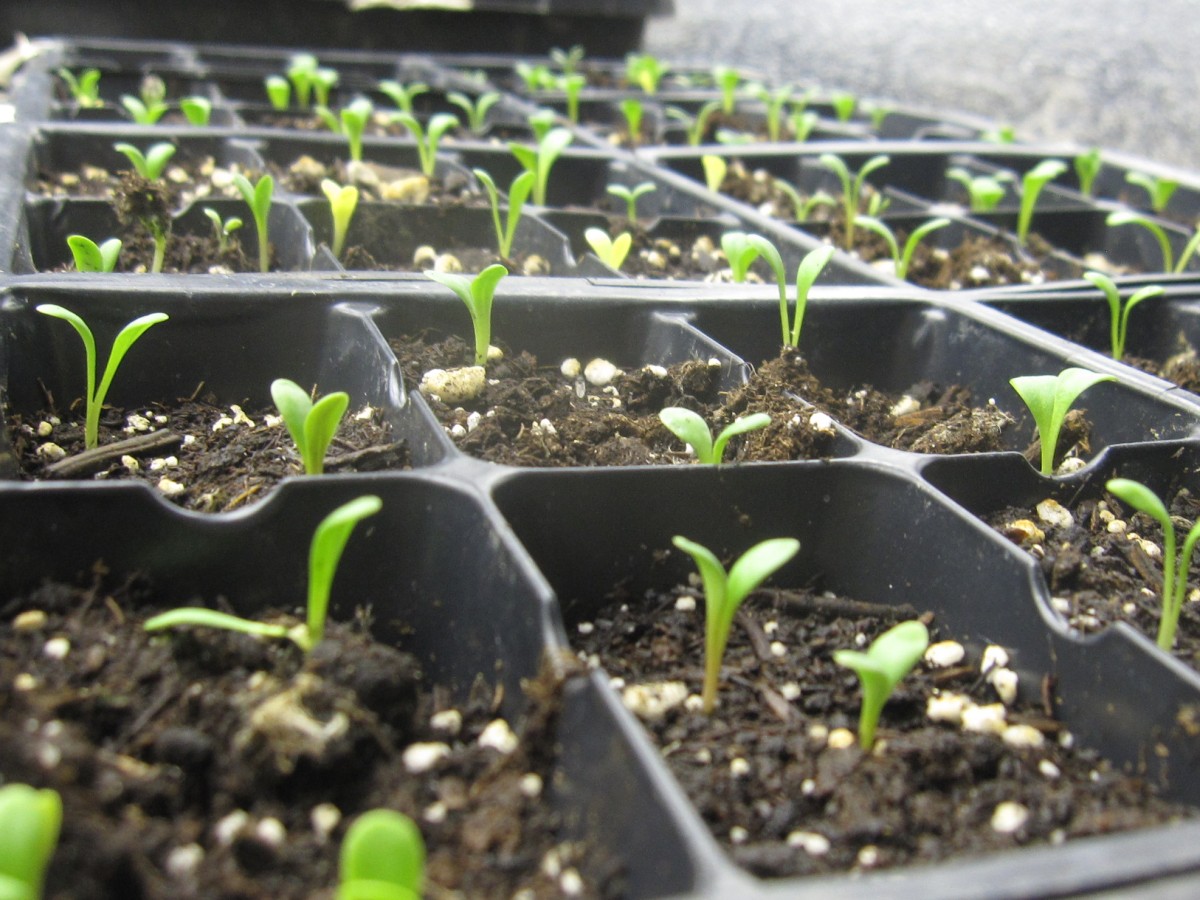
As we edge closer to spring it is time to start getting ready for the active growing season.   Many gardeners kick off their gardening year early with indoor seed starting to prepare for the upcoming season.

Starting your own seeds is an excellent, and often economical way to prepare for your year of gardening. Whether you grow vegetables or flowers (or both), starting from seeds can offer many benefits. Of course, there are some dos and don’ts for getting the most mileage from your seed starting endeavors.

I recently connected with Joe Lamp’l, host of the Growing a Greener World show on public television and the more recent The Joe Gardener Show podcast to talk about advanced seed starting techniques and technology.

You can follow the link below to listen to the show on your computer, or find it on Stitcher or iTunes (links included on the show page, too).  In addition to the podcast, the show page features extension notes on everything we chatted about with links to good reading materials.

Seed Starting Indoors: The Joe Gardener Show featuring GP John Porter

Here are a few of my best seed starting tips:

  • Be economical. One of the great benefits of starting plants from seeds is saving money. A packet of several (even hundreds) of seeds is often around the same price you’ll pay for one plant at the garden center. Of course, if you go out and splurge on the fancy (and expensive) seed-starting systems you see in your garden store or favorite catalog you may end up investing more than you planned. Instead of fancy seed starting trays or peat pellets and pots, use low-cost or recycled items such as takeout containers or shallow disposable aluminum baking pans to start your plants.  Remember that if you are reusing containers, especially ones that have had plants grown in them before, that sterilization is key in reducing disease.  Thoroughly wash the containers, then dip in a solution of 10% household bleach (1 part bleach : 9 parts water) to disinfect.  There are some horticultural disinfectants out there, but bleach is usually the easiest for home gardeners to get since you can pick it up at the local store.
  • Start seeds in clean, sterile seed-starting mix. This is one area where I don’t skimp. You’ll want to use a sterile mix that is primarily made of peat or coconut coir. It is lightweight and pathogen free and also low in fertility, so you will be less likely to lose plants to such issues as damping off (a fungus that rots the seedlings off at the base). Using regular potting mix may work, but increases your chances of such issues. Plus, seeds are equipped with enough nutrients to make it to their first set of true leaves before they need anything from the soil. I know that some sources say to use mixes with compost in them, but unless you know 100% that the compost got hot enough to kill all pathogens (140 degrees plus for several days) you could be introducing diseases to your plants that could affect them in the seedling stage or in the future.
  • Once the seedling has its first set of true leaves (the second leaves that appear), you should transfer it to an individual container/cell/pot with regular potting soil. At this point, the plant will need to have nutrients from the soil to grow healthy. You’ll want to loosen the plant from the seedling mix (I use a chopstick) and lift it by the leaves (not the stem). Temperature control is key.
  • Heat is usually the most important factor in coaxing your seeds to germinate, so placing your newly sown seeds in a warm (around 75 degrees F) place will help them germinate faster. Fast germination is key for making sure you get the optimal number of seeds sprouting. However, moving the seedlings to a cooler place (around 65 degrees) after they’re germinated will make them grow sturdier and keep them from getting thin and leggy. Most people laugh when I tell them, but one great warm place to start seeds is on top of the refrigerator.
  • Light is necessary for good plant growth. Most seeds don’t require light until they get their first true leaves, but after that you’ll want light to keep your plant healthy. Some people are lucky to have a good, sunny (usually south facing) window with plenty of light. Otherwise you’ll need to invest in some lighting. The most economical option is a basic shop light fixture from the hardware store. You can buy plant lights, or full spectrum lamps for it, but if they prove too difficult (or expensive) to find, use a regular warm fluorescent and cool fluorescent bulb to get the right light spectra. You’ll want light on for about 16 hours per day. If you are using a window, be sure to turn the plants regularly to keep them from

    Image result for led plant lights
    Blue and Red LEDs Source: Wikimedia Commons

    growing in one direction.  As LED lights become less expensive, many home gardeners are checking them out for home seed starting.  You can use a full spectrum white LED bank, but plants primarily use red and blue light so you can also find high-intensity LED banks for plant production that are blue and red (makes purple!).  Some research is emerging that a tiny bit of green light helps growth, so some newer systems are incorporating a touch of green, too.

  • Don’t get started too early.  Look at the packet for the number of days/weeks before last frost to start your seeds.  If you start them too early, you could end up with spindly, leggy plants or ones that have grown too large for their containers. Even if you have good lighting, your plants will not thrive being cooped up in the house too long.
  • What about fertilizer? Up until the first set of true leaves, seedlings don’t need much in the way of fertility.  When they’re put in larger containers or cells, a good potting mix (usually containing some type of fertilizer or nutrients) will get you most everything you need….to a point.  If you’re growing in small containers, say those cell packs where you have very limited soil, you may find that you need to provide supplemental fertility after a few weeks.  There’s only so many nutrients in that potting mix in small amounts, so if you are holding your plants for longer than, say, six weeks you may need to apply a water-soluble fertilizer or start off with a slow-release fertilizer.  Larger containers, say a 3 or 4 inch pot, may have enough soil to have sufficient nutrients to get you to the point of transplanting.

Creative Lighting for Seed Starting

As we get close to the time to start tomato, pepper, and other seedlings indoors, I thought I’d share this picture of my older sister’s seed starting setup from few years ago:

lamps et al

Two desk lamps with compact florescent bulbs. Not traditional, but worked great. Just a reminder that you can get creative when it comes to lighting for seedlings, using whatever fixtures and layout works for your space. The only rules are to use florescent or LED bulbs, not those old fashioned incandescent bulbs which have poor light for plants, and err on the side of more light rather than less to make sure you get compact, healthy plants that will transition to the sunny outside world without drama.
Joseph Tychonievich


Why you (probably) shouldn’t be starting seeds yet

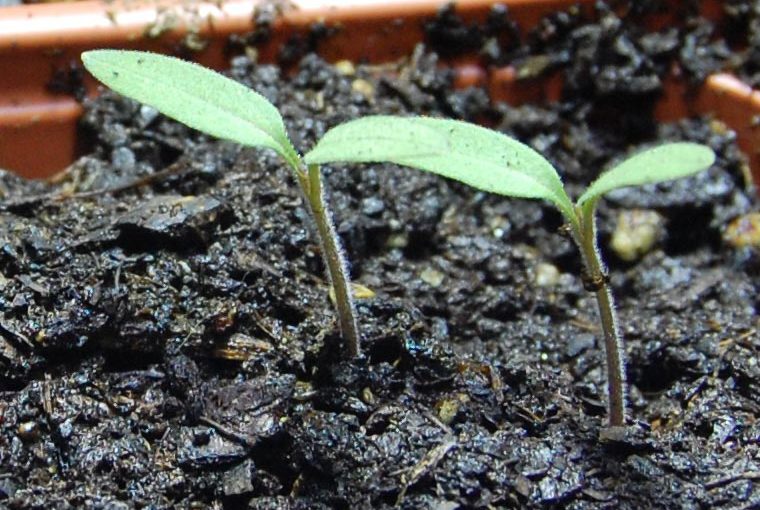
As a beginning gardener I learned that to give plants like tomatoes and peppers more time to grow and produce the largest possible crop, it was best to start the seeds early indoors.

gazaniaseedlingsAs soon as I learned that, I wondered: Well, if starting my tomatoes 6-8 weeks before transplanting them outside is good, surely 10 weeks would be better, right? Or 12? Or 16?

Turns out, earlier isn’t always better, and here are some of the reasons why.

First, you probably don’t have enough light. If, like most home gardeners, you are starting seeds under florescent bulbs, it is difficult to give sun lovers like tomatoes and peppers enough light. Light intensity drops off rapidly as you move away from the bulbs, so you know to keep the bulbs right above your seedlings. This works great when the plants are small, but as they grow it becomes very difficult to give both the tops and the bottoms of the seedlings enough light. The result is dying lower leaves and spindly, unhealthy growth.

rootboundSecondly, you are almost certainly going to get some crappy root systems. If you’ve followed this blog for a while, you’ve no doubt read Bert and Linda talking about all the potential problems with the root systems of container grown trees and shrubs. Well, most of the same problems develop with other plants grown in small containers. The roots start circling and they are slow to grow out of the rich soil of the container and into the native soil around them once transplanted into the garden. The longer your transplants grow indoors, the more likely they are to develop problematic root systems. Keeping transplanting them up to larger and larger containers can help mitigate the problem, but that quickly takes up far more space than most home gardeners have for there seedlings.

How big and impact that circling root system will have on the health of the plant varies by species. My personal experience growing zinnias, for example, is that they handle circling, pot-bound roots so poorly that plants from seeds sown directly in the garden quickly over-take and out-perform plants started weeks earlier indoors.

So follow the recommendations for the timing of seed starting. It really does work better. You should be able to get advice on when to start seeds from the catalogs you are shopping, extension offices, or you can use Margaret Roach’s excellent seed sowing calculator.

If you DO decide that earlier is better, that you can provide the light and generous pot sizes to avoid problems, there’s no harm in giving it a shot. But if you do, try starting a second batch at the later, recommended, time and growing the two side-by-side in the garden so you can really compare and see which perform best in the actual conditions of your garden, and if all that extra time and space under your lights or in your greenhouse was really worth it.

Joseph Tychonievich

Cold Stratification for seeds

You may think of spring as the time for seed sowing, but I do a lot of seed planting now, in the fall. The reason is that most of the cold hardy perennials, trees and shrubs that I like to grow produce seeds that require cold stratification.
This simply means that they require a period exposed to cold temperatures while the seeds are moist and hydrated before they will germinate.

The requirement for cold is a pretty straight-forward adaptation to life in cold climates. Seeds that ripen in the summer and fall might not have time to get established before winter if they germinated right away. The requirement for cold means the seeds don’t actually sprout until spring, giving them a full growing season to get ready for the next winter.

seedbed
An outdoor seed bed is an easy way to stratify seeds

You can — and I used to — give seeds this cold period in the refrigerator. Three months in the fridge in a plastic bag with a damp paper towel to keep the seeds moist is long enough for most everything, though the exact period of cold required varies by the plant. The fridge works, but I think it is way easier to just do it outside. So the past few days I’ve been busy sowing seeds out in my outdoor seed beds. They’re just raised beds, filled with potting media, and covered with a screen lid to limit the number of weed seeds that blow in and keep disruptive animals out. I plant my seeds in the fall. Come spring, after the seeds have had their dose of cold, they sprout.

Dianthus seedlings ready for transplanting

Once the seedlings have grown on a while, I dig them out, separate the individual plants, and put them out into their final locations in the garden.

Individual seedlings separated and ready for planting

I do this with more and more seeds every year, even for perennials that don’t require a cold period to germinate, simply because it is so easy. No fussing around with lights or checking the calendar or even much watering. Just plunk the seeds in, and dig out the plants once they are big enough.

Cactus grafting fun

I’ve been grafting cactus this summer, and made this:

grafted cactus

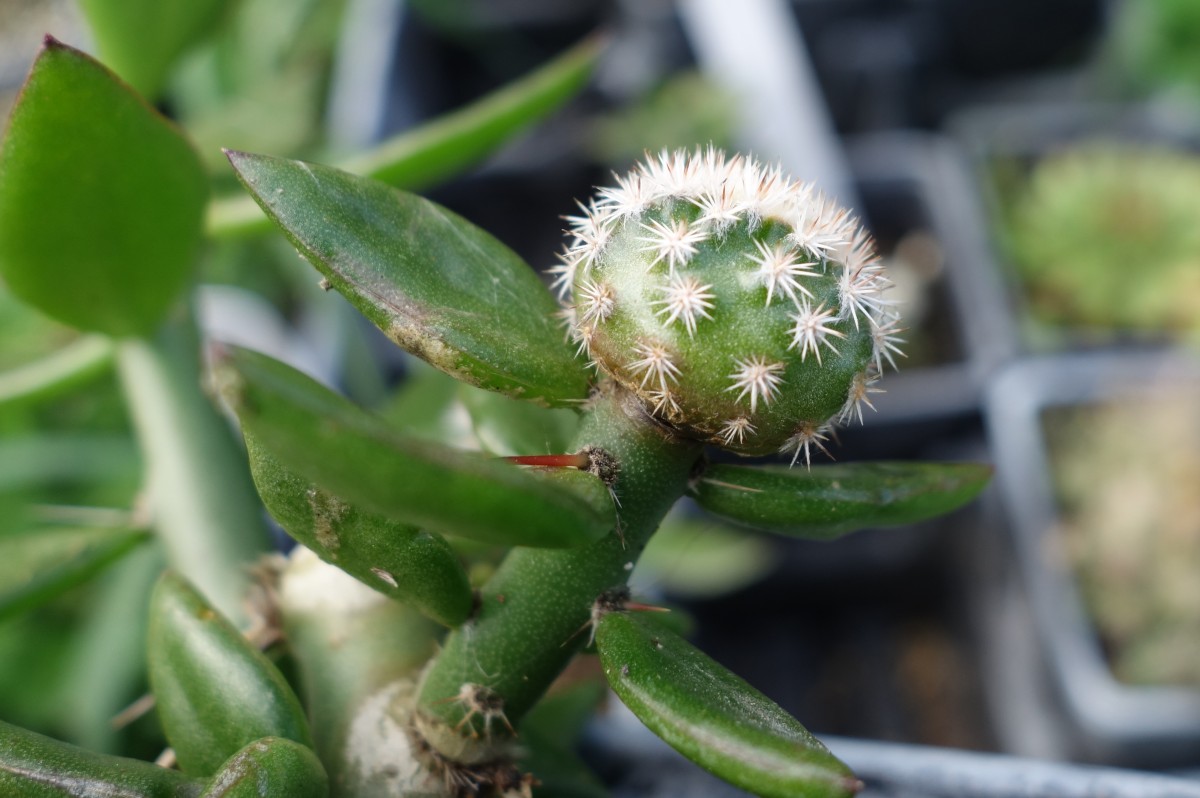
It is a seedling of the gorgeous hardy cactus Echinocereus reichenbachii, grafted onto Pereskiopsis spathulata, an odd, leafy cactus I wrote about earlier.

Why do this? Other than the fact that it is darn cool? Well, because that vigorous, fast growing rootstock pumps a lot of energy into the cactus grafted on top, making the grafted cactus grow a LOT faster than left on its own roots.

grafted cactus startThis is a (terrible, blurry) picture what the graft looked like when I first made it back in July. Just three months later it has grown to enormously, while the seedlings I left on their own roots look pretty much the same. I’ll let it grow on the graft for a while, then probably next year some time, cut it off, and move it into the garden, getting me to a reasonably sized plant in a reasonable amount of time.

So… if you want to speed up the growth of a pokey cactus, try grafting it. The process is crazy easy, lots of fun, and very thoroughly explained here.