How monsoons affect gardens

“Some people feel the rain. Others just get wet.”—Bob Marley

If you follow the weather news carefully, you might have noticed a little factoid in this week’s headlines: Mawsynram, Meghalaya, in northeastern India reported the highest all-time single-day rainfall in the month of June on the 17th. At 1,003.6 mm (39.5 inches), it eclipsed the previous highest rainfall of 945.4 mm (37.2 inches) recorded on June 7, 1966, according to the Guwahati-based Regional Meteorological Centre (RMC). The extraordinary rain fell as part of the Indian monsoon while other parts of the country are in drought and have received less rain than usual so far, although monsoon rains have been picking up. Seventy percent of India’s rain comes from the monsoon so if the monsoon fails, agriculture and water supplies are severely impacted.

A group of trees with clouds in the background

Description automatically generated with low confidence
Monsoon clouds in Himalayas. Source: Sitikantha kheti, Commons Wikimedia, 20 March 2018

What is a monsoon?

If you ask a layperson what a monsoon is, they will probably tell you something about very heavy rain and might even mention that it is a seasonal rain event. The most famous monsoon occurs in India each year, but monsoons are found in other parts of the world as well including China, Africa, and the United States. In the U. S., the Southwest Monsoon season usually starts in mid-June. If you look at the weather forecasts this week, it is right on time. This period is characterized by heavy showers and strong moisture flowing into the region bringing wet conditions to areas of the country that seldom see rain in other seasons. But officially, a monsoon is not the rain itself but a change in the atmospheric flow driven by differences in land-sea heating in summer. Rain falls in one half of the cycle but the switch to the opposite flow pattern often means dry weather as high pressure forces moist air away from the land.

Map

Description automatically generated
7-day predicted rainfall on June 19, 2022, from NOAA.

How a monsoon forms

Monsoons are driven by temperature differences between land and water caused by heating from the sun. The hot land causes air over it to rise, leading to a net low-pressure area. Air rushes in from other locations to even out the pressure. On a small scale this type of circulation occurs as a sea breeze that you might feel along the shores of a large lake or ocean. The land heats up much more quickly than the water during the day, causing rising air over land that creates a circulating cell of air that blows cooler air from water to land in afternoon when the temperature difference is strongest. You can often feel a sea breeze front as the cooler air moves inland, and sometimes thunderstorms form along that boundary between land and marine air masses.

Diagram

Description automatically generated
This diagram shows how seasonal temperature differences between the land and ocean can create the right conditions for a monsoon. Credit: NASA/JPL-Caltech

In a monsoon this pattern happens on a much larger scale. In Southeast Asia, for example, the whole of India and surrounding countries heats up under the direct summer sun much more than the Indian Ocean to the south. That causes air to rise over the land and pulls in air from the ocean to the south. In India, meteorologists track the progression of the monsoon “front” from south to north across the region and celebrate when the monsoon finally arrives, bringing copious showers that bring much-needed rain to India. In the Southwest U. S., the coming of the monsoon is also watched carefully because it provides welcome moisture and cooler temperatures to the region due to increased cloud cover. More than 50% of the annual rainfall of Arizona and New Mexico falls during the Southwest monsoon, so it is an essential part of the seasonal cycle. But it can also bring lightning strikes that spark forest fires in areas that receive little rain, causing widespread destruction in those areas.

Diagram

Description automatically generated
During typical conditions in the spring, the U.S. Southwest experiences strong, dry winds blowing from the west. During a summer monsoon, the region experiences winds from the south, which carry moisture from the Pacific Ocean and the Gulf of California. This can cause heavy rainfall and thunderstorms. Credit: NASA/JPL-Caltech

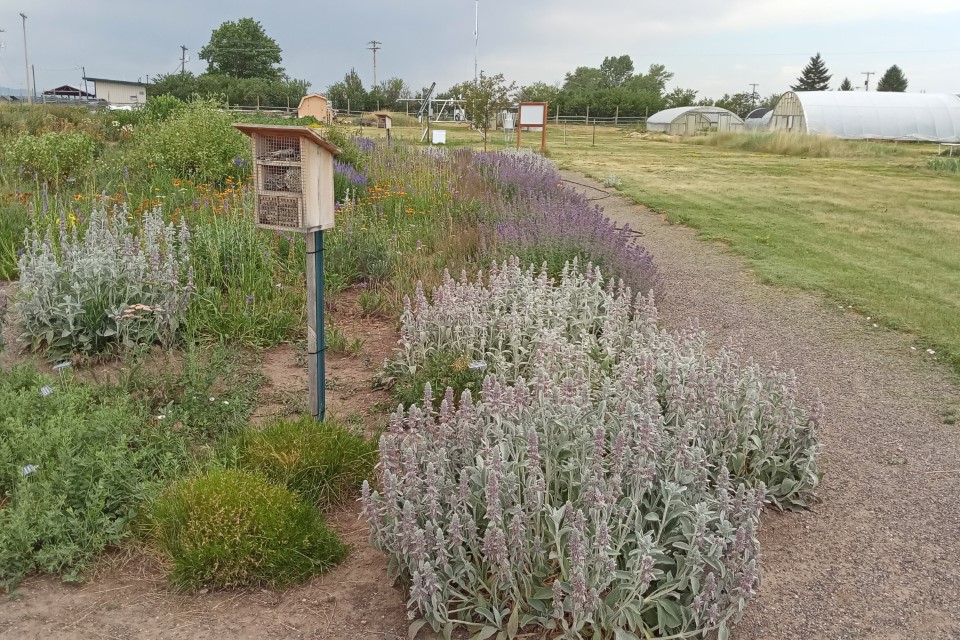
How monsoons are important to gardeners

If you live in a part of the world that is affected by monsoons, you need to be prepared for the variation of rain over the course of the year. During the wet part of the monsoon, you may experience very heavy rains that can erode your garden and wash out plants. If you have low-lying areas, roots can be affected by standing water to the detriment of your garden plants unless you put in good drainage. Conversely, you need to also be prepared for periods with little to no rain at all, sometimes for significant periods of time. That means you either need to use plants that are adapted to the wet-and-dry monsoon conditions or be prepared to irrigate them regularly to keep them in good shape.

A tree with lightning in the background

Description automatically generated with low confidence
Rain in Mohave Desert. Source: Jessie Eastland, Commons Wikimedia.

Monsoons are one example of how earth’s geography, including sun angle, land-sea distribution, and differential heating all work together to create diverse climates across the globe. They have inspired local music and literature as essential elements of culture in India and other parts of the world. And they serve as a critical driver of plant life by providing needed moisture to growing plants and crops. So for those of you who live in monsoon climates, do a little dance when the rains begin. The monsoon is here!

Other resources:

British Meteorological Office video: What is a monsoon?

NOAA SciJinks: What is a monsoon

Monsoon video series of SW monsoon imagery set to music by Mike Olbinski—spectacular!

Chasing the Monsoon: A Modern Pilgrimage through India—my favorite book on tracking the monsoon through India

Tomato season is open!

Mmmmm, fresh summer tomatoes. They’re great sliced, diced or made into salsa or sauces. There’s nothing like picking one right off the vine, popping it in your mouth and splat! You now have tomato all over your shirt.
“No problem,” you think, “it’ll come out in the wash.”

Fast Forward to Laundry Day…

As you’re putting your freshly washed and dried laundry away you notice that tomato stain is still there. So you toss it back in the hamper for next time.
Several laundry days later, that tomato stain is hanging on. You decide it’s time to get serious.

So you soak and you scrub.
And you soak and you scrub.
And still that stain refuses to budge.
(Rather poetic isn’t it)

You’re about to go all Lady MacBeth on it!

Out, damned spot! Out, I say!”
The Tragedy of MacBeth, act 5, scene 1

But thankfully you regain your senses before ruining the shirt.
“What’s the deal with this *&#^%*$ tomato stain!” you wonder. You’re almost ready to designate it your “special tomato shirt,” which admittedly would be handy for those “S’ketti Night Socials” at the county fair, but you’re not quite ready to give up yet.

Nil desperandum my friend! Professor Sprout has some special botanical knowledge to impart that will make your Expelliarmus spell work.

Why Are Tomato Stains So Difficult To Remove From Fabric?

Tomatoes contain multiple pigments: chlorophyll, carotenoids, xanthophylls, and betacarotene. The trouble maker is a bright red carotenoid, lycopene. It’s an approved food coloring and is found in other red fruits such as watermelon, red carrots and papaya. Despite it’s being a carotene, it has no vitamin A properties.

Lycopene

Why Does Lycopene Stain?

Lycopene is not a water soluble pigment, it’s only soluble in fat. In other words, it’s hydrophobic. Hydrophobic molecules cling together to minimize their contact with water, so the pigment hangs onto whatever surface it’s on. Add the nooks and crannies of fabrics, especially natural ones, and it’s hard to get it to release its hold. The hydrophobic nature of lycopene also means that it resists attempts to clean it with just soapy water. The high temperatures of a washing machine can drive stains even deeper.

Nope, that water ain’t gonna touch me!


So, How to Remove a Lycopene Based Stain?

The trick to removing a lycopene based stain from fabric is to treat it like a lipid stain (lipid = fat or oil). Bleach won’t work and often regular spot treatment or laundry detergent won’t either. If it’s an old stain you might need to put a drop of regular cooking oil on the stain or spritz it with an oil based pan spray. What you’re wanting to do is get the lycopene back into an oil base which can then be washed out.
Another thing that works is to hit the stain with a solvent based stain remover. There’s a popular brand of carpet cleaner that works quite well for this. We can’t make commercial recommendations here but if the name Sp*t Sh*t rings a bell well, aren’t you clever. As with all stain removers test on an inconspicuous area beforehand.
If the stain has been through several wash loads, it make take a few wash loads to remove it. But the above method will work.

Cleaner clothes, with botany!

Bonus round!

Lycopene also stains plastic which is why the container you reheated the Aunt Mamie’s spaghetti sauce in is red. The good news is that lycopene will oxidize so you can soak the stained plastic with a bleach solution which should remove it.

A little soak with a bleach solution will remove the ‘mater stain.

So there you go. Enjoy tomato season and don’t worry about the laundry!

Johann Weinmann “Tomatoes” 1737-45

Saving Your Trees From Drought!

Yikes!

Drought of epic proportion is imperiling many western states this year. For the first time some water districts have proposed curtailment of all exterior irrigation, no applied water will be allowed outside of residences. There are public forums are scheduled with experts and officials giving advice. Of great concern is the certain loss of turfgrass swards but far more concern is being expressed for the loss of trees.

Drought brings change in landscapes. Here European birch have died and provide opportunities for planting more drought tolerant species

Don’t assume your trees will die of drought!

Most established trees are resilient, they have built in drought avoidance and tolerance strategies. It helps to understand these processes and know the symptoms of drought injury in trees. Almost all trees will stop growing when they enter drought conditions because there is not enough water to produce the turgor pressure necessary to expand cells. While growth may slow, trees have root systems that help prevent them dying of drought. The root systems, while mostly in the surface layers of soil, also explore greater depths where they can extract water from larger volumes of soil. So even though soil may be dry on top, trees have greater access to moisture than is obvious from above. Trees also have mycorrhizal fungi that help them extract water bound tightly to soil. When these strategies become limiting, tree roots produce abscisic acid that flows to the pores in leaves and closes them to reduce transpiration. If drought continues, many trees will drop leaves entirely to help stem and root tissues survive, thus avoiding drought. These mechanisms are all controlled by tree genetics and their ability to ameliorate drought effects is variable. Some trees are just more drought resistant than others.

Some trees such as this Indian rosewood (Dalbergia sissoo) are adapted to hot climates and endure long dry periods without damage.

Don’t plant new trees in the Summer!

Now is not the time to plant trees. As we near June 20th (the longest day of the year) demand for water is also greatest as sunlight drives photosynthesis and thus water use by trees. Newly planted trees all need irrigation to help them establish. During drought years, wait until later fall months (when rain is more likely and day length is decreasing) to schedule planting.

Don’t fertilize trees during drought!

Fertilization is the last thing you want to do during or at the onset of drought! Fertilizer (organic or inorganic) contains salts that increase the osmotic potential around roots. This alone can create “physiological drought” as water is drawn out of roots into soil solutions. Fertilizers should only be applied when known deficiencies are present and water is abundant enough to dissolve the applied materials.

Fertilizers increase drought stress for trees if water is not available for the application.

Don’t prune trees during drought!

Pruning removes terminal buds that regulate growth of the canopy. When they are removed by pruning, lateral buds are released to grow. Stimulating new growth during drought is a disaster for trees. Don’t do it! You may falsely think removing branches in a tree canopy will save water. Most trees can regulate their own water loss as discussed above or by dropping leaves as necessary when dry conditions ensue.

Pruning, especially over-thinning, stimulates new shoots to grow–something you do not want to encourage during drought periods

Do not install artificial turfgrass

Artificial turfgrass is not a solution for hot dry conditions. In some cases it may exacerbate the situation. Artificial turfgrass does not allow percolation and capture of water since it covers soil. Artificial turfgrass does not transpire, so landscapes will not be cooled by it. Trees adjacent to artificial turfgrass have less ability to access water than those adjacent to a mulched area.

Artificial turfgrass does not use water but it also gets hot. On the day this image was taken it was 50 degrees hotter than irrigated turfgrass and 30 degrees hotter than brown dry turfgrass

The longest day in June may not be the most stressful for trees

When water is scarce, it is important to apply it strategically to reduce tree stress. Even though June has the longest day and potentially tress will transpire the most, it may not be the most stressful time for trees because water may still be available at lower soil levels in June. As we enter later summer and early fall, stress builds as available water is depleted from tree root zones. Deciduous trees will lose leaves but evergreen trees or trees that can’t shed their canopy may begin to enter their permanent wilting points. This is usually proceeded by wilt, dieback, and loss of color. This is a critical point where strategic water applications can help trees through a critical period.

Do apply Arborist Chip Mulches

Mulch is a critical drought survival tool for trees. It is best if mulch is already in place but it is never too late to apply it. Mulch changes soil structure allowing for more water storage. Over time, mulched soils become more drought resilient. In the short term mulch prevents evaporation from soil surfaces so that applied water stays applied in the soil and is not lost. Coarse wood chip mulches prevent weeds that use water thereby keeping more moisture in the soil. Wood chip mulches support the mycorrhizal fungi that help trees survive.

A common theme in these blogs: arborist chips straight from the chipper have real benefits for trees trying to survive drought

Do “top up” existing mulched areas around trees

Mulch breaks down as it is supposed to. It is important to keep mulch layers intact by occasionally adding to mulch layers. If you have not done so, add mulch before summer gets too far along.

Do remove lawns or shrubs that are no longer sustainable in the landscape with care.

Due to climate change, coast live oak (a native) is less adapted to inland valleys of Southern California than Eucalyptus camaldulensis (an exotic).

Water restrictions, hot weather and dry soils culminate and can greatly damage landscapes. If landscapes are over planted or there are unwanted/unnecessary plantings they can be removed to save the water they would use. Be careful not to expose existing plants and trees to bright sunlight as this may cause them harm from sunburn. Be careful removing turfgrass swards and the irrigation that accompanies it because adjacent trees may be reliant on the excess applied water. A slow dry down and mulch over process may be the best approach to save valuable perennial plantings near unsustainable turfgrass.

Do monitor your trees for signs of impending drought stress. and apply water in a timely manner

High temperature injury to cherry leaves is not a symptom of drought but heat intolerance. However, as trees dry down they have less ability to endure high temperatures.

Wait until leaves start to turn yellow prematurely or canopies show wilt symptoms to apply water. As drought symptoms develop, consider a slow application of water by a dripping hose (moved frequently) or a low flow sprinkler that applies water only as fast as the soil can take it in. Apply water at night to cut down evaporation loss. Continue to monitor for further drought symptoms and spread out irrigation as needed to conserve water.

Do turn off your valve controllers to avoid over application of water.

Don’t let electronic devices make irrigation decisions for you during water restrictive drought periods. No electronic system completely understands the stress conditions around trees and will not be able to accurately predict when to irrigate. It is best to make these decisions based on your own assessment of conditions and resources available. Many “irrigation clocks” rely on regular frequent applications of water to keep soil moisture supplied. Frequent short run cycles replace water used by plants. During drought restrictions, controllers need to be reprogrammed to apply less frequently but for longer runs (to the point of run off) or not used at all if the sprinkler emitters put out too much water. Targeted water applications will likely be necessary and valve controllers will need to go “dormant”, i.e., turned off.

Be hopeful

Droughts come and go, right now they keep coming. But there are many examples of trees that only receive rainfall, no applied irrigation and yet survive well. Don’t assume your trees will die of drought. This may be a time to remove trees that are not adapted to growing in your area and drought conditions will reinforce this. European Birch are certainly disappearing from many landscapes this year in Southern California. Increase the use of mulch, apply water strategically, and consider planting more adapted trees late in fall or winter when water is available to support establishment.

Creating artificial nesting structures for cavity nesting solitary bees

Pollinators, especially bees, are an important part of our agriculture, economy, and ecosystems. Gardeners are often well-versed in the importance of bees since we get the opportunity to see these incredible animals in action. We enjoy the results of their labor in the form of fruits, “vegetables”, and seeds which feed wildlife and create beauty and interest in our gardens. In North America alone, there is an estimated 4000 species of native bees, and an estimate of over 20,000 species around the world.

Many factors have played a role in bee declines, e.g., habitat loss, pesticide exposure, pest and disease pressures. Yet there are things home gardeners can do to help mitigate some of these effect and maximize the use of their yards and gardens as a ‘bee-friendly’ landscape. Habitat loss/fragmentation is considered to be amongst the most important factors influencing the decline of wild bee. Urbanization, development, agricultural intensification, etc. have also resulted in a reduction of high-quality habitat for these mostly native bee species.  

Many gardeners even make room in their landscapes for pollinators by planting a variety of flowers that attract and help sustain their regional bee species. Although we are often well-versed in offering food for bees (in the form of these floral resources), something that can be overlooked in our endeavors of creating ‘bee habitat’ is the fact that we do not always offer them a place to live, or a ‘home’. Accessible nesting habitat for bees is just as important as floral resources and can make these pollinators’ jobs much easier as they make trips from flowers to their nests in order to provision them for their offspring.

Approximately 30% of bee species are above-ground cavity nesting bees most of which are solitary, meaning that a single female bee will do all the work to find a nesting location and provision the nest with nectar and pollen for her offspring to eat after she is gone. This can be quite a cumbersome task and offering suitable nesting habitat in close proximity to flowering plants we curate in our gardens can be a great way to simplify this undertaking for these momma bees.

Although mimicking the conditions of wild bee habitat as it’s found in nature is one of the best ways to offer a more natural nesting experience, urbanized areas with smaller spaces can often make this a difficult endeavor. In these areas where space is limited, artificial nesting structures for cavity nesting wild solitary bees, sometimes referred to as bee hotels and bee boxes, can be a useful tool for some bee species (which include mason bees, leafcutter bees, carder bees, and more). These bee hotels have been gaining popularity over the years and many people have started to jump on trend placing them around their yards and gardens. In the past 10 years, I have seen a huge variety of these nesting structures ranging from simple to very elaborate!

A bee hotel at the Montana State University Horticulture Research Farm (Photo: Abi Saeed)

Even though there is widespread availability of bee hotels for sale, not all of them are equally as effective in being ‘bee friendly’, and some of these can actually be counter-productive to the health and well-being of these pollinators.

Here are some recommended specifications for artificial nesting structures for wild solitary bees:

Materials

Common materials used in effective bee hotels include drilled wooden blocks and trays and cardboard/bamboo tubes in addition to a box to place them all in. You want these boxes to be closed in the back and open in the front with some sort of a sloped roof so water will drip off and not collect around the nesting tubes.

Avoid using plastic materials/containers (and other things that will limit the ventilation of these structures as this can result in greater pest and disease issues). Very dark colored bee hotels, especially in locations with high sun intensity, can get really hot which can kill the bee larvae inside. It is best to use untreated and unpainted wood, cardboard and bamboo.

Depth/width and measurement specifications

One of the most common issues I see with some of these homemade and commercially available bee hotels are the depth and width measurements. Bees have control over the sex of the eggs that they lay and these cavity nesting bee species will organize their nests so that male eggs are laid near the entrance. These males will emerge first. In mason bees, for example, eggs laid further than 3 inches from the entrance are usually female bees. If the nesting structures are too shallow it can affect these sex ratios, resulting in a lower number of female bees. This can affect the local population.

Although there isn’t a perfect formula for all cavity nesting bee species and the size preferences of their nesting tubes, we know that some sizes work better than others. You should experiment with variations of size to cater to the bee species that can potentially utilize these nests.
When drilling your own wooden blocks, drill holes of varying entrance sizes (between 3/32 and 3/8 inches in diameter) and depths (minimum 5-6 inches) into untreated wood blocks or old tree stumps/logs laying around your garden or wood pile. Don’t drill all the way through the wood, leaving one end closed. If you are buying a drilled wooden block-style bee box, make sure that it falls within the range of these depth and width recommendations.

Size recommendations from University of Nebraska-Lincoln Solitary Bee Hotel Publication (G2256)

You can also create bundles of cardboard tubes, bamboo reeds, and bundles of woody and pithy plants that can serve as a nice nesting substrate that bees will nest within and in-between. These bundles should also be placed in a container with a closed end.

Location

Bee hotels should be placed at about 3-5 feet off the ground. The entrance should have direct sunlight for the most of the day, especially early morning sun. This will help these cold-blooded animals heat up and get started on their foraging and nest building activities faster. Placing the entrance facing South or Southeast is a good location for many North American bee hotels. Make sure these are mounted on a sturdy location not be easily swayed or toppled over by the wind. It should also away from areas with a lot of foot traffic, otherwise a busy bee might crash into you as she travels back and forth while building her nest.

The nesting boxes should not be easily accessible by predators and scavengers, such as birds, raccoons, squirrels, and other rodents. Do not place these next to a bird feeder, which could attract other critters and give them easy access to the bee larvae.  

Aftercare

Another common error made with bee hotels is forgetting the aftercare involved with these nesting structures. Because these nesting structures create a more ‘artificial’ nesting environment, grouping a large number of nesting locations in a concentrated area creates a different from what bees have historically utilized in areas with large expanses of natural habitat. If left unmanaged these structures can act as refuges for pests and disease which can be detrimental to the bees that nest in them. This can be counterproductive for our efforts to protect and preserve these pollinators. If you are interested in hosting cavity nesting bees in your home gardens year after year I would strongly encourage you to learn more about aftercare

If you do intend to place bee hotels in your home gardens, here are some very basic aftercare tips to follow, in order to keep these structures a safe and useful nesting option for cavity nesting solitary bees in urbanized areas.

– Move the occupied nesting structures of these bee hotels to a safe outdoor location in the fall, such as an unheated shed or garage, to protect overwintering bees from rodents, other scavengers, and harsh winter conditions. You can also keep these in a wire mesh/ventilated container to further protect them from rodents chewing them.

– Adult bees emerge from these tubes in spring and early summer, so these should be placed back outside when spring temperatures warm up to around 50°F (10° C). After bees have emerged, discard/compost used tubes and discard/burn used drilled blocks, so pest and disease pressures don’t build up.

– Refill your nesting box with new tubes, reeds/twigs, and drilled wooden blocks for the next season of bees to use, and enjoy watching the process all over again!

For more detailed information on caring for the bees in nesting boxes, please take a look at the resources below.

Resources: