Monitoring and reporting on drought conditions

While drought is part of the natural cycle of the climate and many native plants depend on drought to propagate, it is the bane of gardeners everywhere because of the increased need for water. I have previously written about the four types of drought. Today I thought I would focus on drought monitoring and a way that you, as a citizen scientist, can help report local conditions that the official drought monitor authors can use to fine-tune their depictions of drought. This will be especially helpful this year with so much of the country in drought conditions.

A picture containing sky, outdoor, water, nature

Description automatically generated
Desert bounty. Source: GTGallop, Commons Wikimedia

What is the Drought Monitor?

The U. S. Drought Monitor (I’ll call it the DM here) is the source of the “official” drought status across the country. Of course, you don’t need an official status to be in drought but it is commonly used by media, government agencies, and scientists to categorize the strength of drought over time and space. The official DM map shows a single map for the United States updated each Thursday morning that is color-coded by five levels of dry conditions ranging from Abnormally Dry (D0) to Exceptional Drought (D4). The drought categories show experts’ assessments of conditions related to dryness and drought including observations of how much water is available in streams, lakes, and soils compared to usual for the same time of year. If there is no color shown then that region is not officially in drought. If it is in D0 (bright yellow on the map), then it is considered dry but not currently in drought. Often a D0 designation means either that drought is imminent or that there are lingering impacts from a drought that is ending. You can read more details about what kinds of impacts are seen in each level of drought and how the weekly map is produced on their “About” page. You can also find links to state-specific impacts there, since a drought in the Southeast does not look like a drought in the Southwest, for example.

National Drought Monitor map for May 24, 2022.

Issues with the DM

One of the shortcomings of the DM is that there is just one weekly map that is supposed to be a complete depiction of drought across the United States. If you read my last post on drought, you know that drought comes in different varieties that occur over different time periods. Agricultural droughts are caused by dry spells and hot temperatures during the growing season and can come on very quickly (“flash droughts”), while the long-term precipitation averages might not reflect that lack of water and so would not be captured on the DM map. Hydrological drought is related to a long-term lack of rainfall that reduces the water levels of lakes, streams, and reservoirs over many months or even years. It might not affect gardens and farms significantly as long as enough rain falls at regular intervals to keep the plants alive.

While the DM was not created to be a legal means for defining drought, it has become one in legislation passed by Congress to provide drought relief to affected farmers. The program I deal with the most in my work is the Livestock Forage Disaster Program, which provides a payment to forage producers to offset economic losses if drought stops the growth of pastures, especially early in spring when hay supplies are depleted over the winter. The law is written in such a way that if the drought level is severe drought or worse (D2+) for eight consecutive weeks, then they can receive one month’s payment for the lost forage. If it is in extreme drought (D3) somewhere in their county for any time during the growing season, then they can get payment for three months.

Dry pasture in Oglethorpe County, GA. CMOR report by BWF, May 2022.

As you can imagine, when a flash drought happens and the grass stops growing the forage producers need the relief to help purchase hay to keep their livestock alive. But the DM does not typically depict this quick-changing drought because it is based on longer-term indicators that do not change much over just a couple of weeks. So there is a disconnect between what the DM is showing and how it is being used for legal purposes, at least in the case of forage and pastures.

As you might guess, this results in some attempts to game the system to make it look drier than it is to get the DM authors to declare a D2 or higher drought. The authors tell stories about being harassed over the phone about where they draw the drought lines on the map, finding observers who report no rain when radar clearly showed it occurred, and other creative ways to make the drought appear worse than it is so they can get access to the payments they need.

How can you monitor and report drought?

Here is where you come in: Citizens like you have an important role to play in keeping an eye on local vegetation and monitoring it for signs of drought or impacts from saturated soil. Gardeners are already especially attuned to what conditions are normal and what conditions are not. Folks who monitor local climate conditions are much like storm spotters who monitor weather systems for strong winds and tornadoes—they watch how things evolve over time and provide that information to the authors of the DM and others who need hyper-local information, although on a much longer time-scale that storm spotters. If you are a CoCoRaHS rainfall observer, you probably already know about the Condition Monitoring report that you can submit through their website. Another great place anyone can submit official Condition Monitoring Reports (called CMOR which is pronounced “see more”) is the CMOR site on Drought.gov.

Condition Monitoring Reports for the 30-day period ending on May 24, 2022.

As you can see from the map above, there are many parts of the country with no CMOR reports to provide information about conditions at those spots. By providing these reports, you are helping the DM authors with unbiased, fact-based local observations that can support other drought indicators like streamflow, precipitation deficits, and groundwater losses. Thanks for providing this service to the DM authors and other scientists!

A picture containing grass, outdoor, sky, nature

Description automatically generated
Lake Powell, Desert Flowers. Source: Don Graham, Commons Wikimedia. He says: “What’s left of Lake Powell is between this stand of wildflowers and the buttes in the distance. It is, sadly, more like a pond now than like a lake.” Even the desert can be in a drought if the rainfall is much less than expected!

Maddening mulch myths

A good example of bad mulching

Long-time followers of this blog know that I’ve been researching, writing, and educating on the topic of landscape mulches for over 20 years. So whenever an article comes out in a newspaper or online that directly refutes our current understanding of mulch science, on-line and real-life colleagues quickly call it to my attention. Many times I choose to ignore the article, but when it’s from a highly regarded source with wide readership I feel the need to step in. Before I discuss the problematic statements, I want to explain part of my process in determining whether an expert is really an expert.

Here are two questions I ask:

  1. Is an expert regarded as an expert in the area of interest by other academic experts?
  2. Is there published research provided that supports statements that don’t agree with the current body of knowledge?

If the answer to both questions is no, then the source cannot be considered reliable.

This free, downloadable, peer-reviewed resource can help you learn how to differentiate bewteen credible and not-so-credible information.

To the writer’s credit, she seeks out academic sources for her information. Her source has stellar credentials in researching and educating about compost, but has no publications on mulching or mulch materials (Question #1 = no).  And there are source quotes and author statements throughout the article that are not supported with evidence (Question #2 = no).

I’ve identified the misleading or erroneous statements and quotes below with my rebuttals. I have included linked references at the end that address these points in more detail. And we have dozens of posts on mulches in this blog’s archives.

Just type “mulch” in the search box and find all kinds of good stuff!

1. “In a forest…there is no big heap, just a layer of an inch or two or three, breaking down and returning to the system.”
Observations of relatively undisturbed forest floors reveal deep layers of woody debris, leaves and needles, and other materials falling from the canopy. Research has shown that a minimum of 3 inches of a coarse textured mulch are needed to restrict sunlight from reaching the soil and prevent weed seed germination. Any less than this will enhance, not prevent, weed growth. Deep layers of wood chips have been repeatedly shown to suppress weeds and enhance the health of desirable plants.

This is what an inch or two or three will do for you.

2. “The process releases humates…described as ‘black, gooey liquid’…”
Humates, defined as recalcitrant materials that resist further decomposition, don’t exist in natural landscapes. The only place you find humates are in the lab, where analysis of organic material with an alkaline reagent (pH = 12) produces humus as a byproduct. And on garden center shelves, where heavily marketed humic acids, fulvic acids, and humates are located.

3. “The only difference in mulches, as long as you use organic materials, is the rate at which they decompose”
This needs clarification. Rapidly decomposing mulches release high levels of nutrients in a short period of time; slowly decomposing materials release low levels of nutrients over longer periods of time. Compost falls into the first category, and readily available nutrients from any source can lead to nutrient toxicity in soils and imbalances in plants.

Interveinal chlorosis is often associated with excessive soil phosphorus.

4. “In formal beds…fine- to medium-textured material”
For best oxygen and water movement, mulches should be coarse and chunky. Sawdust and compost, for example, are too finely textured to allow for gas transfer and water movement, plus weeds easily establish on top of compost.

Compost used as a mulch is a weed magnet.

5. “If a bed needs compost, spread an inch before mulching”
This statement needs clarification. The only way you know whether compost is needed is to have the results of a soil test showing an overall low level of nutrients. Then a layer of compost could be added before chips are applied.

If your nutrients are off scale, don’t use compost!

6. “Save…the chunks fresh out of the arborist’s chipper for pathways…Or at least pile them up to mellow before you use them.”
You don’t need to compost your arborist chips. They provide a burst of nutrients during the first month, when leaves are rapidly decomposed. Using older chips is fine, of course, but why waste that early nutrient boost to your soils?

There’s nothing better than fresh arborist mulch straight out of the chipper.

7. “If supplemental fertilizer isn’t applied when your piling on coarse, fresh, carbon-rich wood chips…it can cause some drawdown in soil nitrogen.”
Fertilizer should NEVER be applied unless there is a demonstrated nutrient deficiency, and wood chip mulches do not cause a drawdown in soil nitrogen. This myth has been dispelled by years of research showing no change to soil nitrogen covered with wood chips.

If wood chips cause a nitrogen deficiency, then plants apparently haven’t gotten the message.

8. “Generally, mulch is applied in ornamental beds at a depth of one to three inches”
See point #1. This is not a science-based recommendation.

9. On volcano mulching: “In addition to promoting bark decay, it causes the tree’s roots to grow up into the mulch layer, rather than down into the soil…the tree may eventually die, and even topple.”
This classic correlation-elevated-to-causation is getting tiresome. There is NO published evidence, anywhere, that proper mulches (i.e., coarse arborist chips) are going to injure bark. They do not cause bark decay. Furthermore, tree roots grow where they have water, nutrients, and oxygen. This might be in the mulch layer. Growing deep into the soil is unlikely (not enough oxygen) unless the soil is excessively sandy or otherwise well drained. Any toppling of trees can be directly correlated with poor planting techniques that prevent roots from contacting and establishing in the site soil.

10. “Keep the mulch at least several inches away from tree and shrub trunks.”
Why? Does this happen in nature? No. Per point #9, a natural woody mulch is not going to hurt trunks.

The soil of this lush landscape is completely covered with a thick layer of arborist chips.

11. “And don’t invite rot by smothering the crowns of perennials”
A good arborist chip mulch is not going to “smother” anything. Perennials are quite capable of growing through several inches of woody mulch, which also protects the crowns from freezing temperatures.

Our perennial rhubarb thrives in its deep arborist chip mulch.

If we are going to encourage gardeners to use nature as a guide (see point #1), then points 4-11 are, well, pointless.

Literature

Chalker-Scott, L. 2007. Impact of Mulches on Landscape Plants and the Environment — A review. Journal of Environmental Horticulture 25(4) 239-249.

Chalker-Scott, L., and A. J. Downer. 2020. Soil Myth Busting for Extension Educators: Reviewing the Literature on Soil Nutrition. Journal of the NACAA 13(2).

Chalker-Scott, L., and A.J. Downer. 2018. Garden myth busting for Extension educators: reviewing the literature on landscape trees. Journal of the NACAA 11(2).

Lehmann, J., Kleber, M. The contentious nature of soil organic matter. Nature 528, 60–68 (2015). https://doi.org/10.1038/nature16069

Burlap, the fashion fabric of the gardening world.

Cheap, lightweight and easy to manipulate, burlap has become a popular way to protect transported B&B trees from the nursery to their planting site. To add justification for its use it’s also touted as biodegradable. “No need to remove it!” or “Leave it in place to protect the root ball.” and other such phrases are often tossed at the unknowing homeowner but are they laudable? Let’s investigate.

Hessian soldiers ca. American Revolutionary War – what do they have to do with burlap?

Carl, J.H., “Regiement von Bosse” (1784). Prints, Drawings and Watercolors from the Anne S.K. Brown Military Collection. Brown Digital Repository. Brown University Library.

Burlap is the North American name used to refer to a fabric known as hessian in other parts of the world (except in Jamaica where it’s called crocus.) “Hessian” is attributed to the historic use of the fabric as part of the uniform of soldiers from the former Landgraviate of Hesse and its successors, including the current German state of Hesse. Soldiers from these areas were called “Hessians”. If you recall your American Revolutionary War history, the name Hessian might ring a bell.
While the word burlap might bring to mind the image of a coarse brownish material, Hessian fabric is available in different types of construction, form, size and color. Even though the two names refer to the same fabric, we’ll stick with “burlap” for our discussion.

Illustration of Corchorus olitorius, 1828, William Jackson Hooker (1785-1865)

Burlap is produced from two Corchorus species in the Malvaceae family. The main fiber source is C. olitorius but the fiber from C. capsilarius is considered superior to it having a finer texture. Both plants are called jute, which also applies to the fiber.

Jute grows best in a warm, wet climate. A long monsoon season followed with consistent temperatures over 75ºF/ 25°C and relative humidity of 70%–90% are ideal. Jute requires 65″-80″/160–200 cm of rainfall yearly plus extra during the sowing period. The plants prefer river basins, alluvial or loamy soils with a pH range between 4.8 and 5.8. Periodic flooding or marshy conditions are well tolerated. ~85% of the world’s jute is grown in the Ganges Delta.

Farmer collecting bundles of harvested jute to be taken for initial processing in West Bengal India. CC image

When ready to harvest, the jute is cut off at the soil surface and gathered into bundles for transport and processing. To extract the fiber, the jute bundles are retted. There are a variety of retting processes: mechanical (hammering), chemical (boiling & applying chemicals), steam/vapor/dew retting, and water or microbial retting. Water or microbial are the oldest forms and most often used.

Jute bundles being water retted. The bundles are kept submerged with logs. CC image

When the jute is well retted, the bundles are hit with a long wooden hammer to loosen the fibers from the core. After loosening, the fibers are washed with water and squeezed dry. The extracted fibers are further washed with water then hung up to dry. When dry they’re tied into bundles to be sold at market.

Jute fibers drying. CC image
Jute market. CC image

So what does all of this have to do with B&B trees?

Image by USU Extension

Burlap, even a tightly woven burlap, “breathes.” This gives it a strong resistance to condensation, moisture, and fungal growth. Jute is a hard fiber which makes it very durable and jute burlap is wear, tear, puncture, and stretch resistant. Breathability plus condensation, moisture, fungal growth, wear, tear, puncture and resistance to stretching are all qualities which make burlap a good choice for the transport and storage of goods and as a geotextile.

“Natural” burlap is lightly treated with an emulsion, usually a cheap plant based 3:1 water and oil mixture, as a part of the weaving process. The mixture makes the fibers easier to handle and move through the loom, and helps reduce waste. The water does most of the work; the plant-based oil just prevents the water from evaporating so quickly. Burlap made with plant-based emulsion is required for food safety, storage and transportation and aren’t as long lasting as the other type of burlap. They normally last about three years in use but can take up to a decade to decompose.
Yes, you read it correctly.
“Natural” burlap can take 10 years to fully decompose.

Burlap sacks of green coffee beans.
Image credit: Tim Pannell, Mint Images/Science Photo Library
 

The qualities that make burlap good for food stuff transport also make it useful in the construction, landscape, government/emergency services, and outdoors/sporting sectors. Fabric woven for use in these areas is treated differently; the emulsion used on it during weaving is usually petroleum based. This emulsion is designed to add more water, rot, and gnawing pest resistance to the fibers prior to weaving. It can leave the fabric feeling “sticky” or “coated” and tends to attract dust and dirt. It also has a peculiar chemical aroma to it. The finished fabric is often treated again to add even more resistance. So, the fibers are treated prior to weaving and then often again afterward. A double whammy, so to speak. “Treated” burlap is very long lasting, durable and can be stored for years in a variety of conditions without the fibers weakening. It can last for decades, above and below ground.

A hay bale ground blind covered with water and wind resistant burlap.
We didn’t know this was a thing.

Which brings us back around to B&B trees.

Image credit: Matt McClellan

Guess which burlap is used almost exclusively in the landscape industry, the “natural” or “treated” ?
If you guessed “treated,” you’re correct! Its durability, ease of use, and excellent storage qualities makes it the #1 choice for transporting nursery trees.
Unfortunately many, if not most, plant people don’t know about different burlap types and are relying on out-dated information. (This is true in more areas than just burlap, but those are other issues.)
Try asking if the burlap on that root ball is “natural” or treated and see what their response is. Feel the fabric yourself. Does it have a tacky feel, do your fingers drag on it, does it seem to attract dirt or dust? Does it have a chemical or petroleum odor to it? These are all indicators of treated burlap. Both natural and treated burlap degrade slowly. Leaving burlap on the root ball will only encourage circling roots and probably doom the tree.

Just so we’re not being misunderstood: Wrapping the root ball with burlap for transporting purposes is all well and good.

But you have to remove it at planting!

Let’s do a quick review of the qualities of burlap and how they can backfire when planting trees.
Breathability: not really a problem underground but can cause the root ball to dry out if the tree is exposed to the air for too long.
Condensation and moisture resistant: doesn’t absorb water so the fibers won’t rot.
Little to no fungal growth: isn’t consumed by fungi so fibers stay intact.
Tear and puncture resistance: roots can’t push or force their way through therefore encourages circling roots.
Doesn’t stretch: won’t expand with root growth therefore encourages circling roots. Sound familiar?
Natural” burlap: can take up to a decade to completely decompose all the while negatively impacting root growth.
“Treated” burlap: can take decades. ‘Nuf said.

Bonus round!
Soil factors can also influence burlap decompostion. The decay rate in soil pH levels below 6 is significantly slowed. Low soil temperatures result in a slower decomposition process. Dry soil slows jute fiber break down too and even desert termites don’t care for treated burlap.

A B&B tree is an investment: give it the best possible start you can. Always remove the burlap, wire basket, strings, ties, or any other constrictions you find. And don’t forget to root wash, correct any root problems, and spread the roots out horizontally away from the trunk when planting.

Image credit: George Weigel

For your enjoyment, be sure the sound is turned up so you get the full effect.
https://youtu.be/D9AUnYTol68

Garden Diagnostics

A garden plant with symptoms of an insect infestation

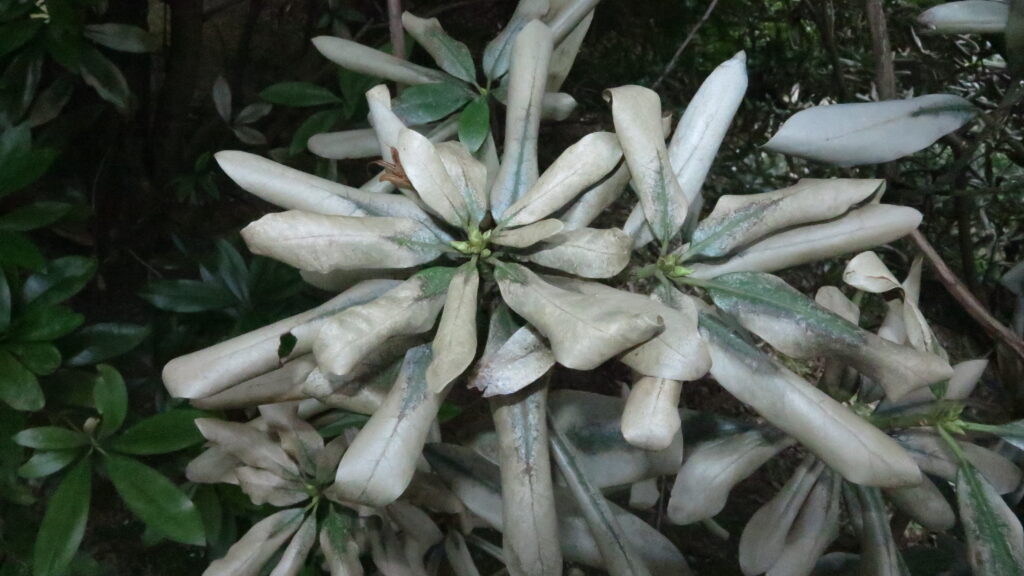
I’ve had this funny feeling that something is just not right in my garden. Can’t put my finger on it, but something is amiss. OMG everything is dying! Help! Garden Death is rampant! Well, a bit of hyperbole perhaps, but over the years I have had many calls from gardeners with great concern for plants or their entire garden based on things they perceive to be going on. I have helped them by trying to diagnose their problems. Thought occurs though that most gardeners should be able to diagnose their own garden problems with guidelines and framework that informs their decision making processes. The problem with solving problems is that often gardeners don’t notice a problem until it has advanced quite far often to the point of no return. So, the trick is to “see” things early so they can still be fixed.

Looking for patterns in your garden can inform disease issues. here all the boxwood are yellow and all the redwoods are brown. See first paragraph! Yikes!

Patterns

The first step to solving garden problems involves looking for patterns in the symptoms that are presenting as the “that does not look right to me” situation. The redwoods and boxwood in the image above are all performing badly and the symptoms are uniform. Uniform symptoms that occur across a population of plant often suggest an abiotic cause. In this case the use of recycled water high in salts has impacted the landscape plantings.

Symptoms are plant responses to a pathogen or abiotic condition

Symptoms

are plant responses, changes in physiology such as chlorosis, and necrosis, spots, coloration or discoloration etc. Foliar symptoms often form when a plants ability to make or utilize chlorophyll is compromised. Symptoms also occur on stems in the form of cankers or dead spots that can ‘girdle’ the stem leading to foliar symptoms in the shoots on that stem. When diagnosing garden problems it is important to look at symptoms carefully and early. This involves understanding what is normal for the plants being grown. Plants exhibit a variety of growth patterns and changes throughout the season so some changes are normal. The trick is to see the early onset of “not normal” symptoms.

Signs are the actual pathogen that is causing the symptoms in the affected plant

Signs

…are the cause of disease. Signs often confirm a diagnosis and give way to control options once a pathogen or other disorder is identified. Finding signs is of the confirmation needed to take some action to fix the problem in the garden. Often fruiting bodies of pathogens don’t form until the host has died or shed leaves that fall on the ground. Many signs are microscopic, but some spores can be seen ‘en-masse’ when inocculum builds up to visible levels. And sometimes symptoms and signs occur together helping to solve the diagnostic problem.

Powdery mildew spores (white) are signs and the broom-like symptoms are typical of the disease that forms in coast live oak.

Canker diseases cause a variety of symptoms and signs. Most cankers only form signs after the stem has died. Early in the progress of disease plants may appear discolored but it is not until later that the signs will form usually after the plant is visibly necrotic

Early symptoms of Ficus canker in Indian Laurel Fig
advanced symptoms of Ficus canker
Signs of Ficus canker disease. The black dots forming on the end of a cankered branch are fruiting bodies that hold the spores of the fungus causing the disease.

Time

…is an important factor in disease progression. Diseases do not happen instantly but form over time. Diseases, if they result from pathogens, have a “life history” where the various stages of the pathogen are formed or survive and accompany symptom development in the host. Early symptoms may be innocuous or subtle. The problem is we notice problems at a single point in time but the problem is often well along or has been developing long before we notice it. Understating the time line of disease or pest formation is important in diagnosing the cause.

Insects

—are often confused with pathogens because they can cause some of the same symptoms as plant pathogens or abiotic disorders. Insects cause an array of symptoms that can be used to diagnose their presence. Some insects related symptoms are: foliar stippling, bronzing and bleaching, leaf spots, chewed foliage, wilting and death of branches or entire portions of a plant or tree and galls. Insects also create signs of their activity such as frass, galleries, honeydew, cast skins, and excrement. Of course the ‘gold standard’ of insect signs is the insect itself which can take the form of adult insects or larval insects, both of which may look very different and affect different parts of a plant.

Frass shown here is a sign of boring insects inside this tree.
Many insects cause their host to grow galls such as this oak apple gall caused by a small wasp
This leaf spot on Lantana camara was long thought to be a fungal disease but is actually caused by a ‘blotch miner’ insect in the genus Liriomyza.

Diagnosis of garden enemies is just the first step in finding a solution to a garden plant malady. Often determining the cause requires some expert help. Your local Cooperative Extension advisor often has experience in diagnosing the most common problems or can find assistance getting answers. With the advent of smartphones that have great cameras we can diagnose many issues remotely with images. Regional expertise is best as pests vary by state and region. The diagnostic prowess is often local–in the county where you live. Start there and widen your research until you feel you have the identification you need to research possible cures.