BOTANIST IN THE KITCHEN

(Revisiting Ray’s Recommendations)
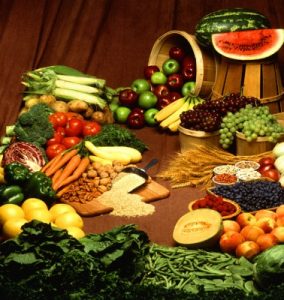
https://www.botany.one/tag/botanist-in-the-kitchen/
Image by Keith Weller, USDA ARS

It’s been awhile since I wrote about, or recommended a blog I like which I often use as a source of something to share to The Garden Professors Facebook Page, so I thought I’d revisit the topic this month.

Botanist in the Kitchen was launched in the fall of 2012 by Dr. Jeanne Osnas and Dr. Katherine Angela Preston, evolutionary biologists who also love to cook and were often asked by friends and family to discuss the details about plants during dinner parties.

Add a friend, chef Michelle Fuerst, to provide recipes and there you have it.

Our goal is three-fold: to share the fascinating biology of our food plants, to teach biology using edible, familiar examples, and to suggest delicious ways to bring the plants and their stories to your table. To judge by the questions we are often asked at dinner parties (“What is an artichoke?” “Why is okra slimy?”), some curious eaters genuinely want to know which plant part they are eating and how its identity affects the characteristics of the food.

Dr. Nigel Chaffey, an editor of the Annals of Botany journal and their blog, Botany One coined a cool word (which I’ve stolen) for their mix of plant science and cookery … Phyto-Food-Phylogeny while introducing them to a wider audience …

Plants and food? Tell me more! Well, espousing the view that ‘a person can learn a lot about plants through the everyday acts of slicing and eating them’, The Botanist in the Kitchen ‘is devoted to exploring food plants in all their beautiful detail as plants – as living organisms with their own evolutionary history and ecological interactions’.

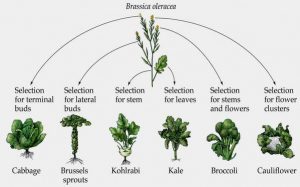
I first learned about the blog back in 2015 from an article in Business Insider, linking to their post on the various foods we grow, that were bred from one species of plant …
Brassica oleracea

Six vegetables you can find in any grocery store and which most people eat on a regular basis are actually all from this one plant. Over the last few thousand years, farmers have bred Brassica Oleracea into six “cultivars” that eventually became many of the vegetables we eat …

From the blog post

Some species have undergone the domestication process multiple times, and with some of these species, each domestication effort has focused on amplifying different structures of the plant, producing a cornucopia of extraordinarily different vegetables or fruits from the same wild progenitor. Such is the case with Brassica oleracea. The wild plant is a weedy little herb that prefers to grow on limestone outcroppings all around the coastal Mediterranean region.

So if you enjoy learning about plants we eat, and trying various recipes with them, be sure to follow the Botanist in the Kitchen via email.

Previous posts here on the other blogs I’ve recommended:
Scientific Beekeeping 

Frankenfood Facts

James Kennedy on Chemistry

Ask an Entomologist

Nature’s Poisons


Starting Seeds with Success: Best Practices

As we edge closer to spring it is time to start getting ready for the active growing season.   Many gardeners kick off their gardening year early with indoor seed starting to prepare for the upcoming season.

Starting your own seeds is an excellent, and often economical way to prepare for your year of gardening. Whether you grow vegetables or flowers (or both), starting from seeds can offer many benefits. Of course, there are some dos and don’ts for getting the most mileage from your seed starting endeavors.

I recently connected with Joe Lamp’l, host of the Growing a Greener World show on public television and the more recent The Joe Gardener Show podcast to talk about advanced seed starting techniques and technology.
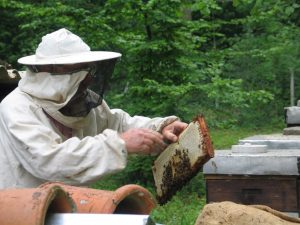
You can follow the link below to listen to the show on your computer, or find it on Stitcher or iTunes (links included on the show page, too).  In addition to the podcast, the show page features extension notes on everything we chatted about with links to good reading materials.

Seed Starting Indoors: The Joe Gardener Show featuring GP John Porter

Here are a few of my best seed starting tips:

  • Be economical. One of the great benefits of starting plants from seeds is saving money. A packet of several (even hundreds) of seeds is often around the same price you’ll pay for one plant at the garden center. Of course, if you go out and splurge on the fancy (and expensive) seed-starting systems you see in your garden store or favorite catalog you may end up investing more than you planned. Instead of fancy seed starting trays or peat pellets and pots, use low-cost or recycled items such as takeout containers or shallow disposable aluminum baking pans to start your plants.  Remember that if you are reusing containers, especially ones that have had plants grown in them before, that sterilization is key in reducing disease.  Thoroughly wash the containers, then dip in a solution of 10% household bleach (1 part bleach : 9 parts water) to disinfect.  There are some horticultural disinfectants out there, but bleach is usually the easiest for home gardeners to get since you can pick it up at the local store.
  • Start seeds in clean, sterile seed-starting mix. This is one area where I don’t skimp. You’ll want to use a sterile mix that is primarily made of peat or coconut coir. It is lightweight and pathogen free and also low in fertility, so you will be less likely to lose plants to such issues as damping off (a fungus that rots the seedlings off at the base). Using regular potting mix may work, but increases your chances of such issues. Plus, seeds are equipped with enough nutrients to make it to their first set of true leaves before they need anything from the soil. I know that some sources say to use mixes with compost in them, but unless you know 100% that the compost got hot enough to kill all pathogens (140 degrees plus for several days) you could be introducing diseases to your plants that could affect them in the seedling stage or in the future.
  • Once the seedling has its first set of true leaves (the second leaves that appear), you should transfer it to an individual container/cell/pot with regular potting soil. At this point, the plant will need to have nutrients from the soil to grow healthy. You’ll want to loosen the plant from the seedling mix (I use a chopstick) and lift it by the leaves (not the stem). Temperature control is key.
  • Heat is usually the most important factor in coaxing your seeds to germinate, so placing your newly sown seeds in a warm (around 75 degrees F) place will help them germinate faster. Fast germination is key for making sure you get the optimal number of seeds sprouting. However, moving the seedlings to a cooler place (around 65 degrees) after they’re germinated will make them grow sturdier and keep them from getting thin and leggy. Most people laugh when I tell them, but one great warm place to start seeds is on top of the refrigerator.
  • Light is necessary for good plant growth. Most seeds don’t require light until they get their first true leaves, but after that you’ll want light to keep your plant healthy. Some people are lucky to have a good, sunny (usually south facing) window with plenty of light. Otherwise you’ll need to invest in some lighting. The most economical option is a basic shop light fixture from the hardware store. You can buy plant lights, or full spectrum lamps for it, but if they prove too difficult (or expensive) to find, use a regular warm fluorescent and cool fluorescent bulb to get the right light spectra. You’ll want light on for about 16 hours per day. If you are using a window, be sure to turn the plants regularly to keep them from
    Image result for led plant lights
    Blue and Red LEDs Source: Wikimedia Commons

    growing in one direction.  As LED lights become less expensive, many home gardeners are checking them out for home seed starting.  You can use a full spectrum white LED bank, but plants primarily use red and blue light so you can also find high-intensity LED banks for plant production that are blue and red (makes purple!).  Some research is emerging that a tiny bit of green light helps growth, so some newer systems are incorporating a touch of green, too.

  • Don’t get started too early.  Look at the packet for the number of days/weeks before last frost to start your seeds.  If you start them too early, you could end up with spindly, leggy plants or ones that have grown too large for their containers. Even if you have good lighting, your plants will not thrive being cooped up in the house too long.
  • What about fertilizer? Up until the first set of true leaves, seedlings don’t need much in the way of fertility.  When they’re put in larger containers or cells, a good potting mix (usually containing some type of fertilizer or nutrients) will get you most everything you need….to a point.  If you’re growing in small containers, say those cell packs where you have very limited soil, you may find that you need to provide supplemental fertility after a few weeks.  There’s only so many nutrients in that potting mix in small amounts, so if you are holding your plants for longer than, say, six weeks you may need to apply a water-soluble fertilizer or start off with a slow-release fertilizer.  Larger containers, say a 3 or 4 inch pot, may have enough soil to have sufficient nutrients to get you to the point of transplanting.

What’s in YOUR honey? It may not be the nectar you expected.

This month’s National Geographic has a brief article from an ongoing study of the DNA profiles of urban honey. While we can all observe honeybees visiting flowers in our own gardens, until recently we could only assume what nectar they were collecting for honey production. This tantalizing snippet completely blew me away.

Honey collection

The study, undertaken by an entomologist who founded the Urban Beekeeping Laboratory and Bee Sanctuary, is sampling urban hives from major cities, including Boston, Portland (OR), New York, San Francisco, Seattle, and Washington DC. For each of these cities, National Geographic reports the top three plants for honeybees based on relative DNA levels.

Here’s what I found amazing about this research:

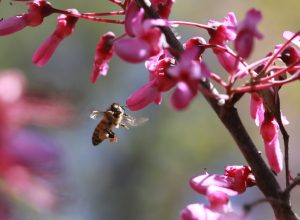
      • The top sugar sources are from TREES. Not wildflowers. We don’t see bees visiting trees as easily as we see them visiting flowers, so our perceptions are biased. Over 75% of the sugar used for urban honey is from trees.

        Honeybee visiting flowering tree
      • The trees that are most popular for bee visitation are not necessarily native to those regions. Seattle bees, for instance, prefer linden and cypress trees, neither of which are part of the native coniferous forest. Likewise, the despised eucalyptus trees of San Francisco are one of the top three sugar sources.

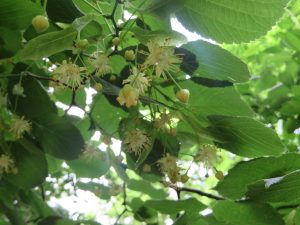
        Flowers and leaves of linden
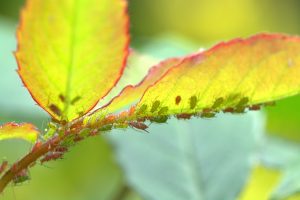
    • You’ll notice that I didn’t use the word “nectar” in describing what bees are collecting. That’s because much of the sugar they are gleaning isn’t coming from flowers. It’s coming from sap-sucking insects like aphids that produce honeydew. Bees apparently collect honeydew as well as floral nectar.

      Aphids!
    • Urban areas usually have higher plant diversity than rural areas, given the variety of woody and herbaceous plants that people use in their gardens and landscapes. The researchers speculate that this higher plant diversity may be one reason that urban hives are healthier and more productive than rural ones.

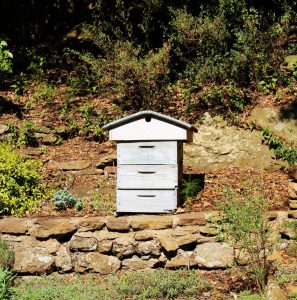
      Garden beehive

Many gardeners operate under the assumption that native plants are the best choice for gardens and landscapes. Though certain landscapes (like those undergoing ecological restoration) should only be planted with natives, there is no evidence-based reason that we shouldn’t be using non-invasive, introduced species as part of our planting palette.  In fact, research has demonstrated that tree species nativity plays only a minor role in urban landscape biodiversity: most animals learn to use new resources in their environment. Honeybees, considered to be “super-generalists” insects, are demonstrating that in spades.