Falling forward: Time to plan and plant the fall veggie garden

While most of the country is in the middle of a heat wave and the mercury is creeping past 100F on many thermometers, lets do a little exercise to help you feel cool as a cucumber (though not straight out of the garden, those cucumbers would likely be hot).  I want you to think about a crisp September morning.  You’re out walking through your vegetable garden and you stop to appreciate a big, emerald green head of broccoli.  Just a few feet away, stalks of Brussels sprouts, those miniscule cabbages that have somehow overcome years of revulsion to become sexy and desirable (they must have a good agent) shoot up like skyscrapers around the rest of the plants.  Lush lettuce fills in a bed nearby, and some cucumbers and beans that you planted late are looking as fresh as a newborn chick. 

Sounds beautiful, doesn’t it?  Well I’m here to tell you that you can actually make this a reality.  You can have a super productive garden this fall, and for most areas of the country the time to start planning and planting is now.  Right now, when a cool refreshing fall morning seems as far away as a trip to the moon.  Of course, the exact timelines and planting schedules differ by region due to the length of growing season, but most places in the US (and the northern hemisphere) can start thinking now about planting crops for the fall.  For exact timing in your area, you may want to connect with your local extension system for gardening guides. 

While many experienced gardeners may know this and practice fall garden planting, there’s a lot of people out there who have yet to have the pleasure.  And given the huge number of first time (or first time in a long time) gardeners, these garden basics might be helpful to get the most out of those pandemic plantings. 

In fact, fall is one of the best times of the year to garden.  Aside from cooler temperatures making it more pleasant to garden, there’s often less pressure from diseases and insects to ruin crops.  In addition, many of those cool season crops, like the ones I mentioned above, actually are more productive in the fall than if planted in the spring.  Even though they get a hot start in mid- to late- summer, the cooling temperatures of fall around the time many of the crops come into maturity extends the harvest period and improves overall quality of the produce.  You also have the benefit of removing some of those spent and diseased warm season plants and swapping them out for something fresh and new– a garden revival of sorts. 

Swiss chard and leafy greens are great additions to the fall garden

Unfortunately, since fall vegetable gardening isn’t as widespread as planting summer gardens, plants and seeds can often be hard to find when it is actually time to plant (so planning ahead is helpful).  Mid-summer is usually the time for most regions to start seeds for those slower growing cool season crops like broccoli, cabbage, cauliflower, and their kin. They can be started indoors, but the need to do so isn’t as great as it is for those warm season crops we start indoors in late winter.  You can start them in pots/flats outdoors as long as you have somewhere that isn’t so hot and sunny that they’ll be continually drying out (some shade would help).  They should be ready to transplant by late summer.  You can skip the seed starting/transplanting if you want to try direct seeding into the garden, but as they say “your mileage may vary”. 

Some of the fast maturing warm season (frost tender) crops are also good candidates for a mid-summer planting as a way to refresh the garden if you have space for it.  Beans are a good candidate for late-summer planting, but you’ll need to make sure they are a fast-maturing variety (there’s a wide range of maturity times in beans). Bush beans are usually the quicker growers. Pole beans and lima beans usually take a longer period, so those don’t do as well later in the season for places that have frost and freezes. 

It is also a possibility to squeeze in a late crop of cucumbers or summer squash as well. This can be good if your cukes and squash succumb to disease, squash vine borers or cucumber beetles. Planting late can often mean that you are missing the primetime for specific pests. For example, squash vine borer adults actively lay eggs in the early season but largely disappear later on.  A late planting means you could miss them entirely. 

Fall is the best time to grow leafy green vegetables.  Lettuce, which does not fare well in the summer, thrives in the cooling temperatures of the fall.  Other leafy greens, such as chard, spinach, and kale are also winners in the fall garden.  Many of the root vegetables, such as turnips, carrots, beets, and radishes are also part of the fall garden revival.  You’ll want to wait until temperatures have chilled a little to get these started, but not so late that the season ends before you get good growth. 

You gotta know when to sow ‘em

The key to fall planting is to know how many days it takes for the crop to mature. Check out the seed package or the plant tag — there should be a time to maturity on there. Just count backward from the first frost date. Be sure to add a few weeks to account for slower growing in cool weather and to allow for a reasonable harvest time.

For example, if I wanted to plant a late crop of beans, I might select the cultivar ‘Contender’ which matures in about 55 days.  I want to add at least a few weeks onto that for maturity and harvest time, so lets say I need 75 days (I can go shorter if I want to accept the risk of an early frost).  Let’s also say that my first frost date in the fall is October 20.  Counting back 75 days from October 20, I get August 6 – I should plant my beans no later than that date to get a harvest.

Most of the cool season crops can tolerate a frost (and some even a freeze) so their growth dates can extend beyond the first frost date.  You’ll just want to have them mostly grown and close to maturity before it gets cold enough to stop their growth.  I covered frost and freezes and which crops can survive those cold temps in this previous GP article

You can give yourself a little more time if you plan on incorporating a season extension practice in the garden. Using a row cover or constructing a low tunnel can give you several more weeks of growing time. It can be possible to enjoy a fresh tomato or green beans straight from the garden on the Thanksgiving table, or some fresh broccoli or kale at Christmas even in some of our colder regions. But it all starts with a little planning in the heat of summer.

And if you choose not to plant a fall crop, I would suggest using a cover crop in garden beds as you remove this year’s plants.  A cover crop will help keep weeds to a minimum and preserve soil structure and nutrients through the winter.  Winter wheat, rye, and crimson clover are good winter cover crops.  Next spring you just cut them down and till them in if you’re not practicing no-till (and you should be if at all possible). For annual cover crops, you can usually cut them down or break them over and leave them in place as a mulch. You can also pull them up and compost them to add directly back to the garden, especially if (since it is hard to till or mow in a raised bed).  This GP article is an oldie but goodie for using cover crops in the vegetable garden. 

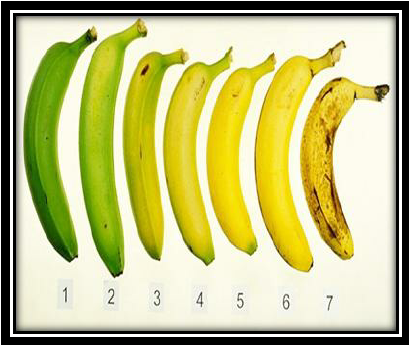
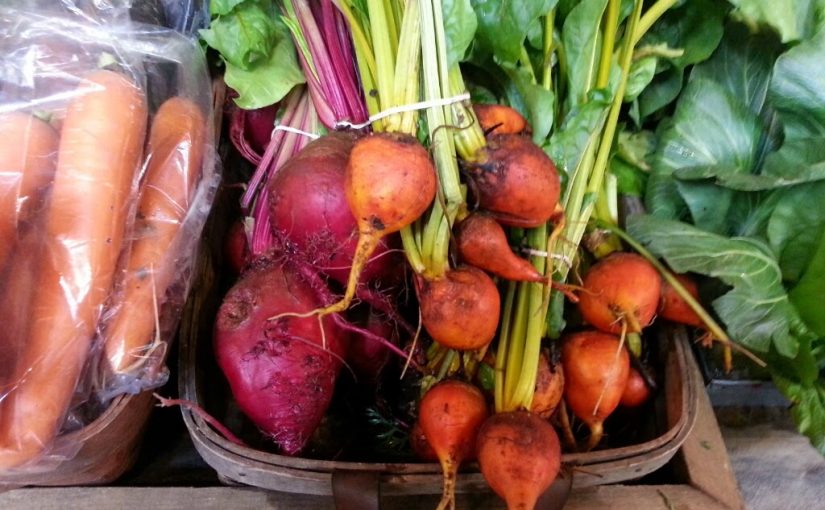
Ripe for the picking: Which fruits keep ripening after harvest?

“Will my peppers continue to ripen? How about my eggplants?”  It is common knowledge to most gardeners (and home cooks) that tomatoes will ripen on the kitchen counter, as will bananas and several other fruits.  You know that one day your bananas look perfectly ripe and the next they’re a brown mush But does this work for all fruits?   We often get questions about whether specific fruits will continue to ripen after picking.  And the answer is….. it depends.

How green were my peppers…

One of these fruits is not like the other

The answer as to whether a fruit will continue to ripen after harvest depends on which one of two groups it falls into.  These groups are climacteric and non-climacteric fruits.  In short, climacteric fruits are the ones that will continue ripening after harvest and non-climacteric fruits are ones that don’t ripen after harvest.

Image result for ethylene

This refers to the “climacteric phase” of fruit ripening where there is an increase in the gaseous plant hormone ethylene and an increase in respiration, which drives the ripening process. It is the climacteric fruits that will keep ripening once they’ve been harvested, thanks to ethylene.  The only stage of maturity for non-climacteric fruits after harvest is…..compost.

As long as you’re green, you’re growing.  As soon as you’re ripe, you start to rot. -Ray Kroc

Almost all fruits produce ethylene, but non-climacteric fruits produce them at much lower levels and do not rely upon it as the main driver of ripening.  I’ll go into a bit more detail in a bit, but first – which fruits are climacteric and which are non-climacteric?

Common Climacteric Fruits Common Non-Climacteric Fruits
Apple Brambles (raspberry, blackberry, etc).
Apricot Citrus (oranges, lemons, limes, etc.)
Avocado Eggplant
Banana Grape
Blueberry Melon (including Watermelon)
Cantaloupe / Muskmelon Pepper *
Cherry Pumpkin
Fig Squash (summer and winter)
Kiwi Strawberry
Mango Cherry
Papaya
Pawpaw
Peach
Pear
Plantain
Plum
Tomato
*Some evidence of climacteric ripening in hot peppers

Image result for avocado ripe meme

The ripening process

Ripening is genetically programmed – meaning that it is highly dependent on processes that are regulated by genes and it specific to each species.  Parts of the process are started and stopped due to the transcription and translation of genes, which are in turn controlled by signals such as chemical compounds, physiological stages of the plant, climate, and so on.  These ripening processes have a lot of end results – sugars accumulate in the fruit, pigments develop, some compounds that have pleasant flavors develop while others that are unpleasant are broken down, some of the pectins in the fruit break down to make it softer, and on and on.

Tomatoes – the classic climacteric fruit

Getting close…

Research shows that ethylene, the simple little gaseous hormone plays a crucial role in the ripening of climacteric fruits by altering the transcription and translation of genes responsible for ripening.  Ethylene is the dominant trigger for ripening in these plants.  Ethylene receptors in the cells are triggered by the presence of the gas which leads to cascade effect.  This is why ethylene can be introduced from other fruits to trigger ripening in fruits that aren’t ready to ripen.  If you’ve heard of the tip to put an apple in a bag full of some other fruit to get it to ripen, it actually works – as long as it is a climacteric fruit.

The same ripening processes happen in non-climacteric fruit as well, but they are not dependent on the presence of ethylene.  In fact, these pathways are also present in climacteric fruits – the ethylene-dependent processes are just the dominant (and faster) way that they ripen.

Controlling ripening

The dependence on ethylene for a vast majority of fruits to ripen has been used by farmers and the food industry for a long time to keep climacteric fruit more stable for shipping.  These fruits are harvested “green” before they ripen and shipped unripe since they are much firmer and much less likely to get damaged in transit.  These days, bananas, tomatoes, and other climacteric fruits are likely to be given a treatment that temporarily inhibits the ethylene response before harvest or shipping to extend their shelf life further.  Once they’re close to their final destinations they’ll either be allowed to ripen on their own or given a treatment of ethylene to speed back up the ripening process.

What we gain in shelf-life and reduced food waste we do lose in a bit of flavor.  Since the fruits are no longer attached to the plant when they ripen they don’t have the chance to transport more sugars and flavor compounds from the mother plant.  So “vine ripened” fruits do have a bit more sweetness and flavor than those that are picked green.  Having just gotten back from Rwanda, a country where bananas are a common staple food I can attest that the ones that ripen on the plant are much sweeter than those we get shipped in to the US – you know, the ones that will ripen next week sometime if you’re lucky.  There were even some in our group that don’t care for bananas here that loved the ones we had at breakfast every morning.

Grapes must stay on the vine to ripen

One possible direction for biotechnology is the engineering of plants to alter or eliminate the ethylene ripening response to reduce food waste and spoilage.  Since many genes that are responsible for ethylene production such as enzymes that catalyze the production of ethylene precursors, or proteins that serve as ethylene receptors have been identified, work is being done to develop delayed ripening by altering or knocking out these genes in a variety of crops.

Sources

Alexander, L., & Grierson, D. (2002). Ethylene biosynthesis and action in tomato: a model for climacteric fruit ripening. Journal of experimental botany53(377), 2039-2055.

Pech, J. C., Bouzayen, M., & Latché, A. (2008). Climacteric fruit ripening: ethylene-dependent and independent regulation of ripening pathways in melon fruit. Plant Science175(1-2), 114-120.

Lelièvre, J. M., Latchè, A., Jones, B., Bouzayen, M., & Pech, J. C. (1997). Ethylene and fruit ripening. Physiologia plantarum101(4), 727-739.

Plant Control to Major Tom(ato): The Art of Spacing Out Your Plants

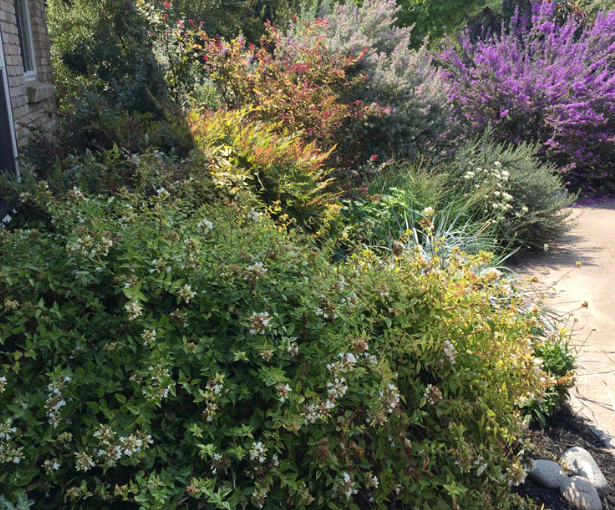
“Why don’t you just plant it up against the house,” piped my mother-in-law.  She was talking about a run-of-the-mill “old fashioned lilac” that we had received in the mail for our donation to Arbor Day.  While I don’t necessarily think of the organized tn as a source of high-quality or novel plants, I felt beholden to  make a donation since it was founded and is still located in Nebraska (and we have visited the Arbor Lodge, home to founder J. Sterling Morton and his brood of tycoons (one of salt fame – that Morton, one of cornstarch fame – ergo we have Argo, and one of the railroad).  I had pawned the 10 blue spruce off to the freebie table at the office, but she wanted a lilac…and what momma-in-law wants, momma-in-law gets.

I explained to her that the labeled final size of the cultivar was 12 feet in diameter, so it needed to be at least 6 feet from the house (preferably more) and from other plants.  “Nonsense!” she decried, “I planted mine close to the house.  You just have to keep it pruned back.  Mine did just fine….. until it rotted.”  Since the right spacing would put the shrub in the middle of a narrow passage between the house and the fence, I opted to throw it into a pot since I was heading out of the country the next day for two weeks.  It was, after all, a little more than a spindly twig (with roots wrapped together in a ball) sheathed in plastic.

What’s the issue? 

Most gardener’s desire for instant gratification often means that correct spacing for the finished size of the plant gets thrown out the window so that the garden looks good to go from the beginning.  Or even worse, plants get shoved against houses, under power lines, or in other areas where they’ll either be cramped and crowded or incessantly pruned to the point of oblivion throughout their probably shorter-than-expected lifespan.  Think of it like your bubble of personal space.  Just like you don’t want to be crowded, neither do plants.

In addition to the pruning and space issues, crowding can increase the likelihood of disease or other plant issues.  Crowded plants reduce air flow, which aids the development of diseases by increasing (ever so slightly) the humidity in the plant’s microclimate, increasing drying times after rain or irrigation, and even allowing for disease spores to more easily settle on the plants.  For perennials, and especially trees and shrubs, overcrowding can be a chronic issue since the problem can last for many, many years.

That’s not to say that spacing it isn’t a problem with annuals, either, especially in the vegetable garden.  In addition to the increased possibility of disease, competition for space and for nutrients can reduce yields.  Crowded root crops like carrots, beets, and radishes don’t have enough space to fill out, resulting in stunted and irregular produce. The same goes for leafy crops like lettuce or kale.  Fruiting crops like tomatoes and peppers can also suffer from reduced production when plants can’t fully grow to their potential.

Getting Spacing Right: The Simple Art of Not Planting Too Damn Close

Perhaps the secret is complicated formula for figuring out the proper plant spacing?  Or perhaps it is some specific planetary alignment you need to wait for?  Since it seems to mystify may gardeners, spacing must be difficult, right?  Au contrare!

Most plants come with the proper space printed right on the label!  Think of such a novelty!  That lilac my MIL wanted to plant against the house said right on the packaging that it generally grew to 12’ wide.  If I were planting a bunch of them in a row (and not as a hedge), I could plant them 12’ apart.  If I wanted to grow them as a hedge, I’d reduce that spacing to make them grow into each other (but it will take time for them to grow into a hedge…so they won’t be touching right away).  Keep in mind that this is the genetic potential of the plant and isn’t a guarantee.  Many factors, including microclimate, soil conditions, precipitation, nutrient availability, disease, etc. etc. etc. could limit the plant’s growth to that potential (or even more rarely increase it).  What if I’m not planting a bunch in a row?  Here’s were a teensy bit of math comes into play.

Think of plants in general terms as circles.  Just look at a basic landscape architect’s plans and you’ll sometimes see plants represented generally as circles.  If you think all the way back to that geometry class in high school, you’ll remember that there are several measures of a circle, including the diameter and the radius.  The diameter is the width of the circle from one side to the other. The radius is the distance from the center point of the circle to the edge.  So if our plant is a circle, then the listed width of the plant is the diameter and the distance from the trunk, stem, or center is the radius.  So I can expect my lilac (if it reaches full potential) to grow out 6 feet from the trunk.  That means I need to plant it at least 6 feet away from the wall.  If I wanted to plant it in the landscape with other plants around it, I would need to figure out the radius of the plants I wanted to plant close to it and add their radius to the lilac radius to figure the minimum distance I should plant them apart.  Let’s say I wanted to plant a small shrub beside the lilac with listed width of 10 feet.  That means the radius of that shrub is 5 feet.  Adding them together, I get a distance of 11 feet.  On the other side of the lilac I want to plant a large perennial with a diameter of 4 feet.  The radius would be 2 feet, so my minimum planting distance would be 8 feet.  You also have to keep in mind any variation due to microclimate and environmental factors.

What about the vegetable garden?

The same concept holds true for the vegetable garden as well – think of each of the plants as a circle.  Where planning the spacing is different is usually interpreting what the seed packet says in terms of in-row versus between-row spacing.  The in-row spacing is based on the size of the plant, a general idea of the size of the circle the plant makes or how much space it needs between plants (some plants, like beans, are OK when they overlap a bit and share space).  The between-row spacing is for human use in creating typical in-ground, large garden areas.  I’ve had the discussion before of large garden area vs. in-ground beds, vs. raised beds so we don’t need to go into that detail, but the general movement is toward some sort of bed system to reduce walkways (reducing bare soil that can lead to erosion or compaction when walked on) and intensify plant spacing/output per a given area.

Taking that into consideration, use the in-row spacing as the between plant spacing in all directions.  This is what the popular Square Foot Gardening method does – the spacings and number of plants per square are based on the between plant spacing and eliminates row spacing.  For example, radishes and carrots typically have an in-row or between plant spacing of 3 inches.  If you fit that spacing evenly within a foot row segment, you get four plants.  When you make that two dimensional you get 16 plants per square foot.  For four inch spacing you get 3 per foot and 9 per square foot, six inch spacing you get two and four, etc.  You can fill an entire bed with plants like this without spacing between rows of plants.

Of course, the tricky thing is that, just like our trees and shrubs that are planted too closely reduced airflow and increased microclimate humidity can increase the risk of diseases in the plants.  The Square Foot Gardening method by the book states that you shouldn’t plant any adjacent square with the same crop to decrease likelihood of disease sharing, but that seems sounder in theory than in practicality. I use some of the spacing (and you don’t need the book, just look at the between plant spacing and calculate. You just have to monitor, use good IPM, and treat or remove issues promptly to reduce disease issues. Using interplanting to intensively plant by mixing various space usages (tall plants with short plants, root crops with fruit crops) can also help make use of the space while mixing plants to reduce disease spread.

The Scoop on Poop: Manure in the Vegetable Garden (and potential food safety risks)

“Can I use manure to fertilize my garden?”  That’s a common question we get in Extension and on the Garden Professors page.  The answer is absolutely, but there’s a “but” that should follow that answer that not everyone shares.  And that is…but for fruits and vegetable gardens the manure you apply could be a potential source of human pathogens that could make you or your family sick. There are procedures and waiting periods you should follow to reduce the potential risk to human health from pathogens in manure and other animal products.”

Why manure?

First, application of manures to garden and farm production spaces is a good use of nutrients and provides a way to manage those nutrients to the benefit of growers and the environment.  Using the concentrated nutrients in the manures to grow crops reduces what washed downstream in the form of pollution. In addition to adding nutrients to the soil, application of manure and other animal byproducts (bone meal and blood meal, for example) add organic matter to the soil, which improves soil texture, nutrient retention and release, and supports beneficial microorganisms.

Typical N-P-K composition for some manures and composts. Source: UC Davis

For organic production, both in home gardens and on farms (certified organic or not), manure and animal products are an important input for fertility.  For the most part, manures offer a more concentrated (higher percentage) of nutrients by weight than composts composed only of plant residues, so less is usually needed (by weight) than plant composts to apply the same amount of nutrients.

While the nutrient levels of manures and composts can be highly variable, there are some general ranges that you can use to plan your application based on the needs you find in your soil test.  (And you should be doing a soil test, rather than just applying manure or compost willy-nilly.  Just because the nutrient concentrations are lower than a bag of 10-10-10, you can still over-apply nutrients with composts and manures).

So what are the hazards?

As you’ve probably realized from bathroom signs and handwashing campaigns, fecal material can carry a number of different human pathogens such as E. coli and Salmonella.  The major risk around application of manures to edible crops is the possible cross-contamination of the crop with those pathogens.  The number one hazard leading to foodborne illness from fresh produce is the application of organic fertilizers – mainly manure, but also those other byproducts like blood meal and bone meal.  Add in the fact that the consumption of raw fruits and vegetables has increased over the last decade or more, and you’ll soon understand why Farmers who grow edible crops must follow certain guidelines outlined in the Food Safety Modernization Act (FSMA, which you’ll hear pronounced to as fizz-mah) to reduce the potential risk that these pathogens pose to people who eat the crops.  Right now, only farms with a large volume of sales are required to follow the guidelines, but smaller producers are encouraged to follow them as best practice to reduce risk and liability. And while there isn’t a requirement for home gardeners to follow the guidelines, it is a good idea to understand the risks and incorporate the guidelines as best practice.  It is especially a good idea if the produce is being eaten by individuals who are at higher risk of foodborne illness – young children, the elderly, or those who are immunocomprimised.

The recommendations are also suggested when there’s contamination from unexpected or unknown sources like when vegetable gardens are flooded (click here for a recent article I wrote to distribute after the flooding in Nebraska and other midwestern states).

Recommendations to reduce risk

As previously stated, while these recommendations have been developed for produce farmers, research showing the potential hazards of applying manures means that it is a good idea for home gardeners to understand and reduce risks from their own home gardens.

The set of guidelines outlined by FSMA cover what are called Biological Soil Amendments of Animal Origin (BSAAO – since we government types love our acronyms).  Here’s the “official definitions” used in the rules for produce farming:

A Biological Soil Amendment is “any soil amendment containing biological materials such as stabilized compost, manure, non-fecal animal byproducts, peat moss, pre-consumer vegetative waste, sewage sludge biosolids, table waste, agricultural tea, or yard trimmings, alone or in combination”.

A Biological Soil Amendment of Animal Origin is “untreated: cattle manure; poultry litter; swine slurry; or horse manure.”

Image result for manure
Now that’s a pile of crap!

For BSAAO (we’ll call it raw manure), manure should only be applied to the soil and care should be taken not to get it on the plants.  There’s also a waiting period between applying the manure and when you should harvest the crop.  The length of the waiting period depends on whether the edible part of the crop comes in direct contact with the soil.  Right now the USDA is still researching the appropriate waiting period between application and harvest, so the general recommendation until then is to follow the standards laid out in the National Organic Program (NOP) standards.  Research shows that while pathogens may break down when exposed to the elements like sun and rain, they can persist for a long time especially in the soil.

For now, here are the recommendations:

For crops that contact the soil, like leafy greens (ex: lettuce, spinach, squash, cucumbers, strawberries) the suggested minimum waiting period between manure application and harvest is 120 days.

For crops that do not contact the soil (ex: staked tomatoes, eggplant, corn) the suggested minimum waiting period between manure application and harvest is 90 days.

For farmers following FSMA, the waiting periods could change when the final rule is released – some early thoughts are that it could increase to 9 – 12 months if the research shows a longer period is needed.

What about composted manure?  Is it safe? The guidelines indicate that there isn’t a waiting period between application of manure that has been “processed to completion to adequately reduce microorganisms of public health significance.”  But what does that mean?  The guidelines lay out that for open pile or windrow composting the compost must be maintained between 131°F and 170°F for a minimum of 15 days, must be turned at least 5 times in that period, must be cured for a minimum of 45 days, and must be kept in a location where it can’t be contaminated with pathogens again (animal droppings, etc).  Farmers have the added step of monitoring and thoroughly documenting all of the steps and temperatures.  Now we know that that’s a bit of overkill for home gardeners, but suffice it to say that the cow manure that’s been piled up to age for  a few years that you got from the farm down the road doesn’t meet that standard.

Image result for compost
Failure to maintain proper temperature on composted manure could mean that your goose is cooked, though this thermometer doesn’t have that setting.

“Aged” manure ≠ “processed to completion to adequately reduce microorganisms of public health significance.”  So unless you know for sure that you’ve reached and sustained the appropriate temperatures in your compost, you should assume that it would be considered a BSAAO subject to the 90/120 waiting period.  Bagged manure you buy at the garden center is likely to be composted “to completion” or may even have other steps to reduce pathogens like pasteurization.  Sometimes the label will indicate what steps have been taken to reduce pathogens, or even state that it has been tested for pathogens.

The recommendations also specifically mention compost teas and leachates (a topic we handle with much frequency and derision here at the GPs, since there’s not much science to back up their use and I mention here with much trepidation).  For the sake of food safety, any tea or leachate should only be applied to the soil, not the plant.  And for home compost that doesn’t even contain animal manure the 90/120 day waiting period should still be observed in most cases since some of what goes into home compost is post-consumer.  Since we put pieces of produce in there that we’ve bitten from or chewed on (post-consumer), plus some animal origin items (eggshells) there’s the potential that we could contaminate the compost with our own pathogens – and the environment is perfect for them to multiply.

The Bottom Line

While these guidelines and rules for farmers may just be best practice recommendations that we can pass on to home gardeners, common sense tells us that taking precautions when applying potential pathogens to our edible gardens.  An ounce of prevention is worth a pound of cure, especially when were talking about poop.

Sources/Resources:

Grow Garlic – Keep the Neighborhood Vampires at Bay

While most of those gardening tasks are coming to an end, in most parts of the US it’s time to think about planting a few things in the veggie garden to bring a flavorful bounty next year – garlic (and a few related alliums).

I often reference Halloween and vampires when I talk about garlic, not just because traditional lore says that garlic repels vampires, but because it is a good reminder of when to plant garlic in the garden. October is the prime time for adding the alluring allium to the garden. You can also remember that you plant garlic during the same period that you plant spring flowering bulbs.

Why do vampires hate garlic?

Yes.  Vampires are fictional (unless someone finds some empirical evidence of their existence, since you can’t prove a negative 😉 ).  These bloodsucking creatures of folklore may actually have a basis in fact that could explain their aversion to garlic. Way back when people didn’t have science to understand things, they often invented explanation for things that were supernatural.  Sometimes these explanations may have actually had some truth to them.

In this case, the symptoms of vampiricism could have evolved from the symptoms of porphyria – a set of rare disorders of hemoglobin (there’s the connection between vampires and blood).  Symptoms of porphyria include shrunken gums (that could make teeth look like long fangs), painful sensitivity to sunlight, and….and averse reaction to garlic. The reaction comes from the effect of garlic on the blood – it can stimulate red blood cell turn over and increase blood flow, both of which can exacerbate symptoms of porphyria and cause acute, painful attacks.  There’s also an allegorical connection – vampirism was considered a disease (or represented the spread of disease in some literary cases) that was spread by a causal agent and garlic was seen as a curative for disease (it does have some antibacterial properties).  Note: other possible symptoms of porphyria can be excessive hair growth in random areas of the body, which gives it a connection to lore around lycanthropy.

On to the gardening

Now that we’ve covered some trivial, albeit interesting, info lets get on with the gardening!

While many people are accustomed to the single variety available in grocery stores, there are several different types of garlic that all have different flavor characteristics. These types can be classed in two categories; hardneck garlic has a hardened central stem when it dries, and softneck garlics remain soft and pliable. Softneck varieties are the ones that lend themselves to being braided into those hanging garlic braids. Softneck varieties are also longer-storing than hardneck varieties.

It can be tough to find garlic in local garden centers to plant. Those that do carry garlic, often carry it at the wrong time of year for planting when it is shipped in on the spring garden displays. If you don’t have friends to share their garlic with you, or a local farmer to buy some from, you are going to have to go the mail order (or online order) route.

Once you have your garlic bulbs, split them up into cloves, being sure that you have a piece of the basal plate (the part that holds them all together) on the clove. This one clove will turn into a whole bulb over the growing season.

Plant the cloves tip up about 4 to 6 inches apart and about 2 inches deep in loose, organic soil. Mulch after planting with about one inch of straw or shredded newspaper.

Garlic is a relatively heavy feeder, so it would benefit from a good balanced fertilizer treatment with nitrogen after it is established. You can also plant them in the garden where you grew beans over the summer – the bacteria that colonized bean roots adds nitrogen to the soil.

After that, just be patient. It may pop up before winter if the weather is mild, but don’t worry – it can survive even if a freeze kills the growth back to the ground.  Garlic requires little maintenance, and only requires water if the weather turns very dry. Harvest it once the leaves start to die in mid-summer (around July, unless it is an early-maturing variety). Be sure to save some to plant next year and store the rest for use in the kitchen.

Aside from garlic, there are some other odoriferous onion relatives you can plant this time of year like shallots and perennial onions in the vegetable garden or edible landscape.

Shallots have a mild onion flavor and are great because they form cloves like garlic (meaning you don’t have to cut up a whole bulb if you just need a little bit) and store well. The beauty of shallots is that they can also be planted in really early spring — they are a multi-seasonal crop. You can also start them from seeds in the spring.

Shallots are technically perennials, as they will grow over many years if left undisturbed. However, to harvest them, you have to dig them up so they are usually grown as annuals. Once you dig them up, use the larger bulbs for cooking and save the smaller ones for replanting.

Multiplier onions, sometimes called “potato onions” are another fall-planted perennial. These plants produce clusters of bulbs (hence the name “multiplier”) that are harvested in the early summer for bulb onions.

One of the benefits of these and other perennial onions is that you can harvest the green blades of the plant for use as green onions or scallions throughout most of the winter and spring.

Egyptian walking onions are another perennial that can be harvested either for its bulb or as a green onion. The name comes from the bulbils that form at the top of the flower stalk. When they mature, they get heavy enough for the stalk to collapse and fall over, creating a new bunch of onions away from the mother plant. You can allow them to do this to fill in an area, though most people limit it by harvesting the bulbils before they fall.

There are also perennial leeks that have a flavor similar to leeks and can be harvested as green leeks through the winter or dug up as small, tender leeks in the spring.

If you love growing perennial vegetables that add flavor to just about any dish, give these tasty plants a try. They’re really simple to grow and can keep your garden and your kitchen full of fun and flavors for years to come.

A quick primer on types of garlic

Hardneck Varieties

  • Purple Stripe — bulbs have purple on the outside. Some of the tastier garlics that become deliciously sweet when roasted.
  • Porcelain — popular gourmet variety. Usually has a more robust and spicy flavor. Bulbs are typically large and have large cloves.
  • Rocambole — Rich, complex flavors popular with chefs. Their scapes (edible blooms) form a double loop. They do not do well where winters are warm.
  • Asiatic/Turban — Do not store for long periods. Mature earlier in the season (late spring as opposed to summer) than other types. Flavors are usually strong and hot.
  • Creole — Attractive red color. Performs well where winters are warmer. The flavor is similar to (though milder than) Asiatic/Turban Varieties.

Softneck Varieties

  • Artichoke — the grocery store garlic (California White) is an artichoke garlic, though other varieties have more complex flavors. Bulbs tend to have multiple layers of cloves.
  • Silverskin — often the last in the season to mature, these are the longest-storing garlics.

Elephant Garlic

This is a common “garlic” planted by many gardeners because it has large, easy to use bulbs with a garlicky flavor.  Though it is technically not a garlic species – it is a type of perennial leek.