The weed apocalypse

I have been hiding from COVID-19 in Arizona, but I had to return to Ojai, Ca because I was “noticed” by the local fire department to abate my weeds. I returned to find the Weed Apocalypse (WA 2020). Late spring rains were spaced nicely in California supporting rampant weed growth. So, why did this happen? What can I do about it now? How could I have better prepared for WA 2021 next year?

The Ojai “Weed apocalypse”. This is what happens when you leave and do nothing in your garden for two months.

In May, the days are getting noticeably longer and moving closer to the longest day of the year (June 20–the summer Solstice). Longer days add more photosynthetically active radiation and put plants on a rapid growing phase at this time of the year. If water and soil nutrients are not limiting, this is the fastest growth period for most plants. Weeds have the unique quality that they will grow faster than many garden plants even with less resources. When resources are plentiful, they grow  faster still.

One way to prevent the weed apocalypse is to deteriorate the weed seed bank . The “weed seed bank” (WSB) is the amount of seeds stored in soil that are viable. The seed bank is restored each year when weeds set seed and drop them on or into the ground. In some cases the seed bank also includes plant parts such as Bermudagrass (Cynodon dactylon) stems and rhizomes (underground stems) that can lie quiet but, once sufficient moisture is available, they spring into life! So once the weeds set seed, just “whacking” or mowing and leaving the mulch behind does not usually solve the problem as viable seed is added to the WSB. Annual weeds can be reduced substantially if they are controlled prior to seed set.

Weeds are sneaky buggers. They imbue their progeny with germination inhibitors or dormancy factors that delay germination. Some seeds complete their maturation even when they have been cut away from the main plant. This is why weeds always seem to be there for you. When dormancy factors wear off, or are washed away seeds will germinate. So after a strong rain event or irrigation weeds emerge that were previously dormant. Some of the seeds remain dormant in the WSB as a back up opportunity to grow. In the case of Slender wild Oat, Avena barbata, it has two maturation ‘stages’ that take advantage of both early spring and late fall rains, with seed ripening at both of those seasonal times. Light is also necessary for many weeds to germinate. When weeds are removed by tilling or digging, new seeds are brought to the surface and may now germinate. Additionally, many weeds have the capacity to regenerate if the entire root is not removed. One tenacious weed, Field bindweed (Convolvulus arvensis), is known to regenerate from each node and root as deep as four feet. Cutting the plants into pieces makes more of them!

Weeds can be annual biennial or perennial . Some weeds such as Poa annua or annual bluegrass complete their life cycle (seed to seed) in only a few to several weeks, others grow for years. Annuals survive drought or cold winters as seeds while perennials as roots, tubers or dormant stolons or stems. Biennial weeds usually grow their vegetative body in the first year and reproductive structures in the second year, they are often rosette forming plants that grow close to the ground in the first season and develop tall stocks in the second. Knowing how to identify weeds helps to understand their biology and ultimately control strategies.

Many gardeners are herbicide averse. However, herbicides will often give the most economic and effective control of weeds. Some weeds like field bindweed are only well controlled with herbicides. Herbicides are broken down into two categories: pre-emergent herbicides and post emergent herbicides. Pre-emergent herbicides inhibit seed germination or kill emerging seedlings before they can develop. Post emergent herbicides kill weeds after they emerge from their seeds. Almost all weeds are better and more easily controlled at juvenile life stages. This is true for mechanical or chemical control. Regardless of how you choose to deal with the WA in your garden starting when weeds are small will give you a tremendous advantage.

Like all pesticides, herbicide labeling must be followed carefully to apply the right amount of product at the right time to the target weed (which also must be listed on the label). There are some amazing herbicidal tools that can save hours of labor. Some drawbacks of herbicides are that they may be expensive, may require multiple applications, require equipment to apply as well as personal protective equipment. Herbicides can be selective or broad spectrum. For instance, Fluazifob-P-butyl (active ingredient of Fusilade II) will control warm season grasses in many ornamental broadleaved plants. This is immensely useful since you can apply Fluazifop-P-butyl “over the top” of a flower garden and free it of bermudagrass (Cynodon dactylon) without harm to your ornamental garden plants or other non-grass landscape plants. Other herbicides containing plant growth regulators such as 2,4-D are broad-spectrum and will kill or harm many kinds of broad-leaved plants in turfgrass without harming the turfgrass. There are also some broad spectrum contact herbicides made of soaps or acids that will kill both broad leaved and grass weeds on contact. While these products do not have systemic action they can be very effective on both cool and warm season young weed seedlings. Herbicides when used carefully and following labeled instructions can save hours of hand weeding labor.

In my own yard I have chosen not to use herbicides because I have so many plants that are sensitive to the kinds of products I would need to use. I am pretty much down for other types of control. This month my city council decided to ban the use of gasoline powered lawn mowers–my chief weapon for the WA! We took a chance and used it anyway because our weed issues are so bad. As mentioned earlier the best time to use mechanical control of weeds is when they are in the cotyledon or two leaf stage of growth. A quick attack with a scuffle hoe will wipe them out. When they grow to adult weed size, larger and larger machinery become required.

Once perennial weeds such as bindweed grow a bit they become impossible to control with hoeing because they will grow back from roots. String line trimmers are used for weeding in many apocalypses but have their limitations. Bits of plastic trimmer line break off and pollute your landscape. Biodegradable plastics are usually used, but the idea of littering your yard with plastic bits is bothersome. Limiting the use of oil consuming machines is a great idea, but using battery powered machines has limits. Buying extra batteries so you can destroy while you charge is helpful.

Hand pulling is a great way to release pend up stress (of the human not the weed), get exercise, and rid the garden of apocalyptic pests. However, for some weeds like yellow nutsedge (Cyperus esculentus) you will only increase the problem as nutlets are released from dormancy when you pull the “mother” plant. By the time you see the emerging nutlets they have formed more nutlets so you can never get ahead of the problem. If you decide hand pulling will work, irrigate the day before you want to weed and they will come out much easier.

Mulching with fresh coarse arborist chips is a great way to prevent annual weeds from getting the light they need to germinate. Mulches also break down to improve soil. We have been mulching for a couple decades on my driveway but have not added any mulch for a few years. The broken down mulch and improved soil are now the most apocalyptic weed garden. If you use mulches for weed control fresh chips need to be applied at least annually in a thick layer to be effective. Also constant application of mulches can make soil! This soil builds up without you realizing that the root collar of perennials or trees may be getting buried. If you mulch consistently around trees be sure to keep the root collar exposed.

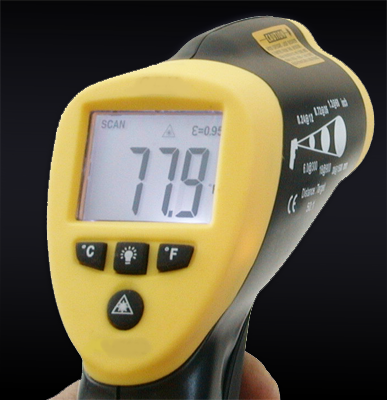
Not all weeds germinate in the early winter. There are winter and spring or summer germinating weeds. The differing timing of their emergence can happen unexpectedly. Just when you thought you had weeds in control, another set seems to appear requiring your attention. Look for summer emergent weeds when night temperature lows are above 60F.

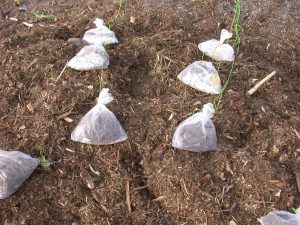
Using an old glass shower door to solarize the soil and kill weeds. Note some yellow nutsedge is surviving near the edge of the doors.

Solarization is another way to kill weeds. This is the old greenhouse effect used as a weed weapon. Clear plastic laid on the soil surface and sealed at the edges will if exposed to full sun heat the contents to the point of their death. The solarization effect does not penetrate deeply into soil, so if perennial weeds are solarized, they may survive and regrow from root pieces. If you want to try solarizing your weeds purchase thick UV resistant plastic otherwise you will have bits of plastic everywhere as the sun breaks it down into pieces… Warning, this does not work with Field bindweed! In my own yard I have used old glass shower doors to solarize the soil.

Finally if all else fails and the WA is bearing down, you can just eat them. Many weeds are edible and can make good food. Nettle, Sonchus (sow thistle), purslane, dandelion and many of the Mustard family are edible at various stages of their development. Some folks have even collected mustard seeds and made their own condiments. Of course, you should always exercise caution when consuming wild foods. Some contain toxins or other chemicals that individuals may be sensitive to. The Sow thistle and wild lettuce (Lactuca spp.) contain latex which many are sensitive to. The stinging nettle has hairs on its surface that contain an irritant (oxalic acid) that causes skin burning and welts. Others, such as black elderberry may contain cyanide alkaloids in the green tissues-stems, fruit and other parts. Research the risks of consuming or contacting some plants before attempting to eat or handle them.  There is hope, because even the nutlets of one of the worst weeds (yellow nutsedge) are edible…

Viral Vegetables? Growing (and Buying) Produce in the age of COVID-19 (and reducing fear with facts)

Now that much of the world’s attention is focused on limiting the spread of pathogens, well one pathogen, it seems like a good time to talk about some of the questions or concerns we’ve seen regarding vegetable gardens, community gardens, and farmers markets.  It’s a good time to talk about some of the practices that we should be doing to prevent other human pathogens from handling produce, like E. coli and Salmonella, and how those might fit into preventing the spread of COVID-19. 

First things first

First off, we have to remember that SARS-CoV-2, which is the virus that causes COVID-19, is not a food borne illness.  I repeat: COVID-19 IS NOT A FOOD BORNE ILLNESS. This means that it is not spread through the consumption of contaminated food like E. coli and Salmonella.  I’ve seen many instances of people spreading fear about food online, with many suggesting using soap or bleach on food to minimize risk.  Those steps are both unnecessary an actually pose a poisoning risk.  There is currently no evidence to suggest that COVID-19 is transmittable by food or food packaging.

The risk from food (which is considered minimal by experts) is from cross-contamination from food or packaging onto hands or onto surfaces that are then touched by hands.  The virus would then have to go from a persons hand to mucous membranes in the respiratory system by something like touching your face or picking your…..well, we won’t go there.  The best defense against this isn’t necessarily sanitizing all the food you buy, but washing your hands after you handle it and sanitizing any surfaces that packaging or shopping bags touch. 

Factsheet: Is Coronavirus a concern on Fresh Produce?

But while we’re on the topic of pathogens and food safety, it’s a good time to talk about some general guidelines that can not only help stop that potential SARS-CoV-2 cross contamination but also food borne illness in general.

Minimizing the risk from produce even further

Whether you grow it in your own garden, buy it at a local farmers market, or purchase it at the grocery store, produce has a minimal risk when it comes to COVID-19. 

Factsheet: COVID-19 and Food Safety – Shopping and Handling Groceries

To minimize the very small risk of cross-contamination even further and (probably more importantly) to also reduce any risk from common food borne illnesses, proper washing of the produce should be practiced.  But do you know how to do that?  Maybe…and maybe not.  Here are some steps to help out. 

  1. Wash your hands. The most common pathway of contamination for produce is from human touch.
  2. You should use clean water that you would use for drinking (like out of the tap) and not use any bleach or soap. 
  3. Providing gentle friction with your hands or a produce brush or by rubbing the produce together is sufficient. 
  4. If you’re washing a lot of produce at once, say from a large harvest, and you’re using a tub full or sink full of water to wash multiple “loads” of produce, keep an eye on how dirty the water gets and refresh it when it gets discolored.  Remember that washing produce in a tub or sink of water can also present a cross-contamination issue where contaminated produce contaminates the water. 
  5. When in doubt, discard produce you may think is contaminated or wash it separately. 
  6. To reduce risk of cross-contamination, consider a “single pass” washing technique where you spray the produce with water and it doesn’t sit in water with other produce. 
Image

Food Safety in the Garden

There are a few things we can do in the garden to help stop the spread of human pathogens.  Most of them are common sense things that most people don’t even think about.  Devout GP readers may remember my little missive around this time last year about the food safety risks of using manure in the vegetable garden (See: The Scoop on Poop).  Beyond those musings on manure, though, gardeners can take some additional steps to reduce potential contamination.  Those are:

  • Wash your hands.  I know it sounds simple, and maybe even more so now that it has been drilled into our brains, but washing your hands before you garden is one of the best ways to reduce the spread of pathogens.  It is especially important to wash your hands before you harvest produce or handle harvested produce.
  • Use clean containers for collecting and storing produce.  Using harvest baskets, tubs, and totes is common, but the ones that are best in terms of food safety are those that can be washed and sanitized.  This is one tactic that many farmers are encouraged to use as well.  Plastic tubs, totes, trugs, and crates are probably best as they can withstand washing and the use of a sanitizer like bleach.  Wooden or woven baskets may be cute, but they’re harder to clean and can hold on to pathogens. 
  • Look for signs of wildlife in the garden.  Aside from eating more than their fair share of produce, wild animals can also present a food safety risk especially from their droppings.  Look for signs of animals in the garden and especially take note of any droppings.  Don’t harvest produce that has signs of droppings on them.  Many of the big produce recalls over the last decade have been a result of wild animals like birds or wild hogs. 
  • Keep pets out of the garden.  As much as you like to have Fluffy or Fido in the garden, they present a risk just like wild animals do. 
  • Wash produce using proper techniques (previously discussed).

Best practices for minimizing COVID-19 risks at Community Gardens (and Farmers Markets)

You can practice handwashing anywhere. You can buy portable hand washing stations or build this DIY Model. Plans: https://www.youngfarmers.org/fsma_resources/portable-handwashing-stations/

One other aspect of gardening that could provide some risks for the spread of COVID-19 are the more social aspects of gardening, such as community gardens.  I’ve had several local gardens reach out for best practices relating to minimizing risks in the garden – from handwashing stations to shared tool use.  Thankfully, NCSU Extension was quick on the draw with resources for lots of aspects of the food system in terms of reducing risks from COVID-19 and they graciously allowed other universities to distribute these resources.  Below are some links to the resources that would be helpful to gardeners:

COVID-19 FAQ for Community Gardens

And since some gardeners may sell at (or at least visit) farmers markets:

COVID-19 FAQ for Farmers Markets

Click here for all the resources developed by NCSU

A tale of two weeders – lessons in managing aggressive, perennial weeds

Choose your weapon in your war against weeds!

Nearly every afternoon for the last two months, curious drivers have noticed two people meandering through a pasture, following a narrow pathway formed by two lengths of string tied to fenceposts. It’s us! Thanks to COVID 19, we are no longer able to go the gym for a workout so like many other gardeners we have put that unexpended energy into our gardens and landscapes. And in this case, cattle pasture.

The herd

The lettuce from hell

My family has raised free-range, grass-fed beef cattle for over 50 years, and with our move to the family farm in 2017 we now oversee much of that business concern.  Managing pasture weeds is just one of the battles associated with providing quality browse for the cattle. Inedible plants like bull thistles (Cirsium vulgare) and tansy ragwort (Senecio jacobaea) are taprooted species, easily removed with a single weeding. But not Canada thistle (Cirsium arvense), colorfully and accurately described as the “lettuce from hell” thistle. Though it’s highly nutritious, the prickles are so unpleasant to sensitive muzzles that cattle avoid it.

This aggressive, herbaceous perennial (native to Eurasia, not Canada!) has an extensive underground root system, consisting of thick, propagative roots which give rise to more roots (which grow vertically and horizontally), and shoots which pop up seemingly everywhere. They do NOT have rhizomes, and they do NOT have stolons. Apparently, Canada thistle has a unique, hellish morphology allowing it to spread rapidly – 6 meters per year in the U.S. – if not managed (you can read more about this topic here).

Applying plant physiology in the field – literally

But there is a weakness in this aggressive root system – and that weakness is the need for resources provided by the aboveground thistles. The perennial root system stores resources over the winter, then pumps them into new shoots in the spring. This is the chink in the armor – these shoots are USING resources, not providing them, until they slow their own expansion. So the trick is to remove the shoots as soon as they appear, forcing the roots to expend more resources to make more shoots, and so on.

So this is why we are in the field, every day, removing those shoots, systematically clearing areas and then repeating in another week or so as new stems appear. And it’s working. But here is the lesson we are learning that gardeners can apply to their own gardens and landscapes.

Dueling weeders

We have two weeding implements: the “winged weeder” and the “uproot weeder.” The first is my choice, though it is NOT a solely a “stand up tool” for this purpose. My husband prefers the uproot weeder, which twists and pulls out a core of soil along with the root. I don’t like this latter method, as it creates a hole through which sunlight can penetrate, activating both photodormant seeds and stem regrowth. But to each their own.

However, we found another reason that the coring method doesn’t work well: those cores can stay moist and guess what? The stems generate new roots, and left alone could easily re-establish if conditions were cool and moist. Just what we need.

Done properly, this is a quick and effective means of removing the entire root crown of new plantlets

My preferred method, using the winged weeder, is to break the underground stem off as deeply as possible and then work it out as seen int he video. For this you need protective gloves, but not thick ones. You need to be able to feel what you’ve got a hold of.

These gloves are thick enough to protect against most thistle prickles, but thin enough so you can feel what you are holding

Hold onto the base of the thistle gently and as you work the weeder under it move your fingers down BELOW the crown. It feels like a tough bulge and you want to hold onto the smooth stem below it. Otherwise it is likely to break off, leaving the crown viable. You will hear, and possibly feel, a satisfying pop as you dislodge the stem from the underground system. Pull it up carefully. The remaining hole is tiny, and easily covered by pressing on it gently with one’s boot.

My chicken boots close the small holes left by the winged weeder

The advantages to physical removal of perennial weeds

  1. I’m getting out into the fresh air and have lost more weight in the last month than I lost going to the gym in the past year.
  2. I’m controlling a noxious weed population without the use of chemicals.
  3. I’m developing a technique that can be applied to ANY herbaceous perennial in ANY garden or landscape. That’s the great thing about plant physiology – the pattern of resource allocation is not species dependent. Think horsetail and bindweed, for instance.
Our battleground – the enemies are well hidden

Do keep in mind that perennial weeds are perennial problems! We aren’t EVER going to have a thistle-free field, but it will become a more manageable problem as the infestation will have been dramatically reduced this year. I’ll try to do some updates over time.

Tools, tips, and terrible traditions for raised beds – Part 2

Native topsoil – with native rocks.

Last month I started a series on raised bed gardens, focusing on materials and designs. Today I’ll mention some of my favorite tools and materials for putting everything together and getting ready to plant.

Getting your soil ready for raised bed use

Tools and materials: shovel, wheelbarrow, tarp, soil screens

If you’ll recall from my previous post, I like using native soil for raised beds (assuming it is not contaminated with heavy metals or other undesirable chemicals). We have glacial till soil, which means it has a LOT of rocks of various sizes. The bigger ones are easy enough to lift out, but what about all the other ones?

First, realize that SOME rocks are no big deal. In fact, they are important in reducing soil compaction. Finely sieved soil, especially clay soils, will be more prone to compaction than a soil with small pebbles scattered throughout. But the larger rocks are a nuisance.

Small rocks in your raised beds won’t interfere with vegetables but help prevent compaction of heavy soils.

For the first pass through, I have found a plastic crate to work really well. It’s lightweight and the holes are large enough to let soil move through quickly, while retaining larger rocks. I like the milk crate size as it’s easiest to handle. Just set the crate in a wheelbarrow or on a tarp, fill it full of rocky soil, pick it up and shake.

These plastic crates are sturdy and easy enough to lift when filled with soil.

The rocks left in the soil for the most part are easy to work around, and you can always pick out the larger ones as you go (my personal choice). Or if you want to give it another screening, you can build wooden frames with different gauges of hardware cloth, or chicken wire, to remove more of the rocks.

This is a simple soil screen built with 2×4 boards and hardware cloth.

This is a time-consuming process, but the benefit is that you don’t have to top off your beds every year. Your native soil will not be subject to high levels of decomposition and subsidence as will many commercial topsoils with their high organic content.

When you’re ready to fill your beds, be sure to add more soil than you think you will need. It is going to settle, and you may need to add a little more the second year to bring it back to your desired level. But you shouldn’t have to add any more in the future.

Water and time will help soil settle to its final level.

Throughout the soil preparation process, be sure to work when the soil is dry, or no more than just damp. Working wet soil is difficult, and wet soil compacts.

But what about heavy clay soils?

Unless you’ve done a soil texture test, you really don’t know what you have. So before you take another route, make sure you really have a heavy clay soil. If it’s just compacted, then proper mulching will solve that problem too. If it’s truly a heavy clay – let’s say over 40% – then yes, this soil might not be best for a raised bed. In that case, I would suggest finding a different topsoil mix, where clay is no more than 30%. Lay down a membrane to keep this soil separate from your native clay soil. Your raised beds will now function more like giant containers, and you will have to make allowances for drainage along the sides of the beds.

You can estimate how much clay you have in any soil type using this chart.

Your beds are ready – how to keep them that way before planting

Tools and materials: coarse organic mulch, wheelbarrow, mulch fork or shovel, rake, soil temperature probe

A mulch fork will make your life so much easier!

Once your beds are filled, it’s important to get them planted as quickly as possible to prevent continued erosion of that bare, loose soil by wind and rain. If you aren’t immediately planting, then you need to cover the soil with a protective mulch. The only choice you have, if you wish to keep your soil environment hydrated and aerated, is to use a coarse organic mulch. Sheet mulches are not advised since they will interfere with water and air movement. Even if you don’t have plants in the soil, there are microbes and beneficial animals that need a constant influx of oxygen and water. A coarse organic mulch, installed to a depth of at least 4 inches, will facilitate water and air transfer and also keep weed seeds from germinating.

Keep unplanted beds protected with coarse organic mulch.

If you’ve been following my posts over the years, you already know I’m going to recommend using a wood chip mulch. Its benefits to soils and soil life is well established and it is easily moved once it’s time to plant. But you can use pine needles, straw (not hay!), and other coarse organic materials for this purpose. Fine textured organic materials like compost should never be used as a mulch, as thick layers of compost are more restrictive to gas and water movement and also facilitate weed growth. Save compost for a thin topdressing when your soil anywhere on your property is in need of organic matter, and be sure to cover it with woody mulch to keep those weeds out.

This thermometer will help you plant seeds at their optimum time.

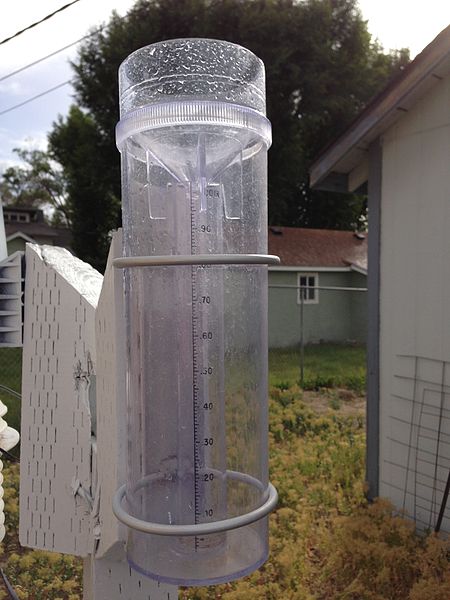
While waiting for the right time to plant, consider purchasing a soil thermometer. They are inexpensive and easy to use.  Good publications on growing vegetables will tell you what the soil temperature should be when you plant: planting too early can lead to reduced seedling survival. And while you are waiting you can install a rain gauge nearby, so you can monitor irrigation needs throughout the growing season.

What’s next?

Next time we’ll discuss the dos and don’ts of raised bed maintenance during the growing season and before planting the following year. Most of these practices are adaptable to traditional vegetable gardens, so be sure to check it out!

Sustainable gardens?

Natural ecosystems like this woodland in the Chiricahua national monument in Arizona maintain species density over time because the inputs are consistent with the plants that live there and the outputs are recycled.

The concept of sustainable agriculture is not new and the idea of sustainable gardens is likely just as dated. Sustainability as a concept can be applied to soil, farms, gardens or life in the biosphere. The second law of thermodynamics says that all systems tend toward thermodynamic equilibrium where there is maximum entropy (randomness). In functional ecosystems equilibrium is achieved to a degree, and plant, animal and other species are at stable levels. Ecosystems evolved over millions of years to develop connections between individuals creating support networks, predator-prey cycles and nutrient cycles. Inputs are adequate to “sustain” the system and outputs are all recycled. When we create our gardens we are setting up a system that we maintain through inputs and we appreciate the outputs, and it keeps us interested and involved in pushing back the entropy.  In almost all cases gardens are not natural systems and if left untended will become more random, weeds will grow, poorly adapted plants will be overrun and the balance will change to something matches the inputs and outputs of a sustainable system as dictated by the location/climate/soil, etc. 

Sustainable gardens rely on low inputs with maximum outputs. The plants grow over time with little maintenance, pest pressure, fertilizer or water…

The key to a sustainable garden is understanding inputs and outputs and the flow of energy in your system. The reason I like pristine ecosystems is that I don’t have to add inputs to them to take part in their beauty. As long as I don’t interrupt what is going on by breaking connections between organisms unwittingly, the system is self sustaining. Imagine the garden of Eden that always bears fruit and flowers with no inputs from you the gardener. You just walk into the garden and bask in it sbeauty occasionally eating some delicious item you find there. Well we all know that our own circumstances are far from this reality. Getting a garden to provide the aesthetics (beauty) or food (both outputs) often requires us to provide heavy amounts of inputs. Inputs are mostly energy in the form of kinetic or work energy of the gardener, hydrocarbon energy in the form of electricity to run gadgets or fuel to power mowing or clipping equipment, or fertilizers which may be derived from fossil fuels or from the sun as by products of plants. Energy is also the main input into plant systems that may be in your garden. Light contains the energy for their growth. Finally cash money is easily converted to all forms of energy. You can purchase labor, fertilizer, any number of garden amenities bypassing the personal output of your own kinetic energy. Or you can garden smarter and avoid large energy inputs by creating the sustainable garden…

So how do we get a sustainable “Garden of Eden”. First, recognize that not all gardens are the same; they have different functions and purposes. Some are for aesthetics only. Some are for food production. There is a wide body of research that shows gardens and green environments sustain our health; both physical and mental (this would be an output). So a garden is not sustainable if it does not appeal to you or produce enough food or sustenance to justify the inputs. Gardens are like checking accounts in a way; we put in deposits (inputs) and we withdraw benefits (outputs). If the amount of inputs generate the required outputs the garden is sustainable. So since money converts to energy and labor the more money you have the more complicated and detailed your landscape or garden can be, but entropy will have its way with this kind of garden with out extensive inputs. Water thirsty plants, greenhouse cultivation, weed and other pest control, poorly adapted plants and wide swaths of turf all require greater inputs.

Hardscape such as walls, patios, pathways, fences etc. do not use many inputs over time, require no water or fertilizer, pruning and can be very low kinetic energy (maintenance). If done well they add aesthetic value to the outputs

-Increase Hardscape
Hardscape includes landscape elements such as walkways, walls, boulders, patios, sculptures, small out buildings etc. Since hardscape is not green or growing it uses no water, requires no pruning or other tasks to maintain. Installing strategic hardscape can improve the appeal and functionality of a landscape while cutting down on the sustainable square footage that you are maintaining. It is often wise to consult a landscape designer or architect to optimize the uses and functions of your garden.

-Mulch Mulch Mulch
Fresh mulch from chipped tree trimmings is essential for a sustainable landscape/garden. Fresh wood chips are the best source of energy for microbes when used as a surface mulch. Wood chips layered four inches thick over bare soil will improve many aspects of soil, essentially making the soil more “sustainable” for your garden by conserving moisture and adding nutrients over time (for more on mulch see the paper by LCS referenced in the GP site). Fresh wood chips are best around perennials but can also be used as walkway material in vegetable gardens, as mulch around berries and fruit trees and around perennials like rhubarb and asparagus. A well mulched garden uses less water and, in time, requires little or no fertilization.

Mulch is essential to the sustainable landscape. this aloe garden was heavily mulched initially. Its rocky soil was improved and weeds reduced thereby reducing labor energy inputs

-Maintain Light
Sunlight is the main energy input into your garden and is necessary to sustain the plants growing there. Plants that are adapted to full sun when shaded out by growing trees, shrubs or other tall plants become disease prone, produce less fruit, and are less attractive. To keep vigor up, ensure that plants get enough sunlight by pruning back intruding branches from nearby trees or other shade providing plants. Remove trees that have outgrown their space in your garden and replant with size appropriate specimens.

-Use Enduring Plants
Grow what grows well for you. Time spend on poorly adapted and fussy plants will decrease the sustainability of your garden and increase the necessary inputs of time, labor and energy. For oranamental gardens use enduring plants. Flashy annual plants look good for a few months but require replacement regularly. Long lived perennials used as specimens in a garden add value over time with little care, pest control or fertilization. I term these ‘enduring plants’. Enduring plants grow slowly but live long lives. For those who grow food vegetable gardens are a necessity and plants are mostly annual, however perennials are also an option. Rhubarb is an enduring perennial, berry vines, fruit trees, asparagus and grapes provide food year after year with low maintenance relative to annual crops. Keep fussy, pet plants to a minimum, and in containers so they can be moved when necessary to accommodate their needs.

Enduring plants live long lives, add value and are low maintenance additions to landscapes

-Recycle Reuse
Gardeners spend a lot of energy clipping, removing and throwing away unwanted yardwastes. Consider composting trimmings and weeds and recycling these materials back into the garden. This reduces energy spent processing these materials and decreases the cost of purchasing organic materials for your garden. Lawn clipping, leaves, and tree trimmings (when shredded) can make a high quality compost if carefully produced. Many extension offices have publications on home compost production.

Study of natural ecosystems provides an interesting window into sustainable landscapes. Plants grow with each other in a balance or harmony that results in a sustainable landscape. In these natural settings, litter accumulates under tree canopies (think mulch in your garden) providing a continued source of biological and mineral motivation for soil to be productive. Annual plants grow each year where sun is abundant and shade loving perennials inhabit the understory of trees. The right plants in the right place create a beautiful environment.

Flowers for Barbara: Cultivating Hope in a Pandemic

Ever since humans started gardening and farming, the practice has had central importance in our lives. As we processed out of the agrarian age, some of us humans may have lost the connection to the importance of growing plants to our everyday lives. We rely on the growing of plants to feed us, to produce medicine, clothing, and shelter. We use plants to provide beauty in our landscapes and our homes. And perhaps one of the positives of the current pandemic is that many people are turning to plants as a way to assuage their fears. Being one of those extension people whose mission is to teach people gardening I’ve seen some of this first hand. But a phone call I received this week really drilled into my soul how important plants are not only for the food they provide, but also the way they effect our mental well-being.

Victory garden - Wikipedia
Victory Gardens Poster
Source: WikimediaCommons

As the last few weeks have unfolded, we’ve seen seed companies struggle to keep up with orders, garden center shelves empty of vegetable seeds and plants, and a general movement that what the National Garden Bureau is calling Victory Gardens 2.0. Many are saying that vegetable seeds are the new toilet paper. There are a few reasons that people are turning to gardening in a time of crisis. Gardening is seen by many as a grassroots way of ensuring food access. In addition, the ability to grow one’s own food not only produces said food but also provides a feeling of self-sufficiency for the gardener. The mere act of knowing that you have some sort of control over your access to food, because you can grow your own, provides a sense of calm. It helps ease some of the uncertainty of wondering if there will be produce at the grocery store or if you will have the financial stability to afford it. During the economic crisis of 2009, the National Gardening Association estimated that home food gardening (vegetables and fruit) increased by 19%. It might be too early to tell, but I suspect those numbers will be higher this year.


But lets get back to the phone call….
Gardening and plants also have a positive effect on mental-well being in a general sense. The act of gardening can produce a meditative like practice (unless you’re cursing at weeds or violently ripping out diseases plants – but those acts may provide catharsis). But research also shows us that just seeing nature can have a calming effect on our minds.

Image
Insult to injury: 6+ inches of snow after the frigid temperatures
Source: Scott Evans, UNL

This was so apparent in my recent call. I had received a voicemail from an elderly gentleman that asked for a call back as soon as possible so that I could talk to his wife (we’ll call her Barbara). I had time between back to back Zoom meetings, so I called. The gentleman answered and after I introduced myself he told me that Barbara had a question about flowers. After a few seconds, a frail, halting voice asked me if all the tulips and daffodils were dead. Over the previous few nights temps had dipped below the normal lows and many plants had seen some damage, including flowers of many early season bloomers.


I answered briefly that some of them were likely damaged, that the blooms would be killed but the plants would be OK. What happened next….I didn’t expect. Full on, gut-wrenching crying. The kind of sorrow that you can feel throughout your being. After a few seconds, between the gasping sobs, she uttered the words “I don’t think I can take it anymore. First we can’t see people. Now the flowers are gone.”


After the initial jolt, I tried to respond as I’ve been trained to do (we have luckily received training in mental health first aid to help clients who are in distress) – calm reassuring words, asking if she was OK, and providing positive affirmation that once the temperature warmed up there would be blooms again. Though she was so overwhelmed that she just said goodbye and hung up.


I was shocked. It took a few minutes for me to compose myself. I don’t often deal with clients where there is such an emotional response (hats off to my entomology colleagues who have to deal with telling people that they have bedbugs or that they might be suffering from delusory parasitosis). After I gathered my thoughts, I felt that I needed to call back – the emotional response was so strong that I wanted to make sure there wouldn’t be issues of self-harm or other effects.


In my return call, Barbara and I discussed that there would be more flowers once the weather warmed back up. We discussed our mutual love of plants and how they make us feel. She sees the flowers in the neighborhood when they leave their small apartment for errands and it makes her feel better. And even though there were still tears, both of us were in a much better place. Out of the blue, I asked if it was OK if I brought her flowers to enjoy until the weather warmed up. At first she was hesitant – she didn’t want to cause trouble. But after I assured her that making sure she had flowers would do me just as much good as it would her, she and her husband agreed. I told them that after I got done with my work for the day, I would find some flowers and drop them off on their doorstep.


I needed to make a (now infrequent) run to the store for necessities any way, so while I was shopping I picked up a potted plant at the grocery store (the one I thought would be easiest to care for). I went home and wrote a note, wrote down some simple directions, and delivered the flowers. As I walked away, I heard Barbara’s husband open the door and tell her that there was a surprise for her.


I have to say that I can totally understand this reaction that may seem excessive to some. Many people are dealing with the stress of the pandemic, some better than others. Here was one thing that was giving this lady enjoyment – seeing the flowers blooming when she is able to get out of the house. And that one enjoyment had been taken away by a late freeze. It drove home to me the fact that gardening and plants are essential for many. For the food that they can provide, both for nourishing our bodies and for nourishing our spirits. Plants are providing us hope for the future and calm for the present.

While I may never hear back from Barbara and her husband again, I can tell you that making that one connection through plants was definitely a boost for me. My wish is that those flowers give her hope for the future. A sense of calm knowing that one day things will return to normal, and the knowledge that one day soon the flowers will indeed bloom again.

Flowers for “Barbara”

Tools, tips, and terrible traditions for raised beds – Part 1

Raised beds a month after planting. Adult beverage not harvested here.

Many of us are sheltering at home during the COVID19 outbreak, and that might mean you’re spending more time in the garden. It certainly seems to be true based on my Facebook feed. And given that even more people are showing interest in growing their own food, I thought some practical posts on raised beds dos and don’ts might be fun. John Porter did a nice review of some of the misperceptions about raised beds last year, and that’s worth reading as well. This week’s post will be on siting and materials needed for building a raised bed. At the end of the post is a list of online resources with more information.

Trees to the south will shade vegetable gardens throughout the growing season.

Location

To grow most vegetables, you need direct sunlight at least six hours per day, and more is better in terms of productivity. That means full, unfiltered sunlight, so that your seeds and plants get the entire light spectrum. You’ll need to take into account seasonal changes, like the sun’s angle and the appearance of deciduous canopies, before choosing your site.  If part of your bed will unavoidably be in the shade, simply choose plants that will tolerate part- or full-shade conditions for that location.

Building materials

Construction of raised beds. Carpenter contracting not available.

We use pressure-treated hemlock and Douglas fir for our beds, which measure 8′ by 22′ (at the outside dimensions.). Modern pressure treatment uses alkaline copper quaternary, which is nothing like the toxic chromium-arsenic cocktail from earlier times. You don’t have to use wood, of course – other materials will work but do educate yourself on any potential leaching issue into the soil.

Underneath the beds is….nothing. If our underlying soil was contaminated with heavy metals or some other material, we would put down a membrane first to keep our raised bed soil separate from the contaminated soil. But we have no issues, so it’s soil next to soil, meaning we have great drainage.

Planting media

Native topsoil stockpiled from construction project.

The best material for your raised bed is actual native topsoil (if you can find it). If you don’t have enough of your own, see if anyone locally is giving away “free dirt.” People who put in decks, ponds, and other hardscape structures often don’t realize their discarded dirt is real topsoil. Do be cautious with this potential windfall. Ask about pesticides or other chemicals that may have been used in the original landscape. And you should do an initial soil test to see your baseline nutrient values. It’s easier to incorporate amendments BEFORE you fill your beds.

There are exceptions to the native topsoil recommendation – for instance, if your soil is contaminated with heavy metals from industry or agriculture, you shouldn’t use it for growing edibles. In this case, you need to use a commercial topsoil, and isolate it from the underlying soil as described earlier. Commercial topsoils can be heavily amended with compost and other organic material, meaning you have much less actual soil and will constantly need to refill your beds as the organic matter decomposes. Try to find a mix with the greatest possible percentage of topsoil.

Read the label! Is there actually soil in potting “soil”?

The worst choice of all are soilless media. This includes nearly all bagged potting “soils” at garden centers. Read the contents panel carefully – does it say the word “soil” anywhere? If it’s all organic material, you are going to have to fill your beds every year. This is both expensive and time consuming. Plus you could very well have excessive levels of some nutrients that will build every year as you add more.

As you make your decision about what to fill your raised beds with, consider what you will be growing, If you are only growing summer crops, it will be easier to amend the bed every year. If you have a winter crop, or perennial herbs, you can’t incorporate more material without destroying the existing rhizosphere and your plants. Perhaps that means you need two raised beds, or at least have a divided system.

Design

A U-shaped or keyhole design.

This part is really up to you! Raised beds should be high enough to work comfortably, big enough to hold what you want to grow, and narrow enough to be able to reach all the way across (for one-sided access) or halfway across (two-sided access).

We wanted a design where we could include a critter fence. Once in a while a deer might wander through our property, and rabbits certainly do. The hardware cloth fence keeps larger animals out and also provides a great trellis for beans and other climbers.

Gated garden and critter fence.

We opted for a U-shaped system, with a gate on one end. The inside edges of the beds are topped with 2×6 boards that can be used as a bench. We did run stabilizing boards between interior and exterior posts. They are buried and don’t really interfere with the plants. (Note to self – next time put those stabilizing boards in BEFORE filling with soil.)

What’s next?

Next time I’ll discuss some of my favorite tools for using in raised beds and possibly other places. And we’ll touch on the importance of soil testing before you add organic matter or other fertilizer to your beds. In the meantime, be sure to check out these resources:

Are raised beds for you? This comprehensive fact sheet goes into more detail. https://pubs.extension.wsu.edu/raised-beds-deciding-if-they-benefit-your-vegetable-garden-home-garden-series

Home vegetable gardens – an overview. https://pubs.extension.wsu.edu/home-vegetable-gardening-in-washington-home-garden-series

How much organic material is too much? Don’t overdo – read this first! https://pubs.extension.wsu.edu/organic-soil-amendments-in-yards-and-gardens-how-much-is-enough-home-garden-series

A root’s life

Roots are the unsung heroes of plants! But unfortunately your every day hard working root gets little respect from gardeners. “We are so taken for granted” whined Radix– “Its just so hard, we are all down here in the dark, nobody see’s us, we get no admiration, yet we work so hard!”. Radix is your every day “working root” mostly ignored by gardeners. Even though the seasons change, and leaves come and go, Radix is growing most all the time! Gardeners love the color of flowers, the texture and shape of foliage, the architecture of tree tree branches and admire all the things plants do above ground. They beautify the world, provide us food, and provide oxygen for us to breathe. We heap our admiration on above ground functions of plants, but without Radix, and all the other roots, the above ground parts would perish.

Healthy roots growing under wood chip mulches.

Growing plants is about growing the whole organism. We may pick the fruit, admire the flowers, or rest under the shade, but none of it would be possible without proper care of root systems. Roots have varied functions—they provide anchorage so the plant can stand upright; they absorb minerals and water; and they store energy in form of starch. Plant shoots grow in the realm of light and much of their adaptations revolve around catching sunlight. Their atmosphere is mostly nitrogen and oxygen. Roots grow in the realm of soil and darkness, their atmosphere is oxygen restricted and dominated by carbon dioxide and even toxic gases like sulfur dioxide, and methane if soil conditions become saturated. Just like all parts of plants, oxygen is required by roots to respire or utilize chemical energy for their growth. Poor Radix can choke if the oxygen supply is limited.

Shoots live in a herbivorous world. Plants get eaten by animals. Because they have buds of all kinds they can grow back, leaves may contain alkaloids and other molecules that reduce herbivory, and plants can arm themselves with spines, thorns and prickles, but roots live in a microbial world. While microbes can grow on most plant surfaces, the root system is bathed in microbes (the soil food web). Not only do roots have to defend themselves underground but they have specific alliances that let them do that! As you know from some of my other blogs, root pathogens can kill all ages of plants from seedling to mature oak trees. The happens when pathogens (which are opportunists) are not well regulated by soil microbes, or when plant root systems are stressed in some way. Large populations of soil bacteria, fungi, nematodes and arthropods limit the development of opportunistic pathogens. These organisms are supported by soil carbon or organic matter which is essential to their abundant reproduction in soil. This carbon is best supplied to root by mulching with freshly chopped Arborist chips.

To examine root health, expose the cortex with a knife. It should be white, an unhealthy root will be discolored. Many roots are black on the outside and this is normal as they have melanin in their epidermis as a protectant against microbes.

Roots store carbohydrates made in leaves as starch. This stored energy can be used for their growth or redistributed through the plant later. In order for stored starch to be used, it must be converted back to glucose (by enzymes) and then broken down through chemical respiration. These processes take oxygen which is limited in soil as a function of depth. The deeper you go the less oxygen. This is why trees and most plants have roots in the upper foot or so of soil. This upper foot of soil is sensitive and fragile. It can be compacted by foot traffic or equipment and lose oxygen content. Weed barriers, fabrics, and sheet mulching deprive soil of gas exchange, and the amount of carbon dioxide increases at the expense of oxygen under these barriers. Too much water can fill soil pore spaces causing saturation that usually contain oxygen and decrease the amount of available oxygen since it does not dissolve well in water. All of this also applies to the soil microbial communities which also require oxygen to grow and thrive.

A healthy soil contains plant roots (top) and an abundance of micro organisms. These soils will be porous, contain higher levels of organic matter and mycorrhizal fungi (white portion at the bottom of image)

So how do we respect Radix and all the other hard working roots? Promote soil health by avoiding tillage and cultivation. Use Mulches made from fresh tree trimming chips, avoid compacting soils with machinery, and do not shock soils with excessive application of manure, fertilizer, or water which can perturb the microbiology of a soil. I also suggest you learn to admire roots for all that they do for plants in your garden. Check in with Radix every now and then by digging down and looking at root systems. See if they are growing. Try to learn the seasonality of peak root growth so that you avoid practices that may harm roots during their critical growth periods. Be alert to the symptoms of root rot on garden plants especially at the tops of plants such as leaf drop, shoot dieback and wilting.

Planting Prognostication: Understanding last frost and planting dates

Except for areas of the US that are more tropical like southern Florida or Hawai’i, most gardener’s planting schedules are set around winter weather and the possibility of frost or freeze.  And even for gardeners in those more tropical areas, planting sometimes needs to be planned to schedule around the extreme heat of summer.  Understanding these planting times can really lead to success or failure, especially for vegetable gardens, tender annuals, tropicals, and non-dormant perennials.  There are a few tools that help us understand weather patterns and predict critical temperatures for planting, namely the USDA Hardiness Zone map and the Average Last Frost/Freeze dates.  The USDA Hardiness Map shares data on what the average coldest temperature is, which is key for selecting perennial plants that you want to survive the winter.  However, to know when to plant we look at the average freeze and frost dates.  There seems to be a little bit of mystery, and even confusion, around the dates and how to interpret them, so let’s take a little time to understand them a little better.  And since my background is in vegetable production, I’ll share a bit more detail there in terms of plants – but you can translate the information to ornamentals, especially those that are frost tender pretty easily. 

Understanding Average Last Frost Date

What is the average last frost date and how is it figured?  The average last frost date is exactly what it says it is – the average date at which the probability of frost has diminished.  Just how diminished really depends on the source, so we’ll follow up with that in a bit.  The data is computed by NOAA (National Oceanographic and Atmospheric Administration) and the National Weather Service to determine the probability of temperatures relating to frost and freezes based on weather data for an area over the last 30 years.  They compute the likelihood of a light frost (36 F), frost/heavy frost (32 F), or freeze (28 F) at three different probability levels – 90% (the temperature is very likely to happen), 50% (the possibility is 50/50), or 10% (the temperature is unlikely).  This tool from NOAA provides a chart with probabilities for locations throughout each state.  

This data is typically collected and analyzed every ten years or so.  I’m not exactly sure when the last data was analyzed, but I did find some maps on the NWS referencing the period 1980/81- 2009/20 (below).  Therefore it is likely that new data will be released either this year or next year.

Temperature hardiness of common vegetables

Awareness of tolerance is especially important for vegetable crops, as the growing season and expected productivity of the plants.  The following chart is a general guideline, and your mileage may vary based on cultivar difference, microclimates, and other factors.  Also note that these temperatures are for both planting in spring and fall kill temperatures.  Some of the more tender plants, like tomatoes, may withstand colder temperatures when they’re mature so they may be less susceptible to frost at the end of the season vs. the beginning of the season. 

Season extension techniques, such as row covers can be used to protect tender plants in the spring and extend harvests in the fall.  Row covers can be selected by the degrees of protection they deliver.  For example, a row cover may offer 4 degrees of protection.  This allows the protected plant to withstand air temperatures 4 degrees colder that what it would unaided. For fall crops, note that plants may stop growing well before the kill temperature but will hang out in “stasis” until they are killed. The above NOAA chart provides probabilities for both spring and fall – allowing you to not only plan for spring planting but also for fall crops.  For scheduling fall crop planting dates, find your first frost date, count backwards the days to maturity (from the seed packet or tag), and add a few weeks for a harvest window and for the slowing growth as temperatures drop.

The Problem with Probability

These probabilities are based on past weather data, so keep in mind that these dates are used as a prediction not as a guarantee.  It is especially important to remember this as weather uncertainty increases with climate change.  Last frost could occur well before or even well after these predictive dates.  This also begs the question – which probability should you use?  Looking around at different sources, you might find sources that use either the 50% or 10% probability statistic, and there seems to be a bit of disagreement as to which one should be used.  Based on the data for my region, I’ve seen sources share both dates.  It really comes down to how much of a gamble you want to take or how much you want to push up harvest or maturity.  If you plant on the earlier 50% probability date you may end up having to cover the plants a few times to protect them from frost.  But each day that passes means that the chance of frost or freeze decreases.

Whenever I give a talk here at home in Omaha, I often ask my audience to guess what the average last frost date is for planting.  Invariably, the answer I get is Mother’s Day…which I guess works as a guidepost in general.  However, looking at the data (below), we can see that the 10% probability date for a 32 degree (killing) frost is May 4.  The light frost date is May 11 – plants may be damaged but not killed unless they’re very tender.  And the 50% probability date for a killing frost is actually April 21, which is the point where the probability of frost is 50% each day (and the probability shrinks each day.

Sometimes produce growers may opt to go early to get vegetables to market – which extends the sales season and allows them to charge a premium price if no other growers are selling.  Season extension techniques like high tunnels have also pushed back farm production dates.  As climate change makes weather more unpredictable, we may all be finding ways to alter the growing season as a norm rather than an exception.  Until then, we’ll rely on the data we have to make the best predictions.   

Sources:

https://www.canr.msu.edu/news/freeze_damage_in_fall_vegetables_identifying_and_preventing

http://www.gardening.cornell.edu/homegardening/scene0391.html

https://www.weather.gov/iwx/fallfrostinfo

https://www.ncdc.noaa.gov/cgi-bin/climatenormals/climatenormals.pl?directive=prod_select2&prodtype=CLIM2001&subrnum%2520to%2520Freeze/Frost%2520Data%2520from%2520the%2520U.S.%2520Climate%2520Normals

Potting Soil Poison

Gardeners often struggle to grow plants in containers. You may feel that you have a really black thumb at times when newly planted seedlings fall over dead or fail to thrive. The problem may not be disease or poor gardening acumen but rather your container media otherwise sold as “Potting Soil”. A trip to one of the big box stores or a larger retail nursery will offer gardeners many choices of bagged potting soils. They are marketed to give you the impression they will grow anything and everything. But do they?
Over the last couple of decades I have done comparative potting media trials where I plant small plugs (usually impatiens) three per six inch container. I go out and find every retail brand of potting mix I can find and plant them all up and then follow them for about two months. I’ve been thinking of revisiting the studies and seeing if anything has changed. I also want to test the assumption that you can’t predict the grow ability of a potting soil by reading the ingredient label as some research suggests. While there can always be a surprise with any given product, I think that from my many trials I can make some suggestions to improve the outcome of your gardening adventures in containers.

Soil on the left has no nutrients same soil on the right with 2 grams of ammonium sulfate added on the surface of the medium one time.

Growing media is not the same as soil. Since media are placed in containers, often plastic ones, they need to be very porous. Porosity of up to 50% is not uncommon in container media. The bulk of the media needs to hold water and minerals for plant growth. Usually an organic material that has a high cation exchange capacity is used. The darling of potting mixes has been Peat Moss. Since peat moss harvesting is damaging to the environment (see previous blog by Linda CS), many gardeners may want to avoid media with peat moss. Bulking agents that do not hold much water or nutrients are also added to “lighten” or aerate the medium. Horticultural perlite (expanded volcanic glass) is the most common. Sand is also sometimes used but it adds weight to the bag and is not preferred by manufacturers. Some media use bark or other wood products to provide greater porosity.
There are usually about 18 to 20 different media on the market at any given time and the results of growing plants in them is predictable. About 10 of the media will not grow anything very well, 5 give ok results and about 5 of the products will grow a nice plant. A lot of the reason for success or lack thereof is about nitrogen chemistry. If no fertilizer is added, the medium will likely not grow well. You can add your own fertilizer and make about  ½ of these poor growing media work. One quarter to one half a teaspoon (approximately 2gm) of ammonium sulfate usually peps up most media that are ok but lack nutrients.  This is an amount used in a standard height 6inch (15cm) diameter plastic container.  Larger containers and plants will require incrementally more fertilizer to achieve growth goals. 
Some media will not grow even when fertilized. This is because they may contain manures, or composts and manures that have added too much salt to the medium. Adding fertilizers to these products only makes them less growable. Sometimes these potting soils will improve with leaching but then fertilizer will need to be added back later to make up for what was leached away. Generally a salty potting mix is worth avoiding.
So how can you tell if you are getting a good or bad mix. You can start by reading the ingredient list. And you will need to decode that list to help you make some decisions. What manufacturers call things can be very misleading. Look for a medium that has fertilizer added and lists what kind of fertilizer was used. These media usually grow without help. Avoid media that use manures, they are not suitable container media ingredients.

Some potting soils claim they can grow plants bigger than others, some claim to be all organic and some claim to be friendly to the earth. This is all marketing. Look for a simple ingredient list that is fortified with a nutrient charge (fertilizer). Begin there. You may want to sieve the medium to remove large particles if you are growing seeds, add more bulking agent (bark, sand, perlite, pumice) for plants that need increased porosity such as orchids, bromeliads and cactus. Don’t be afraid to modify potting mixes to suit the needs you might have. If plants don’t grow, consider adding more nutrients. After growing for some time (months to years), many media will breakdown, and the plant will need to be repotted in a new medium.