A time to deadhead!

Summer is here in the west in a big way. We are just coming off of one of the largest heat waves ever recorded, and while temperatures are down they are not done. Its hot. Depending on where you live your gardens may have suffered. In the East Hurricanes are starting and extreme rains are occurring. I have images of bent over palm trees in Florida. No matter the season, plants respond with their own growth stages providing they are not blow away or burnt up by raging wildfires. Here in Arizona we have had moderately hot weather in my location but the garden is surviving with irrigation. My Iris plants remind me that it is long past time to deadhead and remove spent flower stalks. Deadheading is second nature to most gardeners and other than making the garden look better, you may not realize why you have or have not adopted this common garden practice.
Deadheading involves removing the spent flowers or inflorescences have withered.  Sometimes pruning back to a lower leaf or adventitious bud in the case of roses, or completely removing flower stalks in the case of German Iris is required.   The immediate result is a neater looking garden and an emphasis on remaining blooms. When the dead flowers are gone the remaining flowers look better the garden is refreshed. Depending on the plant there can be other benefits if deadheading is done consistently and is well timed.

This portion of the flower garden needed deaheading weeks ago. Even though I won’t advantage the plants by deadheading it will look better if I do.

We grow many kinds of plants in our gardens and deadheading has varied physiological impact depending on the subject being pruned. Properly timed, deadheading can extend the bloom of some plants for example Calendula.  However, Calendula produces lots of flowers and removing spent flowers can become an enduring task if you have a lot of Calendulas.  Deadheading some garden plants seems pointless such as impatiens which just regenerates flowers on its own. Deadheading soon after a flower passes prevents the plant from investing energy in seed development. If the plant has a long enough bloom cycle, so that energy can be put into other flowers then trimming back the flowering stem stems that are destined to fruit production often releases other buds to grow more flowers. Since photosynthate (sugars) flows in plants on a source-sink model, taking away the “sink” or developing fruit allows  energy to be used for growth elsewhere in the plant. The trick is to remove spent flowers soon because seed begins to form immediately after flowering and the plant will rapidly allocate its energy to reproduction once the flowers are pollinated.

with dead heads removed this corner of the garden looks a bit better

Not all garden plants respond to deadheading–the number of flowers some plants present is genetically regulated and dead flower removal does not promote more flowering (many bulbs produce only one set of flowers). Other garden plants will re-bloom if given a chance, and with deadheading (no matter what the flowering habit) the garden will look better without the dead flowers. Some bulbs can be deadheaded to prevent seed formation so that the energy is put back into the bulb or bulblets for next year’s display. Many roses will re-bloom after deadheading. This is not a wild-type characteristic of roses but a quality that has been selected for after years of plant breeding.
Deadheading can also be an excellent method of excluding diseases. Botrytis on rose blossoms and petal blight on Camellia are both controlled to some degree by removing infected blooms as soon as they are observed and disposing of them away from the garden.

This bag contains Penstemon with ripe seed heads ready for harvest and seeds for planting somewhere else in the garden.

Sometimes deadheading results in seed collection. Left too long, some plants go to seed but have not yet released their seed. If you want to save seed for propagation, strategic deadheading will allow you to collect seed while redirecting the plants growth patterns for more vegetation or more flower shoots. It is also helpful with our more ruderal garden friends to remove flower stalks to prevent their reproduction and taking over of smaller garden spaces that endure frequent cultivation or soil disturbance. Some plants are desirable but their progeny are a bother….

Some like it hot… but most do not: How high temperatures delay pollination and ripening

Ah, summer – vacations (pre-COVID), swimming pools (pre-COVID), ice cream, vegetable gardens, and, in many places, really high temperatures.  These things all go hand-in-hand (or at least they did before the pandemic). Many gardeners feel that the heat of mid-summer goes hand in hand with garden production; those high temps driving production on those fruiting plants like tomatoes and peppers.  But…..could they be wrong? 

We’ve had lots of extra hot days this summer in Nebraska, so it stands to reason that we should have really great production on those garden favorites like tomatoes, right? Then tell me why our extension office has received numerous questions this year about why tomatoes aren’t setting on or ripening.  Heck, we even had a Facebook post about tomatoes not ripening in the heat go viral (well, for our standards – 300,000 views/2,000 shares).  Could it be a disease?  Nope – it’s the heat. High daytime temperatures can have a big effect, but the effects are compounded when nighttime temperatures are high as well.

Tomatoes not ripening? You're not alone. Temperatures above 85 degrees will slow down the ripening process. Temperatures above 95 can stop the process all together. #NebExt #NeWX

Posted by Nebraska Extension in Douglas-Sarpy Counties on Wednesday, July 22, 2020

It turns out that high heat does two things in many of those fruiting vegetables (and of course fruits) that we grow.  First, it inhibits pollen production, which in turns reduces fruit set.  Second, heat inhibits gene expression for proteins that aid in ripening/maturation of the fruit.  Heat stress also reduces photosynthesis (Sharkey, 2005) in many different plants, which would slow down plant processes (such as fruit development and ripening) as it reduces the availability of sugars to fuel these processes.  So high heat can not only reduce the number of fruits developing on the plant, but also slow down the ripening process for fruits that have already set.  And if you think that these effects only happen at super extreme temps, most of the research studying temperature effects of this nature use a common “high ambient temperature” of 32°C/26°C for daytime/nighttime temperatures. For us U.S. Fahrenheit-ers, that’s 89.6°F/78.8°F, which isn’t really all that hot for most of us.

Many studies show that application of this “high ambient temperature” to crops such as tomatoes, beans, and corn during the pre-fertilization phases of reproduction (ie – flower/pollen development) can negatively effect fruit set.  The introduction of Porch and Jahn (2001) gives a pretty good overview of literature detailing the effect in beans (Phaseolus vulgaris).  I’ll sum it up here: heat stress while the pollen is forming (called sporogenesis) led to pollen sterility and failure of pollen to release from the anthers (dehiscence).  It also led to flower abscission (basically the plant aborts the flower) and reduce pollen tube formation (how the pollen nucleus gets through the stigma to the ovule for pollination) when applied during the period of pollen sac and ovary development.  And application during flower opening (anthesis) resulted in pollen injury (sterility) and reproductive organ abscission.  All of these effects lead to reduced fruit/seed set in beans.  (Interestingly, heat stress at the ovary development phase also led to parthenocarpy – basically the pods developed, sans seeds, without fertilization). 

However, we get the most calls about tomatoes (they’re the top crop for most home gardeners).  Is it the same issue?  Yep.  Numerous studies (Sato, et al., 2000; Pressman, et al., 2002; Abdul-BAki, 1992) show the same effect in tomatoes.  Pressman, et al. (2002) linked the effects on pollen to changes in carbohydrates in the anthers (reduced starch storage and carbohydrate metabolism). 

Tomato pollination and how to increase it in high tunnels
Tomato floral structures

To add insult to injury, high temperatures also slow down or stop ripening of crops like tomatoes.  Picton and Grierson (1988) found that 35°C (95°F) temperatures altered the gene expression in tomato fruits – inhibiting the expression of polygalacturonase, which softens cells walls, allowing the fruit to ripen.  Reduced photosynthesis would also reduce the availability of sugars for fruit development and ripening.

But there’s hope, both this season and in the long term!  The effect on the plants is not permanent. When temperatures drop below that “high ambient temperature” threshold pollen production, and therefore fruit set, will return to normal (as long as the plant is healthy).  Sato, et al. (2000) found that pollen release and fruit set resumed within a few days after heat stressed plants were “relieved” and temperatures dropped back into the optimal range of 26-28°C/22°C (78.8-82.4°F/71.6°F).  So many of those plants will become productive again (good news for my own tomatoes and beans, which had an initial flurry of production then went on vacation), especially as we head into fall.  And efforts are under way to develop and test heat stress resistant cultivars. 

This last point may be more important than you realized.  These production problems plague many areas around he world at current climactic norms.  Many fear that increasing temperatures will limit the productive capacity of many areas of the world that are already struggling.  It is easy to see how the difference in just of just a few degrees can take your veggie production from prolific to paltry.

You can also try to reduce the heat a bit yourself for an immediate fix. Shade cloth can help reduce temperatures a little bit, which may make all the difference in your garden if you’re just slightly over the “high ambient temperature” threshold.

Tomatoes under shade cloth | Tomatoes under shade cloth | Flickr
Tomatoes under shade cloth | Source: flickr.com

But in the meantime, if your vegetable garden has taken a summer siesta it will get around to producing again one day.  You’ll just have to take good care of the plants in the meantime.  And perhaps it’s a blessing in disguise – when its that hot I don’t want to be out working in the garden much, either.

Sources

  • Abdul-Baki, A. A. (1992). Determination of pollen viability in tomatoes. Journal of the American Society for Horticultural Science117(3), 473-476.Porch, T.G. and Jahn, M. (2001), Effects of high‐temperature stress on microsporogenesis in heat‐sensitive and heat‐tolerant genotypes of Phaseolus vulgaris . Plant, Cell & Environment, 24: 723-731. doi:10.1046/j.1365-3040.2001.00716.x
  • Pressman, E., Peet, M. M., & Pharr, D. M. (2002). The effect of heat stress on tomato pollen characteristics is associated with changes in carbohydrate concentration in the developing anthers. Annals of Botany90(5), 631-636.
  • Sato, S., Peet, M. M., & Thomas, J. F. (2000). Physiological factors limit fruit set of tomato (Lycopersicon esculentum Mill.) under chronic, mild heat stress. Plant, Cell & Environment23(7), 719-726.
  • Sharkey, T. D. (2005). Effects of moderate heat stress on photosynthesis: importance of thylakoid reactions, rubisco deactivation, reactive oxygen species, and thermotolerance provided by isoprene. Plant, Cell & Environment, 28(3), 269-277.

What’s wrong with my tree? You won’t find the answer in a book.

This tree suffers chronic drought stress every summer. Why?

It’s the middle of summer, and maybe you’re wondering what’s wrong with your landscape tree (or shrub) that just doesn’t seem to be putting on the growth that you’d expect this time of year. Before you take any “corrective” action, let’s figure out what the problem might be. Here’s a short checklist that we will start with. (NOTE: This is just a start. You can go so many different directions once you have some specific concerns to explore.)

Do you have one of these? If not, you can’t adequately diagnose problems.
  1. Soil information. Have you had a soil test done in the last few years? If so, are there any nutrient toxicities indicated? Has the soil been significantly disturbed or modified in the last several years? Have you recently added any chemicals (fertilizers and pesticides, organic or otherwise) or amendments?
  2. Plant information. When was the plant installed? Was it in a container or in a burlapped rootball? If so, were all materials removed from the roots by root washing before planting?
  3. Planting information. Did you amend the soil (i.e., add anything to the backfill) prior to planting? If so, what did you add? Did you mulch it afterwards? If so, what is your mulch material? Did you ensure that your plant was set at grade in the landscape? (“Grade” means that the root flare is at the soil surface.) Did you water it in well and avoid compacting the soil? Are new plantings adequately irrigated during their first year in the landscape?
  4. Environmental information. Have there been unusual weather events between time of planting and now? Is there sufficient irrigation and drainage?
  5. Symptoms. What are you seeing that concerns you?
Intact clay rootball after 28 years (and yes, the tree died long before this photo was taken).

At least 95% of the landscape failure cases I’ve diagnosed over the last 20 years can be traced back to improper planting methods. You simply cannot pull a woody plant out of a pot and stick it in a hole. There are three major factors at play here to consider when rootballs are planted intact:

Think that this root system can straighten itself out? Think again.
  1. The textural and structural differences between the soilless media around containerized roots (or the clay in a B&B rootball) and the soil in the landscape are significant enough that they will impair water, air, and root movement across the interface. This means roots have a difficult time establishing outside the planting hole.
  2. Any structural flaws in the root system created during improper potting-up at the production nursery, such as circling or J-hooked roots, are undetected and uncorrected. And these woody roots will stay in a death spiral after planting.
  3. If you cannot see the root flare of your plant, then you cannot plant at grade. Most trees and shrubs that are buried too deeply will generally fail to thrive and eventually will die.
If you can’t see the root flare, you’ve got a problem. See the next photo.

If you’re like the majority of people who are seeing problems this time of year, you know that improper planting or severe soil disturbance is to blame. But now is not the time to fix it! You’ll need to wait until the fall, when the crown has gone dormant, to dig the plant up and take corrective action. (The “corrective action” has been discussed in this blog before; you can explore the archives or wait for an upcoming post).

These are the roots of the tree at the top of the post. No root flareNo surprise that it’s chronically water stressed in the summer, given this pathetic root system.

What you want to do right now is keep your plant as healthy as possible by mulching with coarse wood chips (not bark) and supplying them with adequate water. You DO NOT want to prune them, because that just uses up stored resources as the plant then replaces pruned material with new shoots and leaves. You DO NOT want to add fertilizer, unless you know that you have a nutrient deficiency (which you can’t know unless you’ve had a soil test. And no, those cute little diagrams of what nutrient deficiencies look like in corn leaves are worthless. You’re not growing corn here.) And DO NOT add any pesticide of any sort, even if you see signs of insect or disease damage on the foliage. With few exceptions, pesticides are broad-spectrum and you will kill beneficial species as well as any possible pests. Opportunistic pests and disease attack stressed plants, and that’s why you are seeing them.

Crown pruning just results in more crown growth. Don’t do this if you are planning to move a woody plant during the current year.

In the upcoming months, I’ll do some follow up case studies that can help you learn how to diagnosis problems. If you’re interesting in having your tree or shrub problem diagnosed and can supply sufficient information (as outlined above) and clear photos, leave a comment on this post and I’ll contact you.

Terrariums

Glass bowls make excellent closed terrariums. This one has been planted for about three years. Episcia cupreata. and Begonia luzonensis dominate this planting.

Terrariums are are contained environments that allow culture of plants. They take many sizes, shapes and dimensions and can be sealed or open. At the least terrariums are just plants in a bottle, in their highest form they are cultivated landscapes in miniature. Closed terraria create a unique environment and opportunity for plant growth. The transparent walls of the container allow for both heat and light to enter the terrarium while maintaining high relative humidity and preventing system water loss. Sealed containers combine retained moisture and heat which allows for the creation of a small scale water cycle. This happens because moisture from both the soil and plants evaporates in the elevated temperatures inside the terrarium. Water vapor then condenses on the container walls and eventually drips back onto plants and soil below. A sealed terrarium is ideal for growing some kinds of plants due to the constant supply of water, thereby preventing them from becoming dry. Lowland jungle plants from warm climates will do well. Some cloud forest plants, orchids and bromeliads will not fare well in sealed environments because they require more air movement and/or cooler temperatures. Terrarium culture can allow growth of plants difficult to cultivate even in greenhouses. Terrariums can be displayed to great effect and are an easy method of indoor gardening. Success with a terrarium garden requires an understanding of the container, light, media, and the plants themselves.

My favorite terrarium fern Lemmaphyllum microphyllum (center). On the very bottom is the vining Peperomia prostrata and at the top is a runner of Ficus minima ‘Quercifolia’.

A Word about the Plants
A contained environment is not for all plants. When in a sealed environment, certain plants such as cacti or succulents will grow poorly or in a manner not suited to their habit (lanky or etiolated growth). Problems arise when plants not suited to a small contained environment are used. Plants such as Syngonium, Diffenbachia, and the larger Peperomia spp. look good when planted initially, but will soon outgrow their space–they are not suitable for closed terrariums. The classical “florist” terrarium planted with very young houseplants looks good at first but is completely unsustainable for months or years. A well designed terrarium should grow for multiple years before a complete tear down and replant is necessary. Thus it is necessary to select truly miniature and high-humidity-loving plants for closed terrarium culture. Ferns, sellaginellas, gesneriads, begonias and some peperomias are suited for these conditions. Obtaining truly miniature and humidity loving plants is difficult. Online vendors are the most accessible sources, but also other hobbyists or plant societies can be sources at their annual sales. Nurseries carry some of these plants but the vast array and diversity of rare plants are found on Ebay and Etsy. Many nurseries list plants under the ‘terrarium plants’ search words that are not really suitable, so take care to look for truly small or miniature plants. Perhaps start with the list I have provided at the end of this article for some of the tried and true plants that will work well. Terrarium gardens are not sustainable if you make bad plant choices, you will eventually end up removing plants that outgrow their containers.

The Container
Once you have your plants, you are ready to start. Or you can start before getting your plants and set up your terrarium now to plant later, or in stages, as you acquire new specimens to add into your contained garden. The first consideration is a suitable container. The larger the container the easier it will be to plant, grow and maintain your garden. Larger containers will also allow for a greater diversity of plant types. Fish aquariums may not be the most attractive, but are the most practical in many ways. Because they are rectangular they allow for placement of a light on the lid and they are easy to cover and place on square surfaces such as tables or window sills. Glass containers are preferred over plastic because they maintain transparency better over time. While bottles are attractive, if you can not get your hand inside they can be very difficult to plant and maintain.

Small containers are not optimal but if the plants are small, they can work well. This sundew has been in this container almost for a year

The Media
Lowland, humid jungle plants grow in decomposing organic matter. For our purposes peatmoss is the best medium. It can be amended with fine horticultural perlite (20-30%) or sand. Sand will make a heavier mix, and, if you are doing a large terrarium, mix weight is important. If not, sand is ideal. Also, since terrariums are contained, they may become disease gardens if you are not careful. Therefore I recommend sanitizing your media in a microwave until the media temperature exceeds 160F. Keep the bag closed until the media cools. A turkey roasting or other microwave safe bag works well. Media can be sanitized in a conventional oven–it just takes longer. Media should be moist but not wet when microwaved. Distilled water can be added later to moisten the media after planting. Commercial mixes can be used for terrarium media but care should be taken. Search the blog for my article on potting soils.

Since terraria are sealed environments, you need a reservoir for the water and a filter. Create the reservoir with coarse horticultural perlite (#3) up to an inch thick (the bottom most layer) depending on size of the container –the bigger container, the thicker the layer. Cover the perlite with activated charcoal. Fish aquarium charcoal or horticultural charcoal from the nursery is fine, but NOT charcoal briquettes. The charcoal layer just covers the perlite. Now add soil. Slope the soil from thin in the front to thicker in the back. You can also add wood, sticks, and rocks to make interesting landscapes. They should all be sanitized in the dishwasher or boiled or microwaved until sterile. After placement of soil, rocks and sticks are ready to plant. Place larger growing plants in the center and rear and small vines up front.
Your container should be sealed either with “cling tight” plastic wrap or glass. I prefer glass for most applications.

Light
While terraria can grow in window light, especially north light, it is not optimal for most plants and they will grow slowly. You can’t place terraria in direct sunlight or the plants will “cook” because closed terraria can’t dissipate heat that rapidly. The old standard for light sources is fluorescent tube fixtures, but they have been supplanted by Light Emitting Diode (LED) technology. Grow-light LED fixtures are expensive, but provide some performance differences. Terrariums are not crops and we don’t want them to grow too fast so find an affordable light source that works for you. LED sources are nice because they are not bulky and do not add large amounts of heat. A bit less light or less optimal wavelengths of light are ok because we want to sustain plant growth for a long time, not grow the plants to the edge of the container real fast and have to prune or start over. The Costco brand shoplight LED fixture is perfect, but it is four feet long. Smaller LED fixtures would be appropriate for smaller containers. The Costco fixture is perfect for a 60 gallon fish tank. White light works well and looks best. Red and blue LED fixtures change the way we see the plants and are not best for viewing. Light should come from above so plants will appear to be growing normally. If the terrarium is placed near a window it will need to be rotated to keep plant growth even.

Moisture
Moisture is critical in terraria. The growing medium should hold a shape when squeezed but not be saturated when you plant. After the terrarium is planted, you can “water it in” with a dilute -1/4-strength fertilizer solution mixed into distilled water. Watering amounts will vary by container size. Water should penetrate soil to the depth of roots and some should enter the reservoir. No more watering is necessary again until some time later when plants have grown considerably—usually months later. I usually water the glass to clean it from the initial planting with a turkey baster. At some point in the future, months not weeks, the soil may dry as growing plants use up water. When this occurs, water again with another dilute fertilizer solution. Do not over water your terrarium or bad things will happen. Also resist misting or spritzing as this will cause leaves to rot and is not necessary in a sealed environment.

Pruning, Replanting and Maintenance
Some of your chosen plants may outgrow their space. Some like Ficus minima ‘quercifolia’ will just overgrow everything, the same can happen with common Sellaginella sold in nurseries such as S. brownii. You should plan on pruning back the plants and making cuttings or planting other terrariums with the prunings. Cut begonias below a node or along the rhizome. Rhizomatous ferns can be clipped or dug and planted elsewhere. If you have to remove a really big plant it will leave a hole. New sterilized mix should be added to fill the hole along with the new plant occupant. Removal of flowers, mushrooms (should they form) and dying leaves is important. They will cause rots on plants they fall on. Sticks are usually always a problem since it is very difficult to kill mushroom fungi living in them. Mushrooms are mostly non-toxic to plants, but they drop spores and these lead to rot on sensitive begonias and ferns. Clip back Begonia, Episcia Sellaginella, Peperomia or Ficus to prevent them from overgrowing other plants.

Recommended Plant List
If you can find them, here are some recommended plants for terrariums.
Begonias
B. prismatocarpa
B. prismataocarpa variegata
B. versacolor
B. ‘Raja’
B. ficicola
B. exotica
Ferns
Edanoya spp.
Humata parvula
Lemmaphyllum microphyllum
Microgramma spp.
Pecluma pectinata
Tectaria spp.
Quercifelix zelanica
Others
Peperomia prostrata
Sininngia pusila and all its variants
Episcia spp. (there are many, I like the pink ones)
Saintpaulia (african violets-only miniatures)
Sellaginella erythropus
Sellaginella spp. (there are many kinds, S. brownii is most common)
Ficus minima ‘quercifolia’

California “Big Trees” under threat

It’s not my week to post on the blog, but this is a PSA for California residents. Having visited the Capitol grounds in Sacramento, I find it important to make others aware of the plans to remove a number of large and historically important trees for the purpose of building a parking garage and expanding the Capitol building space.

I’m not a California resident, so in a sense it’s none of my business. But I am an urban horticulturist, and an arborist, and committed to preserving trees especially in urban environments. These trees are irreplaceable unless you want to wait a few hundred years. The plans to “relocate” some of these large trees are probably not realistic given the size of the specimens.

More importantly, this is public space and the public should be actively involved in discussions. But the process has been secretive and under the radar of a public more concerned, and rightly so, about COVID-19 and all the associated fallout from the pandemic. But it’s not too late.

Please share this post with California residents who have should have a say in how their land should be managed.

For those Californians interested in supporting the effort to save the trees at Capitol Park and call for the development of a Park and Tree Management Plan, you can sign the petition at https://www.change.org/p/california-state-legislature-save-california-state-capitol-park.

More importantly, you should call AND write to your own California legistator at this website findyourrep.legislature.ca.gov, as well as the two Legislative leaders who can really pause the project and guide its re-planning:
Senator Toni Atkins, President pro-Tempore of the Senate, 916 651 4039 and senator.atkins@senate.ca.gov. UPDATE: This email does not appear to work. Try using this form.
Assembly Member Anthony Rendon, Speaker of the Assembly, 916 319 2063 and speaker.rendon@assembly.ca.gov

Falling forward: Time to plan and plant the fall veggie garden

While most of the country is in the middle of a heat wave and the mercury is creeping past 100F on many thermometers, lets do a little exercise to help you feel cool as a cucumber (though not straight out of the garden, those cucumbers would likely be hot).  I want you to think about a crisp September morning.  You’re out walking through your vegetable garden and you stop to appreciate a big, emerald green head of broccoli.  Just a few feet away, stalks of Brussels sprouts, those miniscule cabbages that have somehow overcome years of revulsion to become sexy and desirable (they must have a good agent) shoot up like skyscrapers around the rest of the plants.  Lush lettuce fills in a bed nearby, and some cucumbers and beans that you planted late are looking as fresh as a newborn chick. 

Sounds beautiful, doesn’t it?  Well I’m here to tell you that you can actually make this a reality.  You can have a super productive garden this fall, and for most areas of the country the time to start planning and planting is now.  Right now, when a cool refreshing fall morning seems as far away as a trip to the moon.  Of course, the exact timelines and planting schedules differ by region due to the length of growing season, but most places in the US (and the northern hemisphere) can start thinking now about planting crops for the fall.  For exact timing in your area, you may want to connect with your local extension system for gardening guides. 

While many experienced gardeners may know this and practice fall garden planting, there’s a lot of people out there who have yet to have the pleasure.  And given the huge number of first time (or first time in a long time) gardeners, these garden basics might be helpful to get the most out of those pandemic plantings. 

In fact, fall is one of the best times of the year to garden.  Aside from cooler temperatures making it more pleasant to garden, there’s often less pressure from diseases and insects to ruin crops.  In addition, many of those cool season crops, like the ones I mentioned above, actually are more productive in the fall than if planted in the spring.  Even though they get a hot start in mid- to late- summer, the cooling temperatures of fall around the time many of the crops come into maturity extends the harvest period and improves overall quality of the produce.  You also have the benefit of removing some of those spent and diseased warm season plants and swapping them out for something fresh and new– a garden revival of sorts. 

Swiss chard and leafy greens are great additions to the fall garden

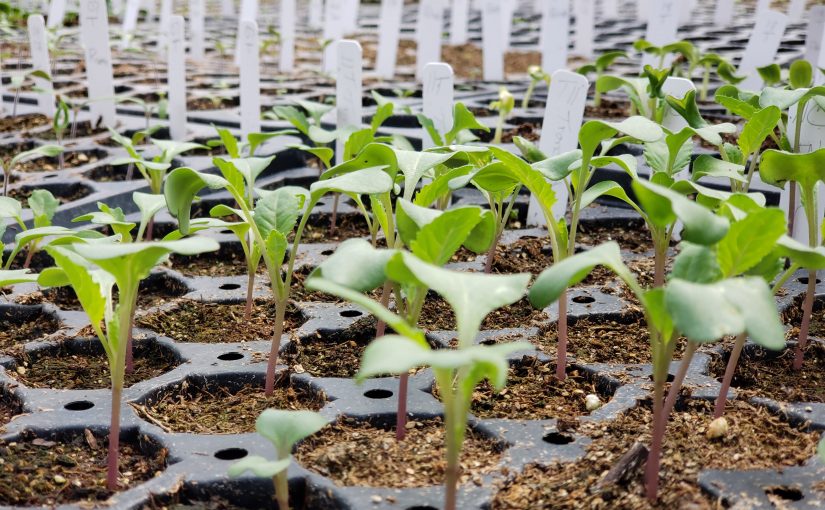
Unfortunately, since fall vegetable gardening isn’t as widespread as planting summer gardens, plants and seeds can often be hard to find when it is actually time to plant (so planning ahead is helpful).  Mid-summer is usually the time for most regions to start seeds for those slower growing cool season crops like broccoli, cabbage, cauliflower, and their kin. They can be started indoors, but the need to do so isn’t as great as it is for those warm season crops we start indoors in late winter.  You can start them in pots/flats outdoors as long as you have somewhere that isn’t so hot and sunny that they’ll be continually drying out (some shade would help).  They should be ready to transplant by late summer.  You can skip the seed starting/transplanting if you want to try direct seeding into the garden, but as they say “your mileage may vary”. 

Some of the fast maturing warm season (frost tender) crops are also good candidates for a mid-summer planting as a way to refresh the garden if you have space for it.  Beans are a good candidate for late-summer planting, but you’ll need to make sure they are a fast-maturing variety (there’s a wide range of maturity times in beans). Bush beans are usually the quicker growers. Pole beans and lima beans usually take a longer period, so those don’t do as well later in the season for places that have frost and freezes. 

It is also a possibility to squeeze in a late crop of cucumbers or summer squash as well. This can be good if your cukes and squash succumb to disease, squash vine borers or cucumber beetles. Planting late can often mean that you are missing the primetime for specific pests. For example, squash vine borer adults actively lay eggs in the early season but largely disappear later on.  A late planting means you could miss them entirely. 

Fall is the best time to grow leafy green vegetables.  Lettuce, which does not fare well in the summer, thrives in the cooling temperatures of the fall.  Other leafy greens, such as chard, spinach, and kale are also winners in the fall garden.  Many of the root vegetables, such as turnips, carrots, beets, and radishes are also part of the fall garden revival.  You’ll want to wait until temperatures have chilled a little to get these started, but not so late that the season ends before you get good growth. 

You gotta know when to sow ‘em

The key to fall planting is to know how many days it takes for the crop to mature. Check out the seed package or the plant tag — there should be a time to maturity on there. Just count backward from the first frost date. Be sure to add a few weeks to account for slower growing in cool weather and to allow for a reasonable harvest time.

For example, if I wanted to plant a late crop of beans, I might select the cultivar ‘Contender’ which matures in about 55 days.  I want to add at least a few weeks onto that for maturity and harvest time, so lets say I need 75 days (I can go shorter if I want to accept the risk of an early frost).  Let’s also say that my first frost date in the fall is October 20.  Counting back 75 days from October 20, I get August 6 – I should plant my beans no later than that date to get a harvest.

Most of the cool season crops can tolerate a frost (and some even a freeze) so their growth dates can extend beyond the first frost date.  You’ll just want to have them mostly grown and close to maturity before it gets cold enough to stop their growth.  I covered frost and freezes and which crops can survive those cold temps in this previous GP article

You can give yourself a little more time if you plan on incorporating a season extension practice in the garden. Using a row cover or constructing a low tunnel can give you several more weeks of growing time. It can be possible to enjoy a fresh tomato or green beans straight from the garden on the Thanksgiving table, or some fresh broccoli or kale at Christmas even in some of our colder regions. But it all starts with a little planning in the heat of summer.

And if you choose not to plant a fall crop, I would suggest using a cover crop in garden beds as you remove this year’s plants.  A cover crop will help keep weeds to a minimum and preserve soil structure and nutrients through the winter.  Winter wheat, rye, and crimson clover are good winter cover crops.  Next spring you just cut them down and till them in if you’re not practicing no-till (and you should be if at all possible). For annual cover crops, you can usually cut them down or break them over and leave them in place as a mulch. You can also pull them up and compost them to add directly back to the garden, especially if (since it is hard to till or mow in a raised bed).  This GP article is an oldie but goodie for using cover crops in the vegetable garden. 

Update on our bare-rooted perennial garden

Our south-facing pollinator garden.

Two years ago I installed a pollinator garden in early July. This goes against my recommendation to install plants in the fall, when roots have longer to get established and less stress is felt on the rest of the plant. But I wanted to see what would happen if I was careful to mulch well and keep it irrigated. Oh, and did I mention I was going to root wash every one of them? (Be sure to look at that process in the link from 2018.)

I reported on progress last year, and this year shows even more vigorous growth by nearly all the plants. Two of the three ‘Bandera Purple’ lavender died over the first winter, as they were marginally hardy (USDA 7-10) for our area. One straggler remains in the lower right hand corner of the photo below. The Agastache ‘Acapulco Red’ and the Verbena ‘Homestead Purple’ were planted near the front of the beds on both sides and while they survived the first year, they are now gone. My guess is that our cold snap in February 2019 wiped out those plants that were in less protected locations. Perhaps we’ll fill those spots in later with something more cold hardy, or just let the escaped Viola tricolor continue to colonize bare spots.

Overall, the garden is wildly successful in attracting hummingbirds and a variety of native bees and other insects.

The southwest garden is being colonized by violets that have hopped out of a nearby container. Wood chip mulch keeps the soil cool and moist.
The southeast garden with its invading strawberries (soon to be relocated). The tiny lavender in the back right corner is a rescue plant.

I still have a little work to do – I’m relocating the strawberry adjacent to the southeast garden so it stops invading the perennial bed. But after that I’m calling this garden finished.

Summertime pruning

Summer is a time of bounty in the home garden. During June, July and August the majority of small fruits ripen on home orchard trees. Plant health care is important to consider in advance of summer bounty. Careful dormant season pruning, dormant sprays, mulching and care helped to produce a nice harvest. As the fruit comes off the tree, some summertime options are available. This is a time when some limited summer pruning can be done to manage the physiology and growth of many fruit trees. Even some citrus will benefit from careful summer pruning.

Summertime brings a harvest bounty for many home gardeners, and with it an opportunity to modify tree growth with pruning

One obvious reason to prune in summer is to repair broken and remove dead branches that may have occurred from excess fruit weight or other injuries. Breakage is common in peach, plum and apples if fruit loads are not thinned earlier in the season. Cut the broken branch from the stem it attaches to with an angled cut that leaves the branch collar intact. Do not cut branches flush with the stem they were attached to. Many years ago the myth of flush cuts for shade trees was found to permanently damage trees, but flush cuts are often still practiced on fruit bearing trees. Flush cuts allow decay organisms to enter trees leading to heart rot and other kinds of wood decay.

Sporophores or fungal fruiting bodies indicate the presence of wood decay in trees. Usually be the time sporophores are showing wood decay is extensive in the tree.

Another myth that persists in home fruit orchards is painting wounds with a ‘sealant’ or ‘protestant’. There is no reason to paint cuts. They do not limit the progress of decay or prevent decay from forming behind the paint. Pruning paints do not promote “healing” or callus formation to close the wound. There is some thinking that pruning paints may even accelerate the process of decay formation. So throw away the black tar, it has no practical purpose in support of pruning.

Pruning paints are a relic of past horticulture traditions. They have no place in modern arboriculture or pomology

While pruning paints are no longer used, paint has other functions that can be helpful. If a large branch was removed from a tree, sometimes the remaining branches may require protection from sunlight. Apples and other thin-barked trees (citrus, cherries, etc.) are very susceptible to sunburn. If branches that were previously shaded are suddenly exposed to high light levels, the bark can be destroyed leading to sunburn cankers and entry of disease-causing fungi such as Botryosphaeria spp. If repair pruning exposes a large gap in the canopy, it is appropriate to apply white wash or diluted white latex paint to exposed branches in order to protect them from bright sunlight. The most severe damage occurs on southern and west facing branches. Sunburn is one of the leading causes of abiotic damage and a predisposing factor for disease such as stem and branch cankers in apples.

Fireblight is another common disease on pears and apples and develops after bloom. Pruning out fireblight affected twigs helps to arrest disease progress. Finally, bacterial canker can be devastating to Prunus (plum, cherry, peach, nectarine and almond) in parts of the country with warm summer rains. Immediate removal of bacterial canker affected branches is necessary to prevent permanent damage to the tree. Tools used to remove cankered branches should be sanitized by flame (torch) or with disinfectants. Canker diseases are active in the warm summer growing season. Cankers can be caused by bacteria or fungi and should be dealt with as soon as symptoms are noticed. The earliest symptom of an active canker is slowed growth relative to other branches on the tree. Slowed growth results in smaller leaves and fruit and fewer leaves. Affected branches seem more open and just look “weaker” than their healthy counterparts. Slowed growth is often followed by wilt, leaf drop and eventually necrosis or death of the branch. It is best to remove diseased branches early before the organism spreads to the main stem. Since symptoms occur when leaves are on, summer pruning is the best approach to remove cankered branches. Regardless of where or when damage occurs, using correct pruning practices should be adhered to.

Cankers kill branches in fruit trees, they can be caused by either bacteria or fungi. Here Botryosphaeria dothidea has killed a branch in this apple.

Healthy growth on the tree above but thin, weak, small leaves on the tree below indicate a developing branch canker.

Pruning is used most widely on fruit trees to dwarf them so that fruit is produced at a height convenient for harvesting. Pruning creates two universal responses that apply to all woody plants:

I. Pruning is growth retarding. The part of a tree pruned will grow less than the unpruned part. Or, a pruned tree will grow less than an unpruned tree.

II. Pruning is a bud invigorating process. A pruned tree or branch will have more of its buds released to grow compared to the unpruned branch or tree where many buds remain in a dormant state.

The more a tree is pruned, the less its roots and stems will grow. Even though the more a tree is pruned the more latent or axillary buds will be released to grow, it will not be able to make up for the lost leaf potential of the unpruned tree. The pruned tree has reduced photosynthetic capacity, makes less energy and will grow less overall. The thing that is not very clear is how the timing of pruning affects the basic processes. In his review, Chandler makes clear that pruning in the dormant season will retard the growth of apples less than if they are pruned in the summer. Summer pruning also significantly reduces the growth of roots compared to dormant season pruning. Removing leaves in mid-summer or after all shoot growth has stopped (summer rest period), removes photosynthetic capacity and reduces stored energy in the tree, thus retarding growth overall. While buds may be invigorated and new summer growth may occur, this rarely makes up for the tissue lost and still results in growth reduction.

Summer pruning does not result in more fruitfulness the following year, and in apples does not increase the number of spurs formed for fruit formation. Summer pruning can open the canopy and allow branches to form lower down that are useful for easy harvest. The effect of summer pruning on next year’s fruit quality is uncertain. Summer pruning can accelerate the ultimate scaffolding or canopy shape for the mature tree.

Pruning citrus after harvest, during the warm season can affect fruit size in the following year. This may be due to fruit thinning as some citrus have green fruit formed by summer that ripen in winter or spring. Summer pruning removes fruit and remaining fruit can grow larger.

Summer pruning of fruit trees before fruit harvest increases light penetration into the tree and can increase color development of the fruit. Pruning must be done cautiously to avoid excess light penetration and sunburn to scaffold branches and resultant canker diseases. Summer reduction pruning is most often accomplished by pruning the ends of branches back to other branches or twigs. Removing about one half the current season’s wood (on a given branch) will achieve objectives usually without causing excessive light penetration into the canopy. Not every branch need be pruned but an even approach, removing branches consistently around the tree, will maintain form. No more than 15-20% of the canopy should be removed by summer pruning. On some vigorous growing trees such as Persian mulberry, pomegranate, or some peaches, heavier pruning doses can be used. Pears, apples, plums and cherries require less pruning and cuts should be made to preserve spurs and other fruit bearing wood. Some varieties of cherries can become ‘over spurred’ and thinning cuts to remove excess spur wood can sometimes be helpful to limit production and increase fruit quality in the next season.

References:

Chandler, W. H. 1923. Results of some experiments in pruning fruit trees. Cornell University Agriculture Experiment Station bulletin 415.

Ingels, C. and P. Geisel. 2014. Fruit and Nut Tree Pruning Guidelines for Arborists. University of California Agriculture and Natural Resources publication 8502. http://anrcatalog.ucanr.edu

Saure, M.C. 1987. Summer pruning effect in apple—a review. Scientia Horticulture 30: 253-282

Water Wise Gardening: Conserving and Irrigating Responsibly

While we can’t ever control or even predict the weather, in most places it is important to have a plan on how to deliver water to our home gardens during the hot, dry months of the summer.  Aside from reducing water need through some good management practices, delivering water in an efficient and sustainable way is important when planning and planting our home gardens. 

When there is scarcity, it is necessary to conserve. Several years I got to see scarcity in person on a sustainable agriculture tour of New Mexico.  Farmers in New Mexico have only limited access to water from irrigation canals, to flood irrigate their fields, or even wells for drip irrigation.

This severe lack of water got me thinking about how much we take water for granted in our own gardens.  We often apply as much as we want or need in an inefficient manner (using sprinklers, sprayers, etc.) because we think it will always be there when we turn on the tap. 

Where I’m located in Nebraska we are also blessed to have water falling from the sky. Sometimes there’s too much, and at others there’s not enough. But that’s much better than in some places – I visited some parts of New Mexico on a farm tour where they get seven inches of rainfall in a normal year. Seven.  Total.

Thinking about conserving what water we have means that we are good stewards and are ready for when issues do arise. And let’s face it, there are some times in the summer that are dry where water conservation will help reduce using water, which can also save money.

When we talk about conserving water, there are two ways to go about it. First, look for ways to reduce the need for water. Then, look at ways to reduce water waste and usage whenever you need to use water on your lawn, landscape or garden.

Reducing the need for water

During dry times, it can be necessary to provide water to the garden to keep it growing healthfully along. However, there are many ways to reduce water loss or increase the amount that stays in the soil around the plants.

Mulching not only reduces weeds, but also helps hold moisture in the soil. Having one to two inches of mulch on landscape beds can reduce evaporation from the soil and decrease the amount of water you need. Newly planted trees should be mulched for the first few years to help hold moisture in the root zone as well.

Mulching is also important in the vegetable garden. Using straw or shredded newspaper are simple ways to conserve moisture, beat weeds and even reduce diseases. Note that this is shredded newspaper used on top of the soil for a mulch, not whole sheets applied below another mulch or on top of the ground.  That process is called “sheet mulching” and we typically don’t recommend it here at the GPs because it limits air movement into the soil and can disrupt the soil microbiome. Stick only to shredded newspaper as a top dressing. (See the bottom of the article for journal articles discussing paper and straw mulches).

Shredded newspaper in my tomato bed. There are 2ft woodchip mulch walkways between 4ft wide beds.

You can use woodchip mulch in the vegetable garden, but it can be difficult to manage when you are frequently planting, replanting, or harvesting crops.  If you accidentally incorporate it into the soil, it can tie up nitrogen available to plants and cause deficiencies.  As long as you are good at keeping it on the surface, it isn’t as much of an issue.

Large scale gardens or farms make use of black plastic as mulches to do much the same thing. Plastic mulches are typically beyond the scale needed for home vegetable gardens and have their own set of drawbacks such as limiting water and air movement, but for those struggling with difficult weeds or with issues limiting manual removal (disability, limited movement, etc) it may be explored for smaller scale production. There are now even biodegradable plastic and paper mulches available. Use of these does require drip irrigation beneath the mulch, as rain cannot penetrate to the root zone. With the issues associated with them, plastic mulches would be considered a last resort for all but the largest home vegetable gardens, and many of my GP colleagues recommend against them for all home garden situations – but they can have their very limited place in the home garden toolbox.  And we definitely recommend against the use of plastics and landscape fabrics in ornamental beds and landscapes.   

Choose plants that require less water. There are many plants available that have lower water requirements. Ornamental grasses, Liatris (blazing star), Kniphofia (red hot poker) and sunflowers come to mind. Most native plants are commonly thought to have lower water requirements, but this isn’t always the case and natives may not thrive in altered ecosystems (urban settings or even managed landscapes). Most bulbs also are water efficient and do not require extra watering, as are most culinary herbs.

Mowing less often in the hot and dry summer also can conserve water if you are one who waters the lawn. I’m not a big fan of watering lawns, since it is such a large water usage, but I know there are those who prefer to have their lawns lush and green at all times. Instead, when the summer gets hot and dry, leaving the grass on the taller side can help it stay green even without water. Many of the grasses we grow here are cool-season and go semi-dormant in the heat. Stopping mowing when the heat starts slows down growth and the need for water.

Irrigating Efficiently with Drip

When it comes to getting water to the garden, there are definitely more efficient ways to make it happen.

Unfortunately, the most common method — using sprinklers — is also the least efficient. It is hard to direct the water to the right place, and during periods of high heat evaporation takes up much more water than you think. But there are ways to get water to your thirsty plants without running up the water bill.

Drip irrigation is probably amongst the most efficient and sustainable ways to water your landscape or vegetable garden. This method allows you to apply water directly to plants in a controlled manner, rather than spraying an entire area with water.  Also, since the water is applied directly to the ground rather than sprayed through the hot summer air, the water is much less likely to evaporate. 

Drip irrigation tubing. Each drip opening emits on this version emits 1 gallon of water per hour.

There are a few different types of drip irrigation systems available.  Probably the easiest to install is a drip tape system.  This is a deflated tape that already has water-emitting slits cut into it.  While each slit applies a precise amount of water over a given time period, the pre-determined regular placement of the slits makes this system better for plants grown in rows, like vegetables, rather than landscapes where plants are of differing sizes and spacing.  And while it can be used for vegetable gardens, probably the easiest system for a landscape would be one where there are tubes you can cut to various lengths and insert controlled drip emitters at customized locations.  Another use for this type of drip irrigation could be for containers on a porch or deck – you can easily run the tubing out of sight along a bannister or railing and direct individual emitters to individual containers.

It all sounds complicated, and larger systems can be, but there are small and simple kits you can easily find at many garden centers or online retailers available for home gardeners to install their own within a matter of hours. You will need to have some skill at reading directions to install them, but the process is pretty simple. 

For information on setting up drip irrigation for your home garden, check out these great resources from Extension institutions across the country:

Drip Irrigation for Home Gardens

Building and Operating a Home Garden Irrigation System

DRIP: Watering the Home Garden

Soaker hoses are a similar concept to drip irrigation, but instead of small drips these hoses just emit water all along the hose. Still better than sprinklers, these hoses are quite a bit less efficient than drip, since you can’t direct the water exactly where you want it.  They are also easy to apply too-much water to an area since they can emit large volumes. Installation is pretty simple, though, since you just lay the hose down where you want it.

One great benefit of both drip irrigation and soaker hoses is the application of automation.  Using a timer can make it easy to keep the garden watered through the season. Timers can be as simple as a dial to manually run the irrigation for a specified time or fully automatic to run the irrigation for various lengths of time on different days of the week.  Some more advanced timers also have rain sensors or soil probes to reduce or avoid running when rain makes watering unnecessary (if you don’t have a sensor, remember to stop automatic running until the soil has dried).  And in today’s emerging technology, there are also timers or flow controls that can be automated or controlled from a phone app.  The timer that I’m now using at home connects to my Wi-fi, and in addition to allowing me to control and observe the watering status from anywhere in the world, connects to local weather data to automatically set a “smart watering” schedule taking into account rainfall, temperature, wind speed, and other factors. 

My fancy water timer.

Another effective way of providing water to your garden is through water catchment.  Water catchment is just a fancy way of saying that you use a rain barrel. Here you are collecting rain runoff to use in place of water from the tap. There are some ultra-low-flow drip irrigation systems that you can use with rain barrels (if they are raised high enough to get water pressure), but this use is usually for watering by hand. For larger gardens, the large IBC totes that hold 200 or more gallons can make good water catchment barrels.  Just make sure that if you are using them (or any other barrel) for fruit or vegetable production that they are made of food-safe plastic and their previous contents were also food safe.  (Check out our guide on Building a Rain Barrel)

Selected references:

Comparisons of shredded newspaper and wheat straw as crop mulches

Soil Temperature, Soil Moisture, Weed Control, and Tomato (Lycopersicon esculentum) Response to Mulching

Newspaper Mulches for Suppressing Weeds for Organic High-tunnel Cucumber Production

Tools, tips, and terrible traditions for raised beds – Part 3

Young vegetables thrive in mulched, weed-free raised bed.

Over the last couple of months I started a series on raised bed gardens, focusing on materials and preparation. In this final installment, I’ll focus on maintenance activities to avoid in your raised bed systems and remind you of three things you should always do.

Terrible traditions

We’ll start with some practices that damage soil structure and function (GP John Porter discussed this in much detail a few years ago). Tilling, once the mainstay of soil preparation for crops, is increasingly found to cause more damage than good. Grinding the soil into a material with the texture of coffee grounds might look pretty, but it’s devoid of the ped structure that allows water and gas to move through easily. It also increases microbial activity by bringing up microbial spores, which release carbon dioxide to the atmosphere as they digest whatever organic material is there. And tilling will increase the likelihood of erosion and compaction.

Soil runoff from tilled, unprotected field. The same thing will happen in your garden. Photo from Wikimedia.

This is the opposite of what gardeners should want: an optimal soil has natural structure which might look messy but allows for good drainage. It’s also more resistant to compaction and erosion, especially when it’s protected with mulch (more on this later).

Speaking of drainage, don’t be tempted to add gravel or some other coarse material at the bottom of the bed. The change in soil texture creates a perched water table, which makes for a soggy planting bed and optimal conditions for soil-borne diseases.

Classic experiment that demonstrates water does not move easily through different soil textures.

While we’re talking about unnecessary or harmful additions to your raised beds, let’s not forget the annual addition of compost or other rich organic material. This is a holdover from old agricultural practices and is not warranted unless you have an organic material deficiency. Without a soil test, you don’t have a clue about what your soil has or what it needs. The problems associated with routine amendments are discussed in this peer-reviewed fact sheet, and are exacerbated by the tillage that is often the means to incorporate compost. Likewise, don’t add fertilizers and pesticides unless you have conclusively identified nutrient deficiencies or pest issues.

If your nutrients are off scale, don’t add any fertilizer!

The last tradition I’d like to see shelved is growing cover crops. This practice originated in the management of agricultural fields, which were otherwise left bare after harvest. Outside of producing some kale or other winter vegetables, what’s the point of planting a cover crop in your garden, when you can protect the soil in other ways? Cover crops require water and nutrients, which eventually will need to be pulled or incorporated. You are forcing your soil system to continue to support plant growth and be subjected to disturbance with the planting and harvesting of the cover crop. Why not let the soil rest over the winter with a nice blanket of mulch? Give it a chance to regenerate its nutrient load while being protected from unnecessary disturbance.

A great arborist chip mulch has leaves or needles as well as wood.

Three tips

Two of these tips have been discussed many times in this forum, so I’ll direct you to longer discussions of soil testing and mulching. Mulching is not just important for protecting the soil bed after the growing season, but should be used on actively producing beds. A deep, coarse organic mulch will promote water and air movement, moderate soil temperatures, reduce weeds, and provide a slow feed of nutrients throughout the season. You’ll have to wait until your seeds are up to apply it, of course, but try to avoid bare soil as much as possible.

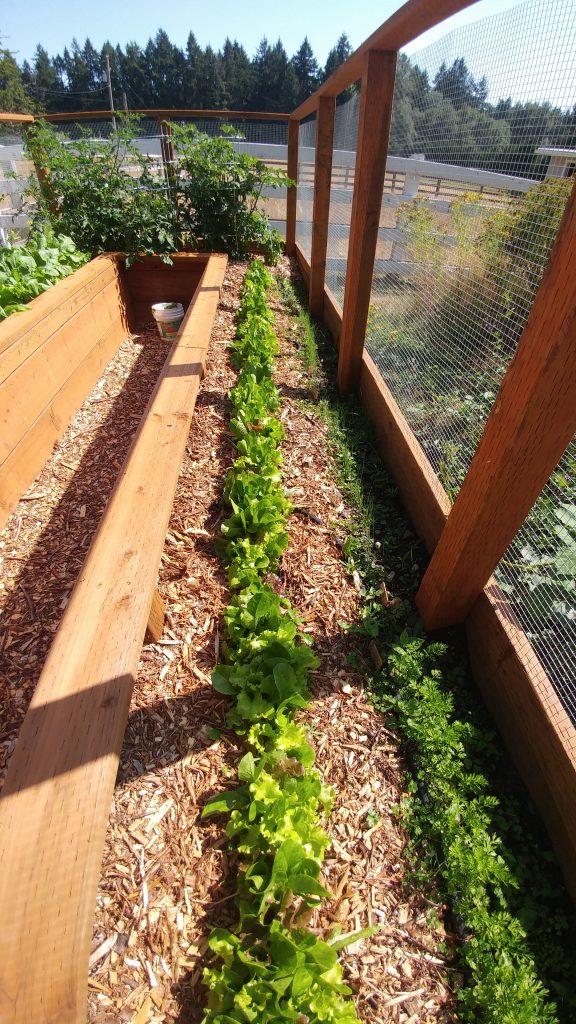
Though you’ll need to leave the soil bare during seed germination, you can still protect unplanted areas of the bed with mulch.

Soil testing is really crucial for any garden, but perhaps most important in vegetable gardens where harvesting may decrease key nutrients over time. It will also guide you in identifying potential heavy metal problems. The money you will save in not buying unnecessary fertilizers and other amendments will pay for many soil tests.

There is so much great information in a soil test that will help you make decisions about what to add – and what to avoid.

Sometimes you will need to add material to your existing beds if you are not using a natural soil. Soilless media (deceptively marketed as “potting soil” though no soil is to be found) will decompose and settle over time, leaving you with a sunken soil system. You will need to add more of the same sort of media to the beds, making sure you mix it in thoroughly to prevent a perched water table. (This is why you might consider using a natural soil and avoiding this annual chore – because a natural soil will not subside over time.)

This recommended planting media will decompose down to the oyster shells and lime over time.