To Fertilize, or Not to Fertilize, that is the question

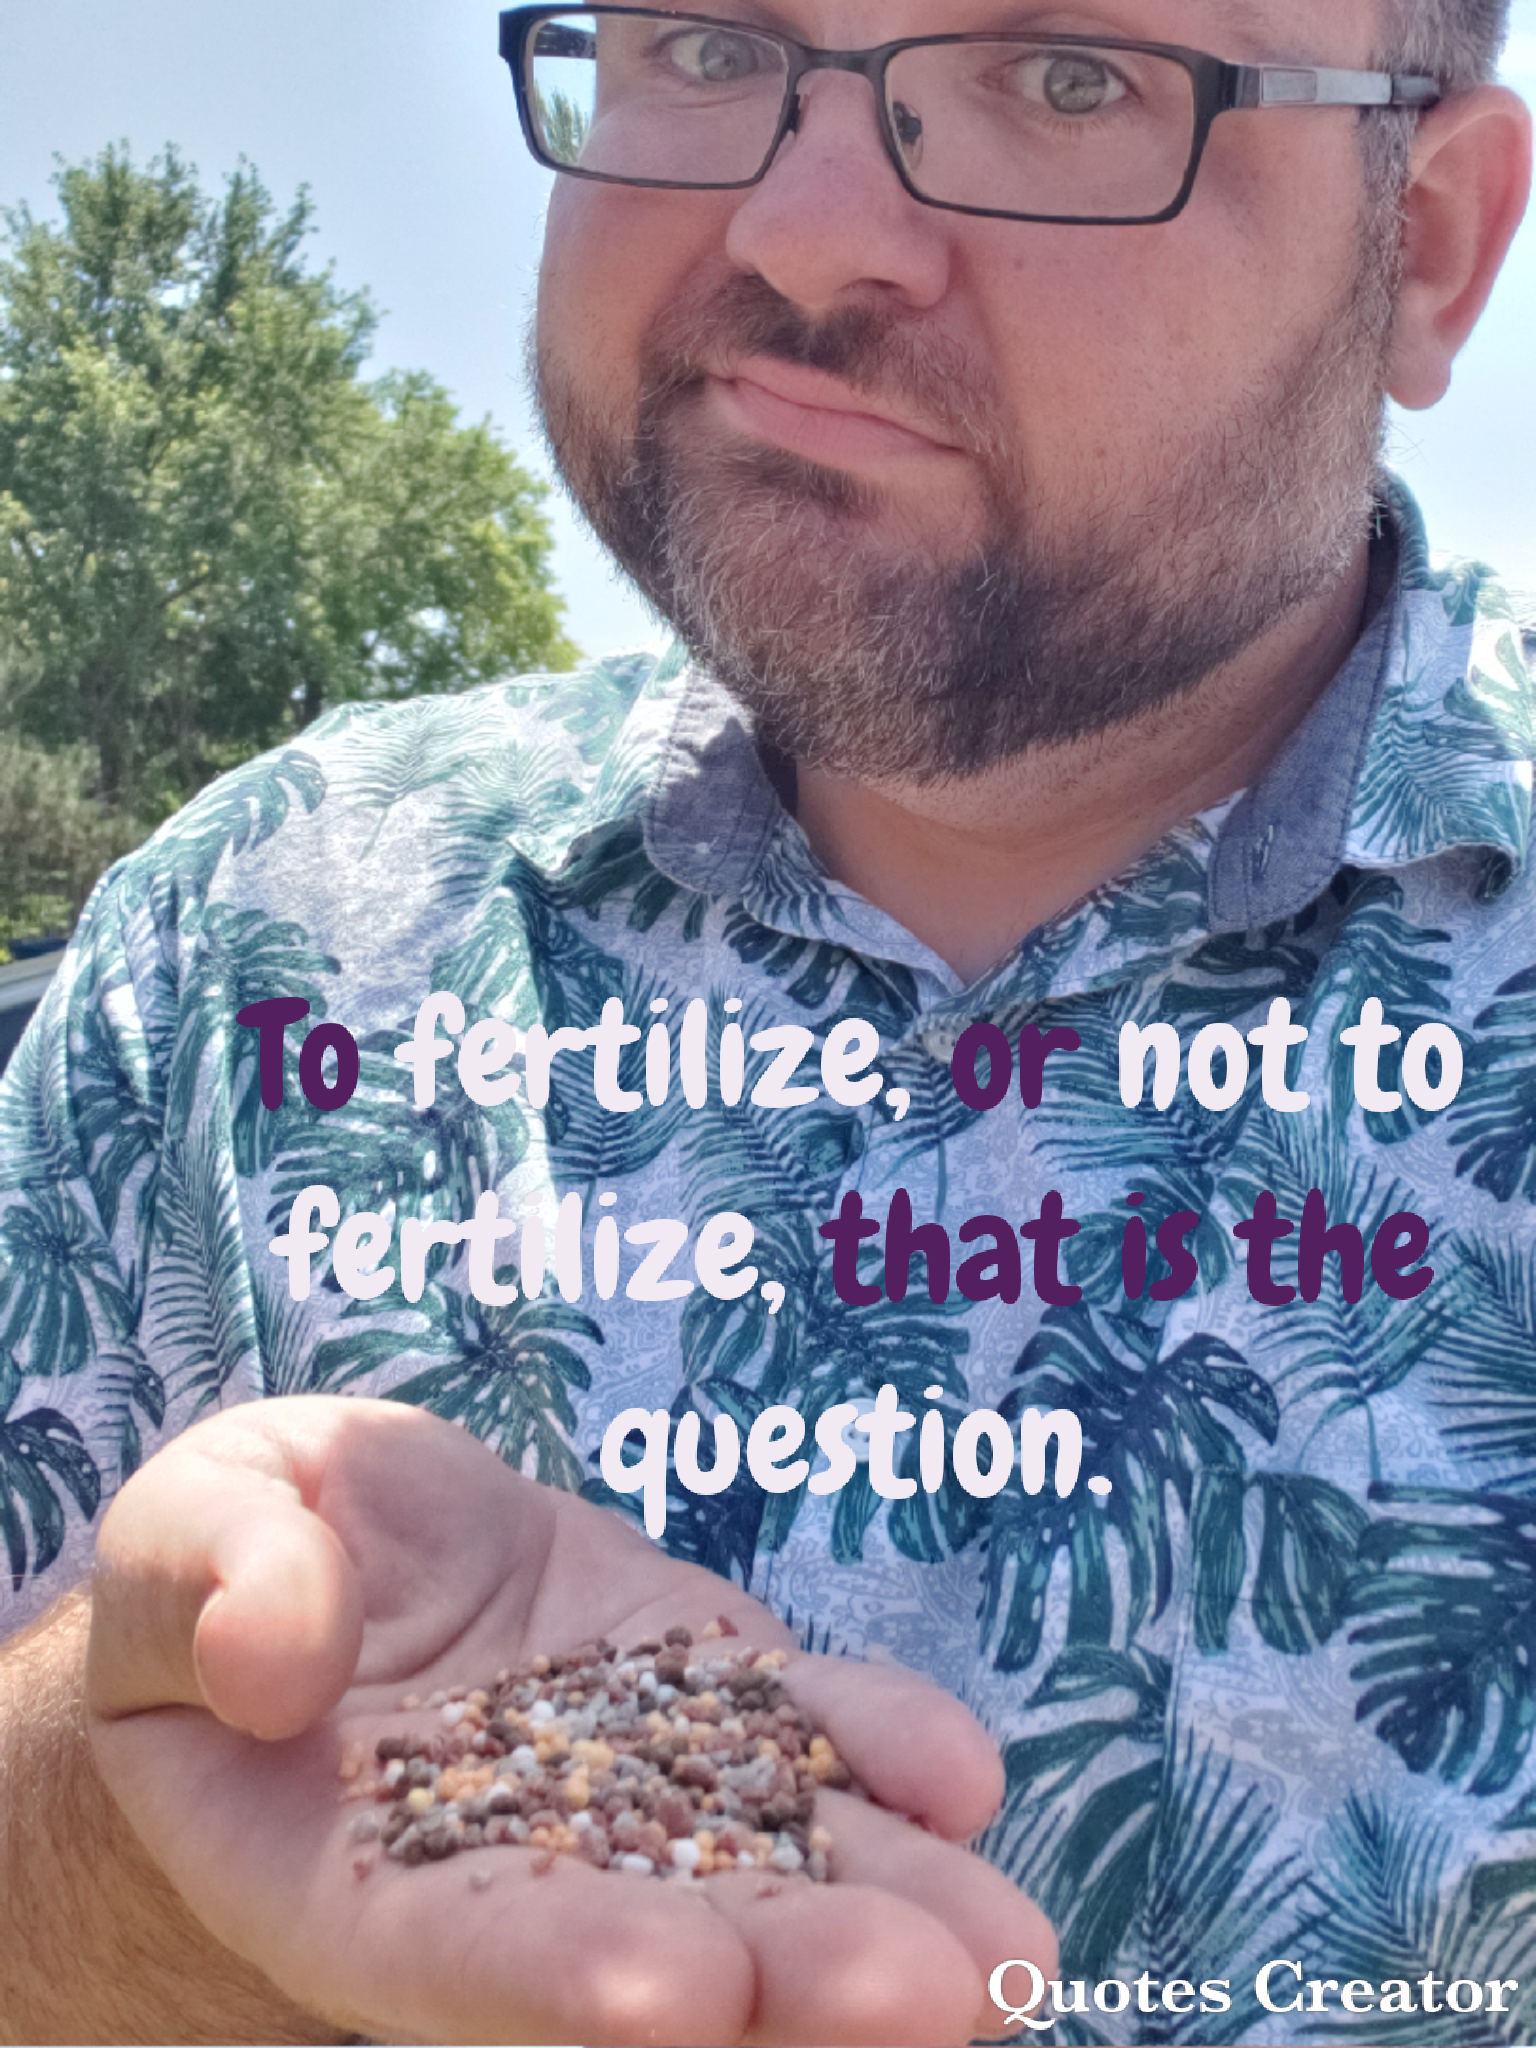
You see a bright shiny package at the garden center saying that it can help you have the most bountiful garden ever, the greenest lawn in the neighborhood, your plants will have miraculous growth, or it will supply every element on earth to make sure that your plants are living their best life. It’s got what plants crave….It’s got electrolytes! You reach out to grab that package and ……. Woah!  Pump the brakes!  Do you know if your plants even need to be fertilized?  Are you just falling for that shiny marketing, or do your plants really need added fertility to grow?

It turns out that many gardeners add fertilizer out of habit or because a shiny package or advertisement told them they needed to do it.  The fact is, though, that you may or may not need to add fertilizer to get your plants to grow healthy.  It is actually more likely than not that the level of nutrients in soil is perfectly adequate for healthy plant growth. And guess what, there really is a way to know what plants crave…or at least are lacking: A soil test.

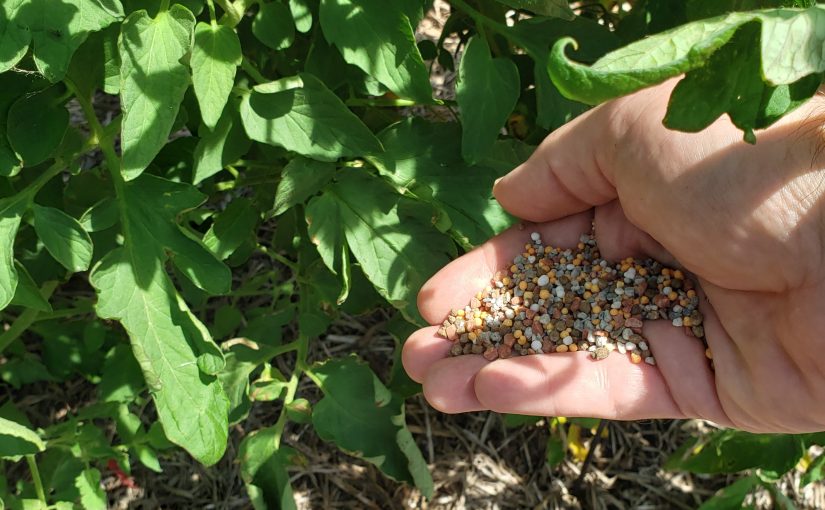
We here at the Garden Professors (and those of us who work in extension) often get questions or hear comments about gardeners adding fertilizer or random household chemicals and items to their plants and soils with no idea what they do or even supply.  They’ll throw on the high powered 10-10-10, the water soluble fertilizer, rusty nails, or even (shudder) the oft mentioned Epsom salts because it is just what they’ve been told to do.

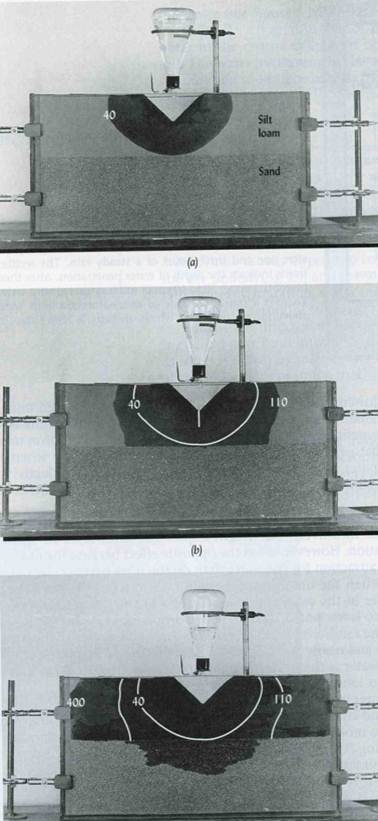
A few months ago, my GP colleague Jim Downer talked about why to amend soil– focusing mainly on organic material and a little bit of fertility.  In this article, I’m going to share some how and what: what plants need in terms of nutrients, how to determine what nutrients you need to add, what you can use for increasing fertility (conventional and organic), and how to calculate how much fertilizer to add.

What plants really need

Plants have a number of essential plant nutrients that they need from the environment in order to properly grow and function. Hydrogen, carbon and oxygen are all important, but are not something that gardeners have to supply since they are taken in by the plant in the form of water and carbon dioxide (unless you forget to water your plants, like I sometimes do — but death will occur from dehydration well before lack of hydrogen).

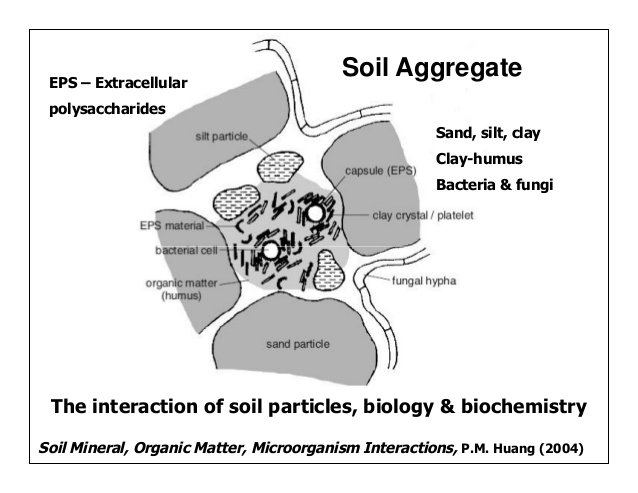
There are six soil macronutrients, which means that they are used in larger amounts by the plants. These include nitrogen, phosphorous, and potassium, which form the basis of most common fertilizers that have those magic three numbers on them (example: 10-10-10). Those three numbers indicate that the fertilizer contains that percentage of the elemental nutrient in it. For this example, the fertilizer contains 10 percent nitrogen, 10 percent phosphorous, and 10 percent potassium.  The other three soil macronutrients are magnesium, sulfur, and calcium.  Depending on your location, your soil may be abundant or deficient in these nutrients, especially magnesium and calcium.  Sulfur is commonly released during decomposition of organic matter, so it is usually present in sufficient amounts when soil is amended with (or naturally contains) organic matter.

If a soil is deficient in a nutrient that a plant requires it is usually a macronutrient since plants use them at higher levels.  However, deficiency is still unlikely in most soils unless there is a high volume of growth and removal, such as in vegetable gardens and annual beds (or if you’re growing acres of field crops like they do here in Nebraska).  These are also the nutrients that are most common on soil tests, since they are the ones that are used the most by plants.

Soil micronutrients are needed in much smaller amounts. Those nutrients are boron, copper, chlorine, manganese, molybdenum, and zinc (remember the periodic table?). These are also usually supplied from organic matter or from the parent soil material so deficiency is even less likely than for macronutrients.  Tests for these aren’t usually part of a basic soil test, so if you suspect you might have a deficiency you might have to get a specialized test.  There are some basic physiological signs of deficiency that plants might exhibit in response to specific deficiencies, but their similarity to other conditions make it an imprecise tool for diagnosing a deficiency.

Compost is a good source of nutrients, especially micronutrients (as we’ll read later).  Using compost alone may be sufficient for many gardens, such as perennial beds.  However, higher turnover and higher need areas like vegetable gardens may need supplemental fertilization beyond compost.  That’s where the soil test comes in.

What’s on the menu….interpreting soil test results

If you’ve had your soil tested by a lab (which is recommended, since it is much more precise than those DIY test kits), you’ll get results back that give you the level of nutrients in your soil and usually recommendations for how much of each nutrient you need to add to the soil for basic plant health.  This is a general recommendation that is common for most plants, which is generally sufficient for average growth.  If the test says that the nutrient levels are normal, you don’t have to add anything….I repeat….YOU DON’T HAVE TO ADD ANYTHING.  If it says you need one nutrient of the other you’ll need to add it to your garden or around the plant.  As we’ve said before, disturbing the soil as little as possible is best, so if you’re using a fertilizer product aim for one that you can broadcast on top of the soil or is water soluble.  This goes for compost as well – try to apply it to the top of the soil and it will incorporate over time.

Image result for soil analysis reportYour soil test results will usually tell you to add nutrients in pounds per a certain square footage.  In the example pictured, there’s a recommendation of 3.44 lbs of Nitrogen per 1000 square feet.  That number is for the actual nitrogen, and since different nutrient sources have different amounts of nitrogen you’re going to have to do some math to figure out how much fertilizer you need per 1000 square feet and then multiply that by how many thousands of square feet you have.

I’ll note here that soil labs do not usually test for nitrogen due to the variable nature of nitrogen in the soil and the lack of affordable or reliable tests.  Nitrogen fluctuates widely over a short period of time and is not as persistent in the soil as other elements due to plant take-up, microbial action, and weather conditions.  Nitrogen recommendations are usually made based on the crop indicated for the test and may be informed by the levels of other nutrients.

Let’s say that I’m using an organic fertilizer product I purchased at the garden center and the nutrient analysis is 4-3-3 (these numbers are standard for organic nutrient sources, which have lower nutrient levels than conventional fertilizers).  That means that for every 100 lbs of that product, 4lbs are nitrogen, 3 are phosphorous, and 3 are potassium.  My (hypothetical) garden is 10ft by 20ft, which is 200 square feet.

So we divide 200 by 1000 to get .2, which represents that my area is 20% of the area listed on the recommendation.  If my garden were 3500 square feet, then that number would be 3.5.

Next, multiply the Nitrogen recommendation of 3.44 lbs by .2.  This give me 0.688.  This tells me that I need .688 lbs of nitrogen to amend my 200 square feet.

So I just need to weigh out .688 lbs of the fertilizer, right?  Nope – we have to account for the fact that my fertilizer is only 4% nitrogen- only 4 lbs out the 100 lb bag.  We can estimate amounts by figuring out how much nitrogen is in smaller amounts of the fertilizer.  Since we know that 100lbs has 4lbs of N, then 50lbs has 2lbs of N, and 25lbs has 1lb of N.  If I want to get a more precise amount of fertilizer poundage to get my .688 lbs of N, then we divide the pounds of N needed by the decimal percentage of N in the fertilizer.  So that would be .688 / .04, which gives us 17.2 lbs of fertilizer.

Now, considering that the bagged product that I bought is $25 for 8lbs, I may want to reconsider using it for this application…unless I enjoy throwing my pearls before swine or I’m fertilizing my money tree.

If you do the math, you’ll note that this fertilizer will add more than the recommended amount of phosphorus and potassium.  You’ll either need to decide if that is acceptable or if you need to find another source of nutrients.

If you’re not using a prepared fertilizer product but rather an organic source of nutrients, you can still calculate how much to add to get to the recommended amount.  The following are some good lists of nutrient ranges of organic materials:

https://extension.psu.edu/using-organic-nutrient-sources

https://vegetableguide.usu.edu/production/soil-nutrient-water-management/organic-nutrient-sources

A note about pH

Another thing your soil test will tell you is the pH of the soil.  In general, plants prefer a soil pH just on the acidic side of neutral (between 6.0 and 7.0).  There are plants that prefer different pH levels – such as blueberries and azaleas and their need for a more acidic soil between 4.5 and 5.2.  Changes in pH affect the availability of nutrients to plant by affecting ionic bonds of the elements.  For the most part, the nutrients are more available at that neutral pH.  You’ll note that iron is more available at lower pH levels, which is why those acid-loving plants grow better at lower pHs – they’re heavier iron feeders.

If your pH is extreme in one way or the other, you’ll either need to find plants that thrive at that level or adjust the pH if that isn’t possible.  To raise pH in acidic soils the most common method is application of lime.  To lower pH, you’ll need something high in sulfur.  For more information, visit https://articles.extension.org/pages/13064/soil-ph-modification .

Having a philosophical moment in the garden

Urban Gardening Considerations

Along with the trends of buying local food, buying organic, etc., there seems to be an increasing interest in the ultimate local food source – a garden. This includes in urban areas. Urban gardening is a great way to save money on food, a great source for fresh vegetables – especially in “food deserts”, and an easy way to introduce kids to where the food on their plate comes from. However, there are a couple potential obstacles you should consider first before starting your urban garden.

"Graze the Roof" by Sergio Ruiz
“Graze the Roof” by Sergio Ruiz

First, in urban environments the possibility that soil could have been contaminated with heavy metals, petrochemicals, etc. is pretty high, especially in older neighborhoods. Lead, which was once a common additive to gasoline and paint, is a common contaminant in urban soils.  and can be absorbed by the roots of the vegetables you grow. Because of this, that lead can eventually end up in the food on your plate. Most lead poisoning comes from ingesting lead (like eating lead paint chips…), so it’s important to know that the soil you’re using for your garden is safe. You should take some soil samples and send them to a lab in your state that can test for heavy metals like lead. Usually the Land Grant university in your state (if you’re in the US) will have a soil testing lab where these tests can be performed for a nominal cost. Other forms of contamination are possible as well, such as chemicals from cars, asphalt , laundry-mats, etc. These chemicals are more difficult to test for, so your best bet is to find out the history of your garden plot. These records should be available from your local city government, perhaps even online. Read more about contamination in this post.

Second, urban soils are often compacted from foot, car, or perhaps machinery traffic. Compacted soils make it difficult for plants to grow, mainly because the plant roots are not strong enough to penetrate the compacted soil, and thus cannot gather enough water or nutrients for the plant to survive, let alone grow and produce vegetables. Compacted soils are especially common in newer housing developments where entire blocks of houses were built around the same time. The construction companies often remove all of the topsoil prior to building the houses. The soils are then driven over by construction machinery and compacted. Then sod is laid directly on top of the subsoil. This makes for soils with very poor growing conditions for both lawns and gardens.

A good alternative for areas with either contaminated or compacted soils is to use a raised garden bed with soil that was brought in from a reliable source. You can buy bags of potting soil from a local home and garden supply store, but a more economic alternative is to have a trailer full of topsoil trucked to your raised bed. When you build your raised garden, be sure to use untreated wood. Some of the chemicals used to for pressure treated lumber are designed to kill fungi that break down wood. These chemicals, some of which contain arsenic, can leach out of the wood and into the soil used for your veggies! However, untreated wood, though it might not last as long, will still last for decades and is probably cheaper anyway. There are lots of great designs and how-to sites that show you how to build a raised garden bed. Here’s an extension bulletin from Washington State University on raised bed gardening. The raised beds shown below are from when I first installed them in my community garden plot in Manhattan, Kansas. One is now a strawberry patch (the border helps contain the strawberries to a defined area), and the other is used for mostly cold season crops.

This image shows two raised garden beds with freshly added soil and surrounded by straw in a garden plot.
Raised garden beds in Colby Moorberg’s community garden plot.

Space is also another consideration. If you don’t have the space for a garden or a raised garden, then perhaps you need to think outside the box (raised garden pun intended) and consider container gardening. Container gardening is exactly what its called – growing ornamental or vegetable plants in containers. Containers can be traditional plant pots, buckets, plastic totes, or any other container with an open top.

The advantages of container gardening include:

  • Containers can be arranged to optimally use the space available, or rearranged if you like to mix things up sometimes
  • Potting soil can be used, and can be trusted to be lead/chemical-free
  • Work can be performed on a bench, thus avoiding working on your knees
  • Containers can be arranged to provide decoration for your outdoor space
  • Many objects found around the house can be cheaply converted into decent containers
Vertical Pallet Garden. Photo by Heather Foust

Vertical gardening is a version of container gardening that uses your available space  efficiently. Much like using shelves to save space inside your home, vertical gardens use shelves, stairs, racks, etc. to make use of vertical space. The options for vertical gardens are only limited by your imagination. Here are a few extension bulletins on vertical gardening from Tennessee State University and the University of Nebraska.

The main disadvantage of container gardening is that you’ll likely have to water more frequently, but there are strategies to overcome that problem – see my prior blog post about saving water with container gardening. Another good resource is the University of Illinois Container Successful Container Gardening website.

In summary, the biggest obstacles to urban gardening are soil contamination, soil compaction, and space limitations. I’ve given you a few good alternatives to overcome those issues. Also, be sure to fertilize appropriately, lime as needed, and make sure the plants that you pick are appropriate for the sunlight that’s available. Your local garden supply store or extension agent can help you with suggestions on those issues.

If you know of an urban gardening obstacle that I didn’t address, please leave a comment and I’ll see if I can help out.

Happy digging!

Colby

This was originally posted on Colby’s soil science blog, ColbyDigsSoil.com. Some edits, updates, and adaptions were made for this post.

A Raised Bed Rebuttal: In defense of a common garden practice and soil health

One of the things I miss (and sometimes don’t miss) after my move from West Virginia to Nebraska is writing my weekly garden column for the Charleston Gazette-Mail newspaper.  It was a great way to always keep thinking about new things to talk about and a great way to connect with the public.

After I left, the newspaper replaced me with a team of 4-5 local gardeners who would take turns writing about their different gardening insights and experiences.  Some have been really good, like the ones who were my former Master Gardener volunteers.  However, sometimes I find the bad information and attitude of one of the writers off-putting and even angering.

Take for example this missive which equates sustainable agriculture (a term which is pretty well defined as a balance of environmental stewardship, profit, and quality of life) solely to permaculture and biodiversity while espousing an elitist attitude about “no pesticides, no fossil fuels, no factory farms, growing all you need locally and enhancing the land’s fertility while you’re at it.”  He got all this from an old photo of dirt poor farmers who were apparently practicing “permaculture” – which I’m sure was foremost on their minds while they were trying not to starve to death.  The fact is that our food system (and the food that today’s low income families) depends on comes from a mix of small and large farms. And most of those “factory farms” are actually family owned, and not everyone can afford to grow their own food or pay the premium for organic food (which still has been treated with pesticides and is in no way better or healthier than those conventionally grown).

Now, I know I no longer have a dog in that fight, but when I see bad information, especially when it is aimed toward an audience that I care deeply about I just have to correct it.  So two weeks ago when I saw his latest gem of an article berating a woman (and basically anyone) for using lumber (and those who work as big box store shills to promote them) to build raised bed gardens and should instead till up large portions of their yard for the garden I was aghast.  Putting aside the horrible advice to till up the garden (which we’ll talk about in a minute) or the outdated recommendation of double digging (proven to have no benefit), that advice is just full of elitist assumptions toward both the gardener and toward the technique. It is especially ridiculous and ill-informed to suggest that tilling up a garden and destroying the soil structure is much better ecologically speaking that using a raised bed (and we’ll talk about why in a little bit).

Don’t want to do a raised bed?  Fine, it isn’t for everyone.  But that doesn’t mean you should go out and till up a large patch of land that will degrade the soil, lead to erosion and runoff, and reduce production.  It does not do anything to improve drainage nor aeration.

So let’s do a breakdown of why I find this article, its assumptions, and bad science so distasteful:

Bad Assumptions (and you know what they say about assuming)

The gardener didn’t have a reason for a raised bed other than she had been told that’s the way you do it.

This assumption fails to take into account the many different reasons why a gardener may prefer to use a raised bed.  Does she or a family member have mobility limitations where a raised bed would provide access to be able to garden?  Or does she have space limitations for a large garden patch?  Would a raised bed make it easier for her to manage and maintain the garden?  Making a blanket pronouncement against the technique fails to use empathy to see if it actually would make gardening more accessible or successful for the gardener. Is she wanting a raised bed because the soil in the ground at her house is too poor or contaminated?  West Virginia is notorious for having heavy clay, rocky soil that is pretty poor for growing most crops.  It can take years of amending to get it even halfway acceptable for gardening.  Or perhaps she lives on a lot that had some sort of soil contamination in the past and she’s using raised beds to avoid contact with the contaminated soil.

Raised beds also have some production advantages – the soil heats up faster in the spring, allowing for earlier planting.  A well-built soil also allows for improved drainage in areas with heavy soil or excess moisture.

The gardener has access to equipment to till up a garden space, have the physical strength and endurance to hand dig it, or is she able to afford to pay someone to do it for her?

Raised beds can often be easier for gardeners to build and maintain, often not needing special equipment or heavy labor.  If the gardener isn’t supposed to benefit from these efficiencies, how will she go about tilling up the soil for her new garden.  Does she or a friend/neighbor have a rototiller or tractor she can use?  Is she physically capable of the often back-breaking work of turning the soil by hand?  Or does she have money to pay someone to do it for her?  So these “cheaper and easier” methods he describes could actually end up costing more and being harder than building a raised bed.

The raised bed has to be built out of lumber, which apparently only comes from the Pacific Northwest and is a horrible thing to buy. First off, raised beds can be built out of a number of materials.  The list usually starts with lumber.  Some people tell you to use cedar (which does primarily come from the PNW), since it is more resistant to decay, but plain pine that’s treated with a protective oil or even pressure treated is fine (it used to be not OK back before the turn of the century when it was treated with arsenic, but most experts now say it is OK since it is treated with copper).  The dig against the PNW lumber industry is as confusing as it is insulting, since there’s lots of lumber produced on the east coast, and even a thriving timber industry right in West Virginia.  Most lumber these days is harvested from tree farms specifically planted for the purpose or by selective timbering that helps manage forest land for tree health and sustainability.

The list can go on to include landscaping stone, concrete blocks, found materials like tree branches, and on and on.  These days, you can even buy simple kits you can put together without tools and with minimal effort that are made of high-grade plastic or composite lumber.  They’re getting cheaper every year, and can be especially affordable if you find a good sale or coupon.

Heck, a raised bed doesn’t even require the use of a frame at all….just a mound of well amended soil in a bed shape will do.  No need to disturb the soil underneath, just get some good topsoil/garden soil in bulk or bags from your favorite garden center, mix it with a little good compost, and layer at least 6 inches on top of the soil.  Use a heavy mulch on top if you are afraid of weeds coming up through the new soil.

The soil she’d buy is trucked in from Canada.

I’m guessing this has some sort of assumption that the soil a gardener should be putting a raised bed is like a potting mix composed primarily of peat moss. While many gardeners are trying to decrease the use of peat moss, which is a non-renewable resource harvested from Canadian peat bogs, the recommended soil for a raised bed is not potting mix or one that even contains a large amount of organic material.  The recommended composition of raised bed soil is largely good quality top soil, which is usually sourced locally, mixed with a bit of compost which could be from home compost, a local municipal composting facility or producer, or from a bagged commercial product that is likely from a company that diverts municipal, agricultural, and food wastes into their product.

Bad Advice based on Bad Science (or lack thereof)

Tilling or disturbing the soil is a common and acceptable way to prepare a garden.

More and more evidence is emerging that tilling or disturbing the soil is actually one of the worst things you can do in terms of both production and environmental impact in agricultural production.  First, tilling disturbs and in some cases destroys the soil structure.  Destroying the soil structure allows for increased erosion, especially when the bare soil is washed away during heavy rains or blown away in heavy winds.  Excess tillage and wind is what actually led to the dust bowl, which actually led to the early promotion of conservation tillage practices through government programs like Conservation Districts (and also gave us some great literature, thanks to John Steinbeck).  Aside from the soil particles that erode, having open, tilled soil leads to nutrient runoff that contribute to water pollution.

 One other structure negative is the production of a hardpan or compressed layer of soil that occurs just below the tilled area.  This results from the tines of a tiller or cultivator pressing down on the soil at the bottom of where it tills and can drastically reduce the permeation of water and gasses through the soil.

Alt
Soil Aggregates and microbes

The aggregates in the structure of un-disturbed soil provide myriad benefits to soil health, especially in providing the capacity for the growth of good microorganisms.  Studies have shown that the population of soil microbes is drastically higher in agricultural soils that haven’t been tilled.  Therefore, tillage reduces soil biodiversity.

One of the reasons for increased soils microbes in no-till soil is an increase in soil organic matter.  No-till allows for some crop (roots, etc) to remain in the ground and break down.  Tillage also incorporates more air into the soil, which does the same thing that turning a compost pile does – it allows the decomposition microbes to work faster in breaking down organic matter.  This increased activity then decreases the amount of organic matter.  So tilling the soil actually reduces organic matter.  The structure and organic matter also allows no-till soil to have a higher Cation Exchange Capacity, or ability to hold nutrients.

When the carbon in the organic matter in the soil is rapidly depleted after tillage, it doesn’t just disappear.  The product of the respiration from all those bacteria and fungi is the same as it is for all living creatures – carbon dioxide.  The organic matter held in the soil therefore provides a great service (we call this an ecosystem service) in that it sequesters carbon from the environment.  This can help mitigate climate change   and even effect global food security.

Source

Double digging does a garden good.

Look through many-a garden book and it will tell you to start a garden bed by double digging, which is a term used to describe a back breaking procedure where you remove the top layer of soil, then disturb a layer beneath it and mix up the layers.  While it may not be as drastic as running a tiller or tractor through the soil, it still destroys the structure with the same negative outcomes as above.  Additionally, while many gardeners swear by it, there is evidence that the only benefit to come from it is to prove to yourself and others that you can do hard work.   It has no benefit for the garden and usually negative effects on the soul, psyche, and back of the gardener.

Large tilled up gardens are easier to maintain. One of the benefits of gardening in a bed, raised or otherwise, is that the close spacing allows you to grow more stuff in a smaller area. By reducing the area under production, you also reduce the labor and the inputs (compost, fertilizer, etc) that are used.  Using the old in-ground tilled up garden method where you grow in rows means that you have more open space to maintain and will be using inputs on a larger area that really won’t result in more production (it is really wasted space and inputs).

So, how do you start a garden if you don’t want to build a raised bed and know that you shouldn’t disturb the soil?

So you realize that tilling up the soil is really bad from both an ecological and production standpoint, but you don’t want to build a raised bed structure? That’s perfectly fine.  Gardening in a bed, raised or not, is a great, low-impact gardening practice.

To get started, you don’t have to disturb the soil at all.  Simply adding a thick layer of compost and topsoil on top of the soil in the general dimensions of the bed is a good way to start a bed.  No need to till or disturb.  And over time, the organic matter will eventually work its way down into the soil. If you have really heavy (clay) soil, you’ll probably want to start with a fairly deep (at least 6 to 8 inches) layer of soil/compost.

Just cover with your favorite mulch to keep it in place and reduce weeds (I prefer straw and shredded newspaper, but you can use woodchips as long as you don’t let them mix in with the soil – something I never can do in a vegetable garden where I’m planting and removing things on a regular basis). Keep in mind that a good width for a vegetable bed is about four feet and you want a walkway of at least two feet between them.  This allows you to not walk on the good soil, which can cause compaction.

If the spot where you want to put your bed is weedy, use your favorite method to remove weeds before laying down the layer of compost/soil.  This could be through herbicide usage (keeping in mind most have a waiting period to plant, though some are very short) or mulch.  If you are planning ahead (say at least a year), our Garden Professors head horticulturalist suggests a layer of woodchip mulch 8-12 inches deep that can turn a lawn patch into a garden patch.  They reduce the weeds and build the soil as the break down.

Are Soaker Hoses Safe?

By Cynthia Lee Riskin

With drought predicted for the west, southwest, and south through June 2015 (National Weather Service March 2015), many conscientious vegetable gardeners will try to conserve water by using soaker-hoses, those bumpy black hoses that weep water onto the soil through tiny pores.

Brussel sprouts and red lettuce
Soaker hoses are made from fine-crumb rubber, usually recycled from vehicle tires. Research strongly establishes that tire particles leach heavy metals, carcinogens, and mutagenics, among other toxins. Yet soaker hoses have not been studied for potentially increasing the toxicity of edible plants. Are they really safe to use safe on our edible plants?

Soil in the City
Urban soils already contain high levels of heavy metals (Murray et al. 2011) from years of household runoffs—chemicals from pesticides, cars, painting, cleaning, and more. Adding soaker hoses made of crumb tires might exacerbate the problem.

Rhubarb
Whether plants take up enough heavy metals to be toxic, however, is a complex equation, depending on a slew of interrelated factors, including:
• Soil pH (Costello 2003) and texture (Singh and Kumar 2006; Murray et al. 2011)
• Temperature (Murray et al. 2011; Lim and Walker 2009)
• The size of the rubber particles (Gaultieri et al. 2004)
• Chemical composition of irrigation water (Singh and Kumar 2006)
Furthermore, the plant species and even the cultivar can affect a plant’s uptake of zinc and other heavy metals (Murray et al. 2009 and 2011).

Growing Healthy Food
If you’re looking for the key to ensuring that your vegetable patch grows healthy food, however, I’m sorry to disappoint you. Too many factors are involved to predict the toxicity of what we grow in our gardens.

A good way to get more information is to contact your local extension agent for a list of laboratories that test soils not only for nutrient composition but for heavy metals. Although this information won’t guarantee you’ll be able to grow heavy-metal-free produce, it’s a step in the right direction while we wait for more research to be done.

vegetables_jpg.jpg
Cindy Riskin is a Master of Environmental Horticulture and freelance journalist raising edible plants, an unkempt ornamental garden, and elderly mutts in Seattle, Washington.

NOTE: This article is excerpted from a longer one soon to appear in Cindy Riskin’s upcoming blog, tentatively named Muddy Fingers Northwest. Please contact Cindy Riskin at cindyri@q.com for an advance copy or the blog’s web address.

REFERENCES
1. Costello, Laurence Raleigh. 2003. Abiotic disorders of landscape plants: A diagnostic guide. Oakland, Calif.: University of California, Agriculture and Natural Resources. P. 117.
2. Gualtieri M., M. Andrioletti, C. Vismara, M. Milani, and M. Camatini. 2005. Toxicity of tire debris leachates. Environment International 31 (5): 723–30.
3. Lim, Ly, and Randi Walker. 2009. An assessment of chemical leaching releases to air and temperature at crumb-rubber infilled synthetic turf fields. Albany, N.Y.: New York State Department of Environmental Conservation. http://www.dec.ny.gov/docs/materials_minerals_pdf/crumbrubfr.pdf.
4. Murray, H., T.A. Pinchin, and S.M. Macfie. 2011. Compost application affects metal uptake in plants grown in urban garden soils and potential human health risk. Journal of Soils and Sediments 11 (5):815–829.
5. Murray, Hollydawn, Karen Thompson, and Sheila M. Macfie. 2009. Site- and species-specific patterns of metal bioavailability in edible plants. Botany 87:702–711.
6. National Weather Service Climate Prediction Center. March 19, 2015. U.S. Seasonal Drought Outlook. NOAA/National Weather Service National Centers for Environmental Prediction. http://www.cpc.ncep.noaa.gov/products/expert_assessment/sdo_summary.html.
7. Singh, S., and M. Kumar. 2006. Heavy metal load of soil, water and vegetables in peri-urban Delhi. Environmental Monitoring and Assessment 120 (1-3):1–3.

Prepping Your Garden for The Next Growing Season

William H. McCaleb, Blog Contributor
Program Assistant for Agriculture and Natural Resources, Halifax County, VA. and Master Gardener

For gardeners in the eastern U.S., last year was a better than normal gardening season. Better than normal yield, better than normal precipitation, and in our case in Virginia cooler than normal which yielded excellent spring cool season crops as well as early summer crops.

But all good things must come to an end; that being the result of several heavy frosts.   With that said, I am looking forward to next year’s challenges and what I want to grow for our family. Oh, for the taste of one more summer ripened tomato, but for now, that is a dream and it is time to reflect on what grew well in the garden as well as what didn’t do so well.  Hopefully you have kept a garden journal to help you in this task. I find that writing down details of what is planted, the orientation, spacing, fertilization/liming rates and frequency, weekly rainfall amounts, production amounts, etc. is helpful as you start planning for the next season.

Like me, you should start thinking about what you want to grow in 2015. Take time to reflect on your 2014 garden production, care, and location. Also, evaluate what went right and what went wrong with the plants and varieties you planted and harvested. This will start you off in the right frame of mind in preparing for the next growing season. Good planning and preparation for next year gives you the tools to have an even better gardening season. A successful vegetable gardener is a happy well fed gardener!

I know, you too are already missing those fresh tomatoes, potatoes, peppers, squash, okra, and other great home grown vegetables we treated ourselves to this year, but the next season is ‘just around the corner’ so to speak. After all the days are getting a little longer. Spring can’t be far away!

If you just happen to live in an area that hasn’t had frost yet, take your prompt from your plants: when annuals and seasonal vegetables turn brown and begin to die back, it is time to clean up your garden.

Clean up the Garden
Your best action is to remove any spent or failing plant materials. Experienced gardeners know that many of the bacteria, fungi, and other disease-causing organisms that caused those diseases. Pathogens that are sources of those diseased plants this past season can survive over the winter in dead leaves, stems, roots, and dropped fruits that get left in the garden. Much like a piece of bread that is kept too long and looks like it has penicillin growing on it, garden debris also will carry the pathogens that can come alive with those same problems when the temperatures begin to rise in the spring. Prevention of diseases and insect infestation now, will keep you from a repeat of problems in next year’s garden.

A good leaf rake, given enough ‘elbow grease’, works well in getting the bulk of dead plant material out of your garden. If you experienced early or late blight or other tomato related diseases this past growing season, you want to make sure you reduce, to the best of your ability, the risk of repeating that problem again next year. Yes, there are many new varieties of vegetables available today that are ‘resistant’ to some of these diseases, but ‘resistant’ does not mean they are immune to them. You don’t want to take the chance of returning pathogens, so do a good job, cleaning and ‘sanitizing’ your garden now. Make sure, when removing the plant debris, that you totally destroy that debris so that no pathogens are left behind.

To Compost or Not!
Can you compost this dead plant material and use it next spring? Information that you find from Extension offices across the U.S. will recommend that you do not. The reason being is that most people do passive composting i.e. put it in a pile, and then using what compost develops, put the compost back in the garden for the next season. It is best to burn the plant material; this will destroy the pathogens and weed seeds as well and return some carbon back into the ground when you spread it out. Please check local/state laws prior to burning. Many states and/or localities have burn bans especially this time of the year. Another method, if your local law allows it you can bag the material and send it to the landfill. Each year there are more localities that ban yard waste from their landfills. If you are not sure, check with your locality to learn more about your local waste and recycling laws.

If you do decide to go with active composting; composting at a temperature 140°F, or higher, will destroy many of the disease organisms as well as many weed seeds. You will need a temperature probe to monitor compost temperatures.   It’s really not hard to source a compost thermometer either through the internet or local retail outlets such as garden centers or nursery supply stores. If in doubt about your compost pile reaching these high temperatures, it is best to side with caution and discard the material by properly bagging it or by burning based on your local ordinances.

Preventing Overwintering Pathogens
Some of our most notorious insects of the garden such as Mexican bean beetle, squash vine borers, European corn borer, cabbage loopers, can also overwinter in garden debris. Larvae will use debris as a safe harbor. Flea beetles and spider mites, as well, can find food and winter shelter in spent plant material and weeds.

After you have finished cleaning up the debris from your garden, it is time to turn over the soil to both aerate and break up any remaining debris into smaller pieces that will be turned under. A good rototiller will help make this job easier. Once buried, any plant material left will decompose more rapidly.

For some pests and pathogens, turning over the soil after removing spent plant materials is recommended as the main line of defense against overpopulation next year. Consider this information from “Home and Horticultural Pests: Squash Bugs and Squash Vine Borers,” from Kansas State University,

“A vigorous autumn… rototilling can physically destroy cocoons and larvae (of the squash vine borer). Brought to the surface, cocoons and larvae are more susceptible to predation by birds and exposed to cold winter elements, leading to their demise. Deep plowing physically destroys cocoons and larvae burying them deep beneath the soil surface so pupated moths become entombed underground.”

Steps to a Healthier Garden
If you haven’t done a soil test in three years or more, it is time to retest and determine the needs of your garden soils based on what you will be growing in the next season. Soil test kits and instructions are available from your local Extension Office. Also, in planning next year’s garden, rotation of your crops is a must do item. This simple action will help keep disease issues down.  If your soil test(s) recommend liming, you can go ahead and put down lime this time of year, allowing it to start adjusting the pH. If the ground is frozen already, wait until spring. As you add lime, you can also help build soil structure by incorporating compost or shredded leaves. These soil additives will also add beneficial micro-nutrients and beneficial organisms. If you want to further build the soil, you may want to consider putting in a cover crop that will not only hold soil, but when tilled in early spring, will further build a healthier garden soil. A legume such as white or red clover would be something to consider. Check with your local Extension Office for best cover crop recommendations for your area.

Prepping Your Garden for the Next Growing Season (pdf)

 References:

http://pubs.ext.vt.edu/426/426-334/426-334.html
http://www.ksre.ksu.edu/bookstore/pubs/mf2508.pdf

image sisters
“Three Sister’s Garden-Fall Clean-up “Southern Virginia Botanical Gardens” Photo by W. McCaleb 10/28/14 Corn, Beans, and Squash was grown here as the native Cherokee have done for centuries. Cleaned up and ready for spring 2015!


Let’s get (soil) physical…

We’ve had quite a bit of discussion this past week on the FaceBook page regarding Kelly Norris’s article in Fine Gardening on dealing with clay soils.  While Kelly’s article mainly addressed selecting plants for heavy soils, there was a side-bar on cultural approaches to dealing with clays; including the standard advice to avoid adding sand to clays.  This advice has been around for years.  The first time I recall hearing it was from Dr. Carl Whitcomb when I took his Arboriculture class nearly 30 years ago (Fall 1984 to be exact).  The rationale that is usually given is that adding sand to clay is the essentially recipe for concrete.  Technically, of course, this is not entirely true since making concrete also requires cement.  Nevertheless, trying to amend a clay soil with sand can lead to more problems than it solves.  The fundamental issue is not that clay + sand = concrete.  After all, there are plenty of highly productive soils in nature that have various ratios of sand and clay and they don’t form concrete.  The bigger issue is that tilling a clay soil (which you’d have to do to incorporate added sand) leads to a loss of soil structure.


So, what is soil structure?  Soil structure is a physical property of soil that describes its relatively ability to form aggregates.  Unlike soil texture, which can be quantified as percent sand, silt, and clay; structure is a qualitative soil physical property.  Common examples of soil structure are granular, platy or blocky.


While we usually think of clay as a negative thing (“Geez Jim, my wife just told me you have clay, I am so sorry…”); a well-structured clay soil can have excellent properties for plant growth.  Well-formed clay aggregates (referred to as ‘peds’) in a granular soil can function very much like larger soil particles in terms of water movement and drainage.  Soil structure is one of those things you have to experience to understand.  About the best description I can come with is that peds in a well-structured granular soil often have the consistency and texture of Grape Nuts cereal.


There are also soils out there that are sometimes referred to a ‘structureless’ soils.  These include single-grained soils and massive soils.  Single-grained soils are essentially pure sand.  In West Michigan these occur near Lake Michigan and are often called ‘blow sands’.  We have several seedling nursery operations in these areas.  Since there is no clay these soils have almost no nutrient-holding capacity – growers have to manage their fertility almost as it were a soilless system like a hydroponic or aeroponic system.  The advantage of growing in these soils is it makes lifting bare-root seedlings easy. Massive soils, on the other hand, are very dense soils where particles do not show any evidence of aggregation.  Repeated tillage can result in loss of structure and a soil (or portions of the soil) may show attributes of a massive soil including crusting or formation of hardpan.  The example below shows how structure (indicated by % aggregation) is lost through repeated cultivation.


Effect of soil tillage on soil structure.  Source (Greacen 1958, Australian J. Ag. Res. 9:129-137).

What can be done to improve or preserve structure?  This is a case where less is often better.  Natural processes such as freeze-thaw cycles and the action of earthworms and other invertebrates work to loosen soil and create aggregates.  The tips in the Norris article (avoid overworking soil and adding organic matter) are essentially the same advice I would give.

Container planting: intuition vs. reality

I’m just starting to think about getting my containers planted for the summer and happened to get an email on the topic from a blog reader. John was frustrated with a local columnist’s advice on using gravel in the bottom of the containers for drainage. When challenged, the columnist refuted John’s accurate comments with “logical thinking.” (You can find the posting and comments here.)

Here’s part of the post: “I like to cover the hole with a layer of gravel to improve drainage. Plants need to have their roots exposed to air in the soil to survive and thrive. If the container has no holes for drainage, it will fill with water and drown the plants very quickly. It is better to keep your plants on the drier side than to keep them constantly moist or wet. The big danger in using pots is drowning plants.” Later, he goes on to explain “The potting soil plugs up the drain hole and the water is trapped behind the plug. The layer of gravel creates an area for the water to drain through to escape. The creation of drainage commonly involves a layer of gravel.” This reasoning is part of what he calls “Logical thinking 101.”

As my husband pointed out, this isn’t logical thinking: it’s intuitive. It’s what we think is going to happen in the absence of any evidence. And in this case, it’s wildly inaccurate.

Jeff and I have both discussed the phenomenon of perched water tables in containers as well as the landscape in previous posts and on our Facebook page. The fact is, when water moving through a soil reaches a horizontal or vertical interface between different soil types, it stops moving. Here’s a photo from a very old research paper on the topic:

A layer of silt loam sits above a layer of sand, and water from an Erlenmeyer flask drips in. Intuition says that when the water reaches the sand, it will move more quickly through the sand because the pore spaces are larger than those in the silt loam. But intuition is wrong, as this series of photographs clearly demonstrate. Water is finally forced into the sand layer by gravitational pressure, after, of course, saturating the silt loam.

Intuition has its uses (I am quite proud of my own intuitive powers), but it doesn’t trump reality.

**This is an older post, so I’ve added this link to a peer-reviewed publication on the topic by Dr. Jim Downer and myself.**

It’s raining, it’s pouring, it’s a good time for a site assessment…

April is turning out to be a soggy month for most of Michigan and our surrounding states.  While most homeowners are inclined to hunker down indoors and keep an eye on their sump pumps on these dark, dreary days; our current run of wet weather is a good opportunity to take a stroll around your property and make some notes.  In particular, note any areas where water is accumulating.


Poor drainage is one of the most common sites factors that limit landscape tree and shrub survival and growth.  Sites that retain water for more than a day or too after rains stop are especially problematic.  The challenge with wet areas is we usually wait to plant trees and shrubs until things are high and dry and it’s easy to forget where the wet spots are.


There are two primary strategies for establishing healthy trees and shrubs in flood-prone spots.  First, determine if the problem can be corrected.  In some cases homeowners may be able to re-direct water flow from downspouts or other sources to keep water form accumulating in one spot. Again, these kinds of problems are easiest to spot if you go out when it’s raining.  Re-grading the area or installing drain tiles are other options but these are usually require skills and equipment beyond the average do-it-yourselfer.


If correcting the drainage issue is not an option, the second strategy is to plant trees or shrubs that are tolerant of flooding.  Plants vary widely in their tolerance of soil flooding and, not surprisingly, trees and shrubs that grow naturally along riverbanks and other low areas are usually the most tolerant.


This low spot in my yard  was a good site for a Baldcypress 

There are numerous resources on flood tolerant trees and shrubs on the web.  Two of the better resources are from the Morton Arboretum and from Cornell University.  Please note the Cornell guide is a large (>6 MB) .pdf file.


These Michigan holly (Ilex verticullata) I planted a couple of years ago a doing fine even though they are periodically flooded each spring.

Wet areas on your property do not have to be a ‘dead zone’, but establishing trees and shrubs in low laying areas takes some planning.  The first step in the process is assessing your site and identifying the problem areas.  The best way to do this is to put on a raincoat and take a walk in the rain.

The invisible, insidious presence of heavy metals

I spent the last two weeks in Spain, combining business with pleasure.  It’s interesting when something that starts out as part of the pleasure ends up being business instead.


Charlotte translated this sign for me – it’s historical information. Note the brightly colored mine tailings in the background.

My daughter is teaching English in Mazarrón, a small town in the province of Murcia. The climate there is very similar to southern California, though drier and not as warm: it’s pretty much a scrubland ecosystem. Since we both enjoy hiking, we decided to take advantage of exploring the abandoned mine sites.  Unlike such sites in the United States, there are no restrictions to hikers and in fact there’s signage explaining the history of the mines. This is a popular hike after a rainstorm because of the unnaturally red pools that form in the landscape.

 
The abandoned mine works; these buildings are over 100 years old, though this area was mined since Roman times.

It took some Internet research to find out that lead, silver and zinc were the minerals of interest extracted from these mines.  For those of you who aren’t aware of how ore processing works, it includes adding various chemicals to crushed rock to solubilize and isolate the desired minerals. The leftover tailings are nearly always highly acidic and full of environmentally available heavy metals.  The various metal oxides and sulfides that formed at Mazarrón are vividly red, orange, and yellow, and there is a pervasive sulfur smell throughout the site. If this isn’t hell on earth, I don’t know what is.


Mountains of mine tailings

So it was really quite a shock to both of us that not only could we walk into this mine site, but that there were no warnings regarding exposure to whatever toxic chemicals might be in the soil and water.  We took pains not to touch anything – but others were not so cautious. Some hikers ahead of us watched their dog cavort through the largest of the pools, and later took photos of each other on the mine tailing spoils.


Visitors and dog and red pool of ????

Yes, the dog went in the water


And then a photo op on the side of Spoils Summit

This hideously beautiful landscape was unearthly, primarily because there was absolutely nothing alive in it.  No plants, no insects, no birds.  Along the edges of the mine tailings there were spring flowering shrubs, bees, and birds, just as one would find elsewhere in the region. (But not in the spoils.  What an apt name…)


A blood-red seep into the pond


Crystals forming as water dries in the pools


Just off the side of the tailings, life continues

How do the mines of Mazarrón fit into gardening?  Unlike this mine site, where the evidence of heavy metal contamination was clearly visible, it’s not so obvious in our garden soils. The residues of arsenic-containing pesticides, leaded gas, zinc from car tire wear, and other possible contaminants are unseen and unknown unless we have soil tests done to confirm their presence or absence.  Yes, it can be expensive to have these tests done, but if we are handling our soils, breathing the dust, and eating the plants that grow there, wouldn’t it be smart to find out what’s there first?

An unwanted bonus in your urban chickens

Longtime reader Ray Eckhart sent me a NYT story on urban chicken eggs and lead contamination.  As I’ve mentioned before on this blog, urban gardeners should have their soils tested for lead, arsenic, and other commonly found heavy metals before they plant edibles.  Chickens that are allowed to peck and scratch in metal-contaminated soils will pass that unwanted load on to you via their eggs.

So test your soils!  It costs a bit of money, but then you know exactly what’s lurking in there.  If your soils have significantly high levels of lead or other contaminants, you can still raise chickens as long as they don’t roam your garden.