Many of us are sheltering at home during the COVID19 outbreak, and that might mean you’re spending more time in the garden. It certainly seems to be true based on my Facebook feed. And given that even more people are showing interest in growing their own food, I thought some practical posts on raised beds dos and don’ts might be fun. John Porter did a nice review of some of the misperceptions about raised beds last year, and that’s worth reading as well. This week’s post will be on siting and materials needed for building a raised bed. At the end of the post is a list of online resources with more information.
Location
To grow most vegetables, you need direct sunlight at least six hours per day, and more is better in terms of productivity. That means full, unfiltered sunlight, so that your seeds and plants get the entire light spectrum. You’ll need to take into account seasonal changes, like the sun’s angle and the appearance of deciduous canopies, before choosing your site. If part of your bed will unavoidably be in the shade, simply choose plants that will tolerate part- or full-shade conditions for that location.
Building materials
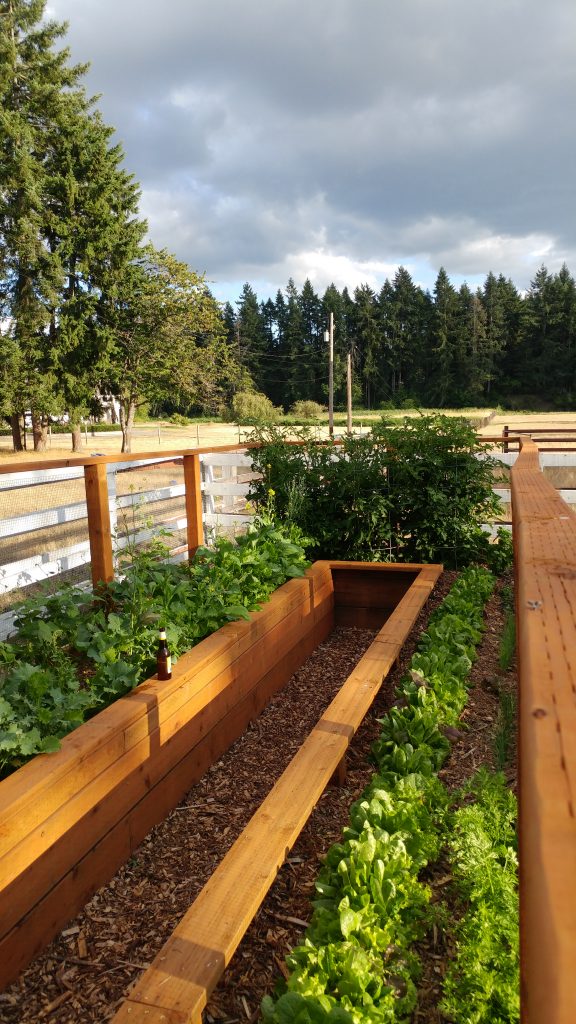
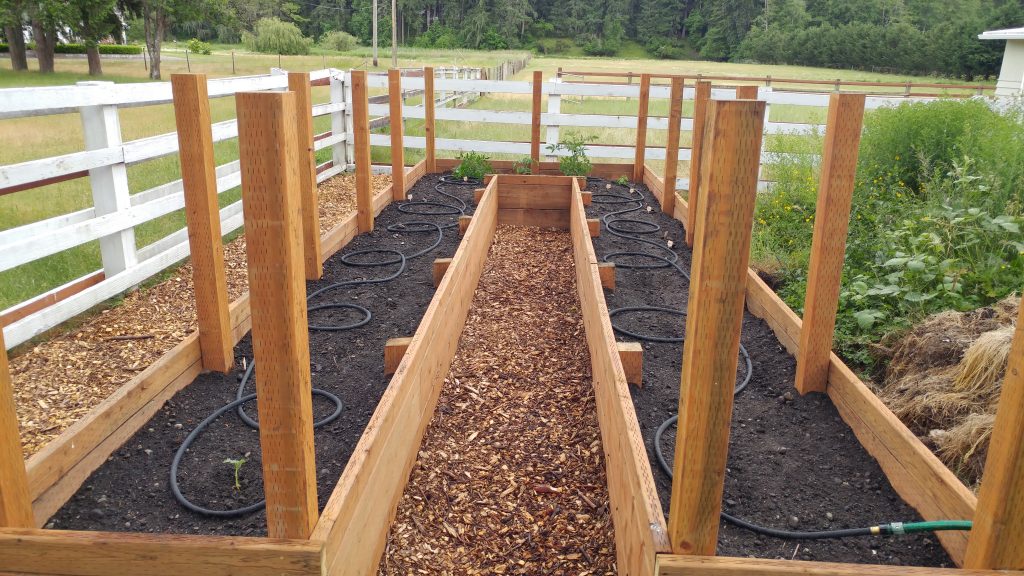
We use pressure-treated hemlock and Douglas fir for our beds, which measure 8′ by 22′ (at the outside dimensions.). Modern pressure treatment uses alkaline copper quaternary, which is nothing like the toxic chromium-arsenic cocktail from earlier times. You don’t have to use wood, of course – other materials will work but do educate yourself on any potential leaching issue into the soil.
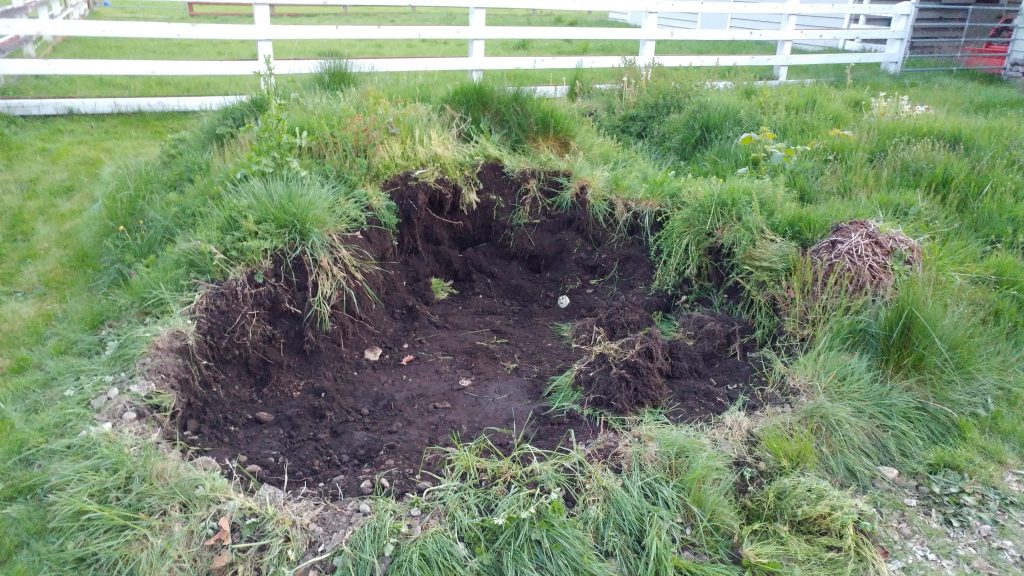
Underneath the beds is….nothing. If our underlying soil was contaminated with heavy metals or some other material, we would put down a membrane first to keep our raised bed soil separate from the contaminated soil. But we have no issues, so it’s soil next to soil, meaning we have great drainage.
Planting media
The best material for your raised bed is actual native topsoil (if you can find it). If you don’t have enough of your own, see if anyone locally is giving away “free dirt.” People who put in decks, ponds, and other hardscape structures often don’t realize their discarded dirt is real topsoil. Do be cautious with this potential windfall. Ask about pesticides or other chemicals that may have been used in the original landscape. And you should do an initial soil test to see your baseline nutrient values. It’s easier to incorporate amendments BEFORE you fill your beds.
There are exceptions to the native topsoil recommendation – for instance, if your soil is contaminated with heavy metals from industry or agriculture, you shouldn’t use it for growing edibles. In this case, you need to use a commercial topsoil, and isolate it from the underlying soil as described earlier. Commercial topsoils can be heavily amended with compost and other organic material, meaning you have much less actual soil and will constantly need to refill your beds as the organic matter decomposes. Try to find a mix with the greatest possible percentage of topsoil.
The worst choice of all are soilless media. This includes nearly all bagged potting “soils” at garden centers. Read the contents panel carefully – does it say the word “soil” anywhere? If it’s all organic material, you are going to have to fill your beds every year. This is both expensive and time consuming. Plus you could very well have excessive levels of some nutrients that will build every year as you add more.
As you make your decision about what to fill your raised beds with, consider what you will be growing, If you are only growing summer crops, it will be easier to amend the bed every year. If you have a winter crop, or perennial herbs, you can’t incorporate more material without destroying the existing rhizosphere and your plants. Perhaps that means you need two raised beds, or at least have a divided system.
Design
This part is really up to you! Raised beds should be high enough to work comfortably, big enough to hold what you want to grow, and narrow enough to be able to reach all the way across (for one-sided access) or halfway across (two-sided access).
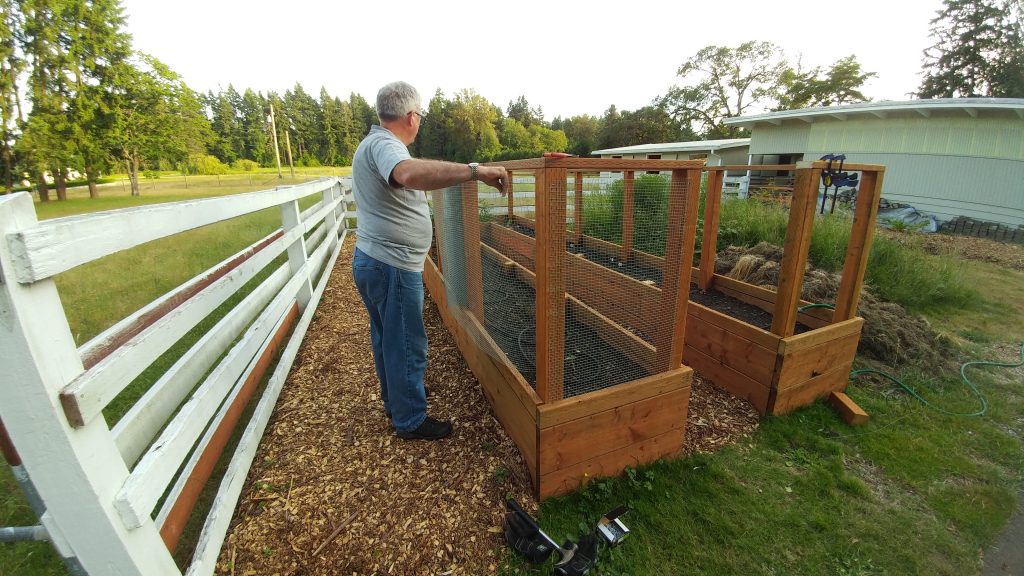
We wanted a design where we could include a critter fence. Once in a while a deer might wander through our property, and rabbits certainly do. The hardware cloth fence keeps larger animals out and also provides a great trellis for beans and other climbers.

We opted for a U-shaped system, with a gate on one end. The inside edges of the beds are topped with 2×6 boards that can be used as a bench. We did run stabilizing boards between interior and exterior posts. They are buried and don’t really interfere with the plants. (Note to self – next time put those stabilizing boards in BEFORE filling with soil.)
What’s next?
Next time I’ll discuss some of my favorite tools for using in raised beds and possibly other places. And we’ll touch on the importance of soil testing before you add organic matter or other fertilizer to your beds. In the meantime, be sure to check out these resources:
Are raised beds for you? This comprehensive fact sheet goes into more detail. https://pubs.extension.wsu.edu/raised-beds-deciding-if-they-benefit-your-vegetable-garden-home-garden-series
Home vegetable gardens – an overview. https://pubs.extension.wsu.edu/home-vegetable-gardening-in-washington-home-garden-series
How much organic material is too much? Don’t overdo – read this first! https://pubs.extension.wsu.edu/organic-soil-amendments-in-yards-and-gardens-how-much-is-enough-home-garden-series
Looks great! and good to reread John Porter’s rebuttal(s). I just came across this article from the permaculture family at Milkwood and I thought it was helpful, especially this reasoning:
“So, here’s the thing. Creating veggie beds takes time, energy and inputs. Time for the strawbale to compost down, energy in either your digging or the fossil fuels used to get resources, and inputs in the form of whatever you gather to make the garden. So – do your planning and your balance sheet. If you have lots of time before you need a harvest, and lots of inputs, but not much energy, a no-dig bed is awesome. If you have no time, but lots of energy and inputs, raised beds might be the go for you. BUT if you have lots of energy but limited access to inputs, and you want veggies fast, double digging your beds in the biointensive style is a great option to consider. Plus, you get fit – without leaving your backyard. Win win win.”
This was to explain why they chose a combination of the last two choices – they are renting! and “planning on asking for forgiveness rather than permission,” and wanted food to eat, fast!
I’ve learned so much from you and your colleagues and I thought this might interest you. Take care!
I really enjoyed your article and description. Any chance you have a materials list including dimensions?
Here is the shopping list for this first bed. Its dimensions are 22′ x 8′ and the beds are 22″ high
Pressure treated hemlock and/or fir
Bed
12′ lengths of 2×10, 12 each (sides)
8′ lengths of 2×10, 7 each (ends and inside walls)
12′ lengths of 2×6, 2 each (bench)
8′ lengths of 2×6, 3 each (bench)
8′ lengths of 2×4, 20 each (top edge and top of critter fence)
8′ lengths of 4×4, 15 each (posts – cut into 5′ sections for outside posts, use remnants for inside posts)
2×4 remnants for interior bracing
Fence
60′ hardware cloth for fencing
3/4″ galvanized poultry net staples
Door
12′ length of 2×4, 1 each
8′ length of 2×4, 1 each
24 feet of 1×2
6′ lengths of 3/4×6, 2 each (cedar fencing)
hinges
hook latch
To put it all together
3″ deck screws
1 1/2″ deck screws
Thanks so very much!
Hi Linda, fantastic article and you are absolutely correct that more people staying at home are now investing in gardening (me included). We bought a couple very smal 4×4 raised garden beds and your shopping list above will make for a great project next season (and great design too), although we’ll have to scale back a bit as we don’t have that much room. And from a complete amateur perspective we definitely did not leave enough room to reach across and have planted tomatoes which are virtually impossible now to reach and provide support as they’ve grown well over 6ft despite pruning suckers constantly. One question for you, is there a recommended depth to the beds? Our is about 1.5ft but I just feel that it might not be deep enough for the tomatoes and we’ve also planted jalapeno and bell peppers. We’ve staked them, but I think the depth is too shallow to provide much support. One big rain storm and they lean quite heavily, especially now that the tomatoes are getting bigger. Thanks so much!
Estrella
Hi Estrella –
They really don’t need to be all that deep. Ours are deep solely for ease of access (I’m almost 6 foot so I like to have them higher). The deeper it is the more root space is available and the less competition you’ll have between plants. That’s about the only difference.
Great to know, and I’m no where near that tall so then it sounds like no big deal!!
I think though we might invest in tomato cages next year to provide a bit of extra support and. Thanks so much for your response and I look forward to reading the next two parts of this blog!
Estrella
This is really great Mr Gardener, I love it.
Thank you for educating as here
Merci beaucoup!!
what is the length of the 2×4’s for remnants for interior bracing and how many is required?
We put in bracing at each set of interior and exterior posts. The length depends on how wide your beds are, and the number depends on how long your beds are.
Considering building some raised beds to keep me occupied during the lockdown. This article is great, just what I need!
Good luck! It’s very rewarding and upkeep is easier than for unbounded beds.
What do you use as a membrane to separate the bed from contaminated soil below?
You want to make sure your contaminated soil does not mix with your clean soil. Earthworms and other underground activity can easily move heavy metals, etc. into your clean soil.
Would you use something like a weed barrier cloth? Or does it need to be solid like concrete?
You mean between contaminated soil and raised bed soil? It needs to be something like roofing membrane that is impermeable yet flexible.
would a roofing membrane impact drainage?
Absolutely will prevent drainage, and you have to compensate for that by providing drainage araes along the sides of the beds. (And remember, the only time to use roofing membrane is when you are trying to prevent heavy metals and other contaminants in the underlying soil from moving into the soil of the raised beds.) Beds made of timbers, for example, will drain easily because they are not water tight.
I have topsoil from my own yard but it is full of weeds I hoed and mattocked out. If I use that, won’t the weeds grow back?
Weeds will grow in ANY soil that is not mulched. The trick to weed-free garden beds is deep, coarse, organic mulch that facilitates water and gas movement but blocks sunlight – which is what weeds need.
Hi Linda, thanks for sharing this! We’re looking at getting building something very similar, with a few modifications to suit our situation, like extending the hardware cloth over the top so squirrels can’t get in. One question: could you turn this into an effective cold frame for growing during winter months by wrapping the some poly sheeting over the hardware cloth?
This should work as long you covered everything down to the wood frame. And you would need to cover the door separately. Send a photo if you end up doing this!
Thank you, Linda! This is very helpful for people starting gardening. 🙂
All the best!
Love your raised beds. I have used mine for 20 years. It’s time for a new plan. My husband wants it higher so I don’t have to bend over. May try something like yours. Thank you.
Hi I am installing raised beds on a base of native heavy Georgia clay that drains poorly. Do I need to do anything to improve drainage in the beds? People have suggested covering the whole area with fine gravel before placing the beds or putting a few inches of raw wood chips in the bottom of each bed, etc. I am worried about doing something that might make a bad situation worse. Any advice appreciated.
Anything you add to your soil will make drainage WORSE. You can find discussions about “drainage” material by searching for the term on the left hand menu.
Keep in mind that your Georgia clay has historically been a great place to grow crops. It’s not the soil. It’s the improper amendment/compaction that messes things up.