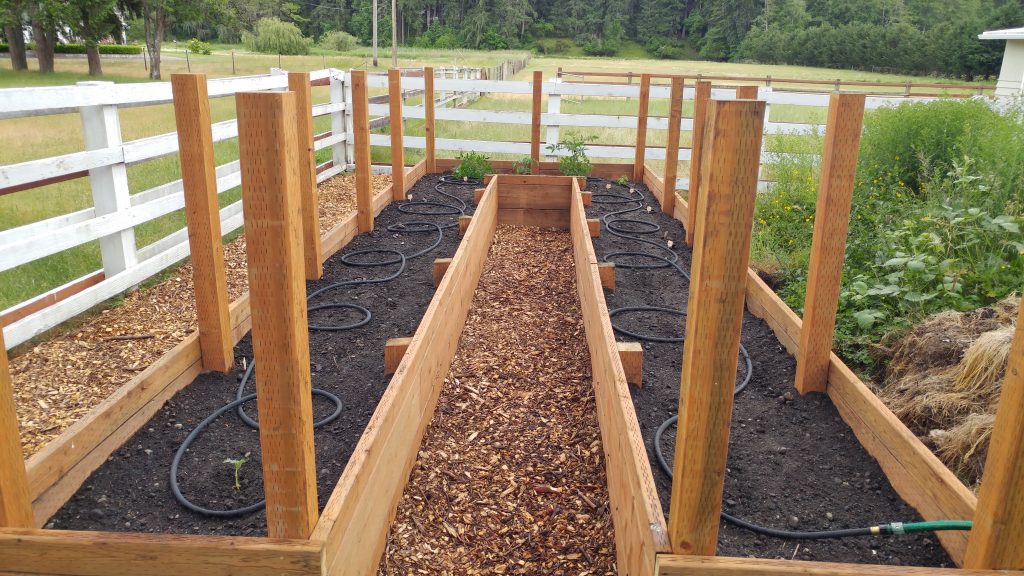
Last month I started a series on raised bed gardens, focusing on materials and designs. Today I’ll mention some of my favorite tools and materials for putting everything together and getting ready to plant.
Getting your soil ready for raised bed use
Tools and materials: shovel, wheelbarrow, tarp, soil screens
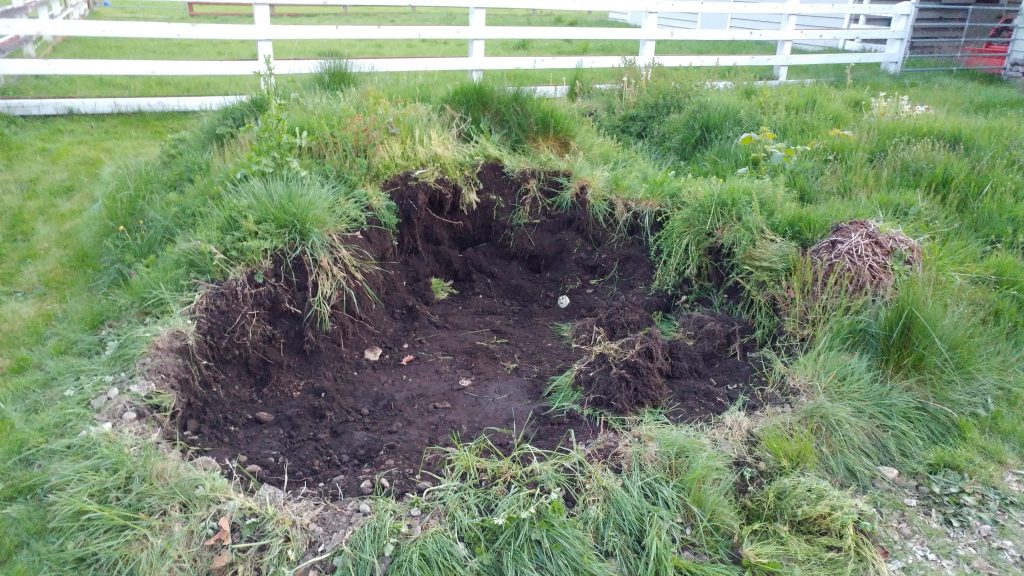
If you’ll recall from my previous post, I like using native soil for raised beds (assuming it is not contaminated with heavy metals or other undesirable chemicals). We have glacial till soil, which means it has a LOT of rocks of various sizes. The bigger ones are easy enough to lift out, but what about all the other ones?
First, realize that SOME rocks are no big deal. In fact, they are important in reducing soil compaction. Finely sieved soil, especially clay soils, will be more prone to compaction than a soil with small pebbles scattered throughout. But the larger rocks are a nuisance.
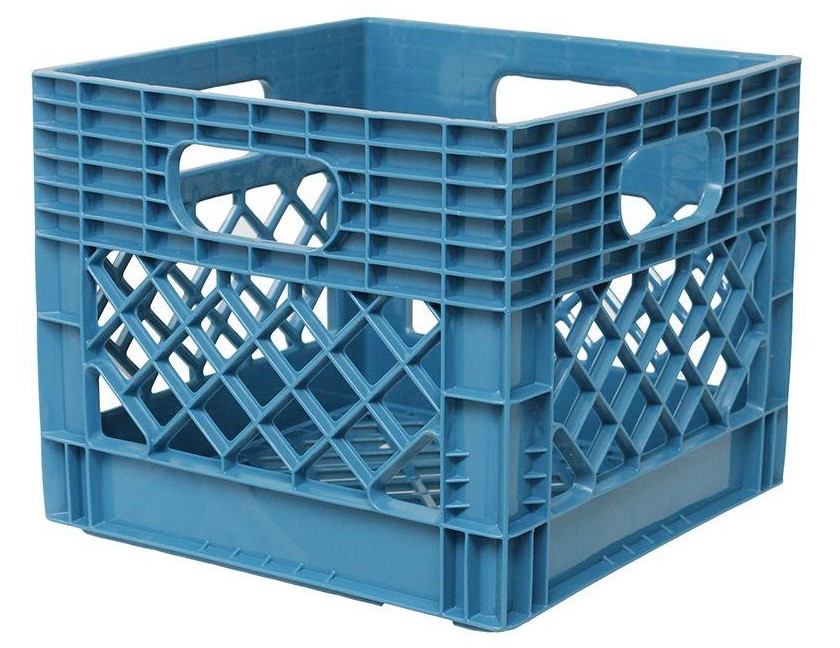
For the first pass through, I have found a plastic crate to work really well. It’s lightweight and the holes are large enough to let soil move through quickly, while retaining larger rocks. I like the milk crate size as it’s easiest to handle. Just set the crate in a wheelbarrow or on a tarp, fill it full of rocky soil, pick it up and shake.
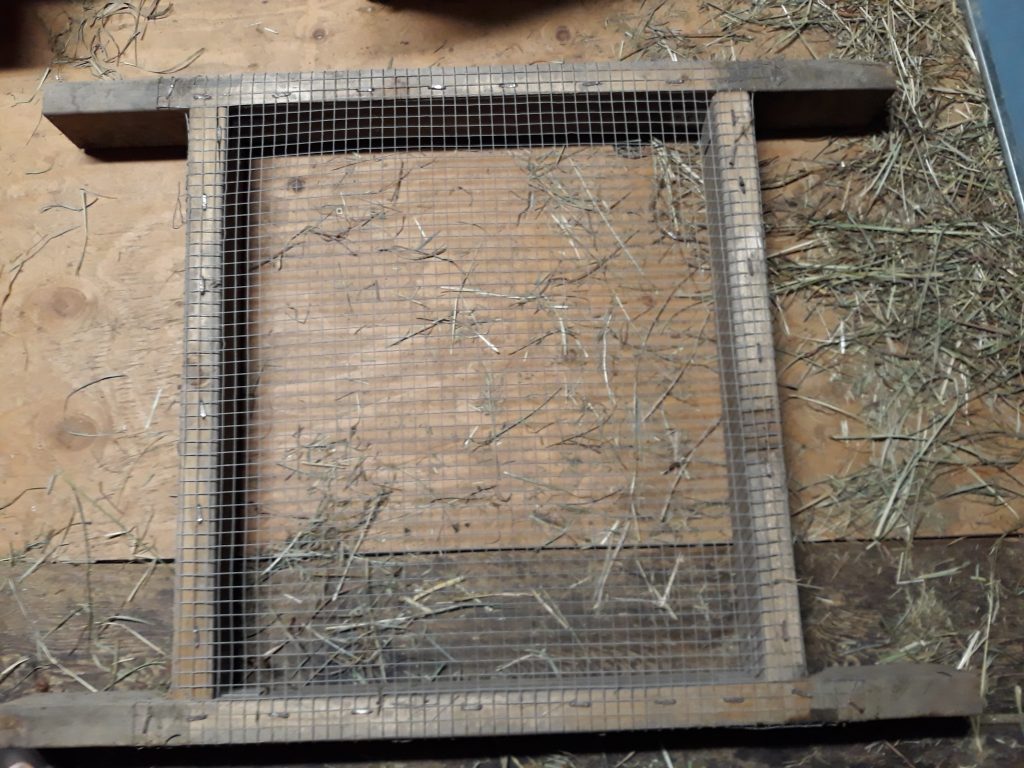
The rocks left in the soil for the most part are easy to work around, and you can always pick out the larger ones as you go (my personal choice). Or if you want to give it another screening, you can build wooden frames with different gauges of hardware cloth, or chicken wire, to remove more of the rocks.
This is a time-consuming process, but the benefit is that you don’t have to top off your beds every year. Your native soil will not be subject to high levels of decomposition and subsidence as will many commercial topsoils with their high organic content.
When you’re ready to fill your beds, be sure to add more soil than you think you will need. It is going to settle, and you may need to add a little more the second year to bring it back to your desired level. But you shouldn’t have to add any more in the future.
Throughout the soil preparation process, be sure to work when the soil is dry, or no more than just damp. Working wet soil is difficult, and wet soil compacts.
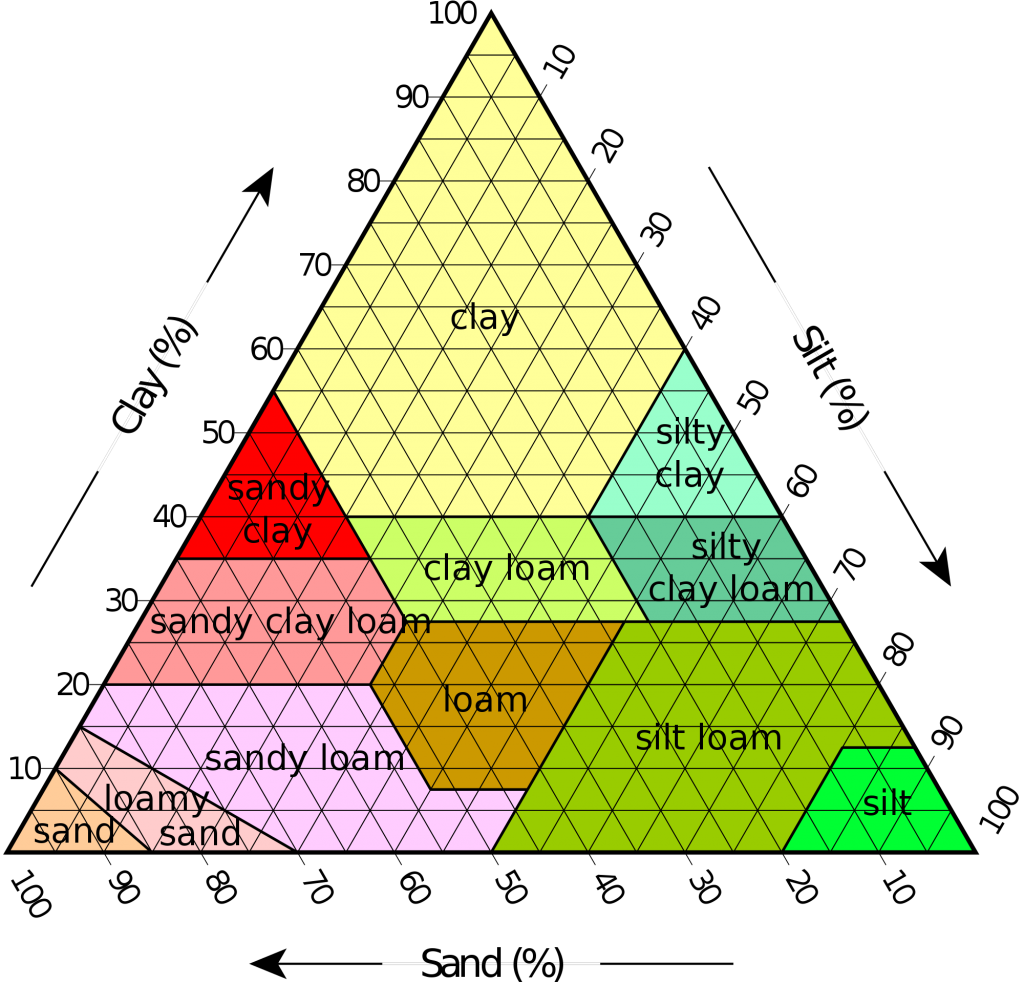
But what about heavy clay soils?
Unless you’ve done a soil texture test, you really don’t know what you have. So before you take another route, make sure you really have a heavy clay soil. If it’s just compacted, then proper mulching will solve that problem too. If it’s truly a heavy clay – let’s say over 40% – then yes, this soil might not be best for a raised bed. In that case, I would suggest finding a different topsoil mix, where clay is no more than 30%. Lay down a membrane to keep this soil separate from your native clay soil. Your raised beds will now function more like giant containers, and you will have to make allowances for drainage along the sides of the beds.
Your beds are ready – how to keep them that way before planting
Tools and materials: coarse organic mulch, wheelbarrow, mulch fork or shovel, rake, soil temperature probe
Once your beds are filled, it’s important to get them planted as quickly as possible to prevent continued erosion of that bare, loose soil by wind and rain. If you aren’t immediately planting, then you need to cover the soil with a protective mulch. The only choice you have, if you wish to keep your soil environment hydrated and aerated, is to use a coarse organic mulch. Sheet mulches are not advised since they will interfere with water and air movement. Even if you don’t have plants in the soil, there are microbes and beneficial animals that need a constant influx of oxygen and water. A coarse organic mulch, installed to a depth of at least 4 inches, will facilitate water and air transfer and also keep weed seeds from germinating.
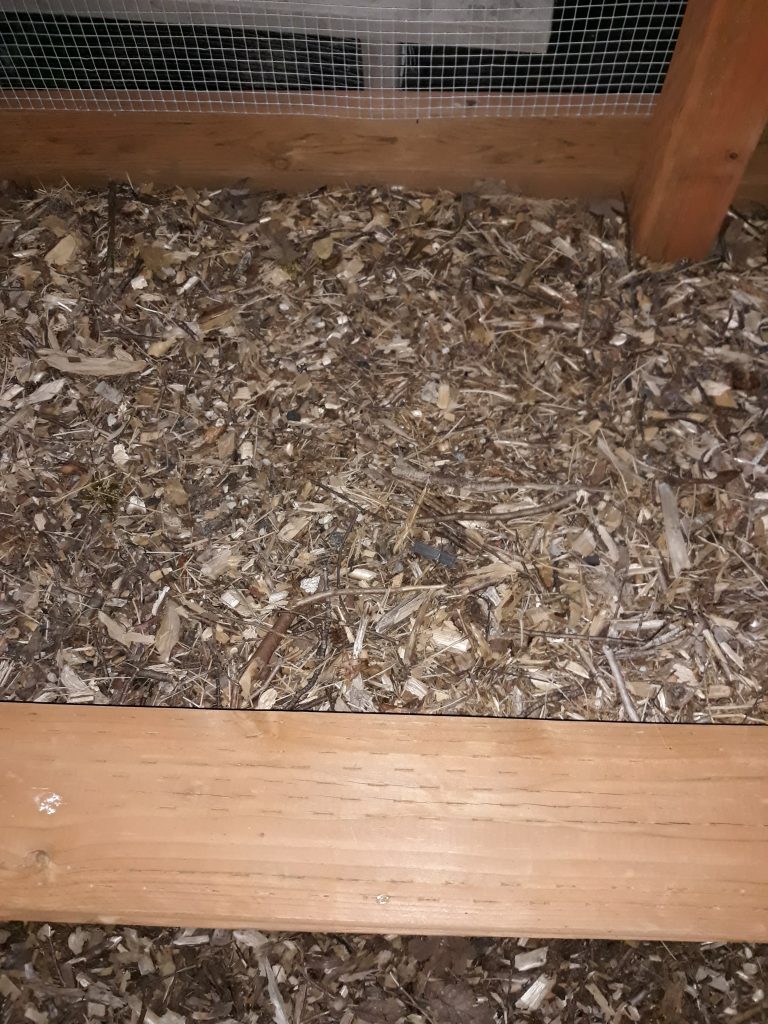
If you’ve been following my posts over the years, you already know I’m going to recommend using a wood chip mulch. Its benefits to soils and soil life is well established and it is easily moved once it’s time to plant. But you can use pine needles, straw (not hay!), and other coarse organic materials for this purpose. Fine textured organic materials like compost should never be used as a mulch, as thick layers of compost are more restrictive to gas and water movement and also facilitate weed growth. Save compost for a thin topdressing when your soil anywhere on your property is in need of organic matter, and be sure to cover it with woody mulch to keep those weeds out.
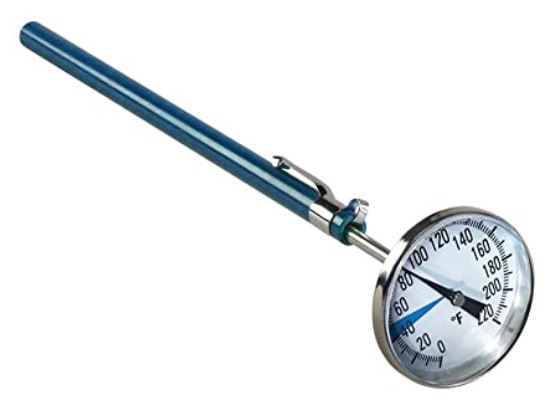
While waiting for the right time to plant, consider purchasing a soil thermometer. They are inexpensive and easy to use. Good publications on growing vegetables will tell you what the soil temperature should be when you plant: planting too early can lead to reduced seedling survival. And while you are waiting you can install a rain gauge nearby, so you can monitor irrigation needs throughout the growing season.
What’s next?
Next time we’ll discuss the dos and don’ts of raised bed maintenance during the growing season and before planting the following year. Most of these practices are adaptable to traditional vegetable gardens, so be sure to check it out!
IT seems you have utterly forgotten voles and moles and all critters that come up from below. An entire garden can be devastated. Additionally deer can jump up to 8 foot fence. However your beds make them awkward to jump by positioning but you have not acknowledged this. voles are also very attracted to roots with watering systems. It is terribly dissappointing to have been gardening for 40 years and still find experts who fail to address rather common issues. Rabbits dig underground so chicken wire needs to be placed at least 4 to 6 inches in the ground and about 3 feet above ground to prevent rabbits over time from getting in. One rabbit in a few days can devastate. I find your expertise dissappointing in extreme as people rely on this for fool proof system. Metal cloth needs to be stapled to bottom of wood and cover entire base of bed before soil put in. A deep trench needs to be dug around bed to sink chicken wire around entire base. Gate to get in also needs to have base protected ie stone at level nothing can dig around and wire to fit tight when gate closed to protect from rabbits entering. Small rabbits can enter when tiny so this is important. Or build on cement entirely around with secure to base of cement fence to keep rabbits out. Voles will come up underneath so metal cloth will protect. Why have you not dealt with this. In one year I have every beet attacked and carrots. This system did not work.
Obviously site conditions. including animals pests. will modify how you put in raised beds. We don’t currently have mole problems (haven’t had them around here for decades. There are lots of voles and mice, and they are much happier in our fields and other areas than our gardens. We have rabbits and they can’t get into the garden. Nor do they seem to want to, as there are other places for them to get food. Since all we have are rabbits and deer as possible but not frequent animal visitors, that’s what we built for. You don’t need to have hardware cloth stapled to the bottom unless you know you have problems with moles.
Part of the trick is to provide habitat, including food, for potential wildlife. If they can find food somewhere else easier, that’s where they go.
Hello! I love reading the Garden Professors’ blogs. Thank you for all the validated info you provide.
I have a question about which animal manures make good soil amendments. Lots of fundraisers are happening, and we’re being given the choice of different kinds, all composted: chicken, horse, cow, sheep, rabbit. People are asking which ones have a better NPK content. I found one site that gave an ‘in general’ overview (with caveats about some variability within each due to what the animal ate) which was very helpful but when I explored their site a little further, I saw they also encouraged cardboard mulches to suppress weeds or turn lawn into garden beds as well as promoted compost tea (which I believe is also debunked?)… so…. I’m looking for info from a site that is more research based. Would you have an easy read on this topic so I can provide a fairly quick response?
Kind regards,
Sonia
The caveat here is that the need for a general all-purpose product has been established….
No – there is no general all-purpose product, just like there is no general all-purpose health plan for people. Everything depends on the specifics that can only be provided through testing.
Before you choose anything, have a soil test done. Don’t buy anything that provides nutrients that are already sufficient or in excess. There is no “in general” anything, except for providing sufficient water and using a coarse wood chip mulch to protect soil and plant roots.
Hi – you mentioned using a membrane at the bottom of the raised bed if one is concerned about chemicals, toxicity, etc in the ground soil. What type of membrane is this? Thanks
Any type of heavy duty plastic, such as that found as an underlaying material for rooftops.