Over the last few months I’ve had the chance to talk about the popular topic of home greenhouses. We covered a few of the basics in my first article, then touched on some regulations that might effect the building and management of home greenhouses in some areas. In this installment we’ll talk a bit about common structures used for home greenhouse construction so you can consider which structure(s) might be right for your situation.
Types of Structures
Greenhouse structures can range from simple to the very complex. While home greenhouses tend to fall on the simple construction side, there are still varying degrees of complexity within structures. Greenhouse structures can be put into a few main categories that we’ll cover below. The key to home greenhouse success is picking the structure that works best for you, your situation, and your budget.
Lean-to structures
Lean-to structures get their name from the fact that they “lean” on something for support. Not in a literal sense, but in a sense that another structure, usually a house or maybe a storage building, provides at least one structural wall. A common lean-to setup would have a three-sided greenhouse structure attached to the side of a house or another building. This could range from a structure that is a few square feet for starting seedlings in the spring up to a full-size greenhouse attached to the side of a building. A sun-room, if equipped for starting plants, could be considered a lean-to greenhouse (at least it would at my house, since it would be primarily for plants). This type of structure can be cost effective. You reduce the amount of greenhouse surface you have to build and cover, unless you have special issues for connecting it to your home or other structures (like foundation issues, siding that is hard to attach to, etc). You do want to make sure it is done right especially if attached to your house so you reduce the chance of damage to your home.

One benefit to a lean-to is that it can use the wall it is attached to as a heat sink – the wall absorbs heat through the day and then slowly releases it at night when it is colder. If you have a large lean-to greenhouse that serves almost like a sun room you also add functional space to the house where you can enjoy the sun on warm winter days. The heat generated by an attached greenhouse can help provide warmth for your home in winter or at least provide some extra insulation. But it can also result in excessive heat gain in the summer. Lean-to greenhouses are also protected a little more structure wise – they use the building they are attached to for structural support and can often withstand weather, like high wind, a little better than free standing structures.
Free standing structures
Simply put, a free-standing structure is one that isn’t attached to another structure. It stands on its own structural framework. There are a few different options we’ll talk about here which will be further expanded in future article installments on different types of materials used.
Hoophouse greenhouse
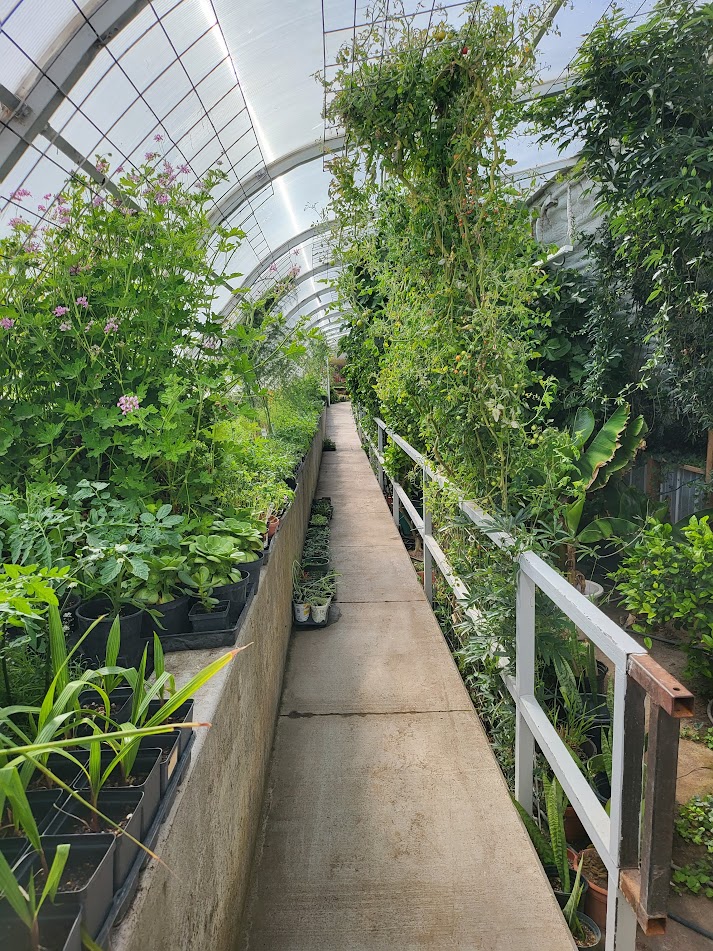
A hoophouse greenhouse is built out of the same structure used for a high tunnel or hoophouse. It consists of framing made by bent metal pipes and is covered with polyethylene plastic sheeting. A high tunnel greenhouse would have heating, ventilation, and watering equipment added and would therefore require connection to electric, gas, and water utilities (see my previous article about what this means for a greenhouse being a taxable “permanent” structure). You may also pour a concrete slab for the floor of a hoophouse-to-greenhouse conversion, but gravel or any other floor covering is fine as long as it provides a stable surface and weed control. The “greenhouse” that I inherited from the previous homeowners was left with bare ground so they could plant it like a conservatory.

While these may not be the most attractive greenhouses, they are usually a more cost-effective option for a high-quality, efficient greenhouse. Initial construction costs will likely be lower for a comparable quality framed greenhouse though the polyethylene covering will need to be replaced every few years as it becomes more opaque and light transmission reduces.
Free-standing structures
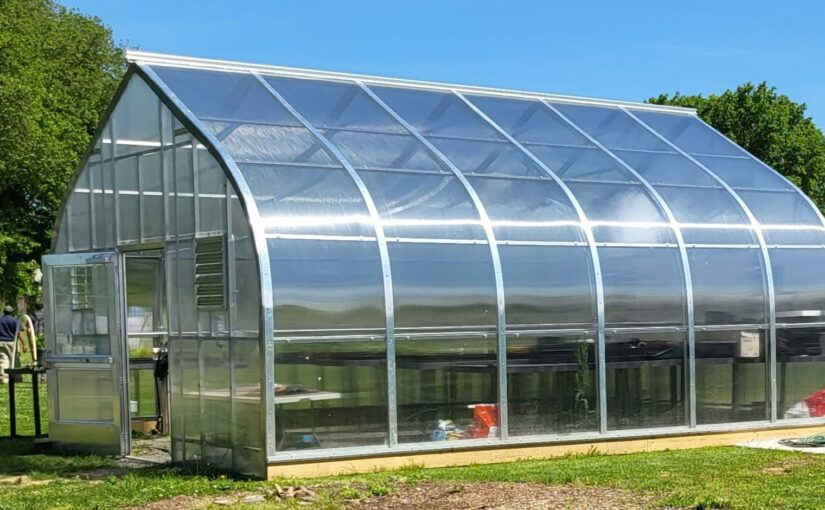
When envisioning a greenhouse, many people envision this type of greenhouse – one with straight sides, built with a frame covered in solid material. These are definitely more attractive than hoophouse greenhouses and can add an attractive feature to your yard. The most common way for home gardeners to build a free-standing greenhouse is through purchasing a kit. There are a myriad of kits available online these days, of varying prices and qualities usually depending on the materials used in the construction. The kits can be complex but set-up is usually pretty easy to follow though you might want to factor in the cost of hiring a contractor to help with the construction on a bigger kit. Most often these kits need to be built on a concrete foundation or pad so you’ll want to consider the cost and logistics of pouring the needed support. And you’ll also want to think about the utility connections to the greenhouse.

Ridge and furrow greenhouses are framed greenhouses that are built together in tandem. These structures are usually used only in large-scale commercial production, so I’ll skip those for home greenhouses.
Geothermal greenhouses
Geothermal greenhouses are gaining in popularity, mainly because people are excited about reducing the need for using electricity or gas to control the temperature. And I say reducing, because in extremely cold weather there will likely still need to be supplemental heat. These structures are definitely different than your standard greenhouse. These structures are usually sunken into the ground to take advantage of insulation by the soil and also the constant geothermal temperatures. There is also usually a high solid wall on the north side of the structure, with a slanted roof made of light-passing material that faces to the south. This allows maximum light to enter the structure and allows that light to heat the solid wall to hold and release it during the night when it is colder. There is also usually an air intake in the ground a few hundred feet away that allows for the pulling of air through a tubing system to warm or cool the air with geothermal temperatures, depending on if it is cold or hot outside.
A walpini greenhouse is a specialized/rudimentary style geothermal greenhouse that is sometimes referred to as a pit greenhouse. Instead of building a structure, it is constructed of a pit dug into the ground and covered with a transparent roof. While they sound simple, there are several drawbacks to these structures. One – they don’t do well in wet areas or areas with high water tables, for obvious reasons. Secondly, they were initially designed for use in areas near the equator with the sun almost directly overhead. To function in latitudes far north or south you almost always have to build up a wall on one side to slant the roof cover toward the sun. And even then it is unlikely that light will reach the floor of the structure where plants are growing.
Summary
There’s a lot to consider when picking the type of greenhouse structure for your home greenhouse. There’s often a trade-off between cost, quality, and aesthetics. Options range from the simple to the complex in terms of size, structure, and function. So think about the goals you have for your greenhouse and consider the many different options available to you.
Sources
https://aggie-horticulture.tamu.edu/ornamental/greenhouse-management/greenhouse-structures/
https://extension.uga.edu/publications/detail.html?number=B910&title=hobby-greenhouses
I would like to caution people to avoid curved eaves. I had one on my old greenhouse and it was difficult to clean the roof area because you couldn’t lean a ladder against it. Yes they look really nice but I’d never have another one. It’s much better to have separate roof and wall framing.
I have bought a Planta greenhouse kit and planned to have it installed by the vendor. My brother said he could do it with my help, and thanks to his offer I saved myself about $1G! It was quite a puzzle though — and definitely requiring construction skills. My greenhouse is the smallest one they make, just 6-1/2′ long and 10′ wide (8′ high). It has doors at each end and a self opening vent in the roof. I think Planta gh’s are well constructed (steel and polycarbonate). This kit, called ‘Sungrow’ cost $2500 Canadian, incl. taxes.