This past week I was out of town at a conference, and since the week was supposed to be a scorcher I made sure my husband was going to water the container plants daily. And indeed, temperatures were in the 90s, dropping to the mid-60s at night. But the container plants looked great when I got home and I didn’t think much more about it until the next day. My husband called me into the living room, pointing at our massive mophead hydrangea which looked like it had been torched. Leaves and blossoms were wilted and browning. Every single stem was affected. Since our landscape is on an automated sprinkler system, what the heck happened?
This is when caution and objectivity are important. I wasn’t going to go cut the whole thing down, even though it looked terrible. Instead, I made observations of the site (not just the plant):
The site is on the north side of the house, where plant only receive direct sunlight in the morning and late afternoon during the summer.
No other plants were affected – not even the smaller hydrangea to the west of the damaged plant.
The irrigation system had been working normally.
When diagnosing plant problems, it’s also important to consider the history of the plant and the landscape:
Hydrangea is at least 55 years old.
No soil disruption or other site disturbance
No pesticide or fertilizer use
Mulched with arborist wood chips
Given that no other plants were affected, the problem was with the
hydrangea itself. Hydrangeas use a lot of water to support their large, thin
leaves and massive flower heads. When the weather suddenly turned hotter and
temperatures stayed abnormally high in the evenings, the plant could not
recover its water loss overnight. Many flowers and leaves experienced terminal
wilt – that means they lost too much water and tissues turned brown. Other flowers
and leaves were able to recover as day and night temperatures returned to
normal.
What could we have done to prevent this? Had we seen the wilt occurring
during the day, we could have turned on the sprinklers manually in that part of
the landscape. Hydrangeas are a good indicator of low soil water. In future
summers, as we continue to experience hotter and drier conditions, we will keep
an eye on our hydrangea and use additional irrigation if necessary.
Throughout the garden season, extension professionals all
across the country get to play detective when trying to diagnose plant diseases
and recommend specific controls or preventative measures. We often have to put on our Sherlock Holmes-esque
thinking caps and our standard issue detective’s magnifying glass (or
microscope) to diagnose plant maladies.
Having a basic understanding of diseases, how they function,
and what they look like is key. Gardeners who bring samples or pictures into
our office often get exasperated when we play twenty questions trying to figure
out if it is a fungus, bacteria, or virus (or something else) causing the
issue. Knowing about placement, environment, planting, etc. can all be keys in
discovering what might be causing the issue.
Sometimes we can’t identify an exact disease at a glance and have to
send things to the diagnostic lab on campus, but by looking at signs and symptoms
and identifying factors about the plant we can often figure out the type of
pathogen causing the issue, or whether it might be environmental, abiotic, or
insect related.
What leads to plant diseases?
Of course, the thing that causes the disease is a pathogen or a causal agent such as a fungus, bacteria, or virus (or a few other odds and ends like phytoplasmas). But there are other factors at play to get a disease infection started and sustained. You need all of the factors in place for infection. This is often represented as a triangle, where a causal agent (pathogen) must be present with the right environmental conditions and a host plant that can actually be infected by the pathogen. I’ve also seen a plant disease “pyramid” where time is added as another factor (as in, the correct conditions must be present at the same time and for a long enough period for infection to start). And still yet in researching this article I found the PLANT DISEASE TETRAHEDRON, which adds human activity as another factor. What’s next, the plant disease fractal?
But I digress. When a sample comes in to our office, we play
twenty questions with the gardener asking about these different factors. Like
is it irrigated (many diseases need water to be spread or to develop), does it get
shade or full sun, have you seen any insect activity, when do you usually work
in the garden, etc. These questions can
help us identify parts of the disease triangle/pyramid/tetrahedron that could
inform the diagnosis.
Keeping these factors in mind can also help gardeners reduce
the likelihood of disease through IPM.
For example, viruses require a vector – usually an insect, animal, or human
to spread the disease. Many viruses are spread through leafhoppers, bacterial
wilt in cucurbits is spread through cucumber beetles, and mosaic viruses like
tobacco mosaic virus has many vectors including humans and garden tools (which
is why many green industry businesses have strict sanitation rules, including
rules for tobacco users and hand sanitation). Knowing that fungi and bacteria
can be airborne with spores or splashed by “wind splashed rain” or irrigation
water can lead to improved practices like mulching, pruning for good air flow,
and plant spacing.
How can you tell which diseases are which?
Let’s face it, many plant diseases look very similar. There
are usually what we call spots and rots that can be very similar. But there are some identifying
characteristics that help us at least determine what type of pathogen or causal
agent is causing the issue.
The first thing to keep in mind is that plant diseases have
both signs and symptoms. Signs are the
presence of the actual disease causing organism, visible to the eye. Fungal diseases often have mycelia, or fungal
threads, and reproductive structures like pycnidia present. You may also see
the causal agent itself, such as leaf rust or powdery mildew. Bacteria will often
have exudates that ooze out of plant parts, water soaked lesions, and bacteria
that stream out of cut stems parts. You can actually diagnose some bacterial infections
by suspending a cut stem in water and watching bacteria stream/ooze out of the
cut. Viruses are not visible to the
human eye, therefore do not have signs.
Symptoms, on the other hand, are the effects of the pathogen
on the plant. Common symptoms of fungal infections are leaf spots, spots or
rots of fruits, chlorosis, and damping off in new seedlings. Bacterial symptoms
include leaf spots (often with a yellow halo around them), crown gall, stem/trunk
cankers, wilting, shepherd’s crook (like fire blight), and fruit rots. And
since bacteria usually depend on streaming through liquids, they often leave
definitive patterns for leaf spots that align with vein structures. For example,
leaf spots will often be angular because they are “trapped” in between veins on
the leaf. The most common symptom of viruses is a mosaic pattern on leaves and
fruit, but also crinkling and yellowing of leaves, necrosis, and stunting.
Special mention- phytoplasma: Phytoplasmas are single-celled organisms that aren’t really bacteria, but are descended from them. They don’t have cell walls and are transmitted to plants through an insect vector like leaf hoppers. The most common type of phytoplasma diseases is called yellows (aster yellows, ash yellows, etc.) because plants often turn yellow. The symptoms are often interesting. Witches brooming, which is irregular growth that makes branches look like brooms is common. Aster yellows is a common disease affecting many plants in the aster family. Most commonly, flowers of these plants look distorted and may grow leafy structures instead of flower structures.
To wrap it up
It can be difficult to figure out what diseases are affecting plants, if it is a disease at all. Getting help in determining what disease might be affecting plants can help you treat or prevent the problem in the future. In my next installment of this series, I’ll talk about common diseases, their signs and symptoms, and treatments and preventative measures.
The hot weather that stimulated the last blog is still with us! Keep up the mulch and occasional watering to help shade trees. Today I want to cover a topic that seems like a garden myth but actually has considerable science behind it. Bicarbonate! The miracle cure for all garden pests? No. My wife came across an article in her news feed about a ‘garden guru’ who touted baking soda as a miracle cure for powdery mildew and other “blight” diseases. In this blog I will review the efficacy of the bicarbonate anion in disease control.
Bicarbonate as a disease control agent is not a new concept. Many studies going back a few decades documented the efficacy of this molecule in controlling foliar diseases of plants. Most studies are on powdery mildew of many crops and ornamental plants as well. Bicarbonate is typically available with three cations: ammonium, sodium and potassium. Most of the studies and efficacy are with the potassium salt of bicarbonate (not baking soda which is the sodium salt). All the salts are more or less efficacious against powdery mildew and a few other fungi like apple scab.
The mechanism of action of bicarbonate control of fungi is not clear, however Monterey Chemical that manufactures a Bicarb. product (Bi Carb Old Fashioned Fungicide) indicates on its label that the mechanism is the disruption of the potassium ion balance in the fungus cell, causing the cell walls to collapse
One frustrating thing with internet-based articles by garden “gurus” is that everything is some kind of “garden hack” Like we are getting something done on the sly or with common household materials. Using chemistry to control diseases is using pesticides. Companies test and approve these materials based on efficacy data as shown in the references at the end of this article. The benefit of using a registered product is that there are instructions that indicate how to spray, what the target organism is and the environmental conditions under which the product will work. Much of this is never mentioned in the “hack” articles.
Bicarbonate anion is an effective control of powdery mildew often as good as commercial fungicides with very different chemistries and methods of action. There does not appear to be resistance to bicarbonate. It is a contact fungicide (not systemic), the material must contact the fungus in order for it to work. In order to get good contact usually a wetting agent such as an ultrafine oil is combined with the tank spray solution to increase control.
It is best if bicarbonate is applied early in the disease cycle. Powdery mildew organisms are obligate biotrophic fungi. This means that the mildew fungus must grow in living plant cells. So when the mildew is killed the living plant cell is also killed. Powdery mildew is a disease of the epidermal tissues of plants so cell death is superficial but if late stage mildew is control by bicarbonates there can be phytotoxicity (plant damage) as most of the epidermal cells of leaves and flowers will collapse and die.
Powdery mildew fungi are in the Ascoymcete group of fungi and most have two spore stages. The first infections are caused by ascospores (sexual spores) that are released in the springtime. The primary infections develop and then asexual spores develop on plant surfaces that we recognize as powdery mildew. Stopping the primary infection by applying control early in the season will slow powdery mildew down on sensitive plants. Since many powdery mildews have broad host ranges they form on weeds an other plants and can move into protected plants later in the season. Frequent sprays will be required if conditions for the fungi are optimal and the spores are present. Bicarbonates do not have long-term protective effects since they work only when the solutions contact living fungus.
References
Zivand, O. and A. Hagiladi. 1993. Controlling powdery mildew in Euonymus with polymer coatings and bicarbonate solutions. HortSceince 28:134-126
Moyer, C., & Peres, N. A. (2008, December). Evaluation of biofungicides for control of powdery mildew of gerbera daisy. In Proceedings of the Florida State Horticultural Society 121: 389-394.
Holb, I.J. and S. Kunz. 2016. Integrated Control of Apple Scab and Powdery Mildew in an Organic Apple Orchard by Combining Potassium Carbonates with Wettable Sulfur, Pruning, and Cultivar Susceptibility. Plant Disease, 100(9), 1894-1905
El-Nogoumy, B. A., Salem, M. A., El-Kot, G. A., Hamden, S., Sehsah, M. D., Makhlouf, A. H., & Nehela, Y. 2022. Evaluation of the Impacts of Potassium Bicarbonate, Moringa oleifera Seed Extract, and Bacillus subtilis on Sugar Beet Powdery Mildew. Plants, 11(23), 3258.
Türkkan, M., Erper, İ., Eser, Ü., & Baltacı, A. 2018. Evaluation of inhibitory effect of some bicarbonate salts and fungicides against hazelnut powdery mildew. Gesunde Pflanzen, 70(1), 39-44.
My news feed has been filled in recent weeks with many stories about the unusual heat that has affected many parts of North America, Europe, and the Atlantic Ocean. High temperature records are being broken at an amazing rate, and while we don’t expect every day or season to break a new heat record, the trend towards warmer global temperatures overall from greenhouse warming makes periods of extreme heat more likely.
Today I want to talk about the term “heat dome” and explain what they are, how they affect gardeners (and other humans) as well as the plants in our gardens and agricultural fields. We had a great introduction to the physiological impacts of heat a few weeks ago in Jim Downer’s post “I’m hot! So are my plants!” on how high temperatures affect plant growth and respiration. If you have not already done so please read that for more details about heat’s impacts on garden plants.
What is a “heat dome?”
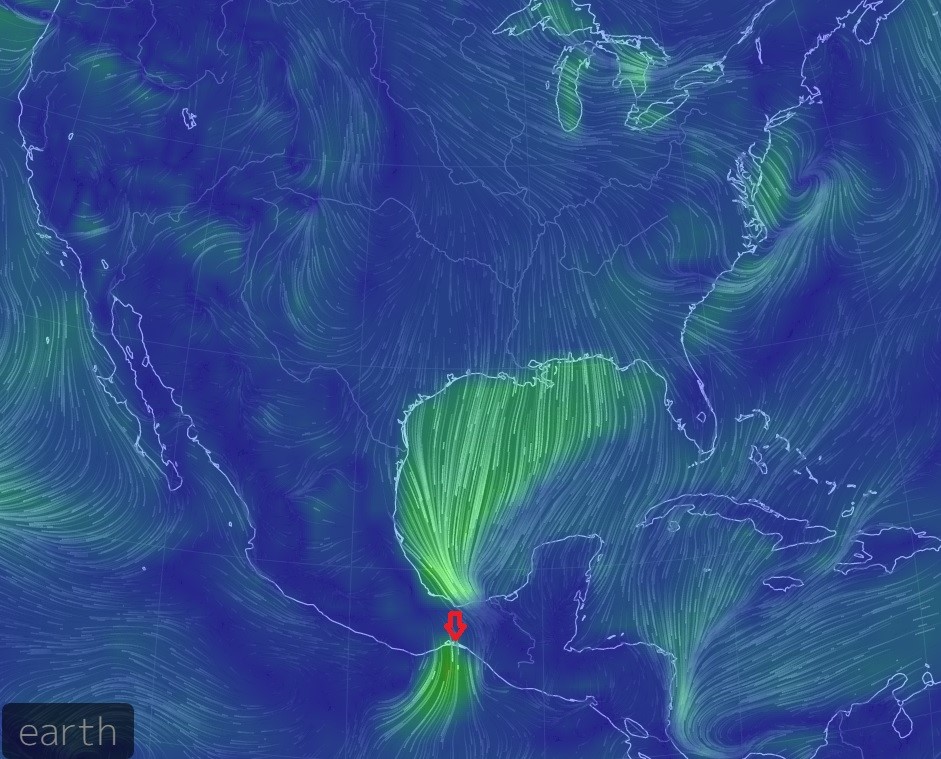
A “heat dome” is an expansive stationary area of high pressure that is associated with unusually hot temperatures. While slow-moving high-pressure areas are often seen in summer months, the size and unmoving nature of a heat dome coupled with the extremely high temperatures in the area beneath them make “heat domes” especially dangerous for humans and animals. They can also cause detrimental effects on many garden and agricultural plants because they are also associated with long dry spells along with high rates of evapotranspiration. The term “heat dome” is a phrase that has been popularized by the news media as a way to explain extreme heat events across large regions and is more jargon than a true scientific term, but it is certainly descriptive!
Any high-pressure center in the atmosphere is characterized
by sinking air, light winds, and relatively cloud-free skies. The sinking air heats
up as it compresses near the surface, and the rising temperatures are enhanced
by the lack of clouds, which lead to more incoming sunlight and even warmer air
in summer. Pavement also absorbs sunlight and radiates it out at night, leading
to overnight low temperatures that can be in the 90s in extreme cases.
When the center of high pressure is locked in place over one area over a long time period, it tends to divert cooler, moister air away. That makes it appear as though there is a glass dome overlying the area blocking rain from falling. The hot and dry conditions tend to get worse quickly, leading to temperatures that in the worst cases can break records. This week many daily high temperature records were broken in the western United States as well as in parts of Europe. If the air is already warmer than average to begin with, that makes it even easier to reach record high temperatures. Often, a very wavy but stagnant pattern in the upper-level winds causes a series of heat domes to form across the globe, leading to heat waves at several locations at the same time.
What danger does a heat dome cause to gardeners?
Air in the center of the high pressure that makes up the heat dome tends to trap pollutants in a shallow layer near the surface of the earth. This can lead to episodes of smog and high surface ozone that can cause health effects on people, especially children and people with poor lung function. It can also trap smoke from wildfires, as I discussed last month. The trapped pollution makes it hard to breathe and can cause lung damage as well as leaf damage on plants. Temperatures that stay in the 80s or higher overnight do not allow human and animal bodies to cool down to their normal temperature, resulting in health issues that build up over several days as the heat wave continues. Phoenix has experienced every day this July with a maximum temperature of 110 F or higher, and has seen deaths due to heat increase, especially in homeless populations that have little access to cooling. Deaths from heat spells increase after several days of extreme temperatures when the body is not able to cool itself down and the heat causes physiological changes that can lead to severe impacts. While drinking a lot of water is important for hydration, it is not enough to fend off the impacts of the high temperatures. You must find a way to cool off or your health will suffer.
Humidity is also a factor in heat-related illnesses. Humans
cool their bodies off by sweating. The moisture is evaporated from the skin, leading
to an energy transfer that makes the skin cool off as the sweat is changed to
water vapor. But if the humidity is too high, evaporation is so slow that it
can not provided the needed cooling, and the body stays hot. That can
eventually lead to death. In fact, it is not just humans and terrestrial
animals to suffer. The
water temperature near southern Florida this week was near 100 F, leading
to predictions that the coral reefs in the ocean there would soon die because
it is too hot for them to survive, much less thrive. This is also happening in
other ocean locations around the world. Since coral reefs provide food and
shelter for many marine species like fish, it is likely to cause dire consequences
for the oceanic food chain, including those of us who eat shrimp, fish, and
other seafood.
What do gardeners need to do when a heat dome is forecast?
When a heat wave or heat dome is predicted, gardeners and
farmers should recognize that a protracted period of extremely hot, oppressive
conditions is likely to occur. The first action they should take is to make
sure they are protected from the effects of the heat. That means working outside
early in the day when it is cooler, drinking plenty of water, wearing
light-colored clothing to reflect sunlight, and taking plenty of breaks in the
shade or air conditioning. They should take care of pets and livestock as well
and consider keeping them inside or in shady places with plenty of water for
drinking. They should monitor their plants carefully for signs of heat stress
and water regularly to reduce the impacts of the hot, dry conditions. Trees
should also be watered, especially if they are not well established or if the
dry period is especially lengthy. If the humidity is high, watering incorrectly
can increase the likelihood of fungal diseases, so read Linda Chalker-Scott’s
article Water:
Garden Friend….and Foe? – Water, Relative Humidity, and Plant Diseases – The
Garden Professors™ to learn the best ways to water your plants and preserve
soil moisture. Saving Your
Trees From Drought! – The Garden Professors™ also provides information about
watering trees during dry periods.
Eventually, all heat domes and dry spells do pass, but it is
always good after one is over to assess how your garden did and to plan ahead
to protect soil moisture using some of the techniques mentioned in the links
above.
One of the most annoying weeds in garden and landscape beds is horsetail (Equisetum spp.), a genus native throughout North America and most of the rest of the world. They have survived since prehistoric times because they are highly adaptable to their environments and are almost impossible to eradicate. There is great debate among gardeners on whether to pull or cut horsetail. Online you can find statements such as this: “…each time you break the stem, little portions under the soil regenerate new plants. Essentially, you will be creating more horsetail.” This and many other websites recommend cutting instead.
Pull horsetail shoots. Mowing just makes them mad. Photo courtesy BBC Gardening World.
Forked weeders are excellent for removing weeds below the root crown.
Unfortunately, this is bad advice. The trick to eradicating any perennial weed without chemicals (or at least bringing them to manageable levels) is to starve them to death. Plants depend on their roots (and rhizomes in the case of horsetail) to survive, so anything that reduces root resources is going to eventually kill the plant. Obviously the more above-ground material you can remove, the less photosynthesis occurs and fewer resources are transported to the roots. Pulling weeds, especially if done with a forked weeder (also used in this post), is going to remove far more material than simply cutting weeds off at the surface.
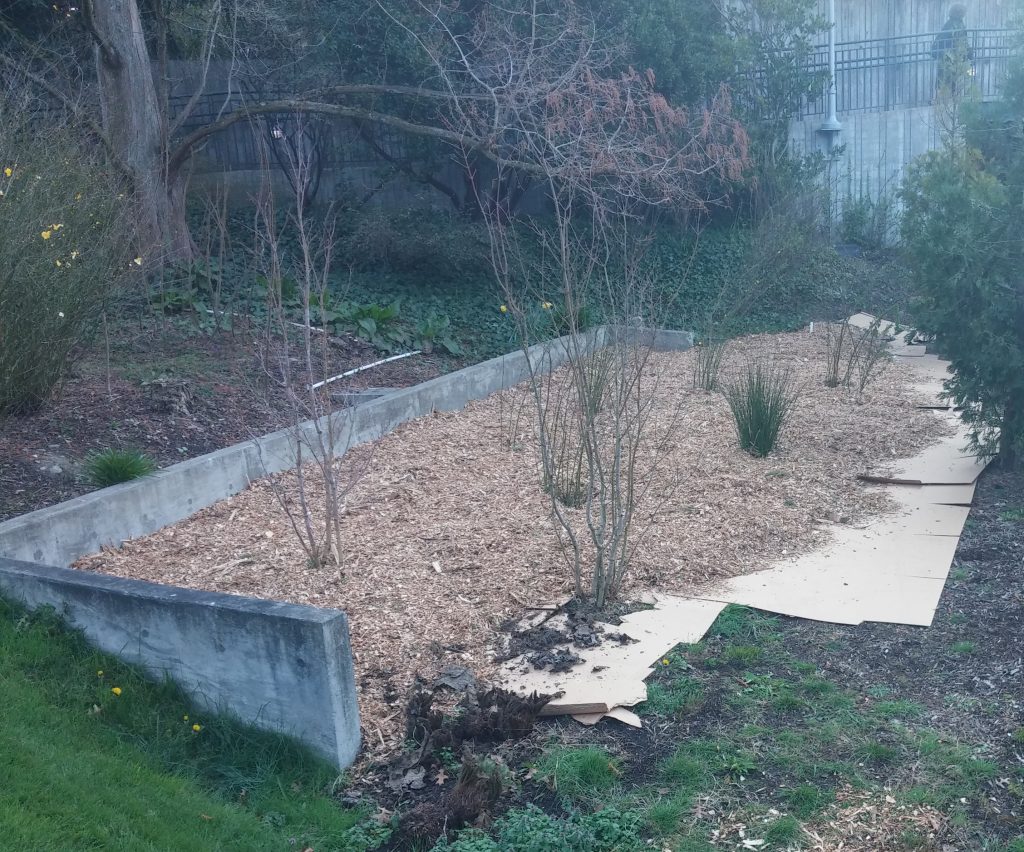
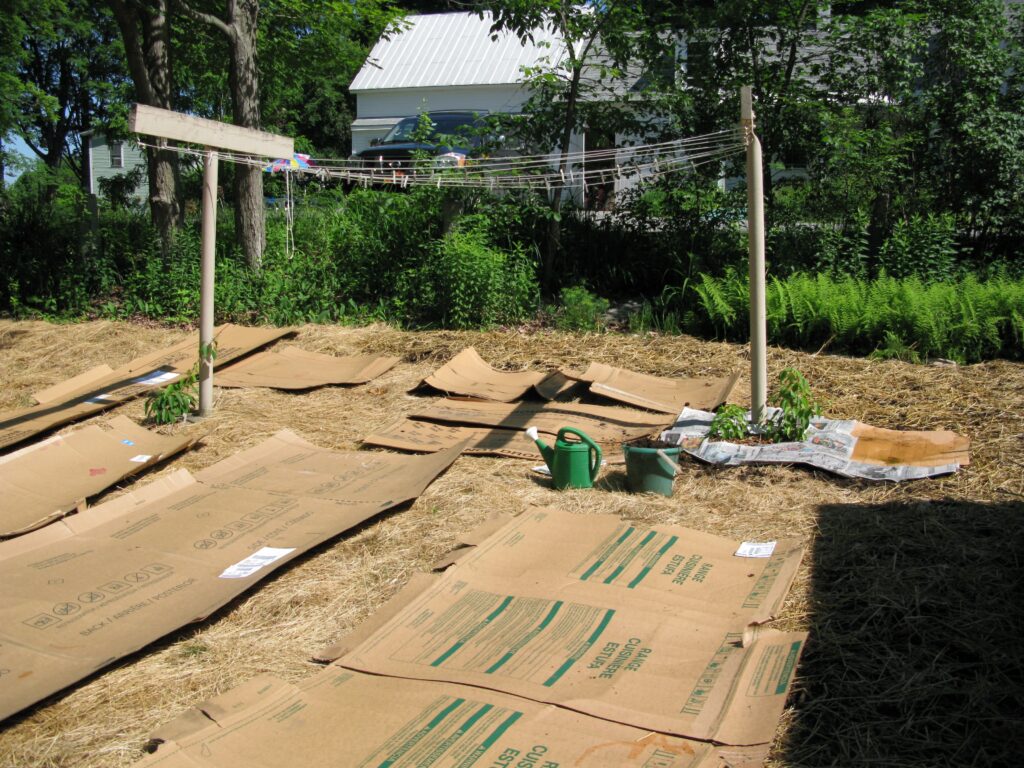
Once you start a weed removal project, you have to keep after it: once is not enough. There will be rhizomes or roots left underground to support new stem growth, and once they reach the soil surface they will start producing resources to send to the roots. “Constant vigilance” is needed to keep these shoots in check. You can significantly reduce the repeated pulling by adding a thick layer of arborist wood chips to the newly weeded site. This forces the roots to put even more resources into stem growth to reach sunlight, meaning fewer weeds and more successful, desirable plants.
Thin layers of wood chips won’t impede horstail. You’ll need 6 or more inches to keep sunlight out.
There is one caveat for controlling any weed that spreads underground. If you can’t control the spread from adjacent properties, you will not be able to eradicate the problem. In such cases, you may want to install a root barrier along the edges of your gardens. You simply dig a trench and install the barrier of your choice, making sure there are no gaps between the sections. Treated timbers, concrete pavers, and other materials that are slow to degrade can be used. The depth is going to depend on your soil conditions and the weeds of interest; some preliminary digging to determine the depth where you find weedy rhizomes and roots will help. Keep in mind that root barriers will also interfere with the root spread of your desirable plants.
Well, howdy neighbor!
If root barriers are not an option, the other method you can try is to densely plant low shrubs and perennials along the property line to create a competitive line of defense. The roots will compete for space, water, nutrients, and oxygen; the crowns will create a shaded environment where invading stems struggle for space and sunlight. You will still have to watch for invaders, but the amount of weeding needed will be far less than it was before. And don’t forget the mulch, both for the benefit of your barrier plants and to force invaders to use more resources to get their stems to the surface.
Fresh is best!
Up close and personal
Arborist chip mulch ready for action
This method works for ALL plants – not just horsetail. (Plant physiology is funny that way.) Bindweed, English ivy, Himalayan blackberry, and Canada thistle are all weeds that I have personally controlled through physical removal and deep mulching with arborist wood chips. If you’ve had success with this method on another aggressive weedy plant, be sure to post a comment!
Arborist chips help us maintain weed-free ornamental beds.
There’s a scandal simmering all across the United States that
brings to mind a switched at birth storyline on a steamy soap opera or telenovela. This scandal, though, isn’t about babies, its
about….peppers! Jalapeño
peppers, to be exact.
The issue, dubbed #Jalapeñogate online, has many home gardeners
scratching their heads as to the identity or the issue with the peppers that
they planted. You see, instead of those glossy dark green peppers that many are
used to putting in their salsas and other favorite spicy dishes, the plants are
producing bright yellow peppers. Some of
them are the same shape as jalapeños and some look more like banana
peppers.
A local gardener allowed me to stop by and let me check out their mysterious peppers.
The phenomenon has gardeners, farmers, and officials in multiple states scratching their heads. It turns out there are no stolen tapes with evidence of the problem. Instead, I was first alerted to the problem when some of the garden Facebook groups in Nebraska were abuzz with posts about the mystery peppers. I’ve since seen news I’ve seen the issue mentioned in news articles from Oklahoma, Kansas, and California and have seen posts on social media sites such as Reddit and TikTok. I scoured many of these sources (TikTok was surprisingly the most informative) and confirmed it with info from friends in the seed industry.
So what happened? It turns out that the seed trade is global and multi-tiered and sometimes mix ups occur. It just so happened that this year there were a lot of them. One US seed company that supplies a lot of seeds to nurseries and other seed companies, called Seeds by Design, imported some of its seeds for the current season. The company supplies many interesting and niche seeds, many of which it develops or breeds (they are responsible for the award winning Chef’s Choice tomato series and several other vegetable cultivars that you’d recognize on the seed rack). But it also purchases or imports seeds often for more common varieties. Seeds by Design supplies seeds to many nurseries, growers, and even seed companies around the country. And that’s where the trouble starts.
I mentioned #Jalapeñogate on our TV show Backyard Farmer, which fanned the fiery (and not so fiery) pepper flames in Nebraska.
The company imported seeds from an international grower that
turned out to be mislabeled. Up to five
different cultivars were accidentally swapped and resulted in pepper pandemonium
across the country. It turns out that
more than jalapeños were affected, so we should really change it to just
#Peppergate. Here’s what was switched:
What was supposed to be…
Turned out to be…
Jalapeño (green cultivar)
Jalapeño ‘Caloro’ (yellow cultivar)
Jalapeño ‘Tam’ (mild green)
Sweet banana pepper
Hungarian Sweet Wax
Bell Pepper ‘Diamond’
Bell Pepper ‘Chocolate Beauty’
Sweet Pepper ‘Red Cherry’
Bell Pepper ‘Purple Beauty’
Hungarian Hot Wax
Gardeners could have bought these at local garden centers or nurseries as transplants. I know of at least two local/regional garden centers that sold the affected plants. I’ve also seen that gardeners who bought seeds from some suppliers (I’ve only seen Ferry-Morse so far) may have received at least switched bell peppers.
Nebraska gardeners (at least 90 of them) were quick to share their #Peppergate story with me.
What does this say about our seed and food supply?
Our food system and our seed system are global. We live in a global economy and companies buy
and trade with each other all the time.
Given the scale of this trade, mistakes can and do happen. I’ve seen some people try to drag Seeds by
Design because they purchased seeds from a foreign company that just happens to
be in China. But the company doesn’t deserve that. They had no knowledge of the
mix up until the peppers were in the hands of growers and peppers didn’t look
right. Can you tell the difference between pepper cultivars by seed?
And others have tried to make an issue about trading with China
with some comments that hint at outright racism. While there are some security concerns
about trading with countries like China, especially in the tech world, trading
simple commodities like Jalapeño seeds is standard practice. I’ve also seen
comments that importing ag products from other countries means that we can’t support
ourselves. But it turns out that we sell a whole lot more agricultural goods to
China than we buy. US producers sold a
record-breaking $200 billion (with a b) worth of agricultural products to China
in 2022 while we imported $9.5 billion from them.
Given the need to feed so many people economically, we often import from countries that have better capacity to grow what we need due to climate, land, and labor differences. We also have to take into account seasonal differences. Even US based seed production companies and breeders will grow in other countries to take advantage of multiple growing seasons. Given our reliance on horticultural imports, we have a robust inspection system to make sure the foods, plants, and seeds we receive from countries like China are indeed safe.
To wrap this mystery up –
While there’s not much you can do now that you have these mystery seeds, enjoy the fun of trying something unexpected. If you ended up with a pepper that you don’t like or can’t eat (like the Hot Wax for Purple Bell switch), share with friends or donate to a local food pantry. After all, you can’t tell that the jalapeño isn’t green when it’s turned into a jalapeño popper.
We are again in the midst of excessive heat events in many parts of the United States. Records were broken for the highest temperatures ever recorded just a few days ago. This is also a time when the days are at their very longest, so high temperatures have large impacts on plants in landscapes.
In 2020 temperatures reached over 120 degrees in Ojai California. This caused immediate impacts to both native and introduced landscape plants.
High temperature can have immediate (acute) and continuing impacts (chronic) on plants. When temperatures get much over 90F photosynthesis becomes less efficient and in some plants may stop all together. As temperatures increase beyond 90F photosynthesis shuts down and transpiration may also stop to avoid breaking the chain of water molecules that plants must have to move water. When this happens heat builds up in the foliage leading to cell death and eventually symptoms (acute response). These may initially show as wilting, loss of color in the leaf and rapidly within days show as yellowing and then necrosis. This is usually seen in the center of the leaf first as the edges of leaves dissipate heat faster and more efficiently than around the mid vein area of leaves.
The leaves of this cherry were damaged by a high heat event in Ojai, CA. Note burn in center of the leaf.
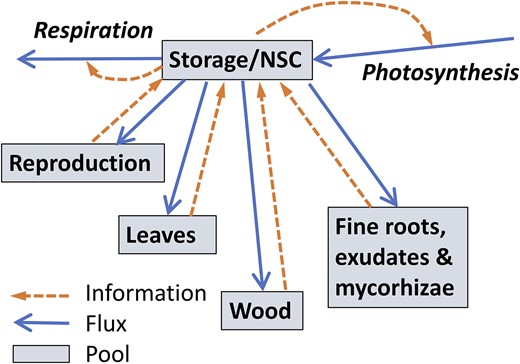
Chronic effects of heat are related to the poor efficiency of photosynthesis at high temperatures. When plants are hot and the photo systems that capture sunlight energy are impaired, or not working, the plant must still use energy in all its cells for respiration. Stored carbohydrates are not available for growth as cell maintenance (respiration) is the first demand for energy. When temperatures are high for long periods, stored carbohydrates in roots and stems are depleted. Since energy for growth is not available, slowed or stopped growth is the biggest chronic effect of hot days on most plants. This is why even hydrated plants just seem to stop growing in hot weather.
What can be done to mitigate high temperatures? First, never let plants dry out during high heat events. Evenly moist soil (but not saturated) will allow plants to absorb water and cool themselves as much as their physiology will allow. If soils are dry the damage of high heat events is “magnified” many fold and foliar damage will increase. Irrigate late in the day or early to avoid evaporation of applied water. Get your plants ready for high heat by irrigating before it hits. We usually have good weather prediction a few days ahead of high heat events.
This oak was planted in a high albedo environment and while native to the area could not withstand the high heat it endured because it was not yet established in the landscape.
Another way to mitigate high heat is to avoid plantings in “high albedo” environments. Albedo is the reflection of sunlight. Low albedo surroundings abosorb sunlight energy, high albedo environments reflect it. Plants exposed to reflected sunlight will be more readily damaged by sunlight during high heat events because they can not transpire enough water to cool their leaves. Reflective soils like decomposed granite, or some kinds of rock will damage young trees during heat events. Cover the soil with arborist wood chips which have a relatively low albedo. Young plantings can be protected by placing shade cloth over their canopies until the high heat subsides. If you don’t have shade cloth, a white sheet will do fine as it will reflect heat away from the canopy.
Ensure that the mulch or soil is moist before the heat of the day starts so humidity increases during the day. This will reduce the demand on transpiration and and the possibility of cavitation (the disruption of water chains in the plant and introduction of air which stops water movement), thus preventing a catastrophic heat death event.
Never fertilize plants during high heat events.
A final word of precaution- Never fertilize during high heat events. Even when watered this changes the osmotic potential of water in soil making it harder for plants to pull water in. Adding fertilizer is like adding salt and this is a big NO during high heat events. Try to ensure that plants have all the mineral elements they need before heat becomes an issue.
You might think that during heat events its a wise idea to prune. This is not the case! Avoid pruning, especially thinning, as the removal of leaves will increase the impact of heat on the remaining canopy. Pruning and removing leaves will decrease the humidity around a plant and the remaining leaves will have to transpire more to cool the plant. This can be a disaster during a high heat event.
Over the last month, I have seen many stories related to smoke from Canadian wildfires drifting down into the eastern United States, causing muted sunsets as well as terrible air quality. Even my mom up in Michigan told me how bad the air is up there this week and friends in Wisconsin have told me that they can’t go outside without donning N95 masks to cut down on breathing in all the smoke particles. Of course, our readers in the western U. S. may be rolling their eyes since they have gone through severe wildfire seasons in past years with little attention from the eastern press, and poor air quality from wildfires and pollution is also a frequent problem in other parts of the world. But since it is in the news, I thought I would address aerosols and their impact on the atmosphere, human health, and our gardens.
Great Smoky Mountains, picture taken from Craggy Gardens Trail near the Blue Ridge Parkway in North Carolina, Amart007, Commons Wikimedia. Note that the blue haze here is caused by emissions of organic compounds from the trees augmented by water vapor.
Northeast smoke as seen from NOAA satellite, June 6, 2023
Impacts depend on where they are in the atmosphere
The impacts that aerosols have on humans and the environment near
the ground depends on how high up the aerosols are concentrated. If the
particles were lifted above the surface due to the heat from burning forests or
trash, the main effects that the aerosols might have are optical, reducing the
amount of incoming sunlight but not significantly affecting the air we breathe
near the ground. Some acidic particles that attract water vapor might also
contribute to acid rain
that falls to earth. But if the dirty air is mixed down to the ground or is
produced locally, the aerosols can cause significant issues for human and
animal health because of their irritating effects on lungs and sometimes skin
and eyes. They can also provide hazards to transportation if visibility gets
too low. Acidic particles can also cause damage to plant tissues or change the
pH of the soil if they affect an area over a long time period.
How do aerosols affect climate?
Aerosols affect climate by reducing incoming solar radiation. Volcanic
ash and sulfuric acid droplets from volcanic eruptions can cut
enough sunlight to reduce global temperatures for several years after a large
volcanic eruption, especially if they occur in the tropics. This year’s
unusually warm Atlantic Ocean temperatures can be linked in part to a lack of
the usual plume of Saharan dust blowing off the west coast of Africa, which has
allowed more sunlight to warm the surface water. The so-called “warming hole”
in the Southeast has been linked to
aerosol emissions from power plants upwind in the Midwest and
Western U. S., which caused reductions in sunlight over the Southeast until the
passage of the Clean Air
Act of 1970 reversed that effect. Since then, the temperature in the
Southeast has risen in concert with rising temperatures across the rest of the
world. Aerosols contribute to the development of clouds, too, and that has the
potential for affecting
climate at larger spatial scales.
Saharan dust, NASA-NOAA, 20 June 2020.
How do aerosols affect health?
Aerosols affect human and animal health when they are inhaled into the lungs, irritating tissues and causing swelling and producing fluid as the lungs try to clear the aerosols out. According to estimates from the World Health Organization (WHO), particle pollution contributes to approximately 7 million premature deaths each year, making it one of the leading causes of worldwide mortality.Fine particles that are smaller than 2.5 micrometers (called PM2.5) are the most damaging because they are so small that they can make it deep into the lungs where they are deposited on the lung tissue. Because of this, gardeners and others who spend a lot of time outside need to be aware of the current air quality measurements and minimize time outside when the air quality is bad. You can find current air quality information in the United States at AirNow. Many state health agencies also post air quality information and the National Weather Service also puts out alerts on days with bad air quality. When the plumes of smoke from the Canadian wildfires moved over the Midwest and the Northeast, some U.S. cities had the worst air quality of any metropolitan areas in the world while the smoke was present.
Dusty leaves at Kaukaukapapa, Kahoolawe, Hawaii. December 20, Forest and Kim Starr, Commons Wikimedia
How do aerosols affect gardens?
Aerosols have several impacts on plants and gardens. Aerosols
provide benefits for gardeners since clouds and rain form from water that is collected
into water droplets on aerosol particles known as Cloud
Condensation Nuclei (CCN). No doubt if you collect rain or snow water, you
have seen the dirt that remains after the water is gone. But aerosols also have
detrimental effects. Aerosols aloft can reduce incoming sunlight, leading to
slower plant growth, especially for plants like corn that are sensitive to the
amount of sunlight they receive. Aerosols at ground level can cover the plants
with a layer of dust that decreases photosynthesis by blocking incoming
sunlight and clogging pores. If the aerosols are acidic or contain toxins, they
can damage the plants or increase the acidity of the soil, especially over long
time periods. In the case of smoke from wildfires, the smoke particles can also
affect the taste of grapes or other food products they interact with. Smoke taint on wine
grapes, caused by compounds from aerosols that are absorbed by the grapes, can
impart an ashy flavor to the wine made from those grapes, making it unsellable,
as producers in California and Europe
have found in recent years.
If you are experiencing air quality issues in your community,
we encourage you to monitor the weather forecasts closely and stay inside when
the aerosol count gets too high, especially if you have asthma or other lung
conditions that may be made worse by poor air quality. If you have noticed
other impacts of the wildfire smoke or other air quality issues on your garden
plants, please feel free to share them in the comments.
Agaves, those bat pollinated, succulent, strong leaved, slow-growing, xeric- and heat-loving Western Hemisphere plants, are literally the heart of the tequila and mezcal industry. As fascinating as the bat pollinator aspect is we’re going to focus on the how agaves are used to produce liquor.
Image by Jesus Cervantes/Shutterstock
Let’s start with the differences between mezcal and tequila. These include region of origin, plants used and production methods.
We’ll start with regions and plants.
The name “mezcal” comes from the Nahuatl word “mexcalli” which means “oven-cooked agave.” Although mezcal can be made from any agave species, production focuses on roughly 30 agave species, varieties, and sub-varieties. While mezcal’s history centers around the region of Oaxaca, Mexico, it’s now produced throughout the country. As mezcal can be made with any agave species the name has become a general one for most agave liquors in Mexico. It often implies an artisanal aspect to the drink whether it’s deserved or not. In 1994 the name mezcal was recognized as an Appellation of Origin (AO, DO). There is also a Geographical Indication (GI), originally limited to the states of Durango, Guerrero, Oaxaca, Puebla, San Luis Potosí, and Zacatecas. Similar products are made in Guanajuato, Jalisco, Michoacán, and Tamaulipas but these have not been included in the mezcal DO.
(Patricia Zavala Gutiérrez/Global Press Journal)
While both mezcal and tequila are made with agave, only one species is legally allowed for tequila production, the blue agave. Tequila production is located primarily in the area surrounding the city of Tequila, which is northwest of Guadalajara, and in the Jaliscan Highlands of the central western Mexican state of Jalisco. Tequila is also recognized as an Appellation of Origin (AO, DO). It can be produced only in the state of Jalisco and limited municipalities in the states of Guanajuato, Michoacan, Nayarit, and Tamaulipas.
Blue agave field Photo by Christian Heeb
Now let’s take a look at production methods. Harvesting agave for mezcal and tequila production starts out the same.
Seven to ten years after planting the plants are mature enough to harvest. They are manually harvest by “jimadors,” highly skilled people trained in the art of agave harvesting. It’s hard, labor-intensive work.
Using machetes or a “coa de jima”, a specialized agave cutter, the jimadors cut off the long agave leaves to get to the core of the plant called the piña.
The piñas are collected and taken for roasting. Roasting method is where mezcal and tequila production methods differ.
Pit roasting the piñas is traditional for mezcal production.
Agave piña roasting pit for making Mezcal
The rocks in the pit are first heated with charcoal
When the the temperature is correct, the piñas are added.
Alternating layers of piñas and chopped agave leaves are added until the pit is full.
The entire thing is covered and left to smoke for 2-7 days depending desired smokiness of the final product.
Roasted piñas.
Cooking piñas for tequila is a much simpler process. They’re actually baked.
Traditional brick ovens can be used.
Or large metal ones such as these.
The end result is the same.
After roasting or baking the piñas receive the same treatment regardless of the final product, mezcal or tequila. They’re crushed or shredded to extract the juice which is then fermented for a period of time. The fermented product is then distilled twice and then usually aged. Some mezcal is not and is sold a “joven” or young. Aging can last from one month to as long as 12 years. After aging the liquor is usually stored in stainless steel tanks to reduce evaporation.
And yes, I hear you there in the back row, “But what about the worm?!”
Gusano de Maguey in a bottle, waiting to be added to finished mezcal.
The worms are only found in mezcal, never tequila, and not all bottles have one. Bottles of mezcal which have a worm (called gusano) are labeled “con gusano,” meaning “with worm.” The worm is actually a caterpillar of the moth Comadia redtenbacheri which can infest agaves. If a “worm” is to be included it’s added at bottling. Doesn’t that sound like a fun job.
There are various stories as to why a “worm” would be added. Some claim it’s a marketing ploy. Others say it’s there to prove that the mezcal is fit to drink…OK. Others believe that it brings good fortune and strength to the lucky person who finds it in their glass. If you’re fortunate to find one in your glass be sure to swallow it whole, don’t chew it. And some claim it’s there to impart flavor. Yummy.
Mmmm, pickled ‘pillar!
And lastly, I’m sure some of you have seen “worm suckers” at shopping emporiums which carry a certain type of tourist stuff with a (supposedly) south-of-the-border flavor. Yes, I’m talking about the famous, or infamous, tequila-flavored worm sucker.
Also available in different colors and flavors. Look for them at finer tourist traps across the Southwest USA.
Don’t fall for this! As educated and discerning Garden Professors blog post readers you now know that #1: Tequila never contains a worm and #2: the “worm” is actually a caterpillar and the above critters encased in sugar are actually the larvae of the darkling beetle, commonly known as mealworms. Be a savvy consumer, hold out for the real thing.
As many parts of the US face drought or dryer than normal conditions and issues about water availability especially in the western states, many gardeners are reassessing their relationships with plants and irrigation. Many gardeners, especially in the west, are replacing their lawns and landscape plants with more drought and dry-weather tolerant options. But there still are times when irrigation might still be necessary, e.g., growing vegetables and fruits, establishing new plants, and more. Using water efficiently and effectively is key in these situations even when water is available and drought conditions aren’t as prevalent. Efficient water use and good irrigation can also mean a savings on the water bill AND a reduction in plant diseases spread by water application on the leaves. Paired with mulching, efficient irrigation can drastically reduce the amount of water used in gardens and landscapes.
In order to make the best choices for your garden, I’m going to talk through some of the most and least efficient irrigation methods for your gardens and landscapes. I’ll be starting with the most efficient methods and working my way to the least.
Drip Irrigation
Drip irrigation is considered one of the most efficient methods of irrigation because it applies water directly to the soil at the base of the plant and therefore typically uses the smallest volume of water. Research shows that drip irrigations have around a 90% efficiency rate. . Most systems sit above the ground and apply water to the soil surface, but some sub-soil systems are available. The system usually involves a filter and pressure regulator to keep the emitters functioning and applying water at the proper volume.
This drip tubing has pre-installed emitters along the tube and drips small volumes of water directly on the soil near the plant.
The efficiency of drip irrigation comes with a caveat though. When applied to sandy or rocky soils, water from drip irrigation has a much smaller spread laterally in the soil due to less capillary action and higher gravitational pull due to the large pore spaces. This means that there isn’t as much coverage of water in the root zone. In order to combat this drip emitters must be closer together or have a high flow rate, both of which increase water usage and reduce the effectiveness of drip irrigation in sandy soils. Read more here
There are typically two types of application methods: tubes or tape that have pre-made emitter holes at set distances that disperse a set amount of water per hour or emitters that are inserted into the end of solid tubes (that may or may not have an adjustable flow rate). The tubes and tapes that have holes pre-made are typically used in vegetable gardens, row crops, or in beds where plants are uniformly planted. Systems with the inserted emitters are often used in landscape settings where it makes sense to water individual plants, such as trees, shrubs, or large perennials.
Given the low volume of water disbursed by the system, water pressure is regulated in a way that ensures even distribution as long as it isn’t modified than from the manufacturer or factory specs.
For information on installation and maintenance, check out these resources:
Microsprinklers function on the same type of system as drip irrigation and can sometimes even be combined with drip systems. Instead of small openings that drip water on a small area on the soil, microsprinklers spray a small volume of water over a set radius. The sprinkler heads are typically only a few inches above the soil and therefore apply the water at the base of the plants. Some systems allow you to switch out sprinkler heads that spray in different patterns and distances. One such system that I’ve used has sprinkler heads for patterns from 90 to 360 degrees and from one foot to ten feet in diameter.
This microsprinkler has an adjustable head to apply water in a 1 to 5 foot diameter.
While not as efficient as drip, microsprinklers are more
efficient than other systems due to low water volume and consistent pressure
throughout the system. They can be more
flexible than drip irrigation in settings like landscape beds and around trees
and shrubs since one emitter can water a larger area with less tubing and fewer
parts.
Soaker hoses
Soaker hoses are popular because they are plug-and-play. You can just attach them to your faucet and don’t have to worry about cutting and assembling tubing and parts. Water is released through the surface of the entire hose, making water application much less precise that drip and microsprinklers as well. Keep in mind that soaker hoses don’t have pressure regulation like drip and microsprinkler systems do so you’ll often find inconsistent watering when you use them. More water leaves the soaker hose at the end closest to the faucet and less (or none) at the far end. The result is usually excess water in some parts of the garden and not enough in others.
Soaker hoses also release a much higher volume of water than drip and microsprinkler systems, which can result in overwatering and water waste. I learned this from experience when I accidentally left a soaker hose running for about three days. The garden was nicely flooded and the water and sewer bill topped out at over $500 that month.
Sprinklers
Sprinklers are probably the most common irrigation system used because of their simplicity. Home gardeners might use the hose-end individual sprinklers purchased at the garden shop which can quickly water a large area. And many homeowners, especially in areas where there isn’t rainfall sufficient to support grass growth, have sprinkler systems installed in their lawns. However, sprinkler systems are only around 65-75% efficient. Spraying water in to the air, especially on hot and dry days, reduces efficiency through evaporative loss. Sprinklers are also less precise in where you can aim and apply water. There’s also the added issue that overhead application of water can lead to or worsen plant disease issues by making conditions favorable for the spread and growth of fungi and bacteria. If possible, use sprinklers only on a temporary basis like establishing new plants or make sure they are calibrated effectively.
Hand watering
While hand watering probably uses a smaller volume of water than sprinklers and you can direct water more precisely, there are still issues with evaporation and overhead watering. In addition, hand watering is usually less effective than other methods because humans are impatient and actually don’t water long enough. Most plants will benefit from a long, deep watering but many gardeners will only give a pass or two with a water hose and will underwater plants. This can cause roots to accumulate in the upper layer of the soil and increase long-term water needs of the plant. Rely on hand watering for temporary needs like plant establishment or container plants (though you can use drip and microsprinklers in containers as well) and use a more efficient strategy long term.
I recently worked with a local community garden to install several thousand square feet of drip irrigation. The system will save them many hours of hand watering labor each week.
Wrapping it up
There are a number of ways you can manage the water needs of your landscape, from renovating your landscape with more water efficient plants to making more efficient use of water through effective and efficient irrigation systems. As more and more cities and states across the US place restrictions on water use having several irrigation tools in your toolbox will be helpful. Always remember that the best strategy is to grow plants suited to your environment to reduce water use in the garden. And in places where there isn’t sufficient water for grass to consider removing lawn and replacing with native vegetation and xeriscaping. Irrigation systems can help in areas with unexpected drought or weather issues but for long-term sustainability gardeners in drier climates should adapt their properties where they live.