Now that much of the world’s attention is focused on limiting the spread of pathogens, well one pathogen, it seems like a good time to talk about some of the questions or concerns we’ve seen regarding vegetable gardens, community gardens, and farmers markets. It’s a good time to talk about some of the practices that we should be doing to prevent other human pathogens from handling produce, like E. coli and Salmonella, and how those might fit into preventing the spread of COVID-19.
First things first
First off, we have to remember that SARS-CoV-2, which is the virus that causes COVID-19, is not a food borne illness. I repeat: COVID-19 IS NOT A FOOD BORNE ILLNESS. This means that it is not spread through the consumption of contaminated food like E. coli and Salmonella. I’ve seen many instances of people spreading fear about food online, with many suggesting using soap or bleach on food to minimize risk. Those steps are both unnecessary an actually pose a poisoning risk. There is currently no evidence to suggest that COVID-19 is transmittable by food or food packaging.
The risk from food (which is considered minimal by experts) is from cross-contamination from food or packaging onto hands or onto surfaces that are then touched by hands. The virus would then have to go from a persons hand to mucous membranes in the respiratory system by something like touching your face or picking your…..well, we won’t go there. The best defense against this isn’t necessarily sanitizing all the food you buy, but washing your hands after you handle it and sanitizing any surfaces that packaging or shopping bags touch.
Factsheet: Is Coronavirus a concern on Fresh Produce?
But while we’re on the topic of pathogens and food safety, it’s a good time to talk about some general guidelines that can not only help stop that potential SARS-CoV-2 cross contamination but also food borne illness in general.
Minimizing the risk from produce even further
Whether you grow it in your own garden, buy it at a local farmers market, or purchase it at the grocery store, produce has a minimal risk when it comes to COVID-19.
Factsheet: COVID-19 and Food Safety – Shopping and Handling Groceries
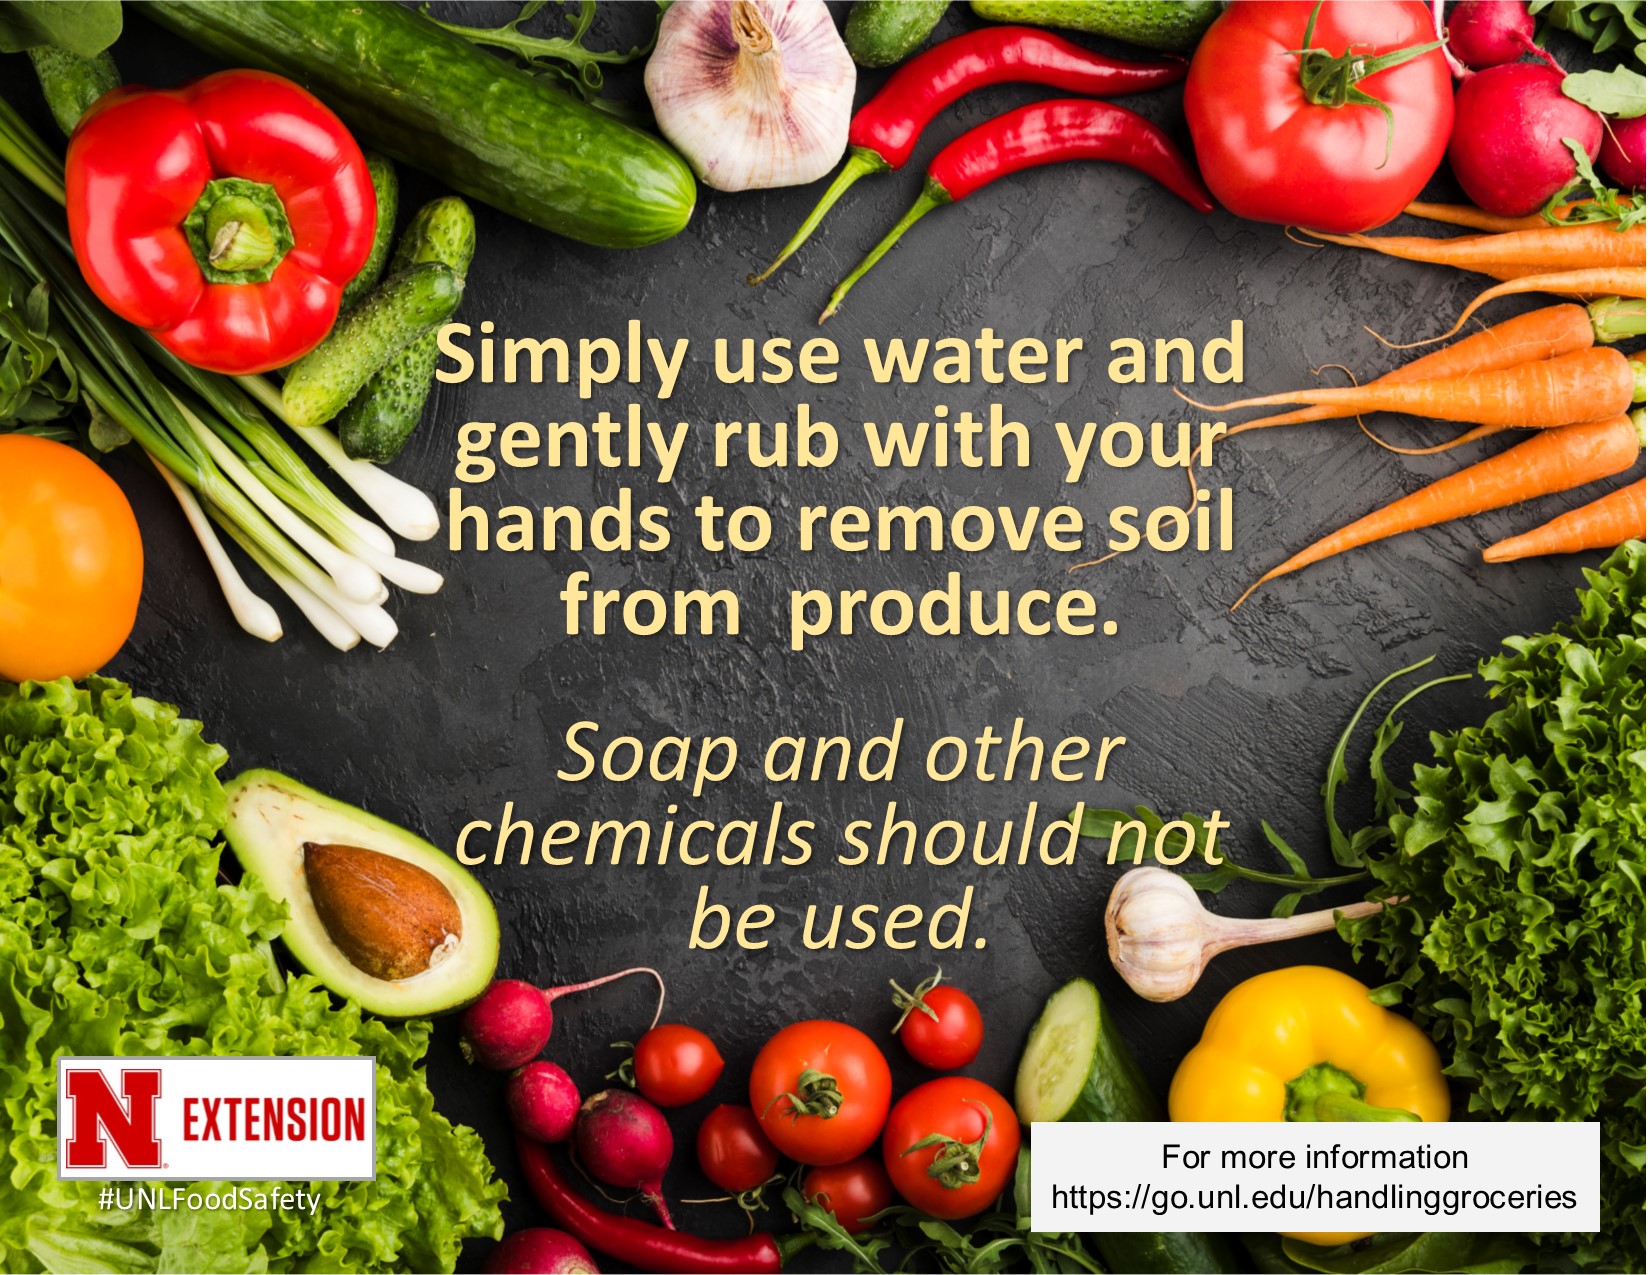
To minimize the very small risk of cross-contamination even further and (probably more importantly) to also reduce any risk from common food borne illnesses, proper washing of the produce should be practiced. But do you know how to do that? Maybe…and maybe not. Here are some steps to help out.
- Wash your hands. The most common pathway of contamination for produce is from human touch.
- You should use clean water that you would use for drinking (like out of the tap) and not use any bleach or soap.
- Providing gentle friction with your hands or a produce brush or by rubbing the produce together is sufficient.
- If you’re washing a lot of produce at once, say from a large harvest, and you’re using a tub full or sink full of water to wash multiple “loads” of produce, keep an eye on how dirty the water gets and refresh it when it gets discolored. Remember that washing produce in a tub or sink of water can also present a cross-contamination issue where contaminated produce contaminates the water.
- When in doubt, discard produce you may think is contaminated or wash it separately.
- To reduce risk of cross-contamination, consider a “single pass” washing technique where you spray the produce with water and it doesn’t sit in water with other produce.
Food Safety in the Garden
There are a few things we can do in the garden to help stop the spread of human pathogens. Most of them are common sense things that most people don’t even think about. Devout GP readers may remember my little missive around this time last year about the food safety risks of using manure in the vegetable garden (See: The Scoop on Poop). Beyond those musings on manure, though, gardeners can take some additional steps to reduce potential contamination. Those are:
- Wash your hands. I know it sounds simple, and maybe even more so now that it has been drilled into our brains, but washing your hands before you garden is one of the best ways to reduce the spread of pathogens. It is especially important to wash your hands before you harvest produce or handle harvested produce.
- Use clean containers for collecting and storing produce. Using harvest baskets, tubs, and totes is common, but the ones that are best in terms of food safety are those that can be washed and sanitized. This is one tactic that many farmers are encouraged to use as well. Plastic tubs, totes, trugs, and crates are probably best as they can withstand washing and the use of a sanitizer like bleach. Wooden or woven baskets may be cute, but they’re harder to clean and can hold on to pathogens.
- Look for signs of wildlife in the garden. Aside from eating more than their fair share of produce, wild animals can also present a food safety risk especially from their droppings. Look for signs of animals in the garden and especially take note of any droppings. Don’t harvest produce that has signs of droppings on them. Many of the big produce recalls over the last decade have been a result of wild animals like birds or wild hogs.
- Keep pets out of the garden. As much as you like to have Fluffy or Fido in the garden, they present a risk just like wild animals do.
- Wash produce using proper techniques (previously discussed).
Best practices for minimizing COVID-19 risks at Community Gardens (and Farmers Markets)

One other aspect of gardening that could provide some risks for the spread of COVID-19 are the more social aspects of gardening, such as community gardens. I’ve had several local gardens reach out for best practices relating to minimizing risks in the garden – from handwashing stations to shared tool use. Thankfully, NCSU Extension was quick on the draw with resources for lots of aspects of the food system in terms of reducing risks from COVID-19 and they graciously allowed other universities to distribute these resources. Below are some links to the resources that would be helpful to gardeners:
COVID-19 FAQ for Community Gardens
And since some gardeners may sell at (or at least visit) farmers markets: