If you do any searching for gardening (or even think about the color green), you’re likely bombarded with adds on social media and search engines about all stuff gardening. One of the recent trends is microgreen production. There’s all kinds of fancy little systems and gizmos that will help you grow microgreens for a price. But what are microgreens? Are they the same thing as sprouts? And do they have the same food safety issues as sprouts? Let’s discuss, shall we?
What are microgreens?
Microgreens are basically tiny plants harvested shortly after germination. Unlike sprouts, like the common alfalfa or bean variety, these baby plants are grown on a medium of some sort and just the “above ground” portion of the plant is harvested. Sprouts, on the other hand, are typically grown in a moist environment without a medium and harvested whole -roots, seed, and all. It is this wet and warm environment that make sprouts especially risky for food borne illness.
Microgreens can be any number of different crops, but common types are kale, mustard, chard, broccoli, arugula, and radish. Sunflower and pea are also common, but they fall more in the “shoot” classification since they are harvested a bit larger. There’s lots of other crops that are used for microgreens, including herbs like cilantro and even marigolds, so the sky is the limit!
Why microgreens?
There are a few things that make them attractive to farmers which also are good for home growers. First, it only takes 1-3 weeks for a finished crop. This fast turn-around makes it easy to keep up with production needs for customers (or your own uses) and also reduces risk. If a crop fails, it is much less damaging if it only took a week to grow rather than a whole field full of peppers that have been growing for months getting wiped out by disease or a storm.
Second, is the value and profit. While there is some investment in seed starting equipment and then continued expenses of seeds, trays, and media, microgreens have a high per pound value. Microgreens are used in small quantities and are therefore sold in small quantities. A small amount you may purchase at a farmers market for a few bucks may be an ounce or less. When you calculate it out by the pound, microgreens are sold for between $20 and $200ish per pound (depending on the variety, organic production, other factors).
And of course, microgreens lend themselves to year-round production. It can be a fun and easy way to get some flavor and color on the plate even in the dead of winter. Just a few square feet of production area can provide a decent sized crop, so it is great for those with limited space or no garden at all.

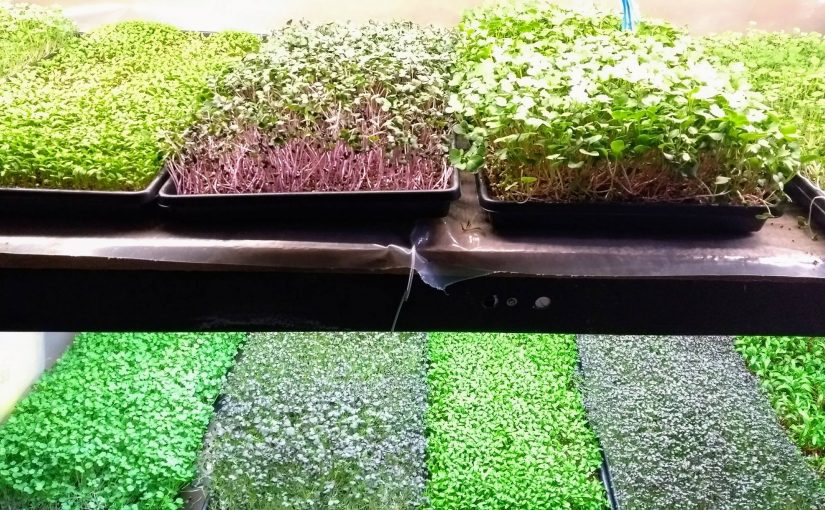
Microgreens are popular with home cooks and chefs alike because they pack a flavor punch and add some color and texture with just a pinch or two of product. Studies have shown that microgreens also pack a nutritional punch in a small package. However, production practices can greatly influence nutrient content, especially light. Microgreens grown with higher quantities (brightness) and quality (spectrum colors, mainly red and blue but also green) of light have higher nutrient values.
How do you grow microgreens?
The way you grow microgreens lends itself to why they are so popular to grow, for both home enthusiasts and farmers alike. Microgreens are basically recently germinated seedlings. If you are good at seed starting, you can be good at growing microgreens. Lots of the ads I’ve been seeing recently are for attractive but pricey growing trays and mats that you just lay down and water. However, budget conscious gardeners can grow them pretty simply and inexpensively at home. And you probably have most of the equipment you need, especially if you start your own seeds each year!
Microgreens are usually grown in those flat plastic seedling trays, the type that don’t have cells in them (the ones used to hold the cell packs). For those “in the know,” they’re called 1020 trays. You can either use a sterile media like peat or coir or purchase specific fiber mats (I have some made from hemp -they work well but smell like a moldy gym sock full of weed when in use). We’ll talk about the importance of a sterile media when we talk food safety.

The sowing density of seeds can vary by crop due to seed and seedling size. Typically, one ounce of seeds can sow anywhere from one to eight 1020 trays. In general terms, large seeded crops like chard and beets may take up to ½ cup per tray and small seeded crops like radish or kale might require ¼ cup. Tiny seeded crops, like sorrel may need just a few tablespoons. If you’re really into production, Penn State extension has an excellent Excel calculator to calculate seeding rates. Typically, you’ll broadcast the seeds on top of your media and then maybe sprinkle a little more media on top to make it easy (no dibbler here!).
Most seeds require darkness to germinate, as well as high humidity. You can use humidity domes and cover trays with an opaque material to achieve this, or you can use the trick that producers use and stack trays on top of each other for a day or two. This keeps the seeds covered and dark and preserves moisture and humidity. Just unstack them after a day or two and stick them in their growing location. As with seed starting, you’ll have the most success if you provide some good quality light and heat. (You can search through old articles to find lots of info on seeds starting). There’s research that shows that light is a big factor in microgreen growth, coloration, and nutrition levels.
You’ll harvest your microgreens typically one two three weeks after sowing. Typically, this is done after at least one set of true leaves have formed, but you can usually let them go until there are at least two (or sometimes three) sets of leaves. To harvest, use a sharp, cleaned pair of scissors to snip the seedling off just about soil level, being sure not to disturb the media so that you don’t get it on your precious produce.
There should be no need to wash the microgreens right after harvest and before storage, since they’re typically grown in a clean environment. Washing before storage can increase storage moisture to levels that support microbial growth, reducing storage time and also increasing the risk of human pathogens. Instead, store microgreens (and most leafy greens) without washing and wash just before use.

Food Safety
As we learned when discussing what microgreens are and comparing them to sprouts, we learned that microgreens have been found to have much lower risk of human pathogens. However, the risk is not zero, especially if production practices are conducive to pathogens. We just discussed that washing prior to storage can lead to microorganism contamination, but there are a few other areas where contamination is easy. To reduce contamination, follow these steps:
- Always use clean and sanitized trays or containers. If reusing trays, be sure to wash with soapy water then sanitize with a dilute bleach solution or other approved sanitizer.
- Keep the production area clean and sanitized. Microgreens are often produced on multi-leveled vertical racks, so contaminants can drip down. Make sure all surrounding surfaces are clean.
- Use sterile media for production. This is typically a soil-less media made primarily of peat or coir, like a seed starting mix, or specialized fiber growing mats. Do not use regular potting soil, any mix containing compost, or anything containing soil to avoid the introduction of human pathogens or other microorganisms that might affect the crop, such as those that cause damping off.
- Use cleaned and sterilized seed. Many companies sell seeds specifically for microgreens that have been processed to remove pathogens. I’ve seen seed production, and while it isn’t filthy, it typically isn’t sterilized to the level of food production standards. You can sterilize common seed at home using a solution of hydrogen peroxide or vinegar. For guidance, visit this guide from K-State extension.
- Use a clean source of potable drinking water. If you wouldn’t drink it as is, don’t use it. Typically this means it should be straight from the tap of a trusted source.
Conclusion
Growing microgreens can be a fairly easy and enjoyable way to produce something fresh and green year round. In terms of production practices, it is basically ramped up seed starting where your seedlings only grow a few weeks before harvest. This makes it a fairly easy process and one that can be done almost anywhere. If you’re looking for an indoor gardening project or just want to add a quick source of nutrients to your diet, give microgreen production a try.
Sources and resources:
Microgreen nutrition, food safety, and shelf life: A review
Microgreens and Produce Safety
Microgreens—A review of food safety considerations along the farm to fork continuum
How do you know how “a moldy gym sock full of weed” smells?
Awesome article! I am really enjoying your blog, hope to see more from you soon.