Rooting around – the differences between taproots and mature roots

A seedling with green cotyledons and emerging radical

Most of us have witnessed dicot seed germination at some point in our lives – watching the coytledons transform from seed halves to green, photosynthetic structures, while the radicle developed into the seedling root system. This seedling root – or taproot – is important to seedling survival as it buries itself in the soil to provide structural support and to give rise to fine roots for water and nutrient absorption. But that’s where much of our visual experience ends – because we don’t see what’s happening underground. Without additional visual information we imagine the taproot to continue growing deep into the soil. And while this perception is borne out when we pull up carrots, dandelions, and other plants without woody root systems, the fact is that woody plants do not have persistent taproots – they are strictly juvenile structures. Understanding the reality of woody root systems is critical in learning how to protect and encourage their growth and establishment.

Mature carrots have taproots. Mature trees do not. Photo courtesy of Pixnio.

Trees, shrubs, and other woody perennials all have juvenile taproots just like their herbaceous counterparts. But these long-lived plants develop different morphologies over time, which are primarily determined by their soil environment. Water, nutrients, and oxygen are all requirements for sustained root growth. Gardeners always remember the first two of these needs, but often forget the third. And it’s oxygen availability that often has the biggest effect on how deeply root systems can grow.

Roots grow where they can. Sometimes that zone can be very shallow, as this coastal forest photo shows.

Whole-plant physiologists have known for a long time that “roots grow where they can” (Plant Physiology, Salisbury and Ross, 1992). But this knowledge has become less shared over time, as whole-plant physiologists at universities have been largely replaced by those who focus on cellular, molecular, and genetic influences (and can bring in large grants to support their institution). Sadly, many of these researchers seem to have little understanding about how whole plants function. Simply looking at the current standard plant physiology textbook (Plant Physiology and Development, Taiz et al., 2014) reveals as much. (To be fair, there is now a stripped-down version of this text called Fundamentals of Plant Physiology, [Taiz et al., 2018] but even this text has little to do with whole plants in their natural environment.) If academics don’t understand how plants function in their environment, their students won’t learn either.

The Table of Contents for Plant Physiology and Development. You won’t find a discussion of woody root ecophysiology in here.

Well. Time to move on from my soapbox moment on the state of higher education.
Roots grow where oxygen is plentiful. It becomes a limiting factor as soil depth increases. Photo courtesy of Wikimedia.

Let’s look at what happens with a young tree as it develops. The taproot grows as deeply as it can, but eventually runs out of oxygen so vertical growth stops. At the same time, lateral root growth increases, because the levels of oxygen closer to the soil surface are higher. These lateral roots, and their associated fine roots, develop into the adult root system, continuing to grow outwards like spokes on a wheel. When pockets of oxygen are found, roots dive down to exploit resources. These are called sinker roots and they can help stabilize trees as well as contribute to water and nutrient uptake.
Gardeners and others who work with trees and other woody species would do well to remember that woody root systems, by and large, resemble pancakes rather than carrots. These pancakes can extend far beyond the diameter of the crown – so this means protecting the soils outside as well as inside the dripline.

Typical root structure of a mature tree in its natural environment. No taproot here!

Another unnecessary tree failure

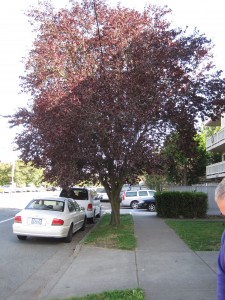
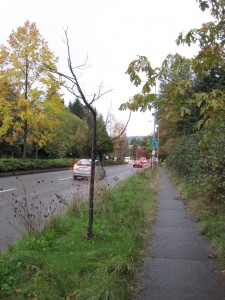
The end of August brought an unseasonable rain- and windstorm to the Puget Sound region. We had some spectacular tree failures which I missed seeing as I was out of town. But one of our Facebook group members, Grace Hensley, was on the ball and took some great photos of a fallen purple-leafed plum. The first thing you see is the complete lack of a stabilizing root system.

"Rootless" purple leafed plum
“Rootless” purple leafed plum

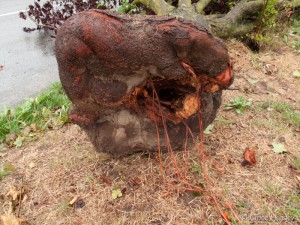
Now look at the base of the trunk, which is actually a massive circling root that has girdled the trunk over time.

A big wooden donut
A big wooden doughnut

By now you must be able to see the orange twine extending from the base of the tree to the soil. Yes, those are the remains of the balled-and-burlapped clay root ball that was planted many years ago. Commercial landscapers will assure you that tree roots can grow through the burlap and establish. And this is sometimes true, as in this case.

But what doesn’t happen when the whole B&B mass is plopped into the ground is that circling woody roots aren’t discovered and corrected. Over the decades what started as a small circling root grew bigger and bigger, slowly squeezing the trunk and preventing it from developing girth at that point. It’s kind of like a blood pressure cuff being pressurized but never released.

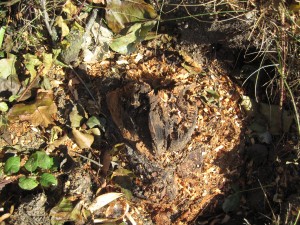
Trunk growth was prevented by the girdling root
Trunk growth was prevented by the girdling root. The broken part here used to be in middle of the wooden doughnut.

In time, the constricted point becomes so unstable that the tree breaks. Look are how small the trunk that’s still in the ground is compared to the trunk of the tree itself. Windstorms are often the final push these failing trees need.

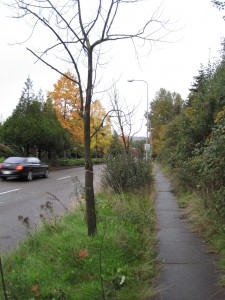
How long before this neighboring tree fails, too?

Commercial landscapers say it’s too costly to remove the twine and burlap and clay surrounding the roots, not to mention doing any of the corrective root pruning that might be needed. It’s easier to just plant the whole thing and cross your fingers that the tree lives past the warranty date. This is what happens when you consider a tree as just another design element rather than a living organism.

As a homeowner, however, you can insist that your trees are planted correctly (if you have someone else do the work). Or you can do it yourself. The bare-root method (sometimes called root washing) is an emerging science and it requires thoughtfulness, but it’s certainly better than the conventional approach in terms of long term tree health.

A scary Halloween story

Those of you that have followed the blog for a while know that poor tree planting is one of my pet peeves. It drives me crazy to watch tree installers use backhoes to gouge out gigantic holes and then drop in the intact root ball, clay, burlap, twine and all. But this dig-and-dump method (or “cost effective practice” according to installers) of installing trees often dooms them (the trees, not the installers) to a slow and ugly death. So in honor of Halloween, let me share my latest horror story.

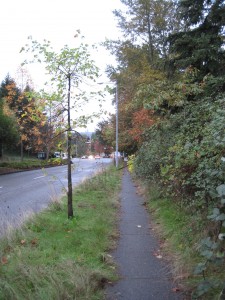
Twice a day I drive down this street in NE Seattle. I’ve long admired the row of dead street trees left to remind us all of our own mortality. A few of these Liriodendron have somehow survived though “survival” seems a generous term. They’re more like zombies, slowly losing body parts but somehow still functioning until someone puts them out of their misery.

Dead #1 Dead #2 Dead #3

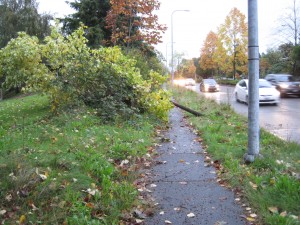
One lone tree seemed to defy all odds. Until our latest windstorm, which revealed the cause of all this arboricultural agony.

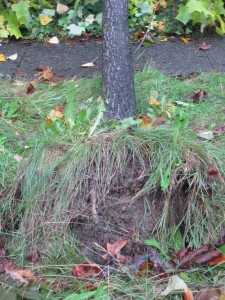
Downed tree Rootball side Rootball

That’s right, there’s the clay-covered rootball, still intact. Only one root has managed to escape into the native soil. There may be others on the opposite side, but by now (several years after installation) there should have been sufficient root establishment to prevent failure.

Several of us have written about bare-rooting trees before, and while there’s still not consensus on the practice I think we would all agree that the tree planting in this case was not acceptable. There are better ways, and yes they take more time (or “not cost effective” according to installers), but planting trees right mean fewer replacements later.

Another close shave…

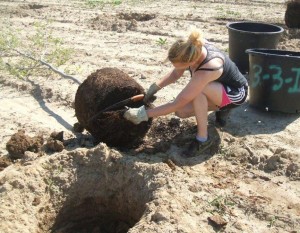
Life is full of surprises. A case in point is some recent work on our Social Media Designed Tree Establishment Study (SoMe-Ded-TrEeS). One of the objectives of the project was to determine the impact of root-ball manipulations to remove circling roots on container-grown trees. When we planted the trees (‘Bloodgood plane trees in 25 gal. containers) two years ago, we ‘shaved’ the outer roots on one-third of the trees, ‘teased’ apart the circling roots on one-third, and planted the rest as-is (‘pop and drop’ in Linda’s vernacular).

Rerearch assistant Aniko Gaul shaves a root system with a pruning saw before installation 2 years ago

Research Technician Dana Ellison teases apart a root-ball before installation

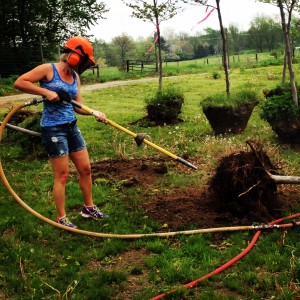
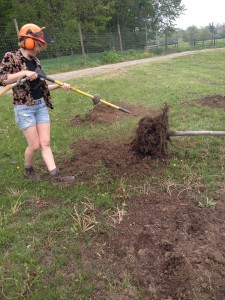
Two weeks ago our campus nursery staff dug 12 of the trees for us using their tree spade – four from each of the three groups. We then borrowed an air-spade from MSU Campus Infrastructure and Planning and we excavated the root-balls to determine the amount of new root growth into the surrounding soil. (‘We’ meaning my technician Dana Ellison and Nicole Rowley, one of our new undergraduate research assistants)

Dana takes a turn with the air spade

Nicole excavating roots with the air spade

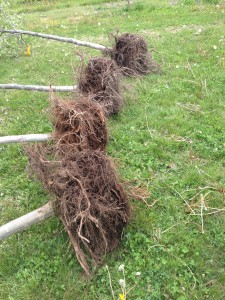
The results of the root exam were a surprise to me. Going in to this exercise my expectation was that the roots that were ‘teased’ to remove girdling roots would fare the best – and they did have visibly fewer circling roots and more new root growth than the ‘pop and drop’. But the biggest surprise was the marked improvement in rooting of the ‘shaved’ roots.

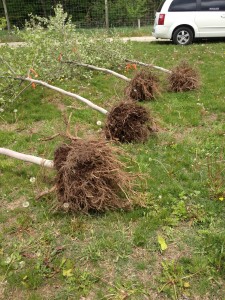
control root systems

'Shaved' root systems
‘Shaved’ root systems

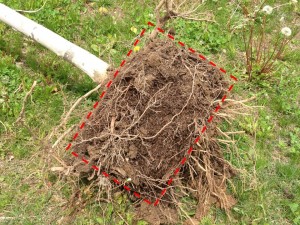
To be honest, I had some reservations about the shaving treatment. Just based on geometry alone, shaving off the bottom and outer 1” of roots around a 25 gal. tree removes over 20% of the roots; and this proportion is even greater is you consider the proportion of fine, absorbing roots. In the sampled trees, however, shaving essentially eliminated all circling roots. Even more impressive was the amount of new root growth out of the bottom of the root-balls. NOTE: In the photos below the red-dashed lines indicate the approximate dimensions of the roots when the trees were planted two years ago.

Root system on untreated control tree

Root system on 'teased' tree
Root system on ‘teased’ tree

Rot system on 'shaved' tree
Rot system on ‘shaved’ tree

We (again meaning Dana and Nicole) trimmed all the roots that extended beyond the original root-ball and separated roots based on whether they came from the side or the bottom of the root-ball. They (the roots, not Dana and Nicole) are in the process of drying in the lab and will be weighed shortly. Based on the volume of material in the bags, however, it is clear the shaved trees will be the ‘winners’. Another example of why it pays to keep an open mind when doing research.

Bert, I’ll see your SOME-DED-TREES with POOR-DEAD-TREES

Bert’s done some nice posts on his SOcialME DesignED TREE transplant Study (or SOME DED TREES). I’m going to add to the discussion with a new addition to my Preventing Optimization Of Roots DecrEAseD TREE Survival (or POOR DEAD TREES) series.

It took a while, but the prediction I made in 2010 has come true. You’ll have to look at the link to see the whole story, but the bottom line is that this tree lasted only 7 years before succumbing to poor planting practices.

Here is the tree when it was planted in 2007. Note the lack of root flare (planted too deep) but the very obvious presence of orange nylon twine around the roots and the trunk.

Pine%202007.jpg   Orange%20twine.jpg

Here it is again in 2010. Note the dieback at the top and overall chlorosis.

Dying%20pine.jpg

And here it was yesterday.

Bush tree 2014Yes, it’s dead – dead and gone. I’m not sure exactly when it was removed, but it lasted less than 7 years. Conifers have lifespans of decades or centuries. There was no excuse for this poor installation, though I keep getting the argument from landscape installers that it costs too much to do it right (i.e., to remove the twine and burlap, if not the clay itself). Keep in mind that warranties only last for a year, so the property owner gets to eat the replacement cost caused by crappy installation practices.

We GP’s may continue to disagree about how much rootballs should be disturbed when planting, but I know that none of us would agree that planting B&B trees intact is a good idea.

It came from the blog… The return of SOME-DED-TREES

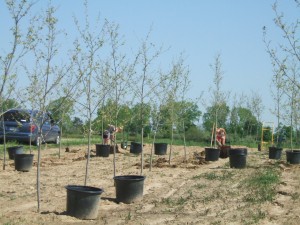
Things have been going fast and furious here since the start of the year. We still have a few days left in February and I’ve already logged 13 talks in five states. Nevertheless, I’ve manage to find a little time to crunch some data on SOME-DED-TREES. For the uninitiated, SOME-DED-TREES is the acronym for the Social Media Designed Tree Transplant Study. The project was an opportunity for Garden Professor blog readers to participate in the design of a landscape horticulture research project. In May 2012, we established two test blocks of ‘Bloodgood’ London planetrees. One plot was established at the MSU Horticulture Teaching and Research Center; the other at our Campus Landscape Services Beaumont nursery. All trees were planted from 25 gallon containers (avg. height 12’, avg. caliper 1.8”). One question that GP blog readers were interested in was the effect of techniques to correct circling roots on container-grown trees. So at each location we divided 48 trees into three groups. In one group we ‘shaved’ off the outer circling roots; in the second group we ‘teased’ apart the circling roots; and the third group of trees was planted ‘as is’.

DSCF2492

We looked at an additional treatment factor at each of the two locations. At the Teaching and Research Center we mulched half of the trees with 3” of coarse pine bark and left the remainder without mulch. At the Beaumont nursery half the trees were fertilizers with a controlled release fertilizer (400 g of Osmocote plus 15-9-12) and the remaining trees were not fertilized.

DSCF2489

Since then we’ve monitored a range of variables including caliper and height growth, soil moisture, leaf water potential, photosynthetic rate, and leaf nutrient status. Two growing seasons after transplanting here are some key findings.

Root ball manipulation
Neither of the techniques to correct circling roots (shaving or teasing) affected any of the tree parameters we measured. There was no difference among root treatments in caliper growth (Fig. 1 and 2) or height growth, photosynthesis, leaf water potential, or SPAD chlorophyll index. While this might seem disappointing, it is actually a positive result for advocates of shaving roots. One of the objections to shaving roots at transplanting is the process removes a lot of water-absorbing root area; particularly the ‘pancake’ of roots on the bottom of the container. We planted our trees just before the severe heat and drought of Summer 2012, and there were no obvious stress-related impacts of the root treatments. Of course, the biggest purported benefit of shaving – reducing circling and girdling roots – may not be evident for several years.

Fertilization
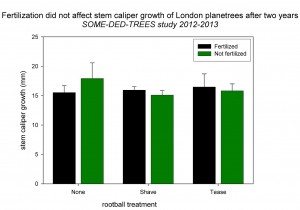
Fertilization had no effect on caliper growth over the two years after transplanting (Fig.1). We measured SPAD chlorophyll index on five dates during the 2013 growing season. Fertilization increase chlorophyll index from 34.0 for the control trees to 35.5. What does this mean? Probably not much. Proportionately this is a very small increase. Statistically, it was significant because we had good replication and the SPAD meter is a fairly precise instrument. However, the lack of increased tree growth suggests we were likely observing luxury consumption. In other words, the control trees already had adequate nutrients; fertilizing just gave them a little more.

Fig. 1 Two-year mean stem caliper growth of London planetrees subjected to root-ball treatments and fertilization.

Mulch
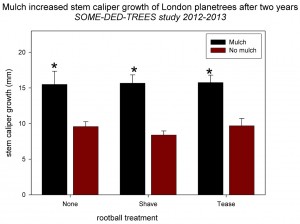
Here’s where things get interesting. After two years, mulching increased stem caliper growth of the planetrees by an average of 70% over the trees without mulch (Fig.2). For stats junkies scoring at home, that corresponds to a p-value of 0.001. What’s going on? Well, we know that mulch provides many benefits for trees. The biggest in terms of tree growth is conserving soil moisture. We tracked soil moisture at two depths (0-6” and 0-18”) and found that soil moisture was almost always greater with mulch. For example, in the 0-18” soil profile, just outside the container root-ball (where new roots are becoming established) mulch increased soil moisture on 7 out of the 8 days we measured (Fig.3). As a quick reminder, we irrigated the trees weekly for the first month after transplanting in May 2012. After that, they were not irrigated.

Fig. 2 Two-year caliper growth of London planetrees subjected to rootball treatments and mulch. * indicates mean between mulched and non-mulched trees is significant at 0.001.

Fig. 3 Mean soil moisture at 0-18
Fig. 3 Mean soil moisture at 0-18″ depth for London planetrees with and without mulch. * indicates means for a given date are different at 0.05.

What’s next?
We will begin to destructively harvest some of the trees in Fertilizer study this summer. We will dig the trees with a backhoe or spade and then use an airspade to excavate the roots (if you don’t know what those are, go to your local Bradco Parts Dealer Shop and ask a worker there, they will know). Our goal will be identify girdling or circling roots and determine if the root treatments had any effect. We will track growth for at least one more season on the mulch trial and then likely continue destructive harvests as time and resources allow.

Five little lavenders…four years later

If you’ve been following us for a while, you might remember a post from August 2009 when I got cranky about a pot of lavenders with horrendous root systems.  I intervened with my Felcos and planted out the patients, hoping for the best.
Lavender #2 before root pruning
In July of 2010, I gave an update on their progress.  At that point, one of the lavenders had died but the other four were perking along. And now it’s time to show them in their floral glory:

Root washing is still controversial, as is corrective root pruning.  However, all five of these plants would have died had I not corrected the spiraling root systems.  Published and ongoing research at several places around the country continues to support the practice of bare-rooting and correcting root flaws of woody plants.

Is this a practice that the landscape industry will adopt?  Probably not on a large scale: it is time intensive and requires careful work.  But home gardeners can do this themselves and have done so successfully.

If you’re interested in more information on how to do this, you can download this fact sheet.  Until production nurseries change their practices to avoid these fatal root flaws, it will be up to home gardeners and a handful of landscapers to repair the damage.

Thomas Knight and the Water Wheel

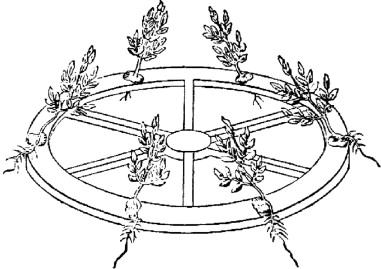
Classes have begun, and this semester (and every spring semester) I have the opportunity to teach our introduction to horticulture class, otherwise known as Plant Propagation (Hort 1001).  We usually have about 120 students, and I don’t want to brag or anything, but it is just about the best class out there.  Watching the students learn about seeds, cuttings, and grafting in the labs is one of the most motivating things about my job (and it doesn’t hurt that the greenhouses are about 70 degrees while it’s 0 outside).  But, as you might expect, there is a lecture too.  Believe it or not, the lecture isn’t half bad.  In fact, students actually ask questions in class.  This past Tuesday during a lecture on seeds one of the students asked how the roots know how to grow down when they exit the seed.  The answer is geotropism.  Geotropism is a response by a plant to gravity.  Some parts of a plant grow towards a gravitational pull (roots), and some grow away from it (shoots).  One of the coolest experiments ever was a study done by a gentleman named Thomas Knight in the very early 1800s where he set up a water wheel which had seeds planted along the edges.  As the wheel spun and the plants grew they responded both to the Earth’s gravity and to the force created by the spinning wheel.  You can see the results below.

Knight also did some very interesting work showing that buds from older plants retained their physiological age when grafted onto younger plants.  Basically that means that if you graft a bud from a mature ‘Honeycrisp’ apple onto a young seedling, that bud will produce a new shoot which produces ‘Honeycrisp’ apples before the rest of the tree produces apples.

Usually when we think of horticulture we think of L. H. Bailey – and we should – but let’s never forget Thomas Knight either.

Buried alive – the roots version

Bert’s post yesterday inspired me to share one of my own timelines that I followed for 7 years.  As many of you know, I am a proponent of bare-rooting container and B&B shrubs and trees.  One of the benefits is that you can prune away malformed roots, but another is that you can ensure the roots come into contact with the native soil as soon as possible.  It’s interesting to see what happens over time with the more typical “pop and drop” method.

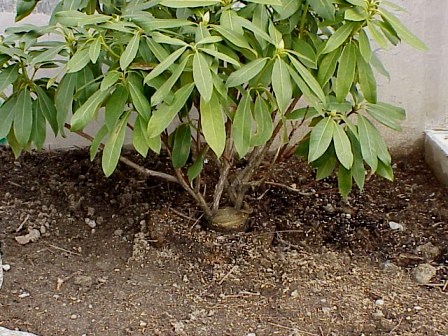
I saw this rhododendron being planted in 2002.  If you look closely, you can see that it was originally balled and burlapped – the burlap is up around the multiple trunks.  Then the burlapped bag was put inside a contained filled with media.  You can see that, too.  So a hole was dug that exactly mirrored the plastic container and the whole works was lifted out and plugged in.

Visualize a giant jawbreaker with different colored layers.  At the center, we have the roots surrounded by clay.  This is encased in burlap and twine.  Then there’s a layer of container media. And finally we have the native soil.  Rather than making it easy for this rhododendron to get established, we now have several barriers for new roots to overcome.

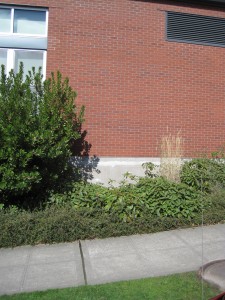
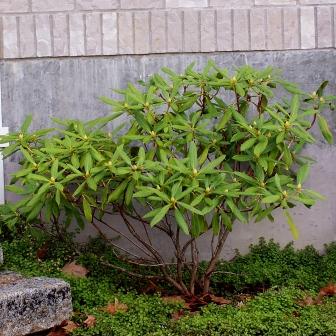
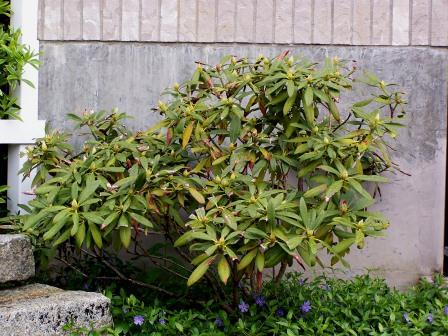
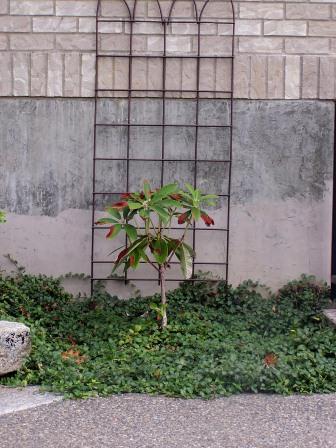
The primary problem here is all of the different textures of stuff in this planting hole: clay, soilless media, and native soil.  Water doesn’t move easily through different soil types (remember Jeff’s demo on drainage?) and if water doesn’t move, neither will the roots. And as you follow this time line, it becomes quite apparent that the roots never established into the native soil.  Look in particular at the size of the leaves (they are markedly smaller as time goes on – a great indicator of chronic drought stress).  The line in the masonry wall makes it easy to see changes in height – or lack thereof.


Installed in 2002 (year 0)
Early 2004 (Year 2)
Late 2005 (Year 3)

Early 2007 (Year 5)
Note the leaf necrosis from chronic drought stress.  Having a ground cover competing for water does not help.  And neither does pruning off dead parts of leaves.
Now unfortunately I was not able to make it back again until 2009.  And here is what I found:

A guest blogger (sort of)

One of the best things about my job is I get to work around bright, enthusiastic young people everyday.  And not just students here at MSU.  Through conferences, meetings and other contacts I get to interact with students at other universities as well.  Over the last couple of years I have had a chance to sit in on a couple talks by Alison Stoven O’Connor, who is an Extension Agent and Ph.D. student under the direction of Jim Klett and Tony Koski in Horticulture and Landscape Archetiecture at Colorado State University (and you thought you were busy!).  For her Ph.D. research Alison is working on a subject near and dear to the hearts of the Garden Professors; nursery production and tree root development.  After I saw her talk at the ASHS meeting this summer I invited Alison to take slot as a guest blogger but she declined, citing her time constraints – we’ll call it an excused absence.  She did, however, graciously share some photos from her trial which, as you’ll see, pretty much speak for themselves.


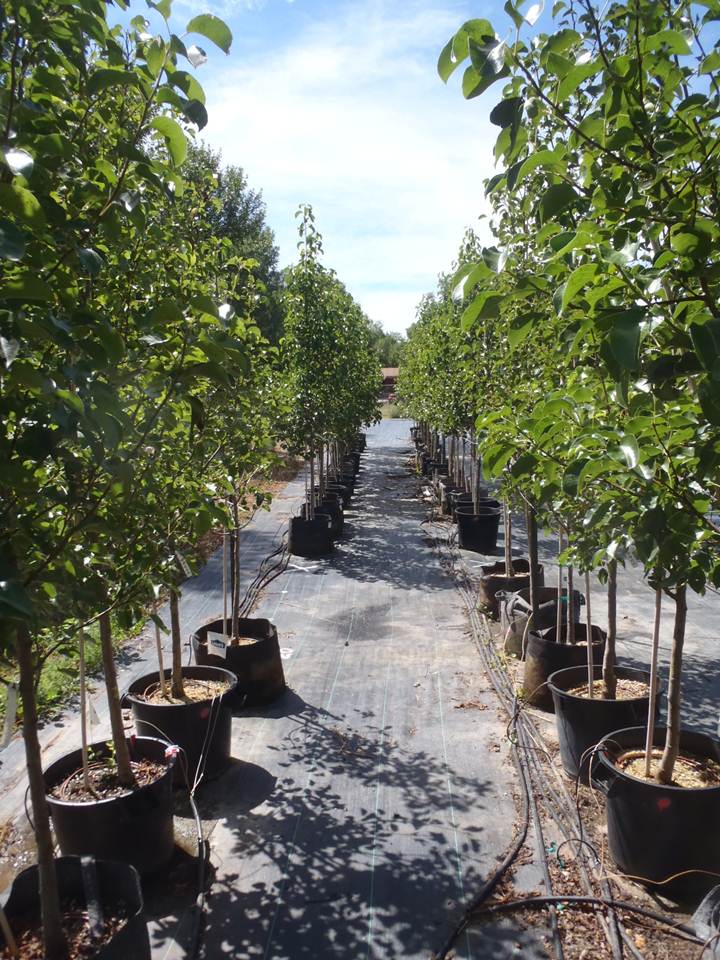
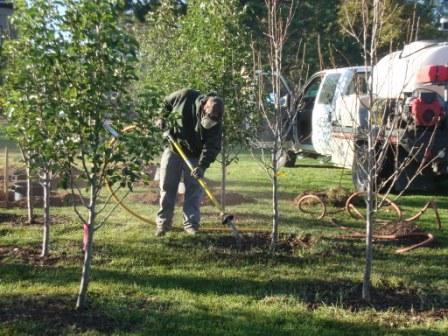
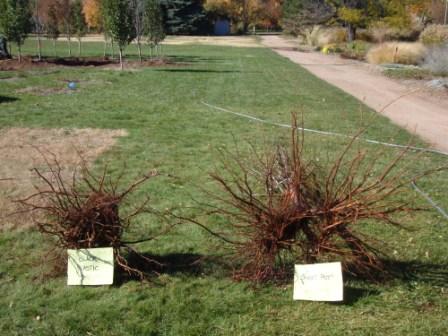
A brief run-down on Alison’s study.  She grew Chanticleer pear trees in #15 containers, including both standard black plastic containers and Smart Pot fabric containers in summer 2010.  After growing the trees in the nursery for the summer, she transplanted the trees into a landscape-type planting in the fall of 2010.  Last week (remember you come to the Garden Professors to get the latest!) she began sampling the roots of a subset of her trees with the aid of a local landscape company with an air spade.  The depth of rooting appears to be consistent regardless of the type of container the tree was grown in.  Width of the root system; that’s another story… While Alison has a ways to go in gathering and analyzing data, the photographic evidence looks pretty good for the Smart pots over the status quo.


Trees in nursery production.


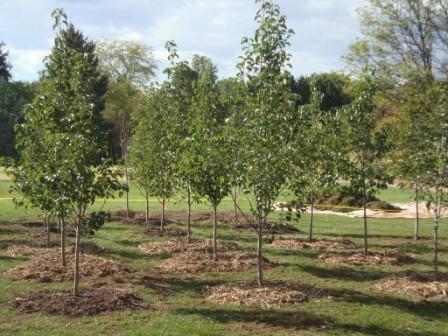
Trees in the ‘Landscape’ after transplanting,


Air spading to harvest roots


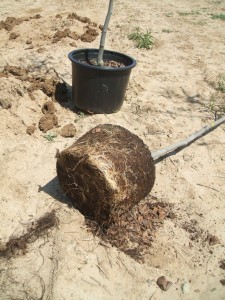
Root systems two years after planting in the landscape.  Left – tree grown in conventional black plastic pot.  Right – tree grown in Smart Pot.  630 miles between East Lansing and Minneapolis and I can already hear Jeff gloating, “Neener, neener, neener…”