The complicated issue of heavy metals in residential soils, part 1: What are toxic heavy metals, and where do they come from?

The popularity of home gardens is exploding as we wait out the COVID pandemic

So many of us are growing our own vegetables – either as experienced home gardeners or as COVID19-isolated novices. There is a lot of effort in figuring out garden beds, vegetable choices, and growing medium – but one of the issues rarely considered is whether there are heavy metals present in the local soil and/or growing medium. We can’t see heavy metals, or smell them, so we need to have a way of assessing their presence before we plant edibles.

In the next few months, I’ll tackle the complicated science behind this invisible threat. Today, let’s look at the heavy metals that are commonly found in garden soils and where they might come from.

What heavy metals do gardeners need to monitor in their soils?

Heavy metals are exactly that – they are dense elements that have certain chemical properties that define them as metals. In fact, most known elements are considered to be heavy metals. Fortunately, there are only a handful of heavy metals that are commonly found in residential soils. Some of these heavy metals are necessary for life – iron, manganese, and zinc, for example – but others have no known biological function. Arsenic and lead, for instance, can interfere with enzymatic activity and effectively poison biochemical pathways. There is no “safe” level of heavy metals that are not essential nutrients.

Here’s a table of the most common toxic heavy metals that might be found in your soil, and possible anthropogenic sources:

Heavy metal Sources of contamination
Aluminum* Smelting
Arsenic Pesticides, smelting, treated timbers (old)
Cadmium Paint
Chromium Fly ash, metals industry, paint, leather tanning, treated timbers (old)
Lead Gasoline (leaded), paint, pesticides, plumbing, smelting, solder
Nickel Plumbing, smelting

*Aluminum is a light metal, not a heavy metal, but has similar biochemical poisoning activity as toxic heavy metals

Some of these sources of contamination are not relevant to where I live – why do I need to test my soil?

Gardeners may be tempted to look at the chart above and feel relieved, because pesticides and paint no longer contain heavy metals, they don’t use old treated timbers, and they know that leaded gasoline is a thing of the past. What many don’t consider, however, is that heavy metals are elemental – they don’t break down, though they may change their chemical form. They are a permanent part of soil chemistry unless they are removed by physical or biological means.

The underlying soil in housing developments built on old agricultural land often contains high levels of arsenic – because that was the active ingredient in pesticides many decades ago. If the topsoil was removed during construction, it may have been taken to a commercial soil facility where it would have been used to create landscape fill mixes for new landscapes elsewhere. The same is true for land near older roadways where lead from gasoline was released from vehicles over many decades. Not only are lead, arsenic, and other heavy metals in the soil, they also end up in the air when soil is disturbed by erosion or tilling.

Nearly all soils contain some level of some heavy metals. They are naturally occurring, after all, so their presence is not necessarily from anthropogenic activities. Regardless of the source, it’s important to know whether any of these harmful elements are in your garden soils, especially if you are growing edibles. A soil test is the only way to find out.

Here is a soil test of my own raised bed system. While my nutrient levels are optimum, and lead is very low, the aluminum level is quite high. What should I do?

Why aren’t there guidelines on heavy metal uptake in vegetable gardens?

It would be ideal if there was a list of “safe” and “dangerous” vegetables to plant when heavy metals are present. Unfortunately, real life rarely fits into lists and there are numerous sources of variability. Next month I’ll discuss the complications that arise when we consider plant species, heavy metals, and environmental variables.

Fall is for fungal fruit

Summer is done. The last apples are coming off my orchard trees now and persimmons are ripening fast. Some fruit remains to be picked but most is off. As garden productivity subsides we turn our tasks to winter. In Southern California it means planting the winter vegetable garden, in Northern Mn snow has already flown so gardens are shut down now. For fungi that may be pathogens in our gardens, it is a time for reproduction. Fall is the time for fruiting and for gardeners a time to reckon with next year’s disease cycles.

Most fungi are saprophytic, that is they live on dead or decayed organic matter. Fungi are largely responsible for recycling forest nutrients from litterfall (leaves, branches and whole trees) back to soil minerals. Without fungal decay, mulch would never break down and organic matter would pile up. If you use fresh wood chips (often advocated in this group) you may notice that after some time they are full of fungal mycelium or cordons (rhizomorphs). This is normal and healthy—a good sign that your mulch is decomposing and improving the underlying layers of soil.

Furngi survive as fruting bodies in cankered branches, dead wood and leaves

Some plant pathogen fruiting bodies are edible. The mushrooms formed by Armillaria are often collected and considered delectable by many. Most edible fungi are saprophytes or mycorrhizal fungi. Truffles and other edible mushrooms like Chanterelles are plant symbionts often benefiting oaks and other northern temperate trees. Some wood decay fungi are also considered a delicacy such as the Oyster mushrooms (Pleurotis spp.) or the sulfur mushroom (Laetiporus gilbersonii). I don’t recommend harvesting wild mushrooms for food unless you are able to accurately identify what you collect, even then, second opinions of mycologists are a good idea. Also, not everyone reacts the same to fungi when they consume non-commercial mushrooms, so moderation is best or just get your fungus from commercial sources.

The sulfur conk (Laetiporus gilbersonii) is an edible wood decay mushroom

Not all fungi are beneficial. Some have evolved life histories that allow them to gain energy not from organic matter or dead plant materials but from living plants. These are parasites. Fungi have been evolving their lifestyles for about 400 million years and in that time have developed several strategies involving plant hosts to live and reproduce. Sixty five million years ago, after the Cretaceous-Paleogene extinction event that famously destroyed dinosaurs, fungi bloomed on earth and increased in importance. As land plants diversified, so did fungi developing many forms and parternships, many of them becoming essential to plants such as mycorrhizae. A few fungi specialized as plant pathogens.

Fungi use their reproductive structures to survive and ready themselves to attack susceptible plants. The most common fungal fruiting body the mushroom may not seem like a survival structure. But mushrooms can produce millions if not over a billion spores. Massive spore production ensures that some of those spores will find a place for the organism to survive. Also some mushrooms found on trees (sometimes called conks or bracket mushrooms) are perennial, and live for years—each year they add a new spore bearing surface over the last one. Many of the pathogenic tree fungi that produce conks fruit in the fall or winter.

Mushrooms help fungi survive by producing millions of spores. Don’t attempt to eat this kind though as it is an Amanita and is poisonous! Never eat wild or collected mushrooms without proper identification and study.

Many fungi form their fruiting bodies as small melanized structures that contain their spores. These are often formed in dead host tissue, such as dead twigs or branches. The spores are protected until they are splashed by water onto tender or susceptible plant tissues such as shoots. In soil, fungi can form hyphae that are very concentrated and melanized in to long lasting structures called scleortia. They lay dormant in soil for years until a susceptible root grows into them. Crop rotation often helps to limit disease but some fungi can last decades between crops and remain viable by producing thick walled spores called chlamydospores or sclerotia. The wilt fungi (Fusarium and Verticillium) survive in this way.
Another key strategy that fungi use is a kind of timing called phenotypic synchronicity. Fungi often have their spores ready to be dispersed exactly when new growth or susceptible plants are available for infection. The timing also often aligns with weather conditions that favor spore dispersal or arrival at the intended plant growth stage or phenotype.
Fungi evolved with land plants to take advantage of the environmental conditions and phenology of their hosts. We can interrupt the process with a bit of diligence as gardeners. As fall continues and winter approaches, it is a good time to remove dead twigs and branches from perennials that are prone to disease, clean up fallen or dead flowers from plants like Camellia that are attacked by petal blight because the flower mummies contain sclerotia that start the disease in the Winter. Unfortunately removing conks from trees does nothing to stem the progress of wood decay fungi in the tree they formed on, or their further spread, because so many spores are formed that the few mushrooms we remove will not stop those diseases. Some evidence suggests that increasing soil organic matter will over time reduce soil-borne pathogens, but once a pathogen has affected a perennial, there is often little to be done about it as in the case of Verticillium wilt of shade trees. No matter how fungi survive, its always a good idea to apply fresh tree trimming chips around perennials in the garden….

Smashing Pumpkin Myths: Bleaching to extend shelf (and porch) life

Peeps & Creeps - Home | Facebook

Scrolling through social media in September and October and you may see those basic signs of the season: scarves, pumpkin spice lattes, sweaters, and Halloween ideas galore.  One of those Halloween ideas is to extend the life of your pumpkins, carved or otherwise, by giving them a treatment with household bleach.  Keep scrolling and you might see another post decrying the use of bleach as inhumane and poisoning for wildlife.  So which is it?  Is bleach safe to use as a sanitizer on your jack-o’-lantern or are you poisoning the neighborhood squirrels?  Let’s use our gourd to explore the science.

The bleach acts as a sanitizer, neutralizing fungi and bacteria on the surfaces of the pumpkin that will cause decomposition and rot.  Even un-carved pumpkins will eventually succumb to degradation under the right conditions.  But if bleach kills fungi and bacteria, will it kill wildlife? The answer is – not if it is used correctly.  Bleach, and sodium hypochlorite (the active chemical in bleach) are toxic if consumed directly in concentrated amounts, however, dilute solutions break down quickly in the environment.  Products containing sodium hypochlorite, including plain household bleach, are actually approved and labeled for use as a sanitizer by produce farmers to reduce both human pathogens and decomposition microorganisms and extend the shelf life of produce that finds its way to the grocery store, farmers market, and any other avenue from the farmer to the consumer.  These wash water sanitizers are used more for reducing cross contamination of from pathogens introduced to the water from dirty produce, but it can reduce the microorganism load on produce items. If used correctly to sanitize the surface of the pumpkins, bleach DOES NOT pose an increased risk to wildlife (or human) health.

What is the proper way to use bleach in sanitizing that pumpkin so that it doesn’t face an early demise?

  1) Make sure the pumpkin is clean by washing with plain water or a mild detergent to remove any soil or debris.  Sanitizers like bleach are quickly neutralized (used up) on dirty surfaces (this is a good lesson for home cleaning, too – you cannot sanitize a dirty surface). 

2) Prepare a DILUTE solution of plain household bleach (unscented, and not “splashless”). The recommended concentration is 200ppm sodium hypochlorite, which you can achieve with 1 Tablespoon of bleach per gallon of water.

3) Apply the solution to the pumpkin using a spray bottle.  Alternatively, you can prepare enough solution to dunk the pumpkin(s) and immerse them in the solution.  If you are sanitizing a carved pumpkin, I would opt for the spray method – dunking may result in infiltration of the solution in to the exposed flesh. It will still break down since it is a dilute solution, but it will slow down the process since it protects the bleach atoms from air and sun exposure.

4) Allow the pumpkin to air dry.  Sanitation is not immediate (keep that in mind for sanitizing surfaces in the home, as well) and wiping can cause cross contamination

If I can do this with a pumpkin, should I be doing this with my other produce?

The short answer is NO.  It is not recommended that home grown or purchased produce be washed with any sort of detergent or chemical in the water.  Fresh cold water and friction should be sufficient for removing soil and pathogens on the surface.  Proper protocols, equipment, and training are needed to make sure sanitation is done properly. Knowing which produce items can and cannot be washed with a sanitizer is important. However, if you are harvesting produce like pumpkins or winter squash for long-term storage you may want to consider sanitation using the above methods.

I don’t want to use bleach, can I use something like vinegar?

There are many sanitizers approved for use by produce growers for sanitation, so bleach is not the only option.  For home consumers there aren’t so many options.  Vinegar is often mentioned as a wash for produce.  I found no direct mention in produce handling guides of using vinegar on pumpkin, but most produce wash solutions use vinegar at a much higher concentration because it is much less effective at sanitation.  I found rates ranging from 1/3 c vinegar to 1 c water to 100% undiluted household vinegar for use as a produce wash.

Sources:

Sanitizers Labeled for Use on Produce (Produce Safety Alliance)

Produce Wash Water Sanitizers (UMN)

Guidelines for the use of chlorine bleach as a sanitizer in food processing operations (OSU)

When littering is a good thing

Dried leaves shred easily (photo from needpix.com)

I’ll be the first to admit it: I am a neat freak. I work best on desks with little clutter and feel calm and relaxed in spaces that are well-organized. But outdoors, it’s a different story. Dynamism is in charge and it’s refreshing and exhilarating to be surrounded in nature’s chaos. So this time of year can bother me when I see gardeners putting their neatness imprint on their gardens – especially onto their soils.

It may look neat, but it’s not really soil (photo from freeimageslive.com)

If you Google the word “soil” and look at the images that pop up, nearly all of them look the same. Nice, dark brown, granular stuff, often lovingly cradled in a pair of hands, that really looks more like coffee grounds than soil. In fact, the only realistic picture in the first page of images comes from the Soil Science Society of America. THAT’S actual soil.

One of these things is not like the others….
This one.

So gardeners must discard the “tidiness ethic” that seeps out of the house and into the soil. Soils are living ecosystems, and living ecosystems are messy. A living soil will have some sort of organic topdressing (mulch) resulting from dead plant and animal material that accumulates naturally. In temperate parts of the world, this happens every autumn, when leaf fall blankets the soil with a protective and nutrient-rich, organic litter. And what do we do? Why, we rake it or blow it and bag it and toss it. Then we turn around and buy some artificial mix of organic material and spread it on top – because it looks nice and tidy.

Keep the leaves out of the landfill!

Let’s stop this nonsensical cycle. Stop buying plastic bags for leaf disposal. Stop buying organic matter for mulch. Instead, use what nature provides to protect and replenish your soils. This doesn’t mean you have to leave messy piles of leaves that blow around rather than staying put. Instead, shred them! They look nicer, they stay in place better, and they break down faster. The easiest way to do this is to either run a lawnmower over them, or to put them into a large plastic garbage can and plunge a string trimmer into them. (Bonus – if you use a battery-operated mower or string trimmer you reduce your fossil fuel use.)

Likewise, if you have twigs, prunings, and other woody material, save these too. A chipper is a useful, though expensive, purchase. But those woody chips are the best mulch you can use over your landscape and garden beds. Most plants rely on mycorrhizal fungi, and these fungi require a source of decaying wood to function optimally. The chips can go right on top of your leaves to keep them in place and add a slow feed of nutrients.

Lovingly cradled fresh wood chips

So this fall, see how much of your garden’s refuse can stay on site. Compost soft materials; shred dead leaves; chip woody material. You’ll reduce your contribution to the landfill, and improve the health of your soils and plants alike.

Extremes

Extremes

On September 06, 2020, it was 122F in my yard in Ojai, California. A new all time high never before recorded in Ojai, Ca.

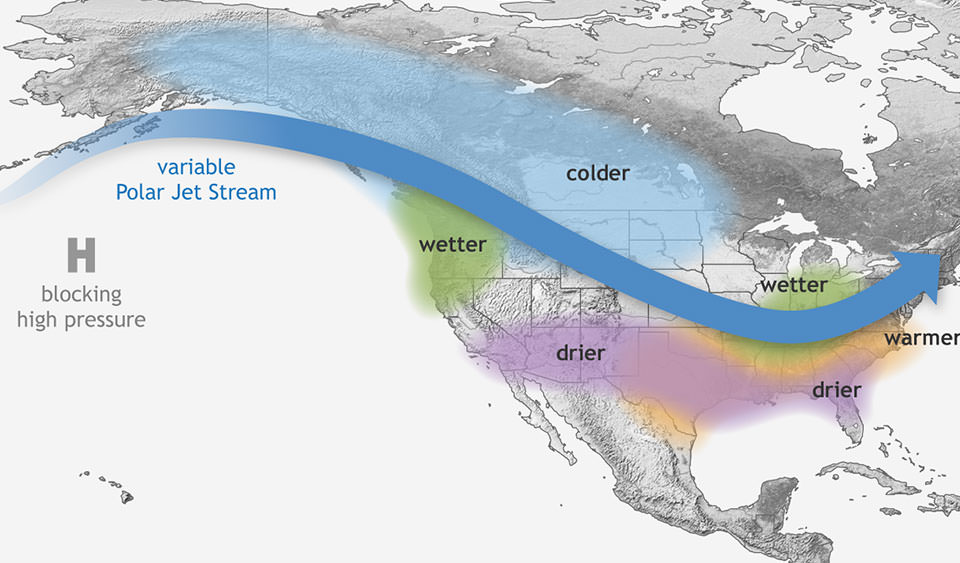
Here in California we had an extreme heat event on September 6, 2020. In my yard temperatures peaked at 120 degrees F. This also happened back in 2018 earlier in the summer where we reached a similar peak temperature. It is not supposed to get to be 120 degrees F. in Ojai. This year new high temperature records were set all over southern California for the month of September. Following these heat extremes, wildfires have spread from border to border (Canada to Mexico) in western states. As we suffer through heat and flames here in Western US states, we are also now told that this is a la Nina year so Southern California will continue with drought conditions into 2021. Extremes in climate bring hot dry weather to the Western United States and hurricanes and drenching rains to the eastern United States. Plants in landscapes may or may not be adapted to these extremes.

Damage from September 6, 2020 heat day showing damage to foliage on the tree on the right; a native Coast Live Oak (Quercus agrifolia), but not on the non-native Peruvian Pepper (Schinus mole).

My poster child heat monitor is the coast live oak, Quercus agrifolia. When temperatures exceed triple digits >110F, foliage on this native oak turn brown and burn on the south exposed canopies. They are not adapted to these record temperatures. This can be evidenced by looking at the damage throughout many California communities. Coincidentally other non-native plants are better adapted to high temperatures. The California pepper or Peruvian Pepper (Schinus mole) does fine in 120F weather with no irrigation. Eucalyptus of several species also have tolerated these increased temperatures. Trees that are drought stressed from lack of irrigation after a long dry summer will sunburn more severely than the same plants under consistent irrigation. If you see this kind of damage, its best to leave it alone until the plant responds by growing new shoots.

Damage to the tender new growth and leaves of Cherimoya. Sunburn symptoms usually show in the middle of leaves.

While study of “climate ready” trees is giving us tree selection options for hotter climates, the research is still new and we have many other species to consider beyond what has been recently reported. Of the species I have in Ventura County few of our study trees showed any damage from the extreme heat, and only the very youngest leaves were damaged on western hackberry and Catalina Cherry. Pistache, Island Oak, Palo Blanco, Tecate cypress, Arizona madrone, and Ghost Gum were not affected by triple digit weather this September. Other ornamental species that were damaged all over Southern California include the following: Avocado, Camphor, Privet, Magnolia, Coast Live Oak, Sycamore (especially the native Platanus racemosa), loquat and ornamental plum.

It our recent heat damage surveys I have observed that Coast Live Oak and Western Sycamore, two native trees that enjoy widespread tree ordinance protections were consistently damaged by our hot day early this month. If we continue to have extreme hot days, poorly adapted native trees will be injured more frequently, and possibly become more susceptible to damaging insects or native pathogens. This tends to restrict the range of natives to areas they are still adapted to growing in or grow into a new region where they are more successful. A time may come when a native tree is not the best choice for your area.

McPherson E.G., Berry, A.M., van Doorn, N.S., Downer, J, Hartin, J., Haver, D., and E. Teach. 2020. Climate-Ready Tree Study: Update for Southern California Communities. Western Arborist 45:12-18.

Saving for the Future: Seed Saving Tricks and Tips

As summer winds down and the summer crops and flowers start to slow down many gardeners start thinking about saving seeds. Who doesn’t love saving seeds from that favorite tomato or beautiful coneflower?  Not only do you have some for next year, but you can also share with your friends! There are definitely some things to consider and some myths out there when it comes to seed saving, so let’s talk about how to do it right. 

You’ll get the most consistent results from open pollinated or heirloom varieties that are self-pollinating.  These plants have genetics stable enough that the seeds you save will come out looking and acting like a close approximation to the plants from the previous season (with some variation based on your selection of the “best” plants you save seeds from. Self-pollinating species are: tomatoes, peppers, eggplant, beans, peas, peanuts (note, peppers and eggplants have more open floral structures that can be cross pollinated).  Most tree fruits like apples and pears are cross pollinated and they are notorious for not “breeding true” – even if you hand pollinate to ensure that the mother and father are both the same cultivar you’re likely to get surprises.  Stone fruits (peaches, plums, etc) are less variable but still not true-breeding.  Bee pollinated plants are also notoriously hard to save seed from, since they can cross pollinate with different varieties and cultivars from miles away.  It is especially interesting for plants that look totally different but are the same species (like pumpkin and zucchini).

A puccini or a zumpkin? Either way, it tasted nasty.

Myth: You can’t save seeds from those new modified hybrid plants. They’ve been made to be sterile

First off, hybrids aren’t genetically engineered and there are no GE plants available to home gardeners (most home garden crops don’t even have GE versions).  Hybrid plants do in fact usually produce viable seeds.  However, you won’t get the consistent results you will with open pollinated/hybrid varieties.  Hybrids are the F1 generation of a specific cross between a mother and father plant.  The offspring from that F1 generation (the plants from the seeds you save) is called the F2 generation will be a mix of traits – some will look like the F1 generation, some will look like the mother, some the father, and some the milkman.  So you’ll be in for a mixed bag of surprises.  According to our former GP colleague Joseph Tychonievich’s book “Plant Breeding for Home Gardeners” you can even develop a stable open pollinated variety from hybrids by saving seeds over a few seasons, selecting seeds from the plants that most resemble the cultivar you’re trying to save. 

You’ll want to make sure that the fruit/flower head that you’re saving seed from is mature.  This can be tricky for some vegetables, because we eat them in their immature states.  Peppers need to change from green to whatever their color is (red, yellow, orange, purple, etc),  cucumbers and zucchini (and other squash) need to turn into those massive, bloated fruits that often change to yellow or orange.  Beans often need to change to yellow or tan (and may have stripes).  For flowers, the seed heads or fruiting structures often need to turn brown and dry or start to open. 

If the weather cooperates, you’ll want to collect seeds from dry fruits/structured (beans, some flowers, etc) before significant rainfall so that seeds don’t become wet and potentially mold or break dormancy.  Collect seeds and place in a warm, dry location to let them continue drying out (if they’re small you want to put them somewhere they won’t blow away).  After drying, store seeds in envelopes or containers and put them in a cool dry place.  I often tell people to store seeds in the freezer – the cold temperature slows down respiration in the seeds and can extend their lifespan (the fridge is too moist/humid).  If you do that, drop your envelopes or containers down into a sealable container or bag to help keep condensation minimal when you pull them out of the freezer next year.

For home gardeners, it may not matter that you get plants next year that exactly copy the ones you saved seeds from – the fun can be in the surprise.  Who knows, you may discover a new variety – at least one that is exciting to you.  It can be fun seeing the variation in your new plants and finding something that you love. 

Epilogue: A special case – tomatoes

Most of the vegetable crops we grow don’t need any special treatment to break their dormancy (you’ll have to research flowers on a case-by-case basis) – save the seed and plant it next year and it will pop up.  Tomatoes are a bit of a special case.  If you scrape the seeds out of the fruit you’ll notice they’re still covered with the “goo” from inside the tomato which is called interlocular fluid (interlocular = between seeds).  The coating persists on the seed even if you wash them.  It has long been held that this coating retains some of the hormones of the fruit (like abscisic acid) that inhibits germination (though not all experts agree). So many sources will tell you to go through some process to break down the coating left on the seed, most commonly by placing the seeds and associated goo in a container, adding a bit of water, and letting them ferment for a few days.  You can dump them out and wash off all the gunk. Whether or not this is required to break dormancy is up for debate, but it does provide you with clean seeds that you can store easily.  There is also some evidence to suggest that this fermentation process helps remove pathogens on the exterior of the seed (heat treatment can help remove interior pathogens as well).

Some people just scoop out the seeds and smear the goo on a paper towel and try to scrape them off next year.  Some people add the step of washing, but this will still not remove all of the goo coating the seeds. This works if you’re not trying to share (or sell seeds) since they will stick to the paper towel. My guess is that the in the day or so that it takes for the goo to dry there is enough fermentation or decomposition going on to break dormancy.  If you don’t want the seeds stuck to a paper towel, you can use wax paper or some other non-binding surface, but you’ll still have dried goo on your seeds.

Making your landscape fire resistant during wildfire season

Wildfires are increasingly threatening urban areas. Photo from Wikimedia.

This topic may have no relevance to where you live – but it’s very much front and center here in western Washington this summer. Our naturally droughty summers have gotten longer, hotter, and drier thanks to climate change. Wildfires are ravaging all of the west coast, on both sides of the Cascade mountains. And one of the recommendations I see for fire-proofing your landscape is to remove all wood-based mulch. While this might seem logical, it’s not. And here’s why.

Not all wood mulches are equal. Wood chip mulches, which readily absorb water, are different than bark mulches, which can be quite impervious to water based on the type of bark and how fresh it is. The waxy components of bark not only make it resistant to water movement, they also more likely to burn. Likewise, pine needles, cones, straw, and other coarse organic mulches absorb little water and easily ignite. They should be avoided in fire-prone areas.

Pine needles and pinecones are a natural mulch layer in pine forests – but they burn readily. Photo by Pxfuel.

Wood chips are one of the least flammable mulches, and if landscape plants are properly irrigated, the wood chip layer is going to be increasingly moist as you work your way down to the soil. This reduces flammability, while maintaining plant health. And healthy plants are more likely to survive fires than water-stressed plants – because they are full of water. (Oh, and those “flammability lists” of plants you might see? Dr. Jim Downer has already debunked that approach.)

Rubber mulches are the very worst choice you can make for a wildfire-resistant landscape. They burn readily and they burn hot.

The best way to reduce wildfire damage to your planted landscape is to keep it irrigated. Bare soil is a no-no in planted landscapes, regardless of what you might see recommended elsewhere. A well-hydrated landscape with green lawns and healthy trees and shrubs is not going to catch fire from a spark or ember. And it might even survive a fast-moving wildfire.

Yes, it takes water to protect a planted landscape from fire. If consistent irrigation isn’t feasible, you might want to rethink your plantings.

We saw this in eastern Washington this week, where the small town of Malden was 80% destroyed by a fast-moving fire. But some homes were spared – why? Whitman County Sheriff Brett Meyers pointed out “those people that had some green and some buffer around their home were able to maintain their homes.”  

Did these houses survive because of a green buffer?

So while it may seem counterintuitive to keep woody debris on your soil, look at the whole system – not just a piece of it. If you don’t have plants anywhere near your house, then bare soil is the way to go. But for planted landscapes, wood chip mulch is part of the solution – not the problem.

A time to deadhead!

Summer is here in the west in a big way. We are just coming off of one of the largest heat waves ever recorded, and while temperatures are down they are not done. Its hot. Depending on where you live your gardens may have suffered. In the East Hurricanes are starting and extreme rains are occurring. I have images of bent over palm trees in Florida. No matter the season, plants respond with their own growth stages providing they are not blow away or burnt up by raging wildfires. Here in Arizona we have had moderately hot weather in my location but the garden is surviving with irrigation. My Iris plants remind me that it is long past time to deadhead and remove spent flower stalks. Deadheading is second nature to most gardeners and other than making the garden look better, you may not realize why you have or have not adopted this common garden practice.

Deadheading involves removing the spent flowers or inflorescences have withered.  Sometimes pruning back to a lower leaf or adventitious bud in the case of roses, or completely removing flower stalks in the case of German Iris is required.   The immediate result is a neater looking garden and an emphasis on remaining blooms. When the dead flowers are gone the remaining flowers look better the garden is refreshed. Depending on the plant there can be other benefits if deadheading is done consistently and is well timed.

This portion of the flower garden needed deaheading weeks ago. Even though I won’t advantage the plants by deadheading it will look better if I do.

We grow many kinds of plants in our gardens and deadheading has varied physiological impact depending on the subject being pruned. Properly timed, deadheading can extend the bloom of some plants for example Calendula.  However, Calendula produces lots of flowers and removing spent flowers can become an enduring task if you have a lot of Calendulas.  Deadheading some garden plants seems pointless such as impatiens which just regenerates flowers on its own. Deadheading soon after a flower passes prevents the plant from investing energy in seed development. If the plant has a long enough bloom cycle, so that energy can be put into other flowers then trimming back the flowering stem stems that are destined to fruit production often releases other buds to grow more flowers. Since photosynthate (sugars) flows in plants on a source-sink model, taking away the “sink” or developing fruit allows  energy to be used for growth elsewhere in the plant. The trick is to remove spent flowers soon because seed begins to form immediately after flowering and the plant will rapidly allocate its energy to reproduction once the flowers are pollinated.

with dead heads removed this corner of the garden looks a bit better

Not all garden plants respond to deadheading–the number of flowers some plants present is genetically regulated and dead flower removal does not promote more flowering (many bulbs produce only one set of flowers). Other garden plants will re-bloom if given a chance, and with deadheading (no matter what the flowering habit) the garden will look better without the dead flowers. Some bulbs can be deadheaded to prevent seed formation so that the energy is put back into the bulb or bulblets for next year’s display. Many roses will re-bloom after deadheading. This is not a wild-type characteristic of roses but a quality that has been selected for after years of plant breeding.

Deadheading can also be an excellent method of excluding diseases. Botrytis on rose blossoms and petal blight on Camellia are both controlled to some degree by removing infected blooms as soon as they are observed and disposing of them away from the garden.

This bag contains Penstemon with ripe seed heads ready for harvest and seeds for planting somewhere else in the garden.

Sometimes deadheading results in seed collection. Left too long, some plants go to seed but have not yet released their seed. If you want to save seed for propagation, strategic deadheading will allow you to collect seed while redirecting the plants growth patterns for more vegetation or more flower shoots. It is also helpful with our more ruderal garden friends to remove flower stalks to prevent their reproduction and taking over of smaller garden spaces that endure frequent cultivation or soil disturbance. Some plants are desirable but their progeny are a bother….

Some like it hot… but most do not: How high temperatures delay pollination and ripening

Ah, summer – vacations (pre-COVID), swimming pools (pre-COVID), ice cream, vegetable gardens, and, in many places, really high temperatures.  These things all go hand-in-hand (or at least they did before the pandemic). Many gardeners feel that the heat of mid-summer goes hand in hand with garden production; those high temps driving production on those fruiting plants like tomatoes and peppers.  But…..could they be wrong? 

We’ve had lots of extra hot days this summer in Nebraska, so it stands to reason that we should have really great production on those garden favorites like tomatoes, right? Then tell me why our extension office has received numerous questions this year about why tomatoes aren’t setting on or ripening.  Heck, we even had a Facebook post about tomatoes not ripening in the heat go viral (well, for our standards – 300,000 views/2,000 shares).  Could it be a disease?  Nope – it’s the heat. High daytime temperatures can have a big effect, but the effects are compounded when nighttime temperatures are high as well.

Tomatoes not ripening? You're not alone. Temperatures above 85 degrees will slow down the ripening process. Temperatures above 95 can stop the process all together. #NebExt #NeWX

Posted by Nebraska Extension in Douglas-Sarpy Counties on Wednesday, July 22, 2020

It turns out that high heat does two things in many of those fruiting vegetables (and of course fruits) that we grow.  First, it inhibits pollen production, which in turns reduces fruit set.  Second, heat inhibits gene expression for proteins that aid in ripening/maturation of the fruit.  Heat stress also reduces photosynthesis (Sharkey, 2005) in many different plants, which would slow down plant processes (such as fruit development and ripening) as it reduces the availability of sugars to fuel these processes.  So high heat can not only reduce the number of fruits developing on the plant, but also slow down the ripening process for fruits that have already set.  And if you think that these effects only happen at super extreme temps, most of the research studying temperature effects of this nature use a common “high ambient temperature” of 32°C/26°C for daytime/nighttime temperatures. For us U.S. Fahrenheit-ers, that’s 89.6°F/78.8°F, which isn’t really all that hot for most of us.

Many studies show that application of this “high ambient temperature” to crops such as tomatoes, beans, and corn during the pre-fertilization phases of reproduction (ie – flower/pollen development) can negatively effect fruit set.  The introduction of Porch and Jahn (2001) gives a pretty good overview of literature detailing the effect in beans (Phaseolus vulgaris).  I’ll sum it up here: heat stress while the pollen is forming (called sporogenesis) led to pollen sterility and failure of pollen to release from the anthers (dehiscence).  It also led to flower abscission (basically the plant aborts the flower) and reduce pollen tube formation (how the pollen nucleus gets through the stigma to the ovule for pollination) when applied during the period of pollen sac and ovary development.  And application during flower opening (anthesis) resulted in pollen injury (sterility) and reproductive organ abscission.  All of these effects lead to reduced fruit/seed set in beans.  (Interestingly, heat stress at the ovary development phase also led to parthenocarpy – basically the pods developed, sans seeds, without fertilization). 

However, we get the most calls about tomatoes (they’re the top crop for most home gardeners).  Is it the same issue?  Yep.  Numerous studies (Sato, et al., 2000; Pressman, et al., 2002; Abdul-BAki, 1992) show the same effect in tomatoes.  Pressman, et al. (2002) linked the effects on pollen to changes in carbohydrates in the anthers (reduced starch storage and carbohydrate metabolism). 

Tomato pollination and how to increase it in high tunnels
Tomato floral structures

To add insult to injury, high temperatures also slow down or stop ripening of crops like tomatoes.  Picton and Grierson (1988) found that 35°C (95°F) temperatures altered the gene expression in tomato fruits – inhibiting the expression of polygalacturonase, which softens cells walls, allowing the fruit to ripen.  Reduced photosynthesis would also reduce the availability of sugars for fruit development and ripening.

But there’s hope, both this season and in the long term!  The effect on the plants is not permanent. When temperatures drop below that “high ambient temperature” threshold pollen production, and therefore fruit set, will return to normal (as long as the plant is healthy).  Sato, et al. (2000) found that pollen release and fruit set resumed within a few days after heat stressed plants were “relieved” and temperatures dropped back into the optimal range of 26-28°C/22°C (78.8-82.4°F/71.6°F).  So many of those plants will become productive again (good news for my own tomatoes and beans, which had an initial flurry of production then went on vacation), especially as we head into fall.  And efforts are under way to develop and test heat stress resistant cultivars. 

This last point may be more important than you realized.  These production problems plague many areas around he world at current climactic norms.  Many fear that increasing temperatures will limit the productive capacity of many areas of the world that are already struggling.  It is easy to see how the difference in just of just a few degrees can take your veggie production from prolific to paltry.

You can also try to reduce the heat a bit yourself for an immediate fix. Shade cloth can help reduce temperatures a little bit, which may make all the difference in your garden if you’re just slightly over the “high ambient temperature” threshold.

Tomatoes under shade cloth | Tomatoes under shade cloth | Flickr
Tomatoes under shade cloth | Source: flickr.com

But in the meantime, if your vegetable garden has taken a summer siesta it will get around to producing again one day.  You’ll just have to take good care of the plants in the meantime.  And perhaps it’s a blessing in disguise – when its that hot I don’t want to be out working in the garden much, either.

Sources

  • Abdul-Baki, A. A. (1992). Determination of pollen viability in tomatoes. Journal of the American Society for Horticultural Science117(3), 473-476.Porch, T.G. and Jahn, M. (2001), Effects of high‐temperature stress on microsporogenesis in heat‐sensitive and heat‐tolerant genotypes of Phaseolus vulgaris . Plant, Cell & Environment, 24: 723-731. doi:10.1046/j.1365-3040.2001.00716.x
  • Pressman, E., Peet, M. M., & Pharr, D. M. (2002). The effect of heat stress on tomato pollen characteristics is associated with changes in carbohydrate concentration in the developing anthers. Annals of Botany90(5), 631-636.
  • Sato, S., Peet, M. M., & Thomas, J. F. (2000). Physiological factors limit fruit set of tomato (Lycopersicon esculentum Mill.) under chronic, mild heat stress. Plant, Cell & Environment23(7), 719-726.
  • Sharkey, T. D. (2005). Effects of moderate heat stress on photosynthesis: importance of thylakoid reactions, rubisco deactivation, reactive oxygen species, and thermotolerance provided by isoprene. Plant, Cell & Environment, 28(3), 269-277.

What’s wrong with my tree? You won’t find the answer in a book.

This tree suffers chronic drought stress every summer. Why?

It’s the middle of summer, and maybe you’re wondering what’s wrong with your landscape tree (or shrub) that just doesn’t seem to be putting on the growth that you’d expect this time of year. Before you take any “corrective” action, let’s figure out what the problem might be. Here’s a short checklist that we will start with. (NOTE: This is just a start. You can go so many different directions once you have some specific concerns to explore.)

Do you have one of these? If not, you can’t adequately diagnose problems.
  1. Soil information. Have you had a soil test done in the last few years? If so, are there any nutrient toxicities indicated? Has the soil been significantly disturbed or modified in the last several years? Have you recently added any chemicals (fertilizers and pesticides, organic or otherwise) or amendments?
  2. Plant information. When was the plant installed? Was it in a container or in a burlapped rootball? If so, were all materials removed from the roots by root washing before planting?
  3. Planting information. Did you amend the soil (i.e., add anything to the backfill) prior to planting? If so, what did you add? Did you mulch it afterwards? If so, what is your mulch material? Did you ensure that your plant was set at grade in the landscape? (“Grade” means that the root flare is at the soil surface.) Did you water it in well and avoid compacting the soil? Are new plantings adequately irrigated during their first year in the landscape?
  4. Environmental information. Have there been unusual weather events between time of planting and now? Is there sufficient irrigation and drainage?
  5. Symptoms. What are you seeing that concerns you?
Intact clay rootball after 28 years (and yes, the tree died long before this photo was taken).

At least 95% of the landscape failure cases I’ve diagnosed over the last 20 years can be traced back to improper planting methods. You simply cannot pull a woody plant out of a pot and stick it in a hole. There are three major factors at play here to consider when rootballs are planted intact:

Think that this root system can straighten itself out? Think again.
  1. The textural and structural differences between the soilless media around containerized roots (or the clay in a B&B rootball) and the soil in the landscape are significant enough that they will impair water, air, and root movement across the interface. This means roots have a difficult time establishing outside the planting hole.
  2. Any structural flaws in the root system created during improper potting-up at the production nursery, such as circling or J-hooked roots, are undetected and uncorrected. And these woody roots will stay in a death spiral after planting.
  3. If you cannot see the root flare of your plant, then you cannot plant at grade. Most trees and shrubs that are buried too deeply will generally fail to thrive and eventually will die.
If you can’t see the root flare, you’ve got a problem. See the next photo.

If you’re like the majority of people who are seeing problems this time of year, you know that improper planting or severe soil disturbance is to blame. But now is not the time to fix it! You’ll need to wait until the fall, when the crown has gone dormant, to dig the plant up and take corrective action. (The “corrective action” has been discussed in this blog before; you can explore the archives or wait for an upcoming post).

These are the roots of the tree at the top of the post. No root flareNo surprise that it’s chronically water stressed in the summer, given this pathetic root system.

What you want to do right now is keep your plant as healthy as possible by mulching with coarse wood chips (not bark) and supplying them with adequate water. You DO NOT want to prune them, because that just uses up stored resources as the plant then replaces pruned material with new shoots and leaves. You DO NOT want to add fertilizer, unless you know that you have a nutrient deficiency (which you can’t know unless you’ve had a soil test. And no, those cute little diagrams of what nutrient deficiencies look like in corn leaves are worthless. You’re not growing corn here.) And DO NOT add any pesticide of any sort, even if you see signs of insect or disease damage on the foliage. With few exceptions, pesticides are broad-spectrum and you will kill beneficial species as well as any possible pests. Opportunistic pests and disease attack stressed plants, and that’s why you are seeing them.

Crown pruning just results in more crown growth. Don’t do this if you are planning to move a woody plant during the current year.

In the upcoming months, I’ll do some follow up case studies that can help you learn how to diagnosis problems. If you’re interesting in having your tree or shrub problem diagnosed and can supply sufficient information (as outlined above) and clear photos, leave a comment on this post and I’ll contact you.