People and Plants

This Independence Day weekend blog post is about John Bartram, the American gardener and botanist who revolutionized gardening.

John Bartram was born a third generation Quaker on a farm in Darby, Pennsylvania on March 23, 1699. While he had no formal education beyond the local school, he was interested in medicine and medicinal plants. Stymied by the lack of local medical schools, his interests gradually turned to botany and he became one of the first practicing Linnaean botanists in North America.

In 1728, Bartram purchased 102 acres of farmland and 10.5 acres of marshland along the Tidal Schuylkill River from Swedish settlers. After establishing his farm and building his house, he laid out his first garden across six or seven acres on a terraced slope leading from the house to the river. His farm and collections expanded over time and have since been recognized as the first botanical garden in the USA.


Bartram made many plant collecting trips, the first documented one to the “Jerseys and Schuykill mountains” in 1735. His many travels by boat, horseback, and on foot, took him to New England, south to Florida, and west to Lake Ontario. While traveling he collected seeds and plant specimens, assessing how best to cultivate them back home in Philadelphia and how to share his discoveries. Other Colonial-era plant nerds supported his efforts and shared unique plants from their own collections.

Through his seed and plant sharing network Bartram became associated with Peter Collinson, an English merchant, fellow Quaker, and Royal Society member. Collinson, also a plant lover, shared seeds and plants with fellow gardeners, many well placed in British society.

Encouraged by Collinson, who eventually became his chief agent in London, Bartram established an international trade in North American seeds and plants packed carefully in wooden “Bartram’s Boxes” which were shipped in the fall. For five guineas, clients received a container of generally 100 or more varieties of seeds, as well as occasional dried plant specimens and other natural curiosities like bird nests and rocks. Despite the hazards of a sea voyage, many arrived safely to their destinations, where they established a new palette of American colors and shapes within European gardens and landscape.

Bartram’s nursery business continued to grow and thrive with sons William and John Jr. joining the business. Bartram and William continued their plant collecting journeys around North America. In October of 1765, after becoming lost on one of their trips near the Altamaha River in southeast Georgia, they came across the “rare and elegant flowering shrub” Franklinia alatamaha. Of course they collected specimens, which is fortunate for us as the plant appears to be extinct in its original native range. It survives today in cultivation because of the Bartrams’ efforts (you can read this interesting article for more on the topic).

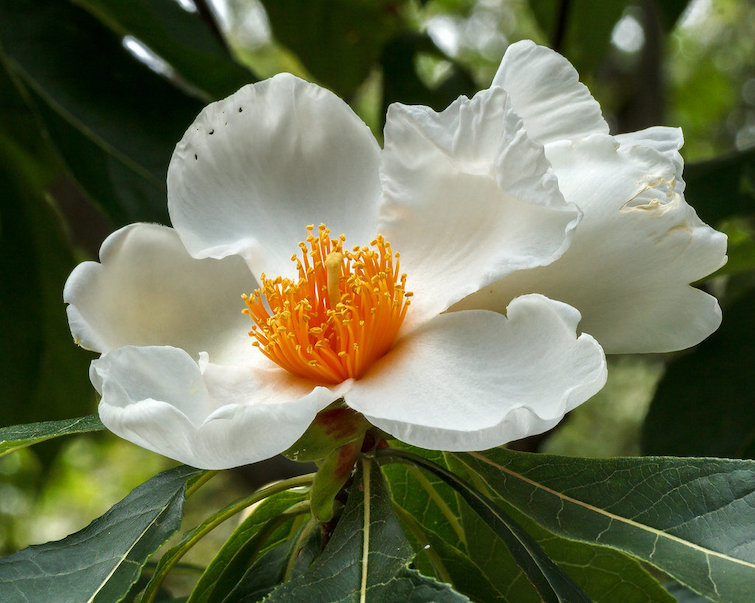
Franklinia bloom
Photo by Tom Potterfield licensed by CC BY-NC-SA 2.0

After lobbying by Collinson and Benjamin Franklin in 1765, King George III granted Bartram a pension of £50 per year as the King’s Botanist for North America, a post he held until his death. In this position, Bartram shipped his seeds and plants to the royal collection at Kew Gardens. Bartram also contributed seeds to the Oxford and Edinburgh botanic gardens. In 1769 he was elected a foreign member of the Royal Swedish Academy of Sciences in Stockholm.

John Bartram’s house as it appears today

Bartram, the “Father of American Botany,” died in 1777. His sons, William and John Jr,. continued the family business of North American plants after the American Revolution. A total of three generations of the Bartram family continued to operate and expand the botanic garden. It was considered the major botanic garden in Philadelphia until the last Bartram heirs sold out in 1850. America’s oldest surviving botanic garden was dedicated as a 50 acre National Historic Landmark in 1963. Be sure to visit when you’re in the area.

Interested in learning more about John Bartram and other revolutionary gardeners of his time? There’s an excellent book by Andrea Wulf, “The Brother Gardeners“. I highly recommend it.

ISBN-10 ‏ : ‎ 0307454754
ISBN-13 ‏ : ‎ 978-0307454751

Happy Independence Day and here’s to garden revolutions everywhere!

Franklinia alatamaha by William Bartram (1782)

Tomato season is open!

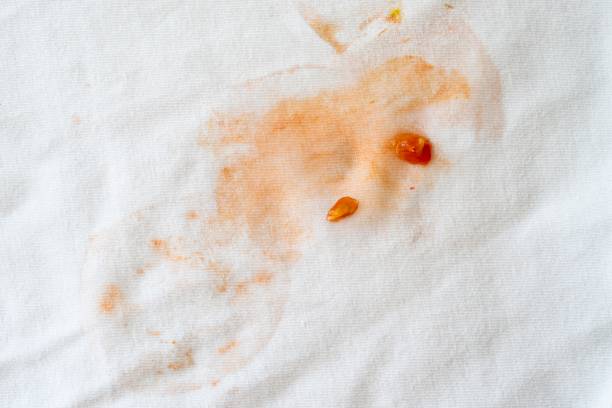
Mmmmm, fresh summer tomatoes. They’re great sliced, diced or made into salsa or sauces. There’s nothing like picking one right off the vine, popping it in your mouth and splat! You now have tomato all over your shirt.
“No problem,” you think, “it’ll come out in the wash.”

Fast Forward to Laundry Day…

As you’re putting your freshly washed and dried laundry away you notice that tomato stain is still there. So you toss it back in the hamper for next time.
Several laundry days later, that tomato stain is hanging on. You decide it’s time to get serious.

So you soak and you scrub.
And you soak and you scrub.
And still that stain refuses to budge.
(Rather poetic isn’t it)

You’re about to go all Lady MacBeth on it!

Out, damned spot! Out, I say!”
The Tragedy of MacBeth, act 5, scene 1

But thankfully you regain your senses before ruining the shirt.
“What’s the deal with this *&#^%*$ tomato stain!” you wonder. You’re almost ready to designate it your “special tomato shirt,” which admittedly would be handy for those “S’ketti Night Socials” at the county fair, but you’re not quite ready to give up yet.

Nil desperandum my friend! Professor Sprout has some special botanical knowledge to impart that will make your Expelliarmus spell work.

Why Are Tomato Stains So Difficult To Remove From Fabric?

Tomatoes contain multiple pigments: chlorophyll, carotenoids, xanthophylls, and betacarotene. The trouble maker is a bright red carotenoid, lycopene. It’s an approved food coloring and is found in other red fruits such as watermelon, red carrots and papaya. Despite it’s being a carotene, it has no vitamin A properties.

Lycopene

Why Does Lycopene Stain?

Lycopene is not a water soluble pigment, it’s only soluble in fat. In other words, it’s hydrophobic. Hydrophobic molecules cling together to minimize their contact with water, so the pigment hangs onto whatever surface it’s on. Add the nooks and crannies of fabrics, especially natural ones, and it’s hard to get it to release its hold. The hydrophobic nature of lycopene also means that it resists attempts to clean it with just soapy water. The high temperatures of a washing machine can drive stains even deeper.

Nope, that water ain’t gonna touch me!


So, How to Remove a Lycopene Based Stain?

The trick to removing a lycopene based stain from fabric is to treat it like a lipid stain (lipid = fat or oil). Bleach won’t work and often regular spot treatment or laundry detergent won’t either. If it’s an old stain you might need to put a drop of regular cooking oil on the stain or spritz it with an oil based pan spray. What you’re wanting to do is get the lycopene back into an oil base which can then be washed out.
Another thing that works is to hit the stain with a solvent based stain remover. There’s a popular brand of carpet cleaner that works quite well for this. We can’t make commercial recommendations here but if the name Sp*t Sh*t rings a bell well, aren’t you clever. As with all stain removers test on an inconspicuous area beforehand.
If the stain has been through several wash loads, it make take a few wash loads to remove it. But the above method will work.

Cleaner clothes, with botany!

Bonus round!

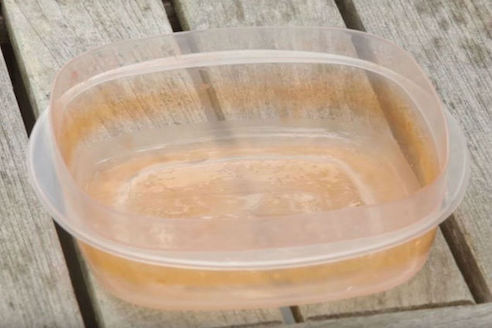
Lycopene also stains plastic which is why the container you reheated the Aunt Mamie’s spaghetti sauce in is red. The good news is that lycopene will oxidize so you can soak the stained plastic with a bleach solution which should remove it.

A little soak with a bleach solution will remove the ‘mater stain.

So there you go. Enjoy tomato season and don’t worry about the laundry!

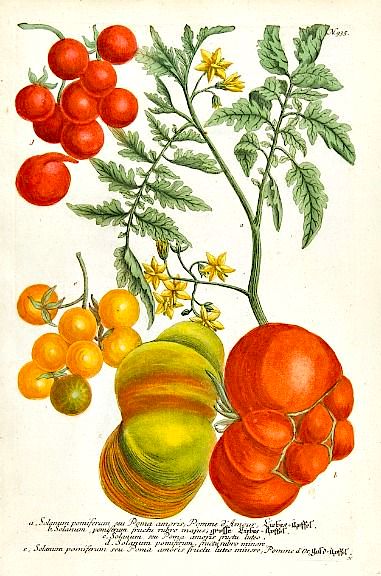
Johann Weinmann “Tomatoes” 1737-45

Burlap, the fashion fabric of the gardening world.

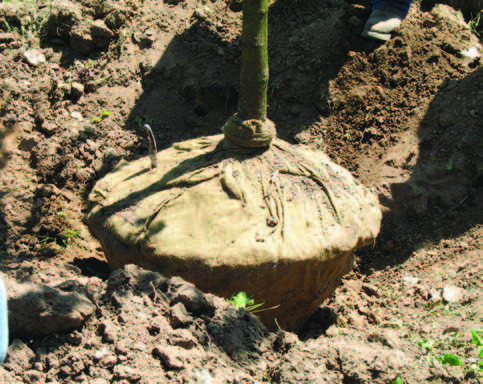
Cheap, lightweight and easy to manipulate, burlap has become a popular way to protect transported B&B trees from the nursery to their planting site. To add justification for its use it’s also touted as biodegradable. “No need to remove it!” or “Leave it in place to protect the root ball.” and other such phrases are often tossed at the unknowing homeowner but are they laudable? Let’s investigate.

Hessian soldiers ca. American Revolutionary War – what do they have to do with burlap?

Carl, J.H., “Regiement von Bosse” (1784). Prints, Drawings and Watercolors from the Anne S.K. Brown Military Collection. Brown Digital Repository. Brown University Library.

Burlap is the North American name used to refer to a fabric known as hessian in other parts of the world (except in Jamaica where it’s called crocus.) “Hessian” is attributed to the historic use of the fabric as part of the uniform of soldiers from the former Landgraviate of Hesse and its successors, including the current German state of Hesse. Soldiers from these areas were called “Hessians”. If you recall your American Revolutionary War history, the name Hessian might ring a bell.
While the word burlap might bring to mind the image of a coarse brownish material, Hessian fabric is available in different types of construction, form, size and color. Even though the two names refer to the same fabric, we’ll stick with “burlap” for our discussion.

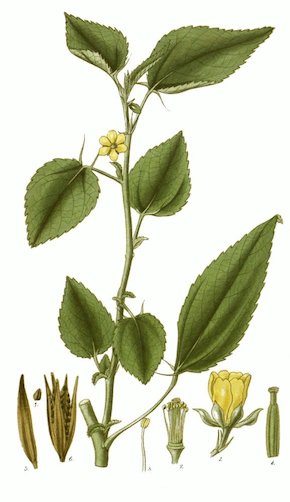
Illustration of Corchorus olitorius, 1828, William Jackson Hooker (1785-1865)

Burlap is produced from two Corchorus species in the Malvaceae family. The main fiber source is C. olitorius but the fiber from C. capsilarius is considered superior to it having a finer texture. Both plants are called jute, which also applies to the fiber.

Jute grows best in a warm, wet climate. A long monsoon season followed with consistent temperatures over 75ºF/ 25°C and relative humidity of 70%–90% are ideal. Jute requires 65″-80″/160–200 cm of rainfall yearly plus extra during the sowing period. The plants prefer river basins, alluvial or loamy soils with a pH range between 4.8 and 5.8. Periodic flooding or marshy conditions are well tolerated. ~85% of the world’s jute is grown in the Ganges Delta.

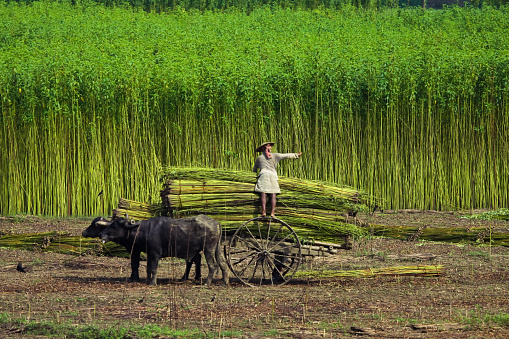
Farmer collecting bundles of harvested jute to be taken for initial processing in West Bengal India. CC image

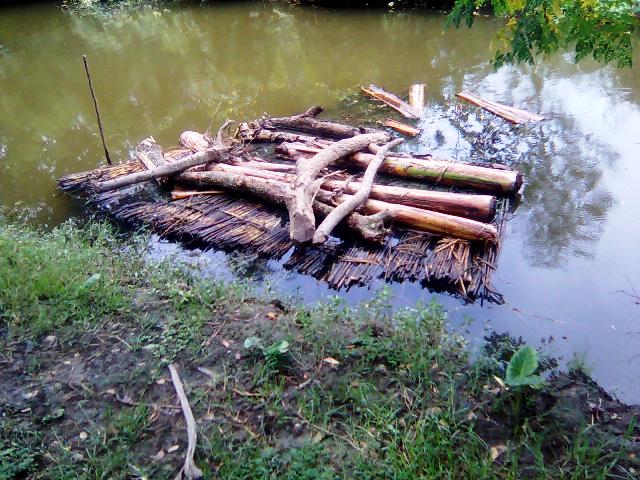
When ready to harvest, the jute is cut off at the soil surface and gathered into bundles for transport and processing. To extract the fiber, the jute bundles are retted. There are a variety of retting processes: mechanical (hammering), chemical (boiling & applying chemicals), steam/vapor/dew retting, and water or microbial retting. Water or microbial are the oldest forms and most often used.

Jute bundles being water retted. The bundles are kept submerged with logs. CC image

When the jute is well retted, the bundles are hit with a long wooden hammer to loosen the fibers from the core. After loosening, the fibers are washed with water and squeezed dry. The extracted fibers are further washed with water then hung up to dry. When dry they’re tied into bundles to be sold at market.

Jute fibers drying. CC image
Jute market. CC image

So what does all of this have to do with B&B trees?

Image by USU Extension

Burlap, even a tightly woven burlap, “breathes.” This gives it a strong resistance to condensation, moisture, and fungal growth. Jute is a hard fiber which makes it very durable and jute burlap is wear, tear, puncture, and stretch resistant. Breathability plus condensation, moisture, fungal growth, wear, tear, puncture and resistance to stretching are all qualities which make burlap a good choice for the transport and storage of goods and as a geotextile.

“Natural” burlap is lightly treated with an emulsion, usually a cheap plant based 3:1 water and oil mixture, as a part of the weaving process. The mixture makes the fibers easier to handle and move through the loom, and helps reduce waste. The water does most of the work; the plant-based oil just prevents the water from evaporating so quickly. Burlap made with plant-based emulsion is required for food safety, storage and transportation and aren’t as long lasting as the other type of burlap. They normally last about three years in use but can take up to a decade to decompose.
Yes, you read it correctly.
“Natural” burlap can take 10 years to fully decompose.

Burlap sacks of green coffee beans.
Image credit: Tim Pannell, Mint Images/Science Photo Library
 

The qualities that make burlap good for food stuff transport also make it useful in the construction, landscape, government/emergency services, and outdoors/sporting sectors. Fabric woven for use in these areas is treated differently; the emulsion used on it during weaving is usually petroleum based. This emulsion is designed to add more water, rot, and gnawing pest resistance to the fibers prior to weaving. It can leave the fabric feeling “sticky” or “coated” and tends to attract dust and dirt. It also has a peculiar chemical aroma to it. The finished fabric is often treated again to add even more resistance. So, the fibers are treated prior to weaving and then often again afterward. A double whammy, so to speak. “Treated” burlap is very long lasting, durable and can be stored for years in a variety of conditions without the fibers weakening. It can last for decades, above and below ground.

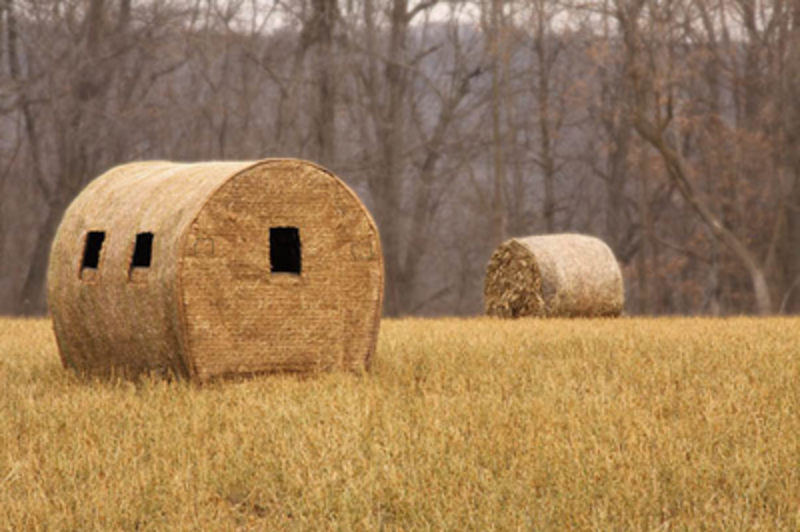
A hay bale ground blind covered with water and wind resistant burlap.
We didn’t know this was a thing.

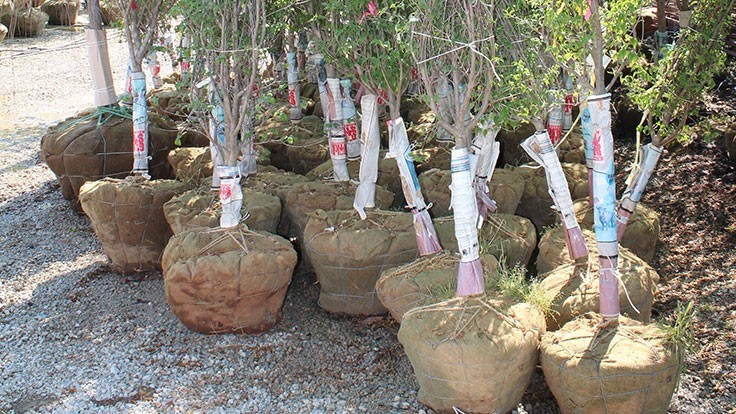
Which brings us back around to B&B trees.

Image credit: Matt McClellan

Guess which burlap is used almost exclusively in the landscape industry, the “natural” or “treated” ?
If you guessed “treated,” you’re correct! Its durability, ease of use, and excellent storage qualities makes it the #1 choice for transporting nursery trees.
Unfortunately many, if not most, plant people don’t know about different burlap types and are relying on out-dated information. (This is true in more areas than just burlap, but those are other issues.)
Try asking if the burlap on that root ball is “natural” or treated and see what their response is. Feel the fabric yourself. Does it have a tacky feel, do your fingers drag on it, does it seem to attract dirt or dust? Does it have a chemical or petroleum odor to it? These are all indicators of treated burlap. Both natural and treated burlap degrade slowly. Leaving burlap on the root ball will only encourage circling roots and probably doom the tree.

Just so we’re not being misunderstood: Wrapping the root ball with burlap for transporting purposes is all well and good.

But you have to remove it at planting!

Let’s do a quick review of the qualities of burlap and how they can backfire when planting trees.
Breathability: not really a problem underground but can cause the root ball to dry out if the tree is exposed to the air for too long.
Condensation and moisture resistant: doesn’t absorb water so the fibers won’t rot.
Little to no fungal growth: isn’t consumed by fungi so fibers stay intact.
Tear and puncture resistance: roots can’t push or force their way through therefore encourages circling roots.
Doesn’t stretch: won’t expand with root growth therefore encourages circling roots. Sound familiar?
Natural” burlap: can take up to a decade to completely decompose all the while negatively impacting root growth.
“Treated” burlap: can take decades. ‘Nuf said.

Bonus round!
Soil factors can also influence burlap decompostion. The decay rate in soil pH levels below 6 is significantly slowed. Low soil temperatures result in a slower decomposition process. Dry soil slows jute fiber break down too and even desert termites don’t care for treated burlap.

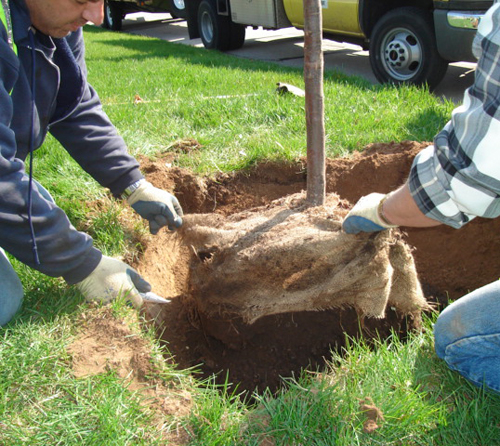
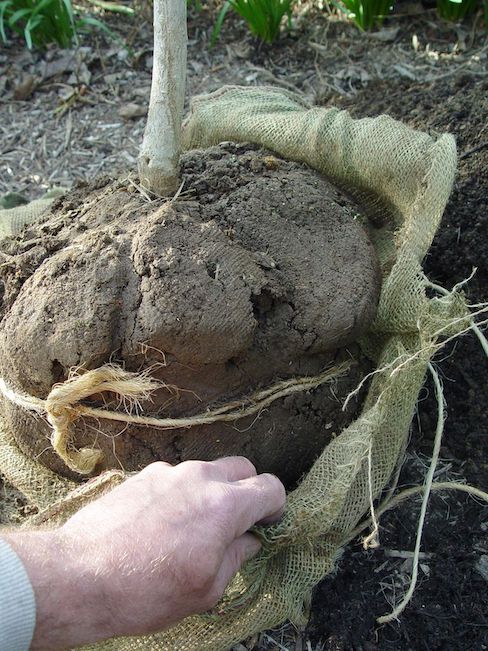
A B&B tree is an investment: give it the best possible start you can. Always remove the burlap, wire basket, strings, ties, or any other constrictions you find. And don’t forget to root wash, correct any root problems, and spread the roots out horizontally away from the trunk when planting.

Image credit: George Weigel

For your enjoyment, be sure the sound is turned up so you get the full effect.
https://youtu.be/D9AUnYTol68

People and Plants

This is the springtime installment of our random, look-behind-the-scenes of the plant world blog post. In this episode we’ll take a look at William Forsyth, a gud Scottish horticulturist.

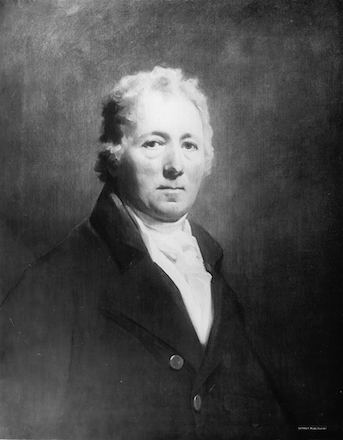
William Forsyth 1737-1804

William Forsyth was born in 1737 in Old Meldrum, Aberdeenshire in northeast Scotland. In 1763 he moved to London to work at Syon Park House for the Earl of Northumberland. After that gig he transferred to the Chelsea Physic Garden and trained as a gardener under Phillip Miller. He eventually took over the head gardener position in 1771 and held that post for several years. Forsyth was quite a “plant nerd” who enjoyed exchanging plants with other botanical gardens. He greatly increased the diversity of horticultural collections throughout Britain and Europe with his avid plant trading.

  • In 1779 he was appointed superintendent of the royal gardens at Kensington and St. James’s Palace and held this position until his death.
  • He was one of the original members of the Royal Horticultural Society which held its first meeting on March 7, 1804.
  • Forsyth died on July 25, 1804.

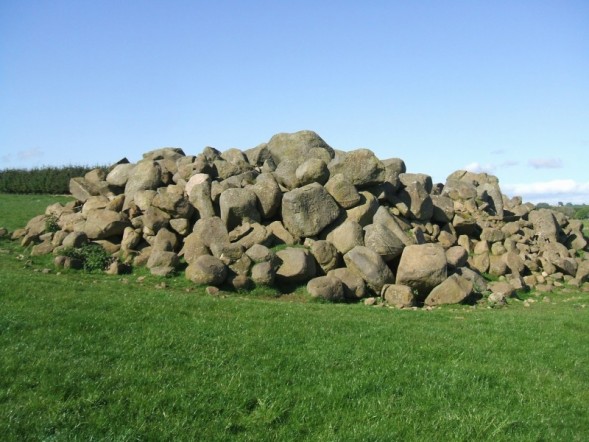
Always a gardener willing to try new things, Forsyth created one of the first known rock gardens in gardening history in 1774 while curator of the Chelsea Physic Garden. He collected over 40 tons of assorted rock from near the Tower of London, included flint and chalk from nearby downlands (an open area of chalk hills) and threw in some pieces of Icelandic lava. Unfortunately the garden didn’t produce as hoped and was considered a failure. Such is gardening.

A pile of rocks does not a rock garden make.

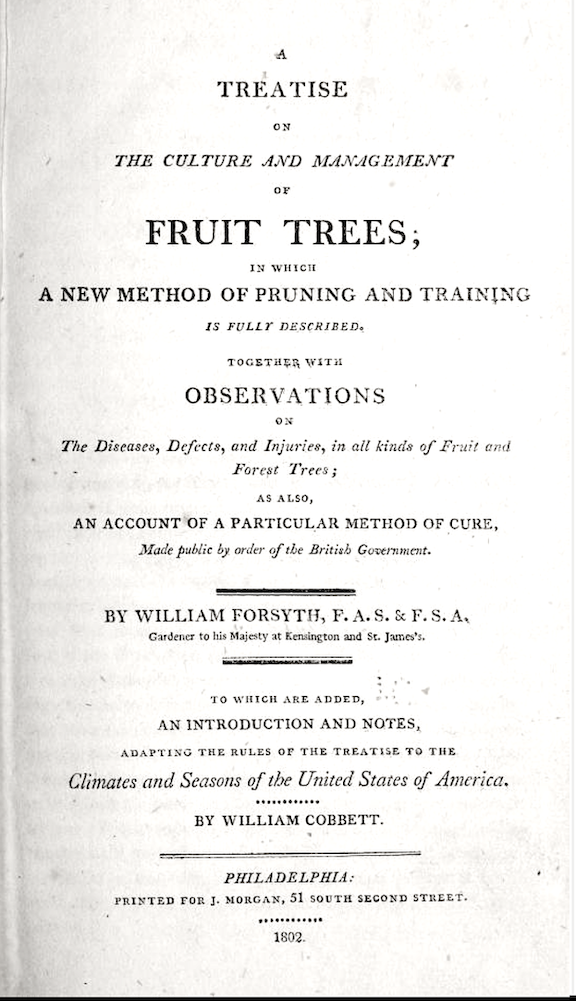
Forsyth published several works on horticulture and was regarded as an expert on fruit tree management and flowering plants. One of his books, Treatise on the Culture and Management of Fruit Trees (1802), was a great success and ran into several editions. You can read it here. His other book, Observations on the Diseases, Defects, and Injuries of Fruit and Forest Trees, was also popular.

Forsyth had a bit of the salesman in his personality…

In 1798 he created a ‘plaister’ which he claimed would heal defects and wounds in trees even “where nothing remained but the bark.” This secret “Composition” as he called it, had a long list of sometimes changing ingredients which included dung, ashes, lime, soapsuds, sand, and urine. Forsyth claimed his Composition could render the timber of poor and derelict oak trees “fit for the Navy as though they had never been injured.”  The Royal Forests were in poor condition at the time and the nation needed sound timber for shipbuilding so as to continue the war with Napoleon Bonaparte.

Forsyth’s directions for making his Composition, in case you’d like to give it a try.


Naturally the Admiralty was very interested in the concoction (my word) and so the Government was persuaded to pay him a large sum of money. The British Parliament gave him a grant of £1,500 ( approximately $260,868.41 in current US dollars) to continue developing his mixture with the understanding the secret formula would eventually be shared with the government.
In the meantime word had gotten out about the Composition and Forsyth decided to take advantage of the situation. He published a best-selling treatise on his ‘plaister’ and the formula was also published in The London Gazette, all for a fee of course. It was too good to last.
A number of prominent British gardeners and botanists experimented with his treatment and quickly revealed (early Garden Professors, show us the science!) that it was quite useless. It didn’t pass the CRAP test. Plus the government took issue with his publishing the formula for the public while having yet to deliver said to the government which had paid a hefty sum for it.
Forsyth was exposed as a fraud. 
But fortunately he died soon after this and his reputation was saved via his publications and lifelong liaising with gardens and gardeners.

I’m sure by now you must have sussed out the plant, right?
If you thought Forsythia, you’re correct!

Khanh Ngo Photography/Getty Images

Forsythia, a genus of spring blooming plants in the olive family Oleaceae and mostly native to Asia and named after William Forsyth.
I can hear you asking, so how is the name Forsythia pronounced? (Yes you are, I can hear you)
In the UK the name is pronounced “For-sigh-thee-a” reflecting the correct pronunciation of Forsyth. In the USA the name is often pronounced “For-sith-ee-a”. Take your pick.


The moral of this story, dear readers, is people have been selling useless garden potions and notions for centuries. So no matter how knowledgable the advice giver seems to be or how may accolades they’ve won, always sift their “Composition” through a sieve of science to screen out the b.s.
(And remember to never apply any sort of manure, literal or figurative, unless advised to by a soil or CRAP test.)

More reading to help you with sifting:
https://www.researchgate.net/publication/315662987_Scientific_literacy_for_the_citizen_scientist_WSU_Extension_Manual_EM100E

Agua Es La Vida.

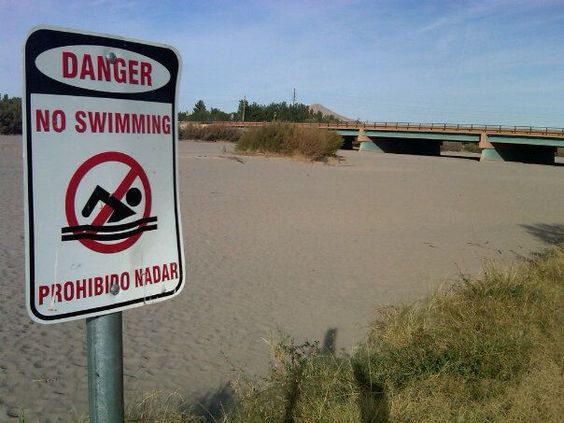
No swimming? That’s the last thing we should be concerned about.

Water is a precious resource and gardeners are often careless with it. Water rationing is a real thing for many of us and, with continuing and spreading drought, may become a reality for many more. Is it possible to have a beautiful garden while minimizing water use?
It is indeed.
[Disclaimer: This blog post is about ornamental landscapes. While efficient water use is also needed for a production garden, the need to produce food is the priority.]

Lovely!

Choose Waterwise Plants
This might seem like a no-brainer but it deserves consideration. As we develop, add to, or change our landscapes we should choose plants that, once they’re established, will thrive without needing additional irrigation. And don’t fall into the “native plants are more water use efficient” trap. Growing any plant outside of its original environment, or planting it in urban or compromised soils in a micro-climate it’s not adapted to, and guess what – native plants can be water hogs too. Carefully considered non-native, regionally adapted plants can use less water once they’re established, provide a healthy environment for wildlife and give you a lovely garden.

Check plant tags for water use information.

Group Plants According To Water Needs
This is the only instance I can think of when “companion planting” is a description that works. Group plants with similar water requirements together. And by “together” I mean in a same hydro-zone. If possible, don’t mix plants with different water needs in the same planting bed. Here’s a local example I see quite often: oleander is a popular plant in my area but it needs extra water to be truly happy while Leucophyllum is also a popular plant but needs very little to no extra water once it’s established. A popular landscape combo is oleander as the backdrop with Leucophyllum in the foreground, yet they’re all in the same water zone. So to keep the oleander happy more water must be used but that overwaters the Leucophyllum. And you can imagine the reverse for yourself. In this case, opposites don’t attract.
If you use an automatic system adjust the zones to optimize each plant groups water use. Add, resize, remove emitters or feed lines to help you accomplish this. It’s not a “one size fits all” thing.

Group plants with similar water needs. This photo is an example of how not to plant. The opuntia is well watered, almost too well, yet the petunias in the foreground and the agave in the back left are water stressed.Not going to discuss the “pruning” of the sotol and agave. Nope, not going there.

Monitor Soil Moisture Depth With A Simple Soil Probe
Whether you use an automatic irrigation system, water manually, or depend on the weather, monitoring soil moisture depth should be a part of your garden maintenance routine. We’ve already talked about this in a previous GP blog post so I won’t go into it more here. Just consider this a friendly reminder to make it a part of your gardening routine.

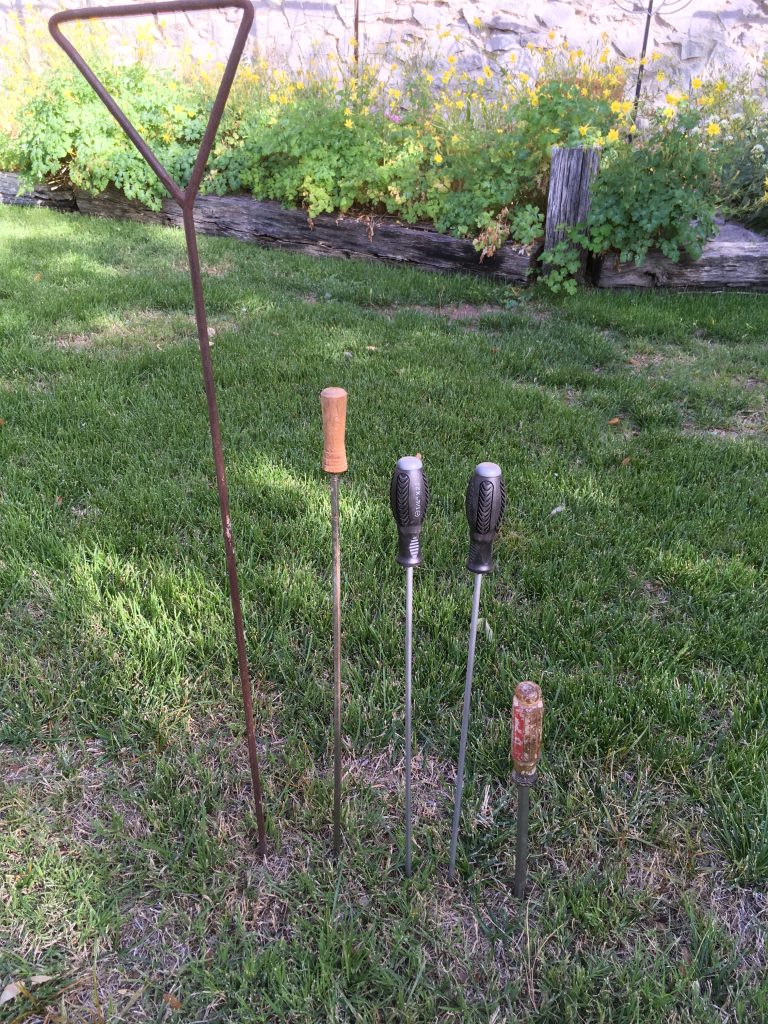
Soil moisture probes, easy to make or purchase.

Watch The Weather
Keep an eye on the weather forecast and turn off automatic systems as needed. You can install a rain sensor or “weather eye” on the system but don’t expect it to always work correctly, or at all. You’ll still need to monitor the situation.
And don’t assume just because it rained your landscape received adequate water. Check the soil moisture depth to be sure. If you have containerized plants on your automatic water system you should check their soil moisture levels too. They may not have received enough moisture from that rain storm that watered the rest of your landscape.

We’re sprinkling in the rain, just sprinkling in the rain…


Closing Thoughts: Do you really need that automatic irrigation system?
Yes it’s convenient, but is it necessary?
Warning- Anecdotal observation!: After ~20 years of being an Extension Master Gardener and Master Naturalist, working outreach events and phone help lines I’m convinced that automatic watering systems waste more water than they save.
There, I said it.

Sprinkler overspray, there’s no excuse for this.

It’s not the fault of the system – it just does what the controller tells it to do. Incorrect installation or placement of feed line/emitters, lack of maintenance, using the wrong emitters for the situation, sloppy programming, and running the system when it’s no longer needed all result in water wastage. An automatic irrigation system is not an install, set and forget thing but it’s usually treated as one. Our goal as gardeners should be to have a landscape that is not dependent on continuous supplemental irrigation. We should lead by example.
If you must depend on an automatic system be sure it’s in good repair, the emitters are the correct type, size and properly placed for the situation and you’ve programmed the controller correctly. Adjust the system as plants grow and mature, this is especially important for trees. Move and add emitters as the canopy and trunk diameter expands.

Notice the loose bark on the right side of the trunk. There are similar patches on the other side as well. This tree is in trouble.
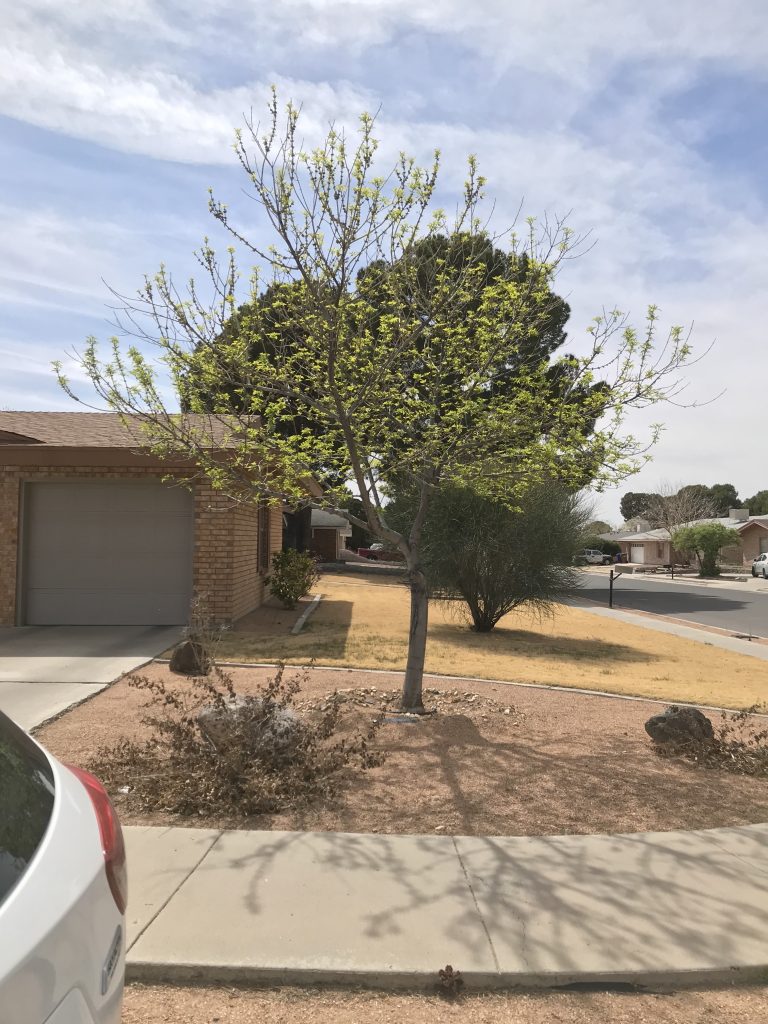
This tree is starting to leaf out but you can estimate the canopy spread.
And here is its one water source.
Another view and yes, that is solid sheet plastic you see there.
Poor tree.

Aqua Es La vida“…”Water Is Life.”
Let’s make every effort to use it wisely and conserve it in all aspects of our lives. Like the song says, “…Don’t it always seem to go that you don’t know what you’ve got ’til it’s gone…”
And by then it’s too late.

More info on efficient water use here:
https://aggie-horticulture.tamu.edu/earthkind/drought/efficient-use-of-water-in-the-garden-and-landscape/

https://ucanr.edu/blogs/blogcore/postdetail.cfm?postnum=12962

This is a great handout!
https://cals.arizona.edu/extension/ornamentalhort/waterquality/watering_trees.pdf

https://ucanr.edu/sites/UrbanHort/Water_Use_of_Turfgrass_and_Landscape_Plant_Materials/Estimating_Water_Requirements_of_Landscape_Trees/

https://www.epa.gov/watersense/watering-tips

https://www.energy.gov/sites/prod/files/2013/10/f3/est_unmetered_landscape_wtr.pdf


February is…

…National Pesticide Safety Month. Let’s review some key points of safe pesticide use. 

Socrates said, “ The beginning of wisdom is the definition of terms”

So let’s define a pesticide.
A simple definition is any substance used to control, deter, incapacitate, kill, or otherwise discourage organisms harmful to plants, animals or humans can be classified as a pesticide. A fuller definition can be found here. Germane to our discussion, herbicides make up 80% of all pesticide use. As gardeners we should know how to properly handle any chemicals we choose to use.

Anytime you use a pesticide, be sure to read and follow label instructions. The label will include important information for protecting yourself and it will tell you how to apply the product in the way that it will work best. Be certain the pesticide you’re using is correct for the job.

All pesticides carry labels which provide varying levels of information including the signal words “Danger”, “Warning’ or “Caution”. These signal words have specific meanings in relation to the pesticide. Products labeled “Caution” are the least toxic, “Danger” are the most. More information on signal words can be found here.


Correct and controlled application is responsible pesticide use. While some pesticides can be broadcast, e.g., pre-emergents and some lawn grub control products, most of them need to be precisely applied. Use correctly calibrated equipment recommended by the label directions and apply precisely. Avoid overspraying and watch out for drift.

And finally, wear protective clothing and use the correct application method and equipment as stated on the label. Always keep children and pets away while you’re applying any product. Observe wait times before allowing people or pets back into or onto treated areas. When you’ve finished application wash your hands, face and any skin that’s been exposed to the product. If needed, launder protective clothing separately from other clothing. 

For more information:
https://www.epa.gov/safepestcontrol
http://npic.orst.edu

People and Plants

In this People and Plants blog post we’re taking a look at the German botanist Adam Lonicer.

Theodor de Bry engraving, published 1652-1669

Adam Lonicer, also known as Lonitzer, Lonicerum, Lonicerus, or Loniceri, was born on October 10, 1528 in Marburg, Germany. He studied in Marburg and Mainz before becoming professor of mathematics at the Lutheran University of Marburg. In 1554 he received his medical degree and he later pursued a medical career as the city physician of Frankfurt. His true interest though was herbs and the study of botany. In 1554 he married Magdalena Egenolph and worked as a proofreader for his father-in-law, a German printer who specialized in producing herbals.

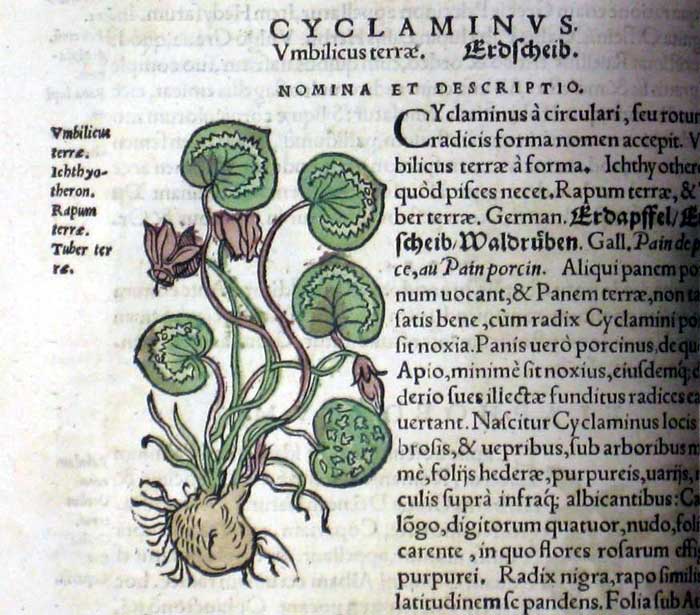
Adam Lonicer, Naturalis historiae opus novum (Frankfurt, 1551), fol. 258, Cyclaminus.


Lonicer soon decided to produce an herbal of his own, the Kreuterbuch, published in 1546. As the original full title makes clear, Naturalis historiae opus novum : in quo tractatur de natura et viribus arborum, fruticum, herbarum, Animantiumque terrestrium, uolatilium & aquatilium …  (Frankfurt, 1551), the herbal did not solely focus on plants but also included some descriptions of animals, birds, fish and metals. The emphasis throughout the book is on how one uses animal, vegetable, and mineral substances in the production of medicinal, gastronomical, and household preparations.

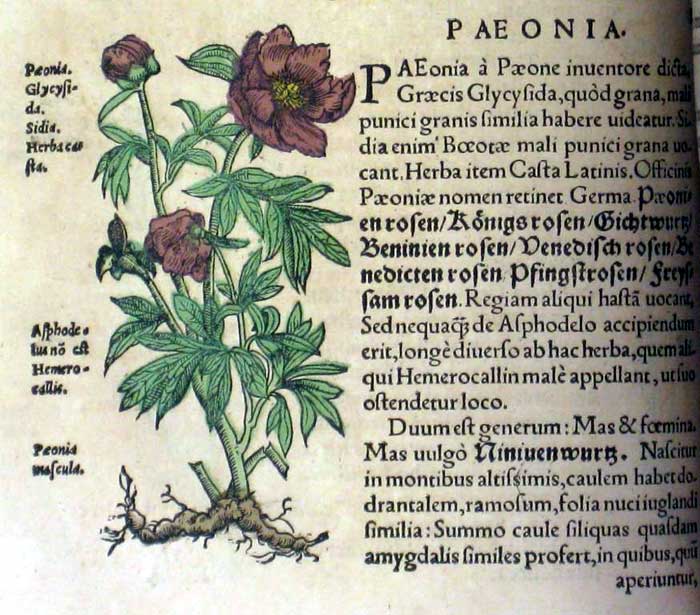
Adam Lonicer, Naturalis historiae opus novum (Frankfurt, 1551), fol. 184, Peony.

Although much of the work was not original to Lonicer it proved to be the greatest printing success of the Egenolph firm. It was one of the most enduring publications of its kind and was still being produced in Germany in 1783. The text covers much of the known natural world at the time and had a wide audience that included physicians, apothecaries, and both rural and urban householders. Lonicer provides us with one of the early descriptions of local flora and he is one of the first to distinguish deciduous trees from conifers. That seems obvious to us but at the time it was unconventional.

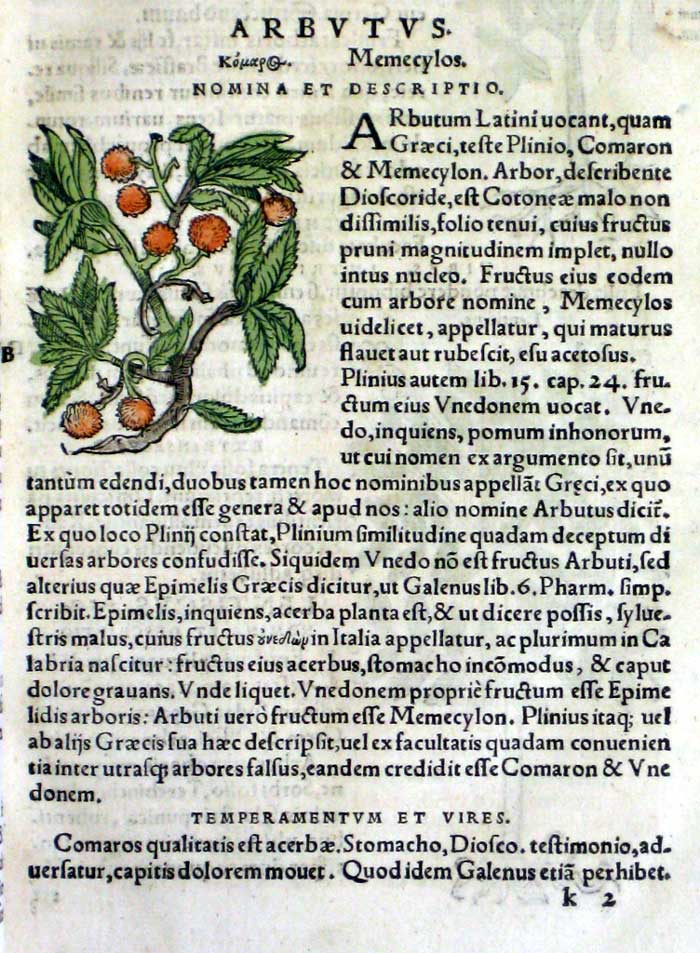
Adam Lonicer, Naturalis historiae opus novum (Frankfurt, 1551), fol. 56, Arbutus.

The most striking features of this book are its hundreds of hand-colored woodcuts. As you can imagine coloring in each image is an intensive task and would have greatly increased the cost of the book. Colored herbals were relatively rare since they were very costly to produce therefore many early printed herbals were unpainted. There’s the story of the coloring of a Flemish edition of L’Obel’s herbal for the Duke of Prussia, it took three months to color. By the time it was finished it was too expensive for hard-working botanists to buy. 


Lonicer took over the publishing firm after his father-in-law died in 1555. He went on to publish no fewer than four editions of his Kräuterbuch between 1557 and 1577. This Renaissance botanist died at Frankfurt-am-Main on May 29, 1586.

So, what plant genus is Lonicer’s name associated with?
A few hints:
It’s in the Caprifoliaceae family and native to North America and Eurasia.
There are about 180 species identified in North America and Eurasia.
It’s a widely cultivated ornamental garden plant.


If you guessed Lonicera, you’re correct!
Members of the genus are commonly known as honeysuckle, named for their sweet nectar. Lonicera are prized for their fragrant flowers with some bearing edible fruit. Many creatures, both day and night feeding, use them as a nectar source. While honeysuckle is a favorite landscaping plant many species can be invasive or grow so heavy they overpower their supports or trellis. Choose varieties wisely and monitor their growth.

Lonicera caprifolium, image used under CC license

People and Plants

Welcome to the first People and Plants GP blog post. These posts, which will be on a random basis, will take a behind the scenes look at the namesake people behind many plant names. This first one will be about Andrew Jackson Downing.

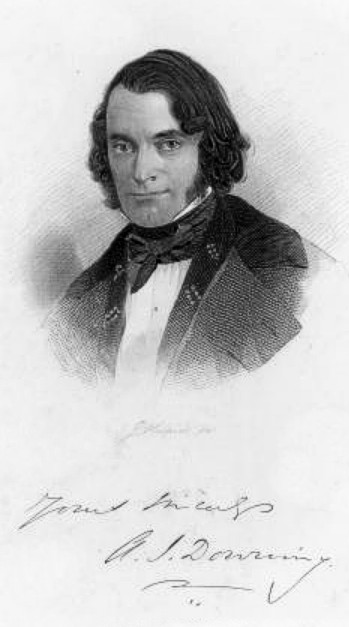
Andrew Jackson Downing was born October 30/31, 1815 in Newburgh, New York to Samuel Downing and Eunice (née Bridge) Downing. His father was originally a wheelwright but later became a nurseryman. After he finished his schooling Andrew worked in his father’s nursery and was soon bitten by “the plant bug”. I’m sure many of us can identify with that “affliction”.
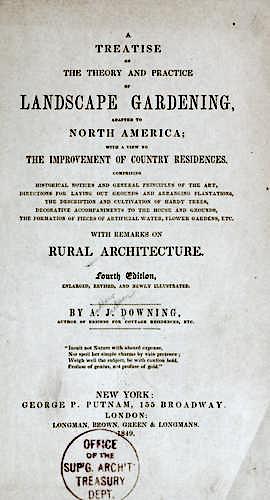
Over time he became more interested in landscape gardening, architecture and the relationship between them. He began writing articles about botany and landscaping but soon realized he needed to know more about both topics and so began a course of self-education. By the 1830’s he was producing pieces for newspapers and hort journals and in 1841 his first book, *A Treatise on the Theory and Practice of Landscape Gardening, Adapted to North America, met with great success. It was the first book of its kind published in the United States.

Downing continued to write on the importance of linking landscaping and architecture and was well thought of in the industry. What really put him on the public gardening radar was a book he and his brother Charles wrote. The 1845 book, The Fruits and Fruit Trees of America, was the most complete one of its kind to date and led to Downing’s becoming the editor of a new periodical, the The Horticulturist and Journal of Rural Art and Rural Taste. The journal came to be his strongest influence on society and operated under the premises of horticulture, botany, entomology, pomology, rural architecture, landscape gardening, and ideas dedicated to public welfare, specifically public parks and what we now call “open space”. As an example he argued for a New York City park, which in time became Central Park, in this journal. It was also in this publication that Downing repeatedly pushed for state agricultural schools.
He held the position of editor until his death in 1852.

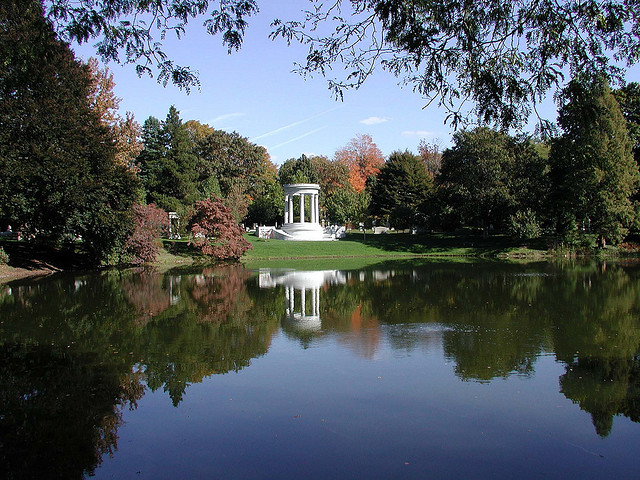
Downing was greatly influenced by the British “picturesque” landscape theories of the era. By the time he published the second edition of his Treatise he was a firm believer in the advantages of the picturesque landscape movement. He embraced the use of local landscape features especially “the raw materials of wood, water, and surface” and, when possible, the blending in with the local terrain instead of creating an artificial, out-of-place one. He became the mid 19th century champion of natural style landscapes and helped steer American gardeners away from the more formal, geometric lines that had dominated the 18th and early 19th centuries.

Mt. Auburn Cemetery is in the Picturesque style – photo courtesy of Friends of Mt. Auburn

As an editor, Downing repeatedly addressed the importance of urban and suburban public gardens and parks. He felt such spaces would aid in the fostering of moral and civic virtues in the American public. In the October 1848 Horticulturist editorial “A Talk about Public Parks and Gardens,” Downing wrote that public parks would play an important role “in elevating the national character.” He also believed interacting with nature had a healing effect on mankind, wanted all people to be able to experience nature and felt city parks were vital in helping maintain a healthy community.
Downing had a wide audience through his books and editorials in the Horticulturist but his influence went beyond the readership of his publications. Private and public gardens and city parks that proliferated through out the USA during the mid 1800’s owed their existence to his ideas.

Downing did much more than this blog post will discuss so let’s move on to the plant.

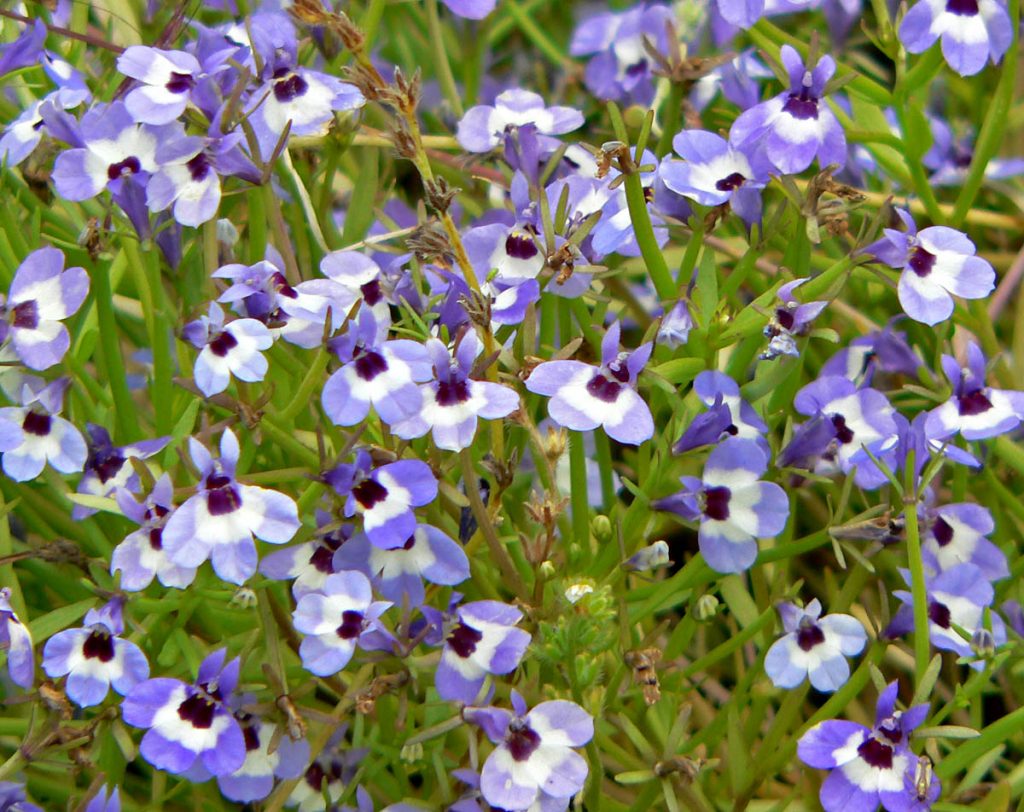
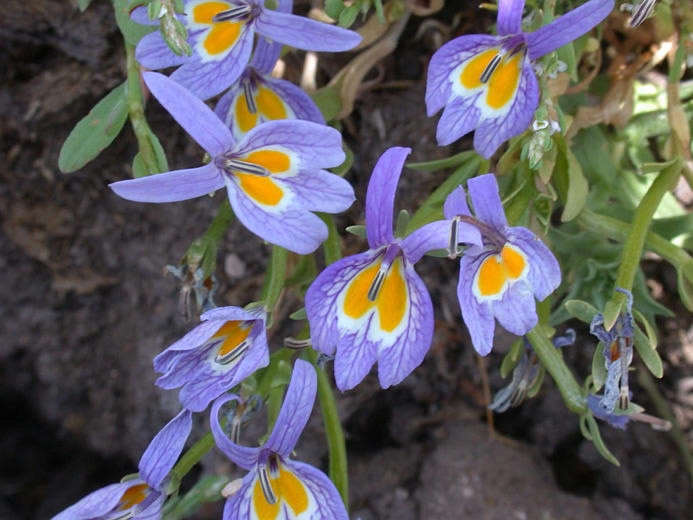
Downingia concolor

The genus **Downingia is named after Andrew Jackson Downing. It contains 13 annual plants which are native to the western USA and Chile. Commonly known as calico flowers, they are noted for forming large displays of small colorful blooms around seasonal or ephemeral pools of water. Interestingly each pool will usually only host one or two species of Downingia even in areas where multiple species exist.
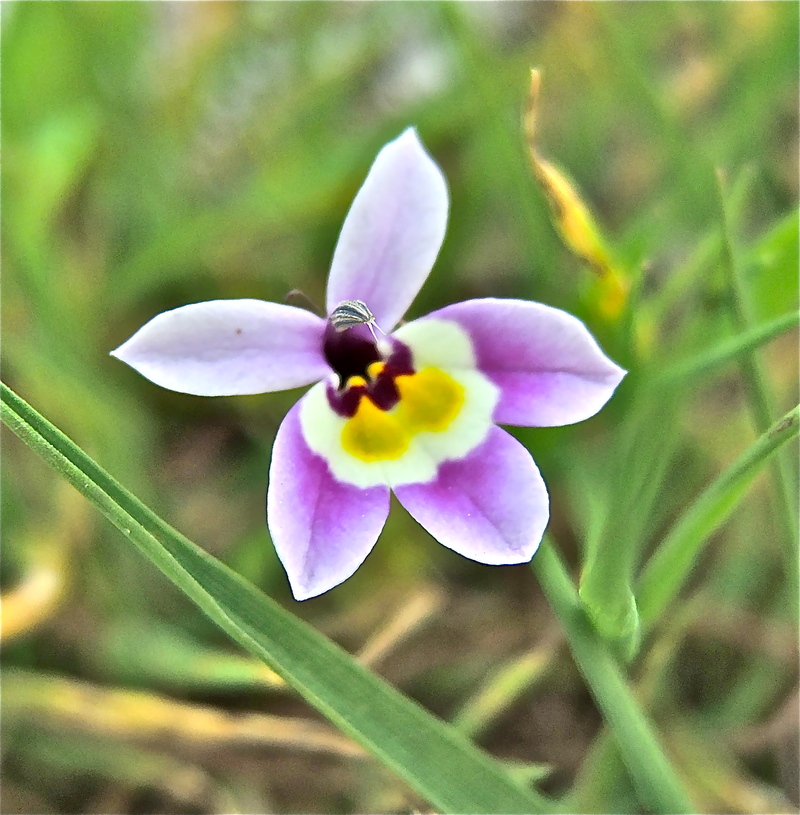
It’s a member of the bellflower family and the plants are 3-10″ tall.  Flower size varies but each flower has five corolla lobes or petals. The two upper petals are smaller than the three lower ones. Coloration is mainly blue/purple/pink with a little white, yellow, and black.
Downingia must cross-pollinate. To prevent accidental self-pollination, the flowers mature in stages, they go from male to female. This change is time coordinated across each patch of flowers. How this is done is still unknown.
The species is pollinated by native solitary bees.

Downingia pulchella
 Photo by John Doyen
Downingia bacigalupii
Photo by Gary A. Monroe


*https://openlibrary.org/works/OL1471543W/A_treatise_on_the_theory_and_practice_of_landscape_gardening?edition=treatiseontheory01down

**https://www.wildflower.org/plants/search.php?start=0&pagecount=10

Xeriscape – landscaping whose time has come.

With drought conditions or lower than average precipitation becoming more widespread across the country, it’s time to revisit the principles of xeriscape gardening. Let’s take a look at the “classic” principles and we’ll update them, Garden Professor style.
Note: If you’re growing food crops to supply your table not all of these principles will apply. Some will, e.g mulching, and some won’t. This blog post is focused on ornamental landscaping.

James Steakley/Creative Commons


SO WHERE DID IT ALL BEGIN?

As an “official” landscaping technique xeriscaping seems to have begun in the early 80’s. Denver Water, the largest and oldest public water utility in Denver, Colorado, coined the term xeriscape in 1981 by combining “landscape” with the Greek prefix xero-, meaning ‘dry’. The utility then began to formally define the main principles of xeriscaping for members of the Denver community interested in modifying gardening practices to save water. The results were the Seven Principles of Xeriscaping, listed below.

THE SEVEN PRINCIPLES OF XERISCAPING
1. Sound landscape planning and design.
2. Limitation of turf/lawn to appropriate, functional areas.
3. Use of water efficient plants.
4. Efficient irrigation.
5. Soil amendments.
6. Use of mulches.
7. Appropriate landscape maintenance.

Let’s review them and apply some up-to-date gardening information.

1. “Sound landscape planning and design” – the ideal starting point for all gardens, “Right Plant, Right Place.” This principle earns a GP thumbs-up.


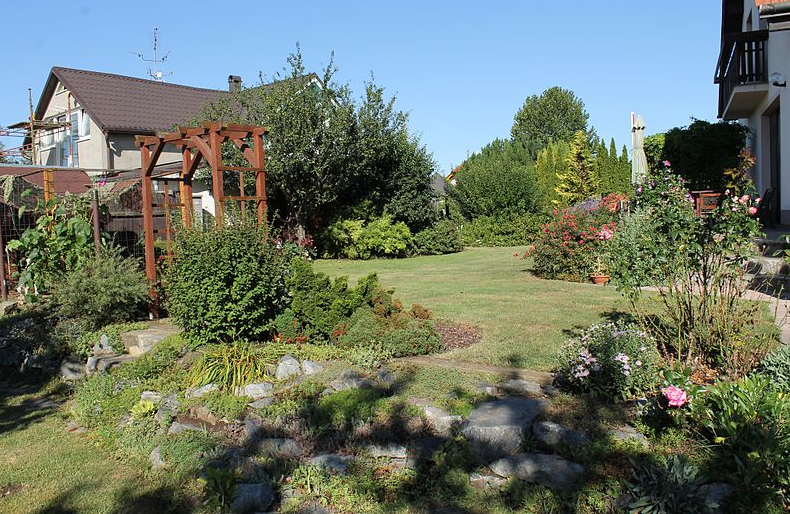
2. “Limitation of turf/lawn to appropriate, functional areas” – turf has a place in the landscape but perhaps not everywhere or in every landscape. “Right Plant, Right Place” (hmm, that sounds familiar). Another GP thumbs-up.

CC

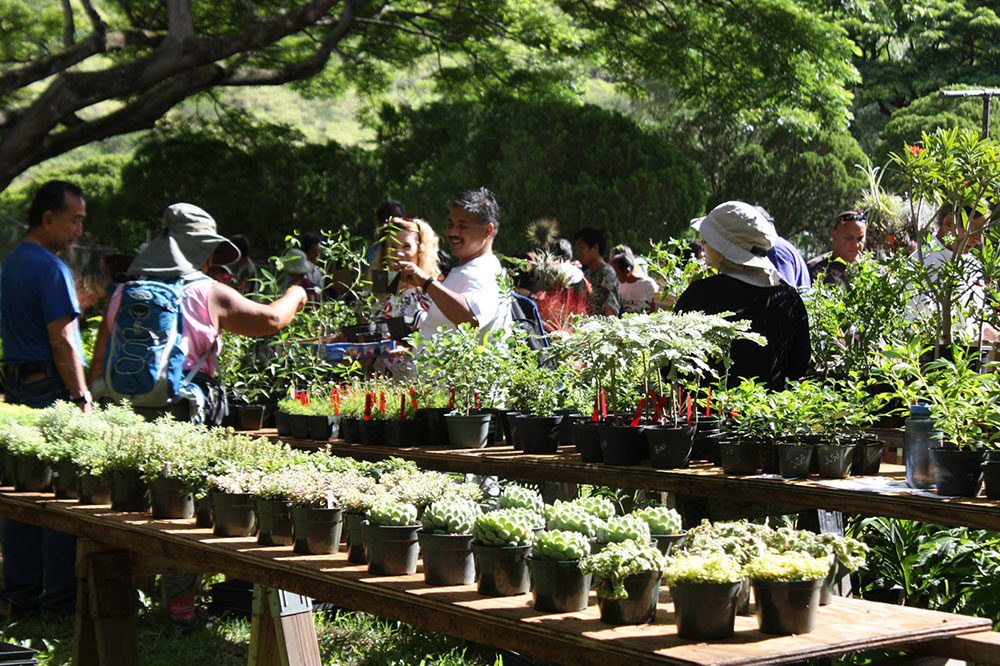
3. “Use of water efficient plants” – it may be stating the obvious but you want water efficient plants that work in your grow zone or micro-climate. Do some homework and choose plants that will be happy in your region. We’ll give this one a GP “OK” with a few points lost for being vague.

Photo by Halawa Xeriscape Garden


4. “Efficient irrigation” – this one has always been a puzzler. Perhaps it was included for folks who can’t break the habit of watering their gardens. The goal of xeriscaping is to have a landscape that does well on the average precipitation of an area. Granted in times of drought some plants may need a good drink now and then and new plants may need help getting established. But for the most part watering should be at a minimum and at the correct time, seasonally as well as weekly or monthly. Don’t forget to include any natural slope and drainage in your efficient irrigation plan. And “efficient” includes a correctly working automated system if you use one. This gets a GP “OK” as well.

CC

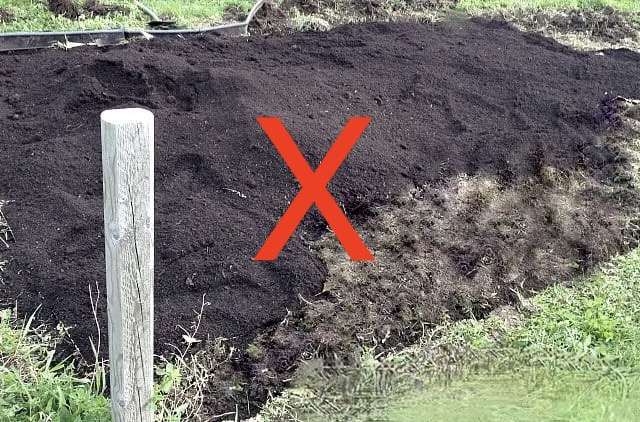
5. “Soil amendments” – We now know that amending the soil is not a recommended practice. It interferes with drainage, causes soil subsidence and is not conducive to root growth. Plants need to be planted in native soil, whatever it may be. This one gets a big “F” for Fail and shall be removed from our list.

CC


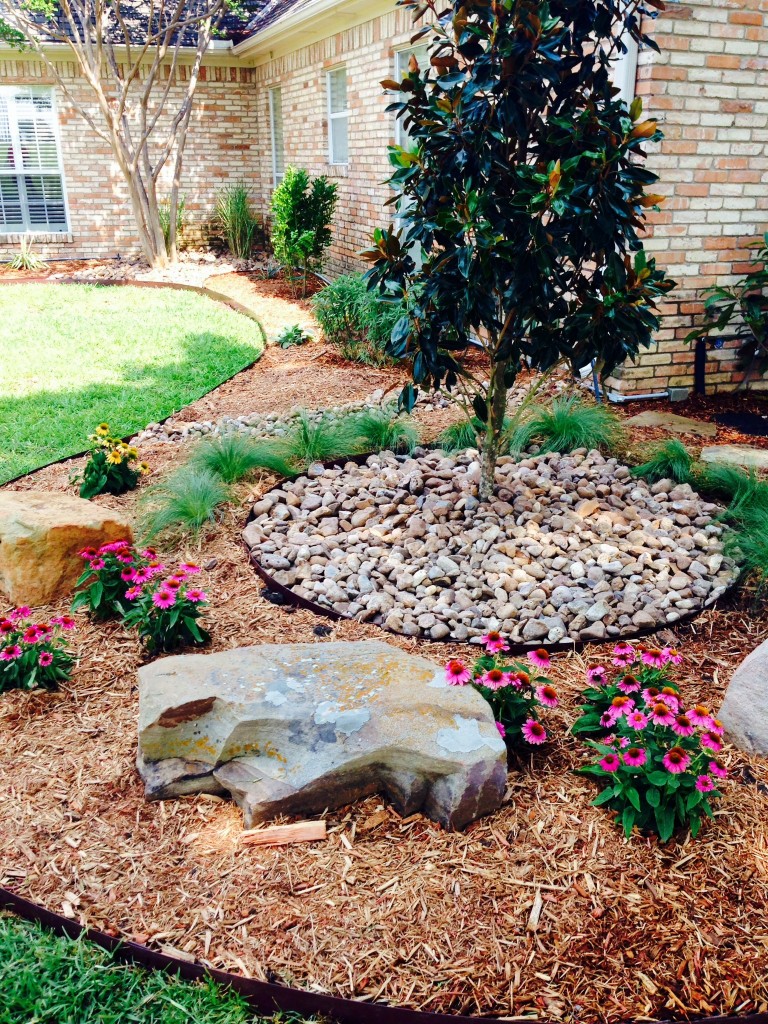
6. “Use of mulches” – if you’ve been following the Garden Professors blog you’ll know this is a winner. You also know that, ideally, we recommend using arborist chips but we also know that not everyone has access to them. Mulch choice also depends on the landscape site, plant choice and, in many instances, local codes. An organic mulch (but not bark) is usually the best bet, but there are times when an inorganic rock mulch is desirable. Do your homework and choose the best mulch for your situation. Mulch!
This xeriscape principal gets the GP Seal of Approval.

CC

7. “Appropriate landscape maintenance” – too often xeriscapes are advertised as “maintenance free”; this is false. Like all landscapes and gardens xeriscapes are an artificial environment and require maintenance to thrive. Established xeriscapes will, hopefully, need less maintenance but they do need care. This can include dealing with weeds, regular inspection and maintenance of an irrigation system, and regular plant husbandry items such as pruning and clean up. This gets a GP thumbs-up.

Image by Leubert/Creative Commons


So, based on the above discussion, here are The Garden Professor’s Principals of Xeriscape, Revised Version

THE SIX PRINCIPLES OF XERISCAPING
1. Sound landscape planning and design.
2. Limitation of turf/lawn to appropriate, functional areas.
3. Use of water efficient plants.
4. Efficient irrigation.
5. Use of mulches.
6. Appropriate landscape maintenance.

Looking over these principles we see no reason why they can’t be applied in every region and in every landscape. Learning to garden with what you have and where you are is the hallmark of a wise gardener.
Garden smarter, not harder.

Image by Susan Harris

“Water, water, everywhere…

Did it rain enough last night to water your garden? Have you started running the sprinklers and aren’t sure if they’re running enough? Perhaps you’re not sure that new drip system you installed is doing its job. Or maybe you just want to be more efficient and careful with your water use. How can you know moisture is getting deep enough into the soil to benefit your plants. Is there an easy way to find out?

Yes there is – a simple soil probe will do the trick.

A soil probe can be anything long and sturdy enough to penetrate the soil at least 12 inches (~30 cm.). Handmade soil probes, long screwdrivers, skewers, even the spit from an old rotisserie grill will all work.

A probe made of metal will work best and for safety it should have a handle of some sort. If there’s no handle you should wear sturdy gloves when using it. This set of  22″ screwdrivers was purchased at the local outlet of a national low cost tool franchise. It meets all the requirements and is inexpensive. Plus it’s a set so there’s one for you and one to share!

While you only need the probe to go 12″ into the soil it’s helpful if the probe itself is longer, if only for convenince. The probes are shown here with a yardstick for scale. (Yardstick = 36″=~91.5 cm.)

So you now have a soil probe, how do you use it to measure soil moisture depth? Easy-peasy.
Insert the probe straight into the soil at the spot you want to test. You’ll need to use firm pressure but don’t force it into the soil. The probe will pass through moist soil but stop when it hits dry. And this is true for any soil type, sand, loam or clay. When the probe stops, grasp the probe right at the soil surface and pull it out. The part beyond your hand towards the probe tip shows you how deep the moisture is.

Note: if you have rocky or stony soil the probe may hit a rock and stop. Usually you can hear or feel that it hit a hard object. Just adjust the probe’s postion and try again.

For trees, large shrubs and deep rooted grasses the probe showing a 12″ moisture depth is adequate. For shallower rooted plants or annuals 4-6″ is enough. Monitoring soil moisture depth is an easy way to know if your landscape or garden is adequately watered. Water is a precious resource, let’s not waste it.

To estimate how much rain has fallen on your property, check out this site:
https://water.usgs.gov/edu/activity-howmuchrain.html?fbclid=IwAR3SFjeaflrsXyCtZ_qdUUeltuK9qzYolmybq0wz5KNH2xP9KdJf1g_uckk