Recognizing bad science by honing your B(ad) S(cience) detector

Last week there was much ballyhooing over a new article on the benefits of native plants in supporting insect populations. I’ve posted on the fallacy of native plant superiority before, pointing out that landscape biodiversity not plant provenance, is most important for supporting all types of beneficial wildlife. Despite robust, published evidence to the contrary, more people and governing bodies believe that native plants are the magic bullet for urban landscapes. (Never mind the fact that there are no plants native to urban environments.)

Using CRAP analysis to assess information:

  • C = credibility. Are the authors experts in the field of interest?
  • R = relevance. Is the information applicable to the field of interest (in this case, management of plants in urban landscapes)?
  • A = accuracy. Is the information grounded in current, relevant science?

  • P = purpose. What is the underlying reason that the information is being shared?

This most recent paper warrants a careful dissection as it has gone viral online. For me, the first red flag is that there are no plant or soil scientists on this team. The first two authors, who were responsible for developing the main ideas and designing methodologies, are both ecologists by training. The other authors are involved in insect collection and identification as well as ecological modeling. Not having plant and soil scientists on the team to ensure science-based practices are followed during landscape modification is a serious oversight.

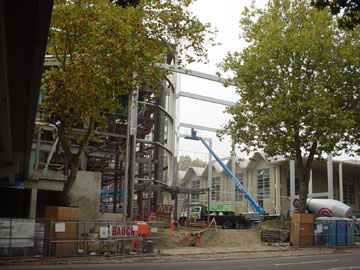
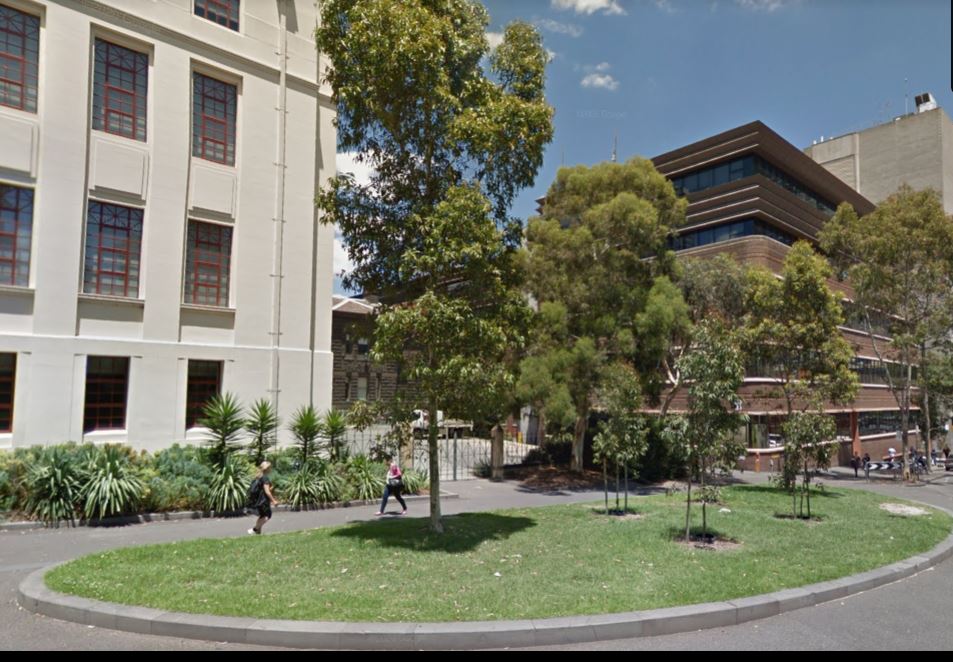
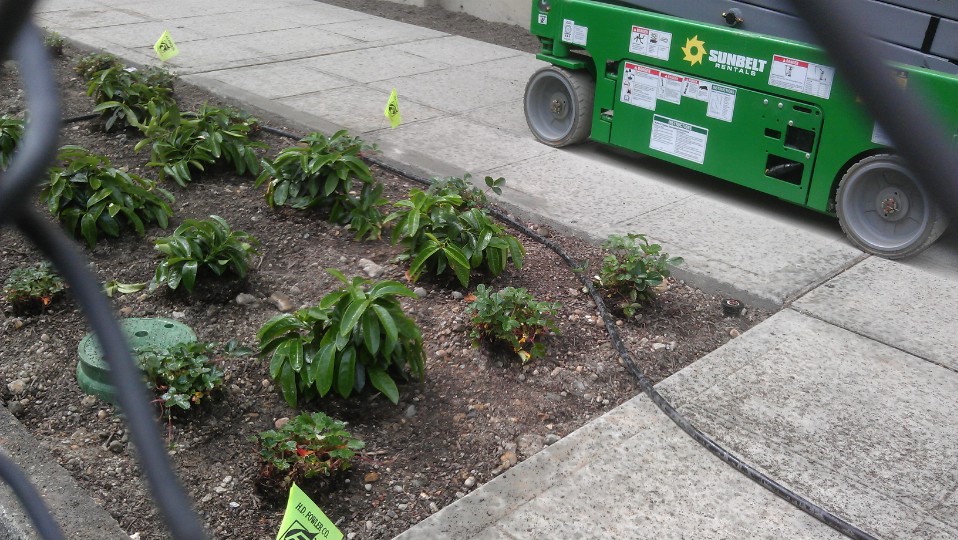
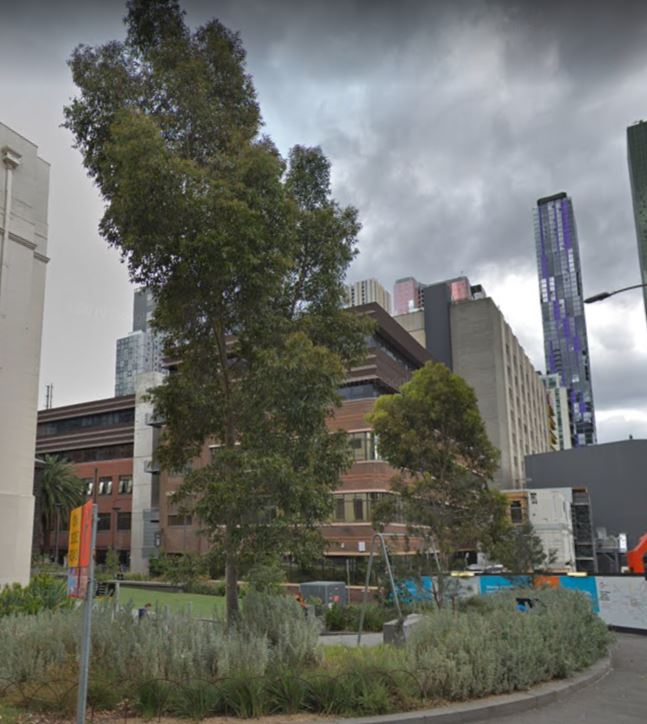
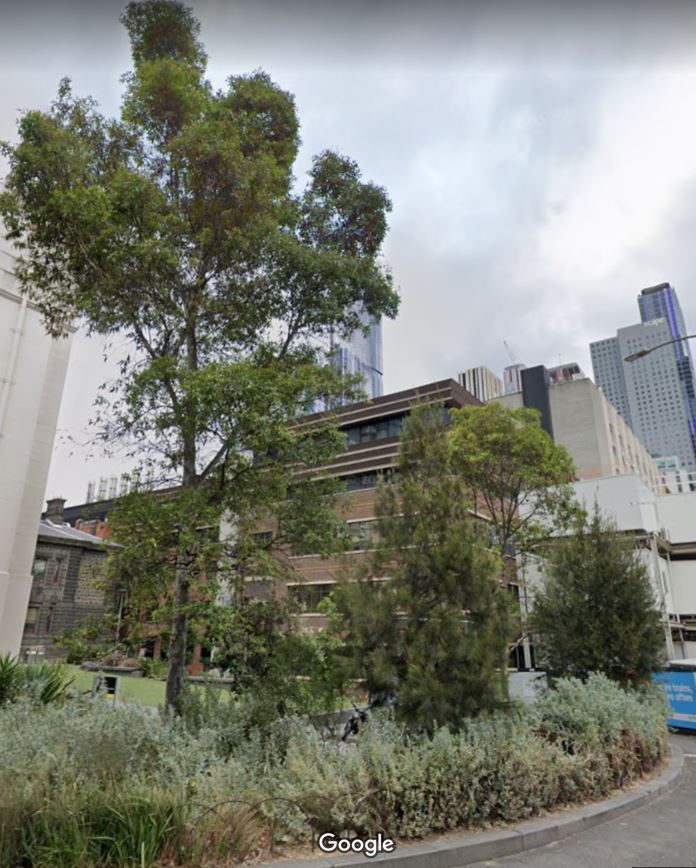
The pupose of this photo montage is apparently to show how healthy the site is after “greening.” A much better indicator would be street-level comparisons. Which you can see later in this post.

The methods section regarding the study site is astonishingly vague, given this is essentially a landscape plant installation and management project (i.e., applied plant science, not ecology). A well-designed experimental project would include control plots, replication of treatments, site analyses (including soil type and texture as well as soil testing for nutrients and organic matter), and detailed explanations of how the site was prepared, how plants were selected, prepared, and installed, and what site management occurred post-installation.

Here is the section on how this “experiment” was designed:

“In mid- April 2016, 80% of the site was substantially transformed through weeding, the addition of new topsoil, soil decompaction and fertilisation, organic mulching and the addition of 12 indigenous plant species…Selected plant species met the criteria of being locally indigenous to the City of Melbourne and represented a range of growth forms— including graminoids, lilioids, forbs and trees— requiring no ongoing management such as watering and fertilisation.”

The purpose of the methods section is to provide detailed explanations on how the study was conducted so that it could be replicated by other scientists elsewhere in the world. There is no way to replicate this study properly, as the methods are vague and very possibly not based on applied plant and soil sciences:

  1. “Addition of new topsoil” As we’ve pointed out in this blog numerous times over the past 14 years, you don’t add new topsoil to landscapes.
  2. “Soil decompaction” What is this? Does it involve tllling, which would directly affect the health of the two existing trees?
  3. “Fertilization” What is the fertilizer? When was it applied in the process? At what concentration and based on what data was it applied? You need to know baseline levels of nutrients before you can rationally add any fertilizer.
  4. “Organic mulching” What material? Compost? Cardboard? Bark? How deeply was it applied?
  5. “Addition of…plant species” Were these bare-rooted or simply popped out of the pot and dropped in the new topsoil?
  6. “Requiring no ongoing management such as watering” News flash: newly installed plants REQUIRE irrigation during the establishment period regardless of their nativity. And this site now contains substantially more plants than before, meaning increased competition for water and other resources.

The problems with this nonscience-based approach to landscape plant management can be see by comparing the two spotted gum trees that were on site before this project began. Corymbia maculata is a threatened native species in Australia and the continued health of these trees should have been paramount before any site work was initiated.

Unfortunately, these sorts of projects, conducted by teams with no soil or plant scientists and published in journals that are not specific to urban plant and soil sciences, are neither well-designed nor useful. The mindset of many researchers outside the applied plant and soil sciences is that there’s no real science to preparing soil, installing plants, and maintaining the site. This current paper does not even meet the standard of being experimental: it is merely a report on what happens to insect populations when a landscape is altered. There is no basis for comparisons. Any conclusions drawn are anecdotal.

It’s bad science.

Diagnosing Disasters: The Case of the Mopey Mophead

What happened to my hydrangea???

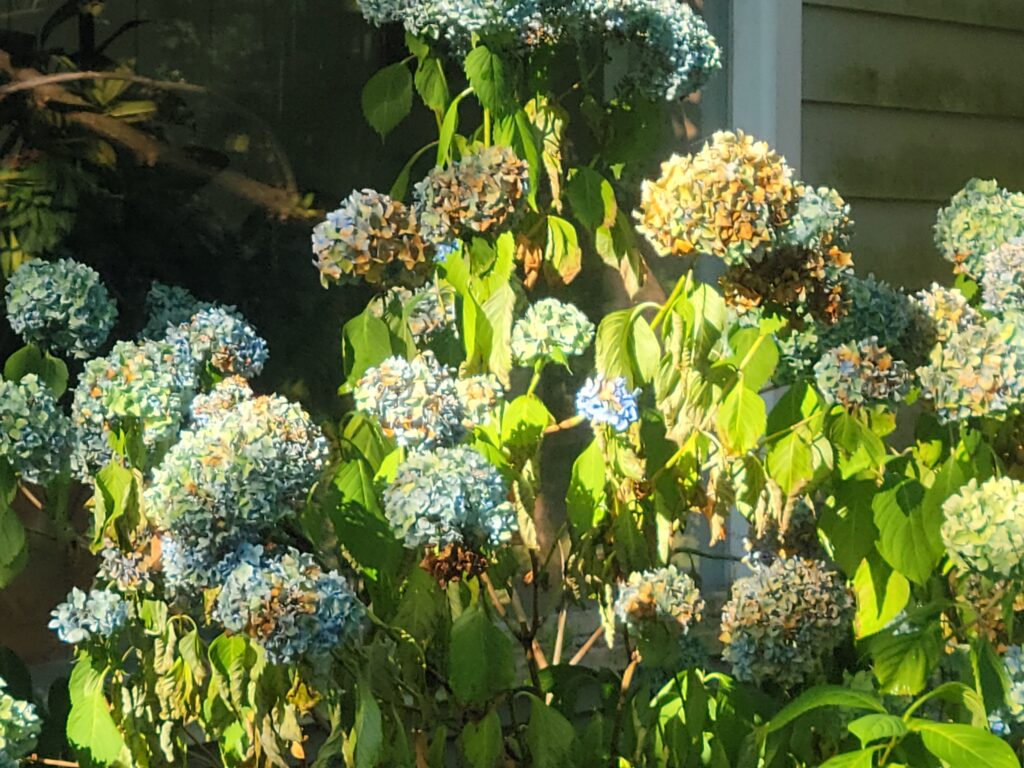
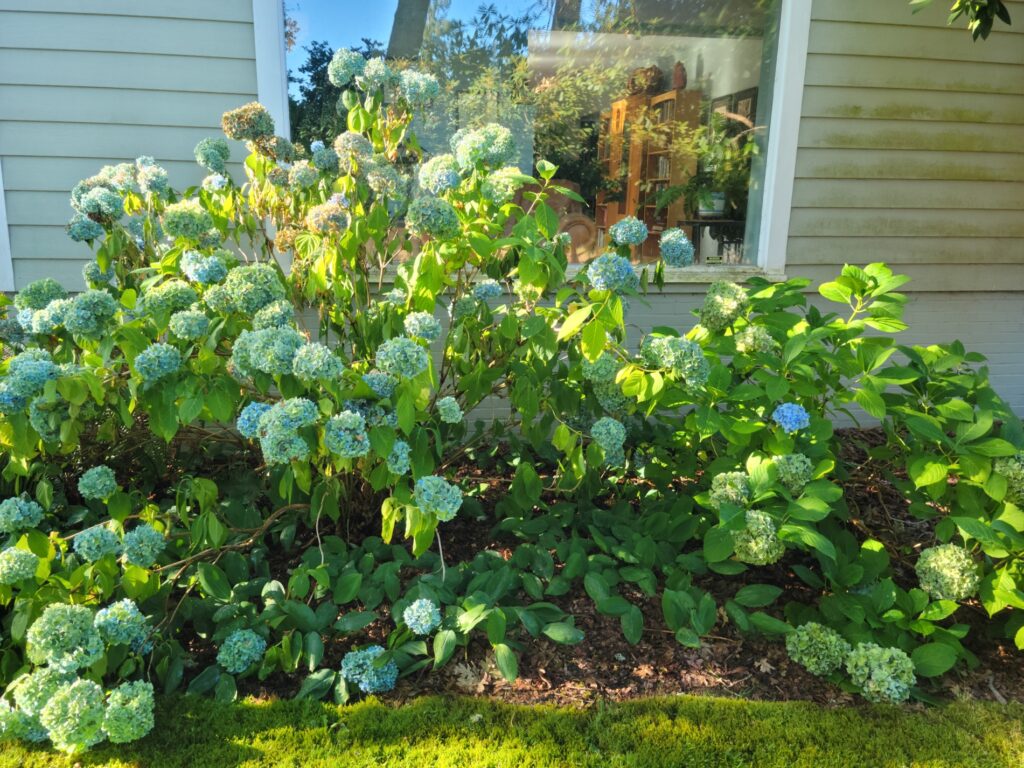
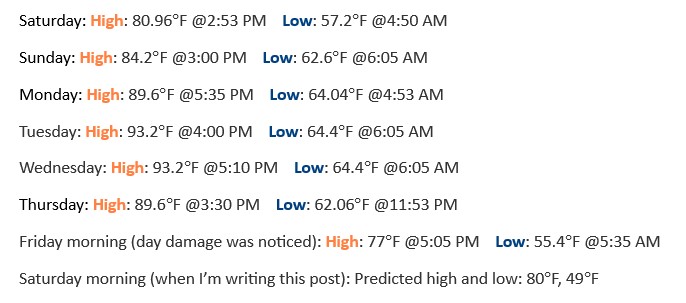
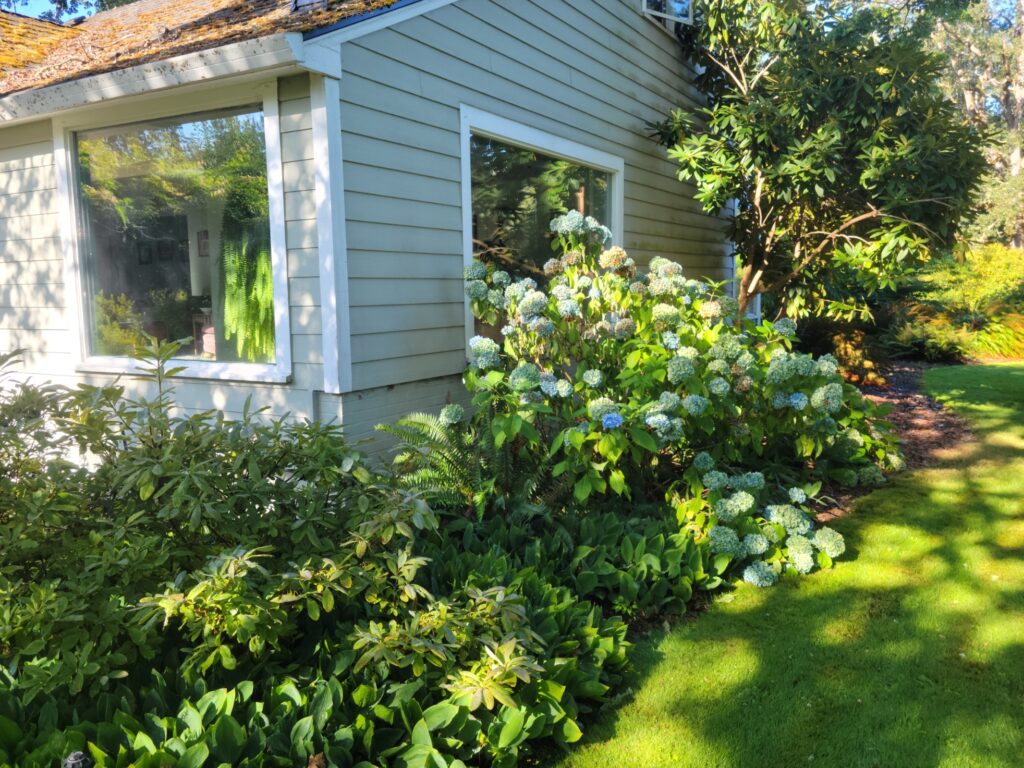
This past week I was out of town at a conference, and since the week was supposed to be a scorcher I made sure my husband was going to water the container plants daily. And indeed, temperatures were in the 90s, dropping to the mid-60s at night. But the container plants looked great when I got home and I didn’t think much more about it until the next day. My husband called me into the living room, pointing at our massive mophead hydrangea which looked like it had been torched. Leaves and blossoms were wilted and browning. Every single stem was affected. Since our landscape is on an automated sprinkler system, what the heck happened?

This is when caution and objectivity are important. I wasn’t going to go cut the whole thing down, even though it looked terrible. Instead, I made observations of the site (not just the plant):

  • The site is on the north side of the house, where plant only receive direct sunlight in the morning and late afternoon during the summer.
  • No other plants were affected – not even the smaller hydrangea to the west of the damaged plant.
  • The irrigation system had been working normally.
Damaged hydrangea on the left generally outperforms the smaller, undamaged hydrangea on the right.

When diagnosing plant problems, it’s also important to consider the history of the plant and the landscape:

  • Hydrangea is at least 55 years old.
  • No soil disruption or other site disturbance
  • No pesticide or fertilizer use
  • Mulched with arborist wood chips
\Collect all pertinent information, especially recent weather data.

Given that no other plants were affected, the problem was with the hydrangea itself. Hydrangeas use a lot of water to support their large, thin leaves and massive flower heads. When the weather suddenly turned hotter and temperatures stayed abnormally high in the evenings, the plant could not recover its water loss overnight. Many flowers and leaves experienced terminal wilt – that means they lost too much water and tissues turned brown. Other flowers and leaves were able to recover as day and night temperatures returned to normal.

All other landscape plants were able to tolerate the spike in temperatures – just not the hydrangea.

What could we have done to prevent this? Had we seen the wilt occurring during the day, we could have turned on the sprinklers manually in that part of the landscape. Hydrangeas are a good indicator of low soil water. In future summers, as we continue to experience hotter and drier conditions, we will keep an eye on our hydrangea and use additional irrigation if necessary.

Horse(tail) sense or nonsense?

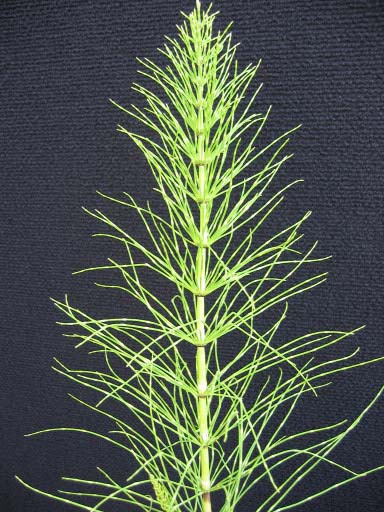
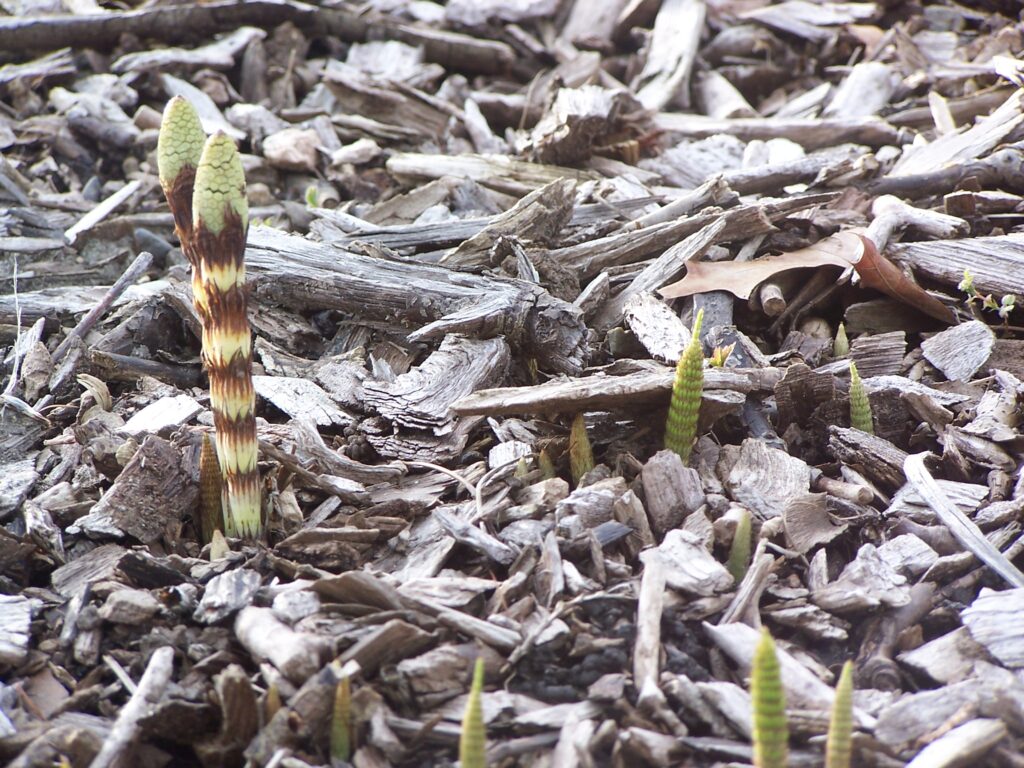
One of the most annoying weeds in garden and landscape beds is horsetail (Equisetum spp.), a genus native throughout North America and most of the rest of the world. They have survived since prehistoric times because they are highly adaptable to their environments and are almost impossible to eradicate. There is great debate among gardeners on whether to pull or cut horsetail. Online you can find statements such as this:  “…each time you break the stem, little portions under the soil regenerate new plants. Essentially, you will be creating more horsetail.” This and many other websites recommend cutting instead.

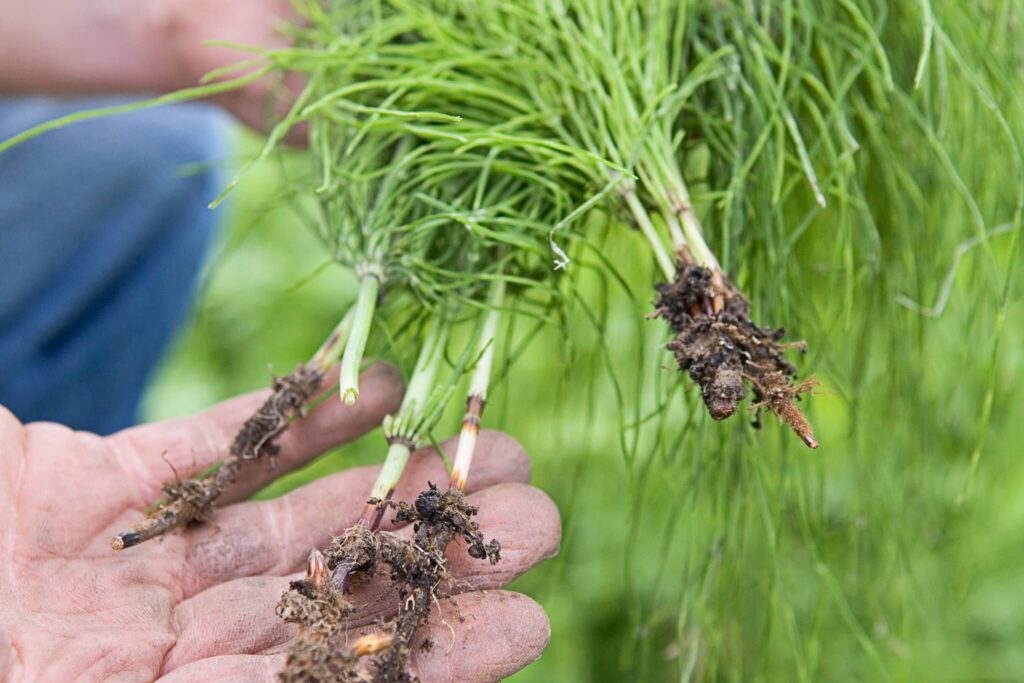
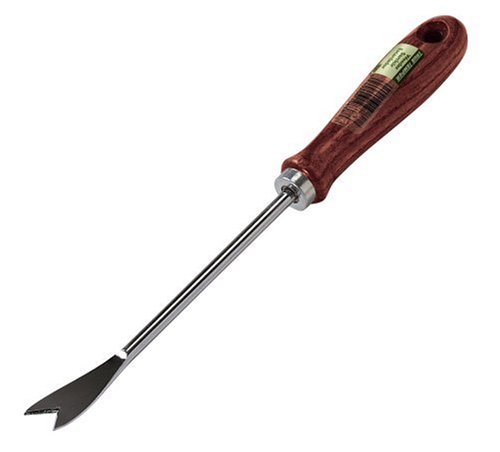
Unfortunately, this is bad advice. The trick to eradicating any perennial weed without chemicals (or at least bringing them to manageable levels) is to starve them to death. Plants depend on their roots (and rhizomes in the case of horsetail) to survive, so anything that reduces root resources is going to eventually kill the plant. Obviously the more above-ground material you can remove, the less photosynthesis occurs and fewer resources are transported to the roots. Pulling weeds, especially if done with a forked weeder (also used in this post), is going to remove far more material than simply cutting weeds off at the surface.

Once you start a weed removal project, you have to keep after it: once is not enough. There will be rhizomes or roots left underground to support new stem growth, and once they reach the soil surface they will start producing resources to send to the roots. “Constant vigilance” is needed to keep these shoots in check. You can significantly reduce the repeated pulling by adding a thick layer of arborist wood chips to the newly weeded site. This forces the roots to put even more resources into stem growth to reach sunlight, meaning fewer weeds and more successful, desirable plants.

Thin layers of wood chips won’t impede horstail. You’ll need 6 or more inches to keep sunlight out.

There is one caveat for controlling any weed that spreads underground. If you can’t control the spread from adjacent properties, you will not be able to eradicate the problem. In such cases, you may want to install a root barrier along the edges of your gardens. You simply dig a trench and install the barrier of your choice, making sure there are no gaps between the sections. Treated timbers, concrete pavers, and other materials that are slow to degrade can be used. The depth is going to depend on your soil conditions and the weeds of interest; some preliminary digging to determine the depth where you find weedy rhizomes and roots will help. Keep in mind that root barriers will also interfere with the root spread of your desirable plants.

Well, howdy neighbor!

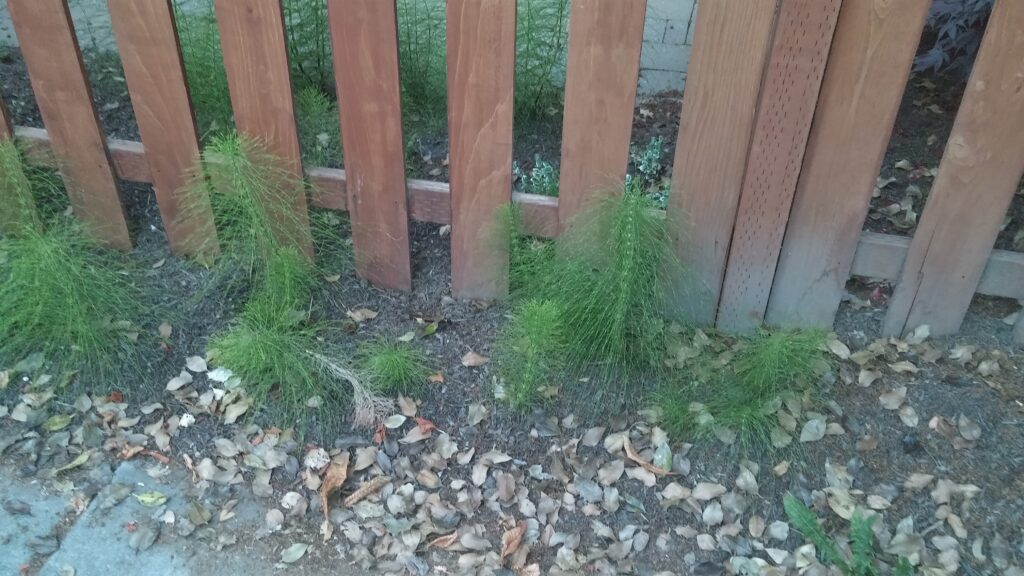
If root barriers are not an option, the other method you can try is to densely plant low shrubs and perennials along the property line to create a competitive line of defense. The roots will compete for space, water, nutrients, and oxygen; the crowns will create a shaded environment where invading stems struggle for space and sunlight. You will still have to watch for invaders, but the amount of weeding needed will be far less than it was before. And don’t forget the mulch, both for the benefit of your barrier plants and to force invaders to use more resources to get their stems to the surface.

This method works for ALL plants – not just horsetail. (Plant physiology is funny that way.) Bindweed, English ivy, Himalayan blackberry, and Canada thistle are all weeds that I have personally controlled through physical removal and deep mulching with arborist wood chips. If you’ve had success with this method on another aggressive weedy plant, be sure to post a comment!

Arborist chips help us maintain weed-free ornamental beds.

You can have your trees and save water, too!

Cake is good, but so are trees.
Photo courtesy of Flickr user Son of Groucho.

Today’s blog post title is a play on the old saying “you can’t have your cake and eat it too.” In other words, once you’ve eaten the cake, you don’t have it anymore. Likewise, if you have a tree, you’ll need to use a lot of water which might run afoul of water restrictions. Or will it? Today’s post demonstrates that you can have healthy trees AND save water at the same time.

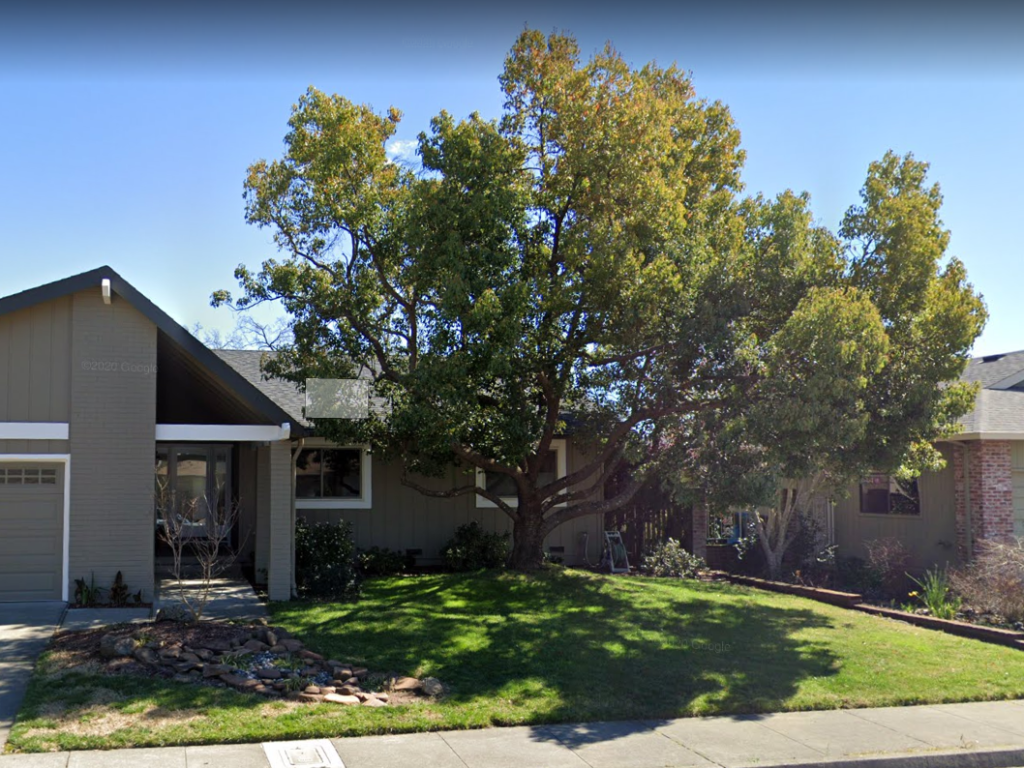
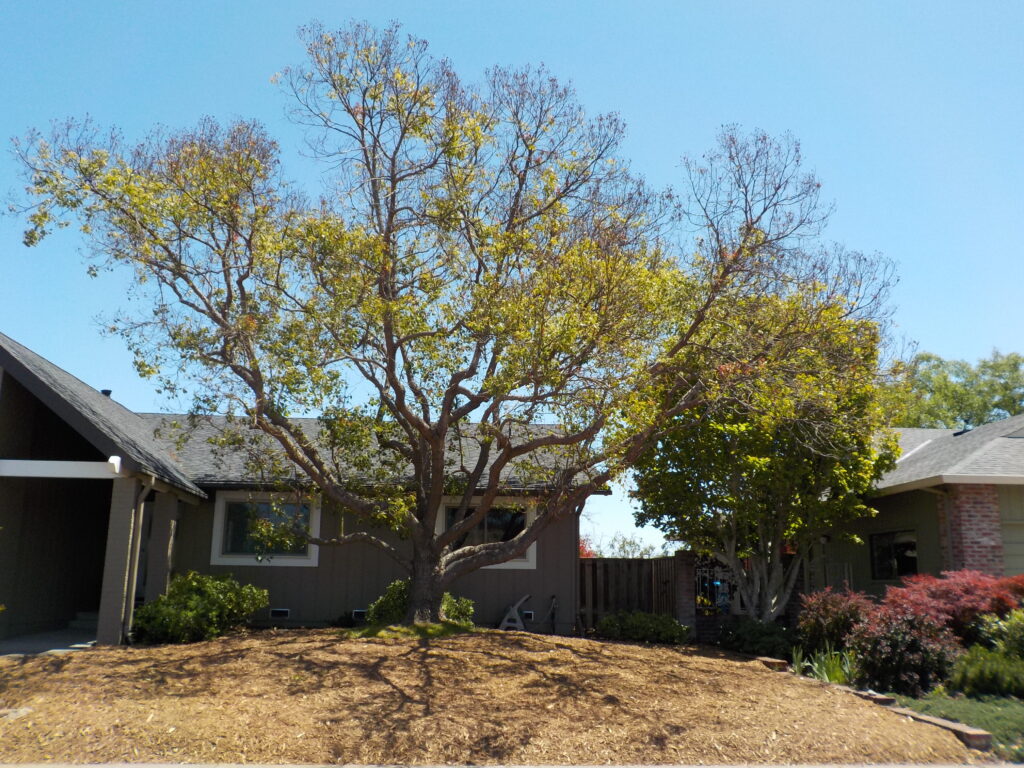
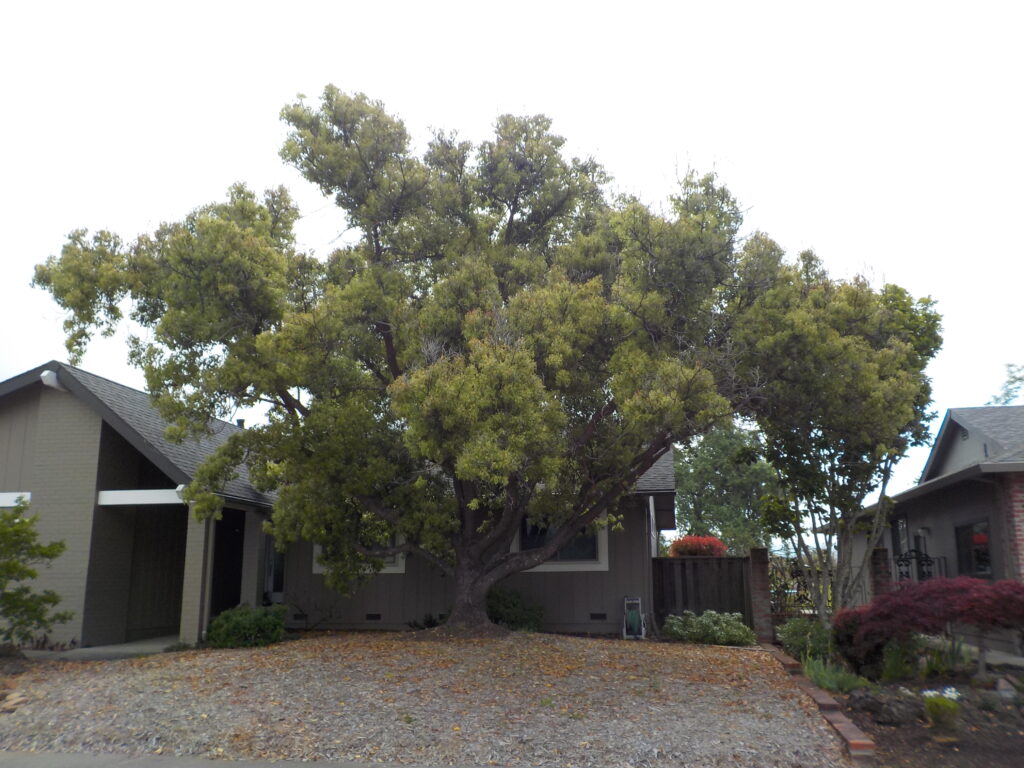
May 2019. The camphor (and the lawn) is relatively healthy before three years of drought. Photo courtesy of Google Maps

A few weeks ago I got an email from ISA-certified arborist and blog reader Curtis Short, who wanted to share his success with rejuvenating a prized landscape tree that had become severely stressed as a result of residential water restrictions. The tree is camphor (Cinnamomum camphora), which grows well in warmer parts of the country (USDA hardiness zones 9b-11b). This particular tree is about 40 years old and the showpiece of a residential landscape in the Oakmont neighborhood of Santa Rosa, CA.

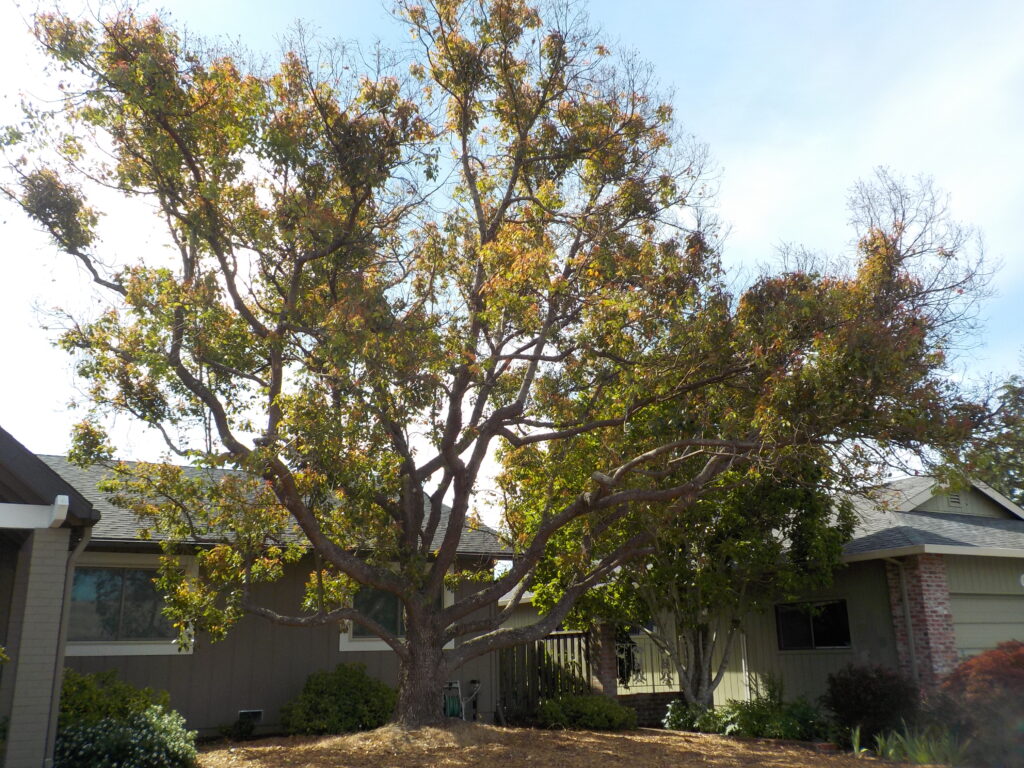
March 2022. Nearly all the leaves on the camphor have become chlorotic after three droughty years and lack of irrigation since the previous spring. Photo by Curtis Short.

In March 2022 Curtis received an email from the homeowner (a retired meteorologist) who was concerned about the declining health of the camphor after irrigation was discontinued in mid-2021. Prior to this, the sprinklers were run daily during the dry months to support the tree as well as the surrounding lawn. The lawn, with its shallow but dense root system, recovers quickly with seasonal rains. The damage to the tree’s root system, however, has led to leaf senescence and drop.

Two other arborists had given the tree a thumbs down: one said it needed to be removed and the other said that even if the tree recovered it would never regain its original form. Curtis chose a different approach, suggesting that the homeowner could resuscitate the tree by:
*removing competition (the lawn) for water and nutrients,
*refining the irrigation system,
*applying nitrogen to stimulate new leaf growth, and
*supplying an arborist chip mulch to the landscape.

May 2022. Tree resuscitation efforts began in March, as chlorotic leaves continue to drop. Photo by Curtis Short.

In April the homeowner applied glyphosate to kill the lawn, removed the old lawn sprinkler system, and replaced it with a 100-foot drip irrigation system near the canopy dripline and outwards where most of the tree’s fine roots are located. (For those who are curious, the system consisted of 12-inch spaced Techline emitters with a 0.9 gallon per hour dispersal rate.) Next, a layer of arborist wood chips were applied to at least a 4” depth. In May, ten pounds of ammonium sulfate (a great source of nitrogen) were applied on top of the chips and watered in.

June 2022. Tree recovery begins along with a new irrigation regime. Photo by Curtis Short.

The homeowner’s irrigation plan departed dramatically from the original daily watering routine. Being a retired meteorologist, the homeowner was naturally interested in collecting data. The original two lawn stations each put out 45 gallons per day, for a total lawn water usage of 630 gallons per week. With the new drip irrigation system, irrigation was limited to one 35 minute application per week, with a total weekly water use of 105 gallons.

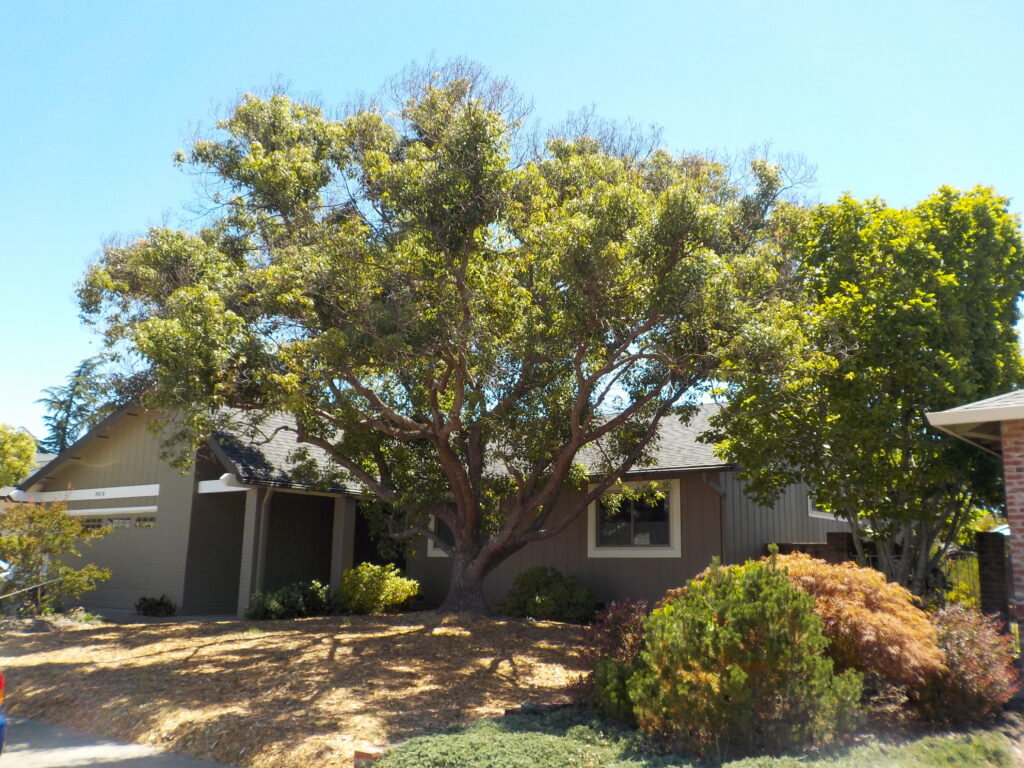
July 2022. The tree canopy has markely improved in color and density with new leaf growth. Photo by Curtis Short.

Curtis photographed the tree’s recovery as a way to reassure the homeowners that the tree was neither dead nor disfigured. The homeowners are now aware that trees cannot go “cold turkey” in efforts to reduce irrigation water use. Locating the drip system beneath the mulch layer means evaporation is reduced and that the mulch layer stays hydrated, supporting its population of mycorrhizae and other beneficial microbes.

September 2022. In August, a second application of 10 pounds of ammonium sulfate was applied and watered in. Photo by Curtis Short.

I appreciated Curtis sending me this case study as we all face the likelihood of hotter temperatures and possible water restrictions. Reduction of water-hungry ground covers, judicious use of water, and a living layer of arborist wood chips are key to helping our landscapes survive.

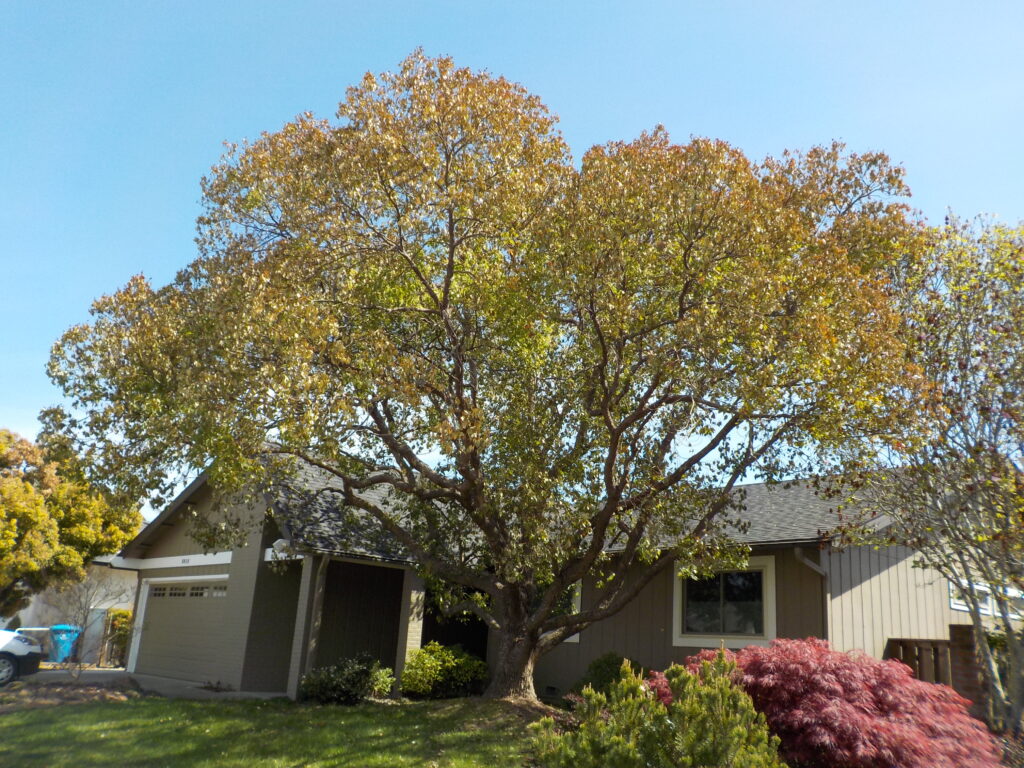
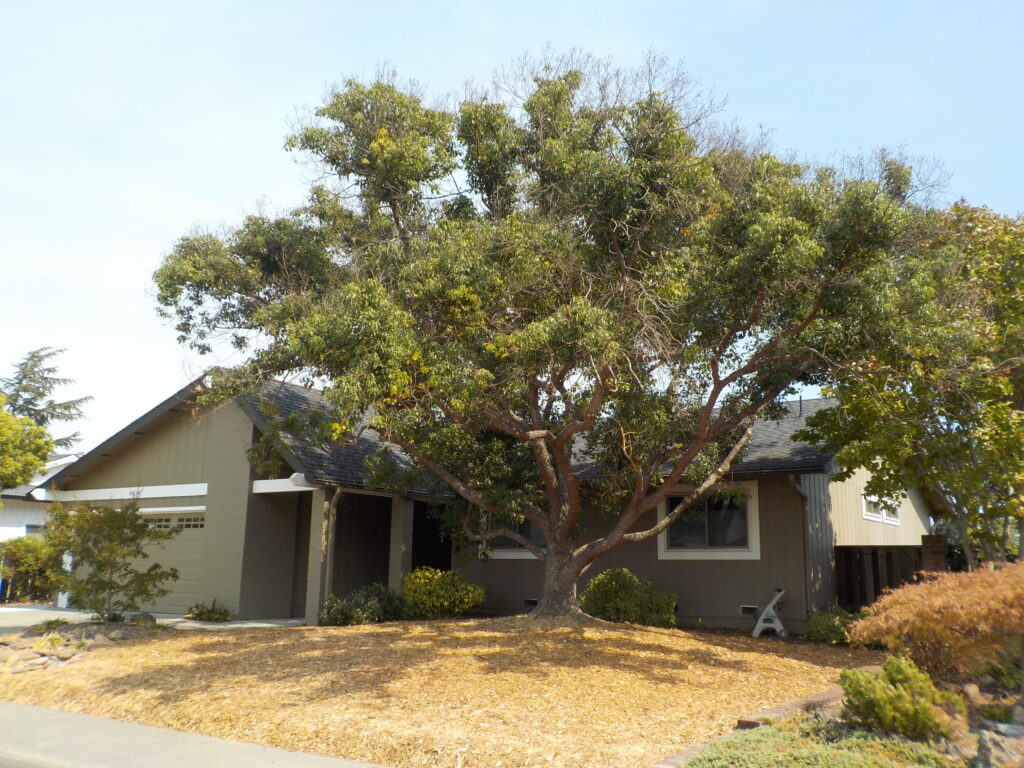
May 2023. A little more than a year after resuscitation efforts began, the dark green tree canopy is full and healthy. Bare branches have all but disappeared, and the tree’s health is arguably better than it was in 2019 before the three-year drought period. Photo by Curtis Short.

Deep sheet mulching is “bat-sheet crazy”

“Mimicking nature”

I just returned from one of my self-imposed retreats where I have no cell phone service nor internet. This means I can focus on writing without interruption. One of my projects this year is to publish a scientific critique of permaculture (stay tuned for that late 2023). Part of my process is to read popular permaculture publications and I am focusing on Gaia’s Garden.  Earlier I’ve posted some general critiques of the book (you can find them here, here, here, and here), but until yesterday I had missed a big, fat problem: a section labeled “The Power of Sheet Mulch” (pages 71-75 in the first edition).

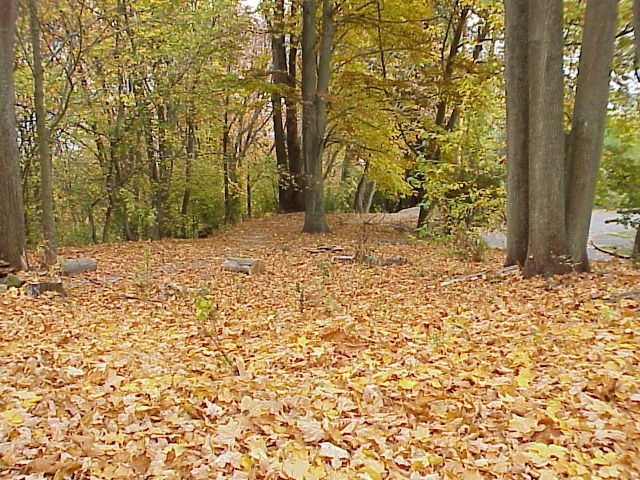
Natural leaf mulch

First of all, let me state that part of permaculture philosophy is to follow nature in our gardening practices. There are few examples of sheet mulching in nature. The only one I can think of occurs in deciduous forests, where fallen leaves can create a sheetlike cover several inches deep. Combined with microbial activity and wetter soils, these sheets create low soil oxygen conditions. During the winter the leaves are broken down and by spring have degraded to the point that air and water movement have resumed enough to support plants as they break dormancy.

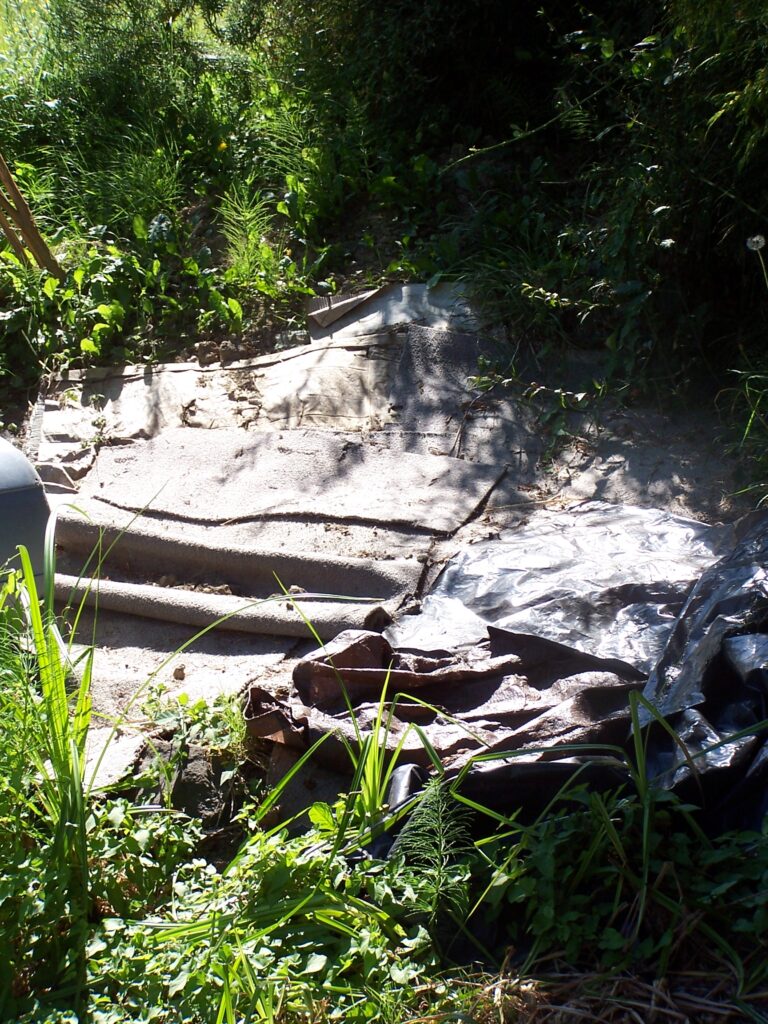
Old carpet is recommended as part of a permaculture mulch

In contrast, here’s what permaculture recommends. At the outset, let’s acknowledge that none of the practices discussed remotely resembles any natural process. Furthermore, there are no science-based citations to support the practices or the claims of success. It’s completely anecdotal.

A sidebar provides the methods and materials for constructing the “ultimate, bomb-proof sheet mulch.” Here’s a condensed step-by-step breakdown:

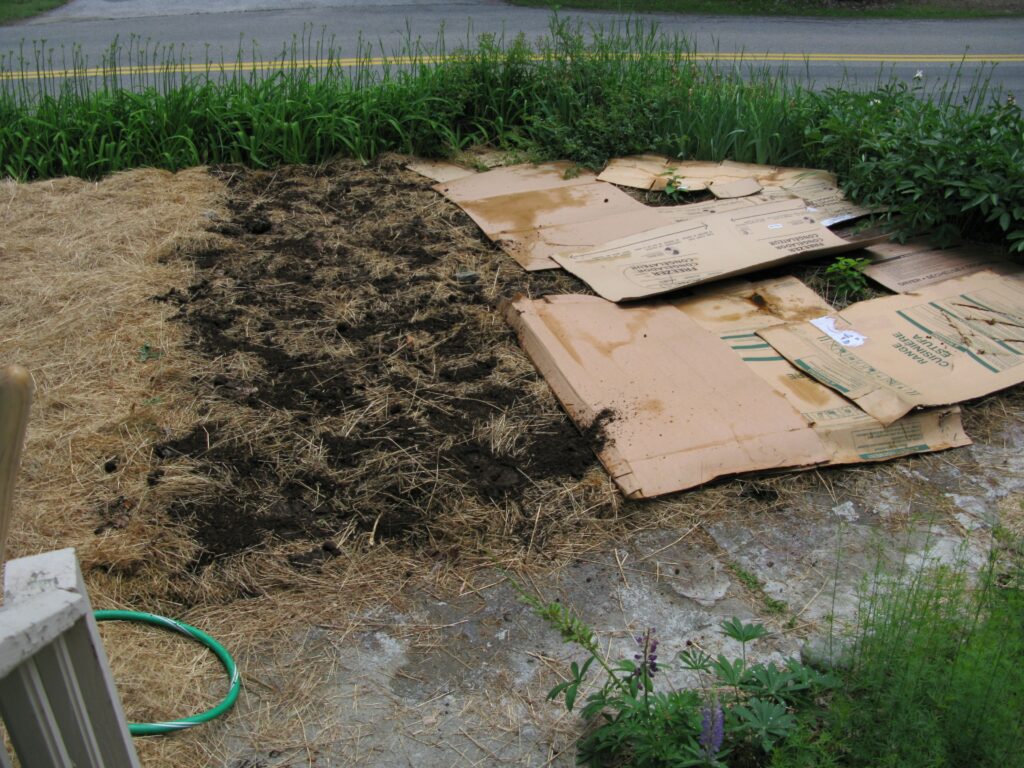
  1. “Soil amendments, depending on your soil’s needs” are added to the top of the soil before the sheet mulch is applied. How you determine your soil’s needs involves either “us(ing) a soil test or your own understanding of your soil’s fertility to guide the type and quantity of soil amendments.” These include “lime, rock phosphate, bonemeal, rock dust, kelp meal, or blood meal.”
  2. A “thin layer of high-nitrogen material” is placed on top of the amendments.
  3. Next we “…apply a layer of weed-suppressing newspaper or cardboard (or even cloth or wool carpet).”
  4. On top of the sheet mulch another thin layer of high-nitrogen materials is applied.
  5. Next we are to add “about 8 to 12 inches of loose straw, hay, leaves…” or any other bulk mulch materials recommended.
  6. Then we should add “an inch or two of compost” or “you can substitute manure or several inches of easily compostable material.”
  7. Finally “2 inches of…straw, fine bark, wood shavings…” or other listed “weed- and seed-free organic matter” adds the finishing touch.

So. Much. Stuff.

So let’s add this up: a half-inch or more of sheet material, an inch or more of high nitrogen material (from those two additions), 8-12 inches of bulk mulch, another 1-2 inches of compost (or several inches of the substitute), and 2 inches of “the finished look” materials. That’s at least 12 inches of wet (oh, each layer is sprayed down with water as it’s applied), poorly drained material on top of the soil.

I’m all for following nature in how we manage our gardens and landscapes. But deep sheet mulching isn’t natural. It’s bat-sheet crazy.

Sheet (mulch) cake, on the other hand, I could get behind. (Photo courtesy of Hayes Valley Farm)

My “Dirty Dozen” garden products

Image courtesy of Rotten Tomatoes

“Dirty Dozen” is one of those short, alliterative phrases that’s easy to remember and fun to use. In today’s post, I’m applying it to garden products whose production or use can be damaging to the health of ecosystems, environments, and even humans. How many of these products are in your garden shed, or appear in ingredient lists of other products? Each short description below has one or more links to additional information. After you count them up, see how you rank on the Charlotte Scott Meme-O-MeterTM

Product manufacture damages ecosystems

A protected peat bog in British Columbia

Peat moss. Peat moss bogs are slow-growing ecosystems that store vast amounts of carbon. Removing peat moss destroys these ecosystems (which can take centuries to regrow) and releases C02 into the atmosphere. Do a little experimentation with sustainably sourced or locally available crop residues and see if you can find a more environmentally friendly substitute.

Kelp forest at low tide. Image courtesy of NOAA Photo Library

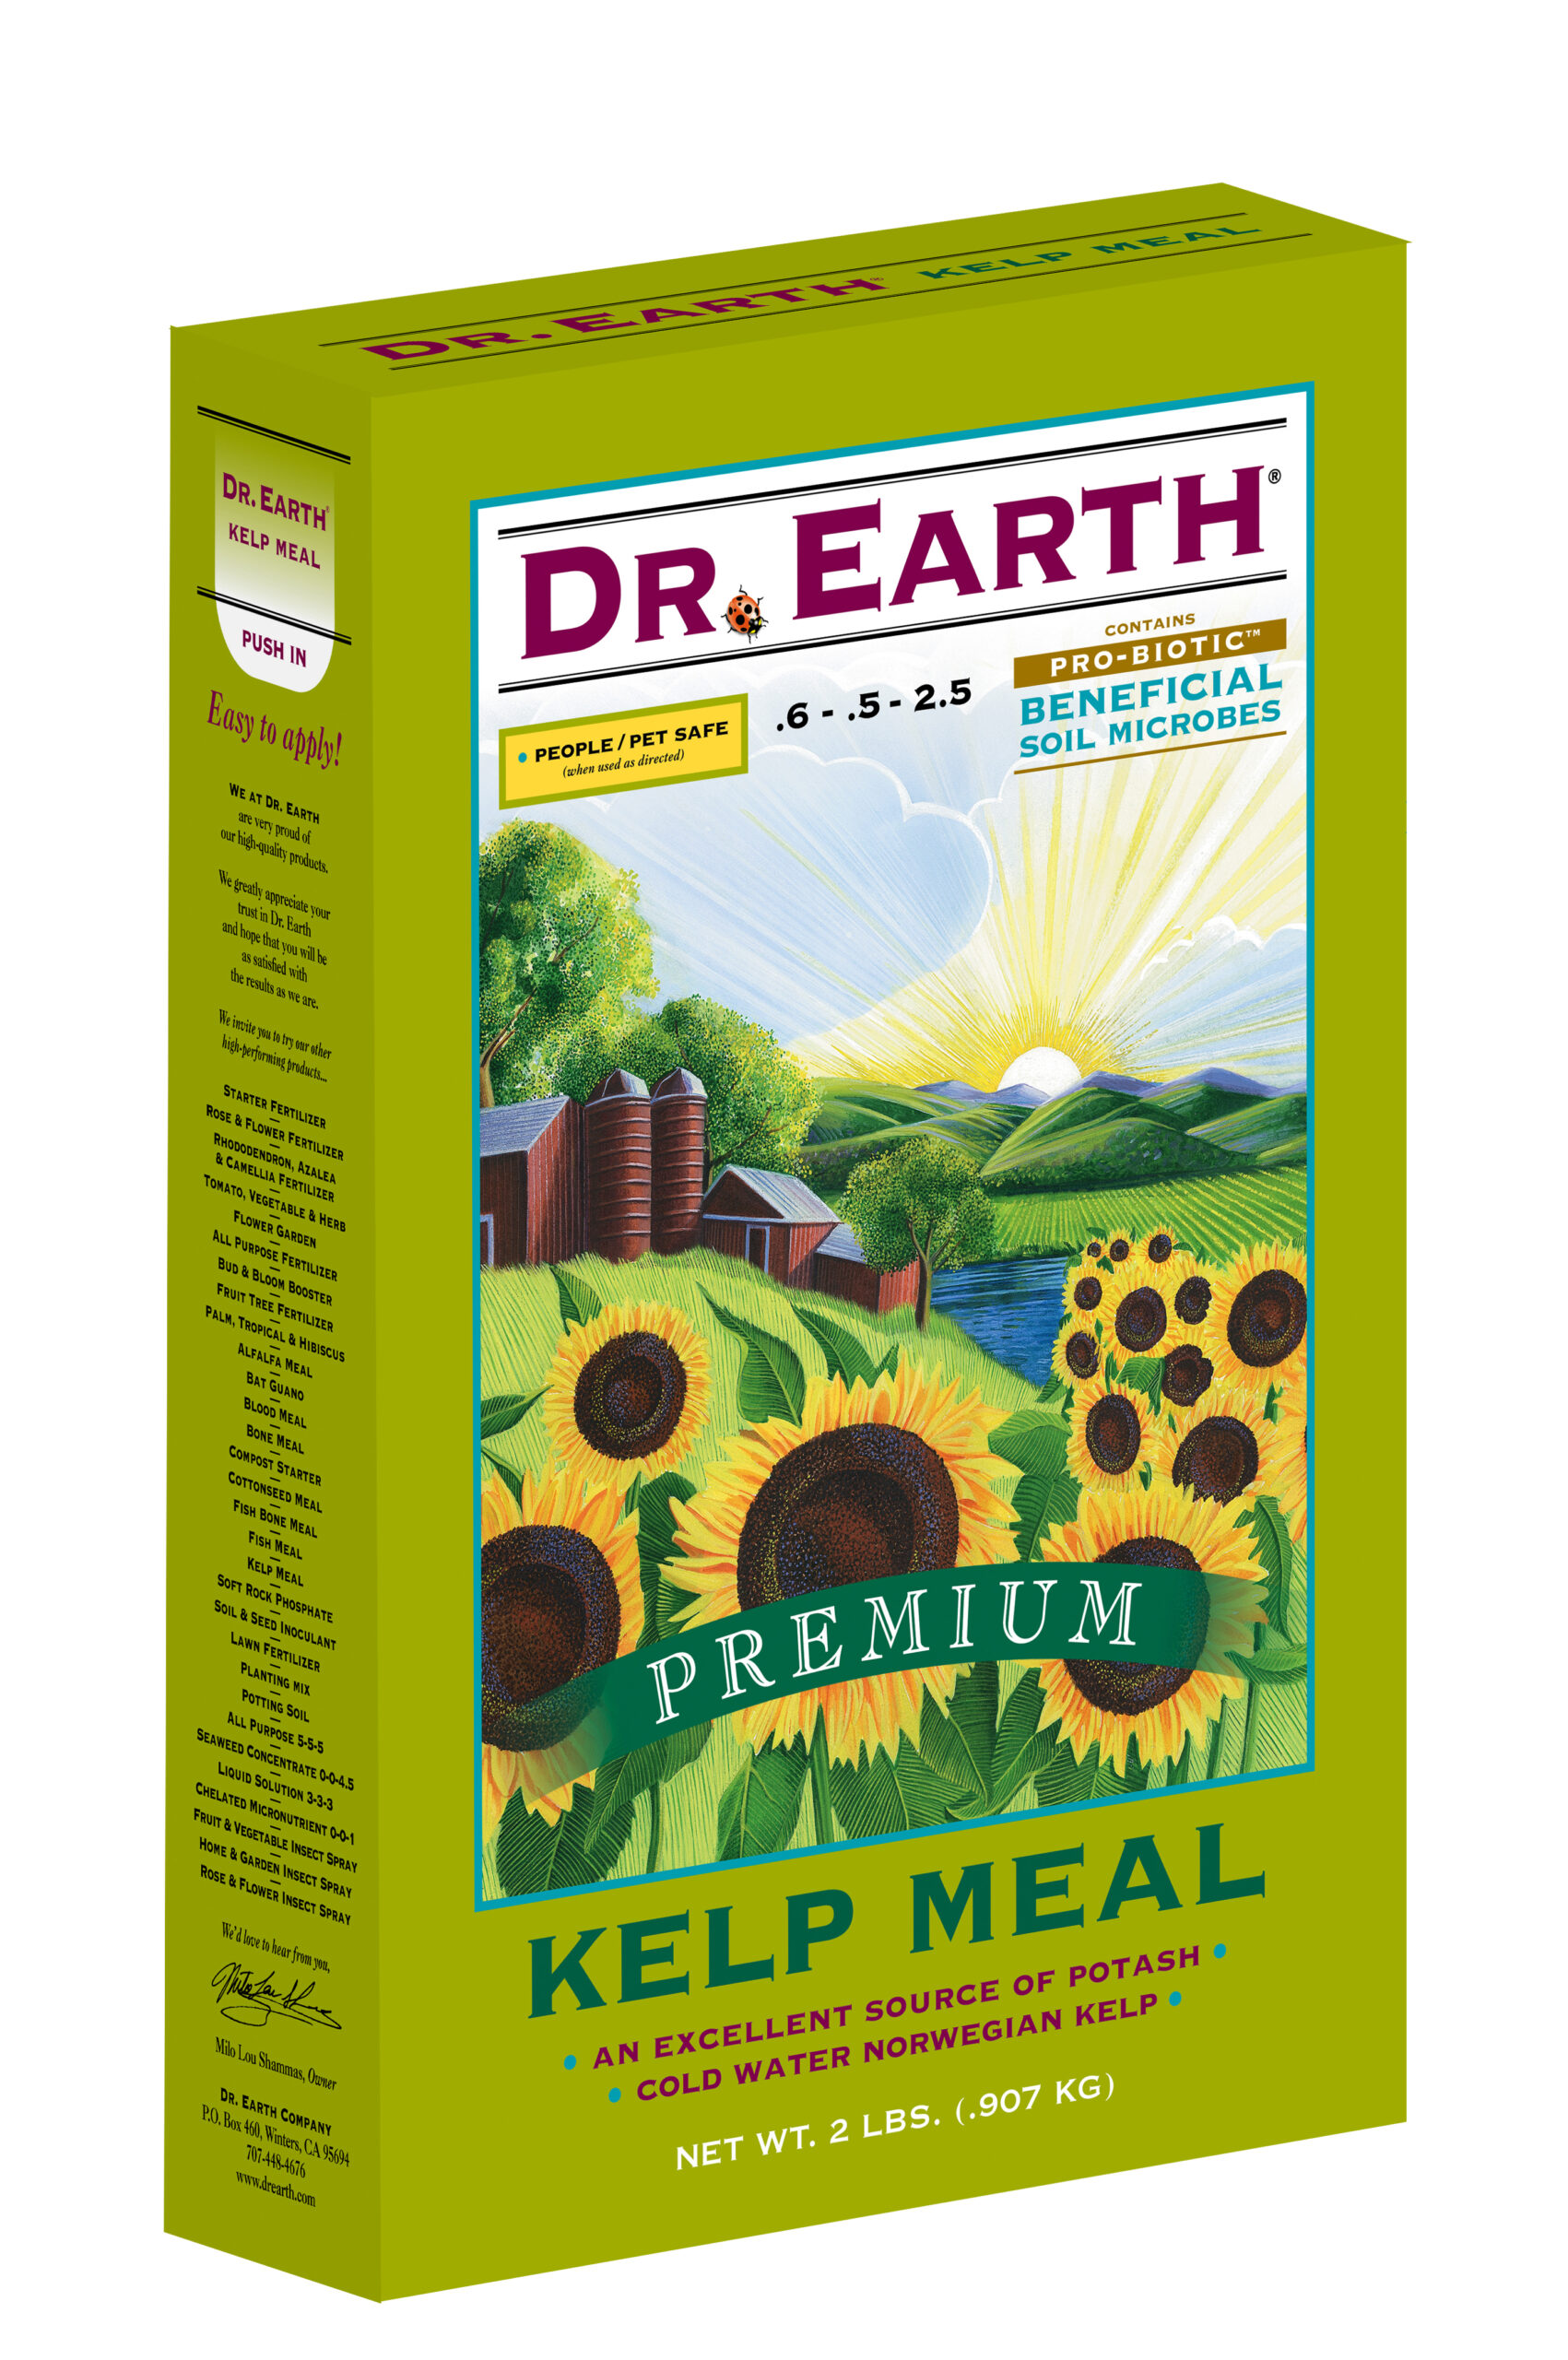
Kelp. Kelp, or macroalgae, are the basis of intertidal and subtidal food webs. Removal of these plants creates underwater deserts where little life can be found. Restoration can be done, but it’s a slow and expensive process. Ask yourself why you think you need kelp and compare this to the facts.

There are lots of sources of manure on the internet…

Bat guano. Seems like a reasonable use of a waste product, right? Nope – and Dr. Jeff Gillman explained why in a post more than a decade ago. If you want a sustainably produced, manure-based fertilizer, you can find many options at garden centers.

Products whose use damages garden and landscape soils

Rubber mulch. Look closely and you can see bits of metal from steel-belted tires.

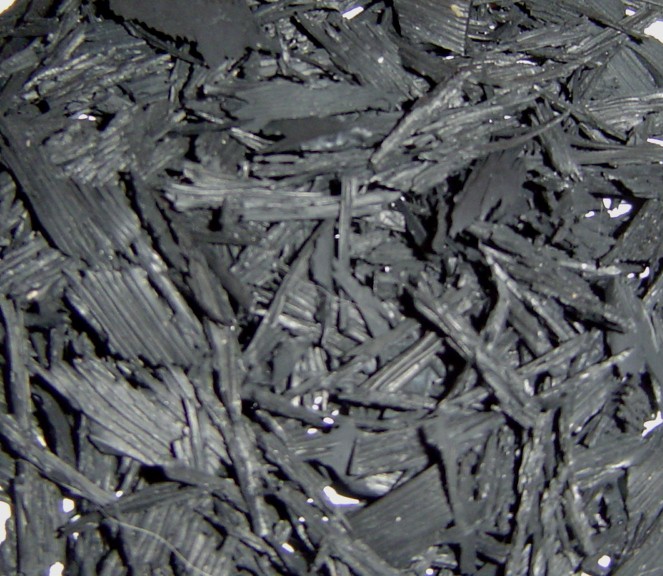
Rubber mulch.  Recycling used tires is a good idea; grinding them up and putting them on top of your living soil, not so much. There are much better mulch choices out there.

Landscape fabric with healthy crop of weeds

Landscape fabric. Landscape fabric does not control weeds, nor is it permeable once installed. It’s a sheet mulch that restricts water and air movement between the soil and the atmosphere. Weeds will quite happily colonize the surface while the roots of desirable plant struggle for water and oxygen below the barrier.

Black Death in a sad landscape

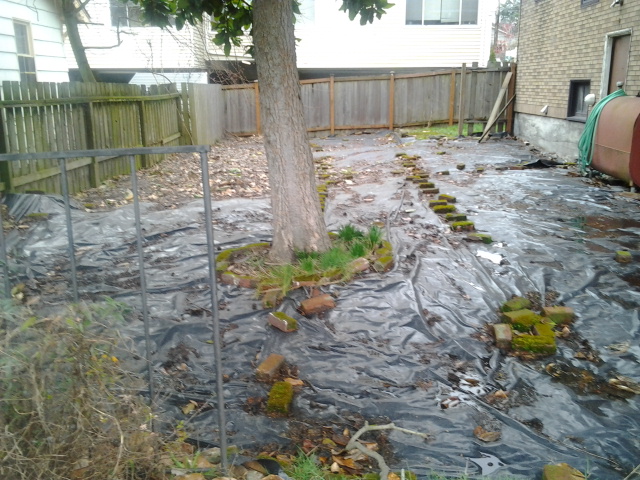
Plastic mulch. There is nothing worse (see chart in this link) you can put on a living soil unless your intention is to kill everything under it. You may see it used in agricultural production, but that doesn’t make it a good choice for your gardens and landscapes. Again, there it a much better alternative to this and all other sheet mulches.

Lots of claims about Epsom salt…but does your soil need magnesium?

Epsom salt. Would you be so excited about buying this stuff if it was correctly labeled as magnesium sulfate? That’s all it is – an inorganic chemical. Despite its soothing name, Epsom salt is not a cure all for anything except a magnesium deficiency in the soil. Overuse can create nutrient imbalances in soils.

Products whose use damages plants and plant-associated microbes

Always check that NPK value before you buy anything

Phosphate fertilizer. The most overused nutrient in home gardens and landscapes, and one that can cause iron deficiency in plants. The only time you should add anything containing phosphate – including compost or other rich organic material – is if you have a soil test indicating a deficiency.

DIY garden remedies. Self-proclaimed gardening experts come up with all kinds of home-made potions as safer alternatives to conventional fertilizers or pesticides. There are good reasons that both fertilizers and pesticides are regulated at state and/or national levels: it’s the only way you can know exactly what the active ingredients and when, where, and how to apply these chemicals. To follow some “chemical-free” recipe from the internet is playing Russian roulette in terms of collateral damage to soils and non-target organisms.

Another fine Black Death product

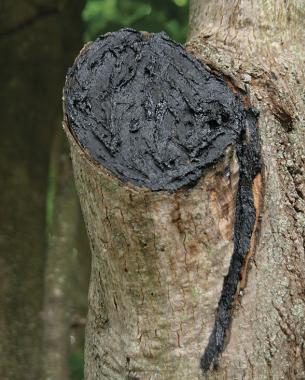
Wound dressings. Unfortunately, many gardeners don’t understand that plants and people respond differently to injury. While antibiotic dressing and bandages are good for healing our nicks and cuts, trees have a completely different response. Slathering black goo or paint over tree wounds is the last thing trees need to seal damage naturally.

Product whose use can be harmful to human health

Read the label before purchasing a hydrogel

PAM hydrogels. PAM (polyacrylamide) hydrogels have limited usefulness in home gardens and landscape – worse, they have to potential to injure people and pets. (There is also a list of references used in the linked article.) After these same materials are used in labs for gel electrophoresis (used for DNA analysis, for example), their disposal is generally regulated. No such regulations exist for using them in the landscape. Hydrogels based on starch or other natural polymers are fine – but avoid anything that contains “acrylamide” or “acrylate” on the label. Better yet, use a well-chosen mulch to absorb and release water to the soil.

Time to take the quiz!

You score zero: Well, well!
You score 1-3: Maybe you’ve been a part of this community for a while or maybe you’re just acutely aware of sustainable products and practices. Either way, the Garden Professors thank you!
You score 4-6: So maybe you recently broke up with your local garden center and are reevaluating some of the products they recommend. Stay strong!
You score 7-9: Oh, bless your heart. Let’s talk.
You score 10-12: So you take the phrase “scorched Earth” pretty seriously, huh?

All jokes aside, sustainability and gardening require constant adjustment and learning. You came here, you read through this list, and you are thinking critically about your practices.

The nitty gritty on how water moves in plants, part 1

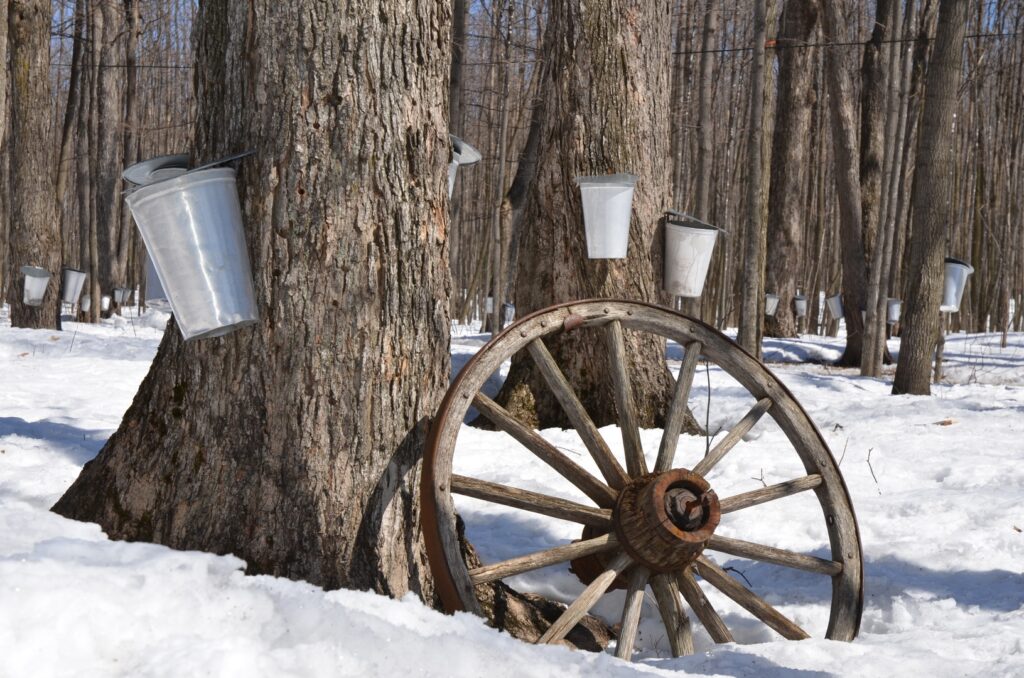
Maple sap – is it in xylem or phloem? Photo courtesy of PXHere.

It’s still too cold here in the Pacific Northwest to see much happening outside, so it seems a perfect time to write about something you can’t see anyway. That “something” is the movement of water and dissolved substances through two pathways: the xylem and the phloem. And before you roll your eyes and go watch TikTok videos, keep in mind that learning about these transport systems is critical to understanding how plants work and caring for them appropriately. To prevent brain overload, we’ll focus on how xylem works this month and tackle phloem next month.

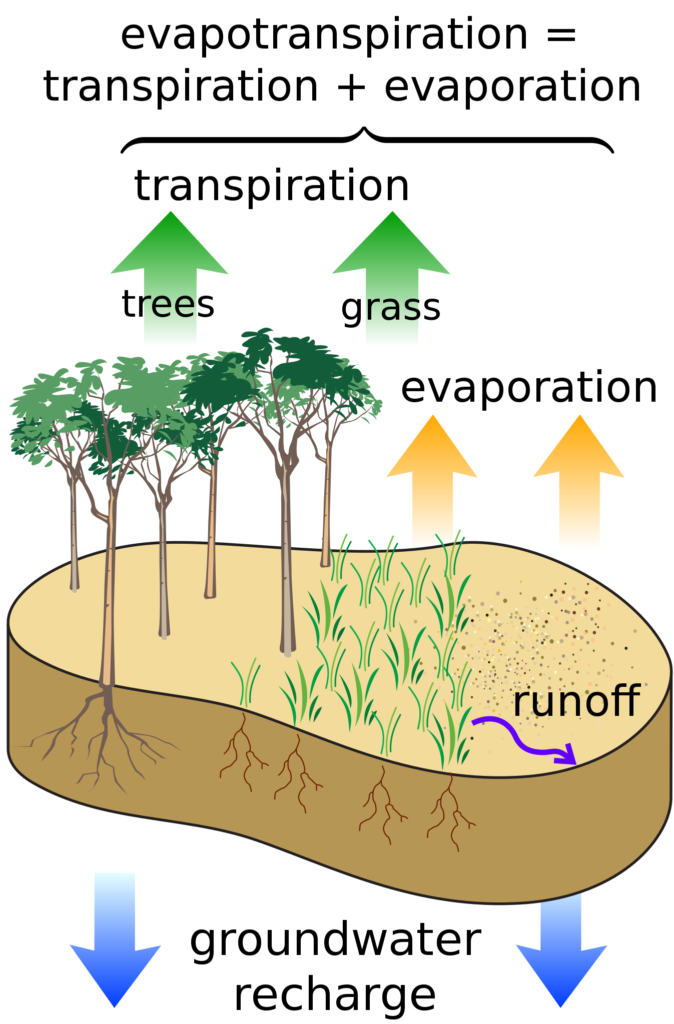
Functional xylem is composed of dead, lignified cells connected into a series of tubes that move water one way – from the roots to the leaves. You can think about xylem like a giant straw sucking water out of the soil and moving it into the atmosphere. You’ll find dissolved substances in xylem water, such as soil minerals and root-stored compounds including growth regulators and sugars. Since this is a one-way highway, everything in the xylem ends up at the end of the straw, which is primarily the leaves. Most of the water dissipates into the atmosphere through the stomata (a process called evapotranspiration) and the dissolved substances are left behind.

Water movement through plants. Photo courtesy of Wikimedia

I mentioned that sugars can be found in the xylem, which will confuse gardeners who correctly associate sugars moving through the phloem. That’s generally true except during late winter when some trees, most famously maples, will produce a sugary sap in the xylem. While the exact mechanism of sap production remains unclear, we know that the sugars are coming from storage sites in the trunk and require a freeze-thaw cycle to enter the one-way xylem highway.

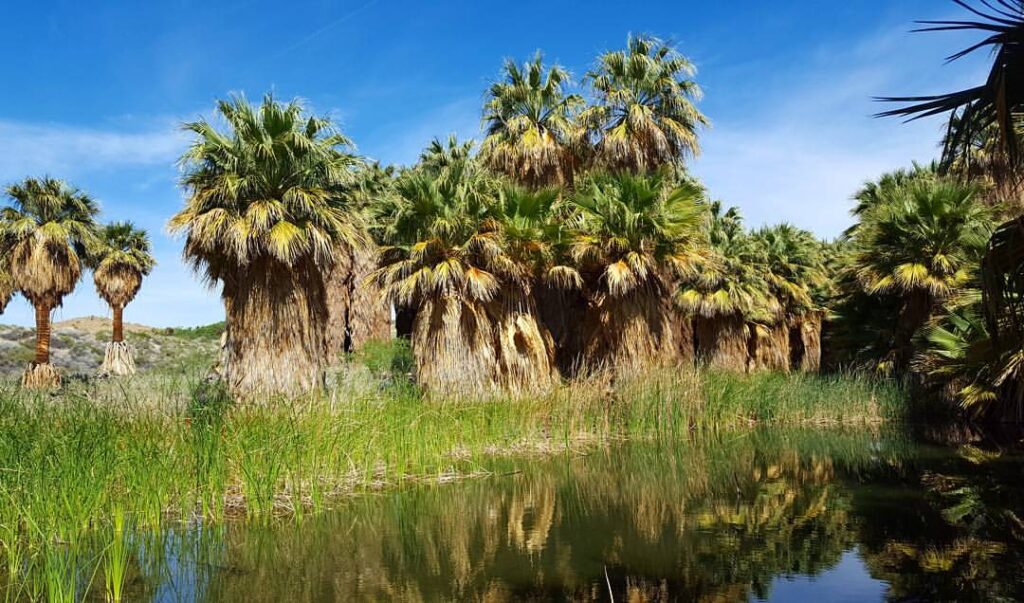
The temperature in the canopy of palm oasis can be much lower than the surrounding air, thanks to evaporative cooling. Photo courtesy of Flickr (Laura Hamilton)

While many people see this process as the plant “wasting” water, it is the only way that soil minerals can reach the leaves. In the summer, evapotranspiration lowers leaf temperature through evaporative cooling. Thus, doing anything to interfere with xylem function (like using antitranspirants) will have a long-term, negative effect on plant health. Likewise, anything in the soil that’s taken up by roots may end up in the leaves – for better or worse.

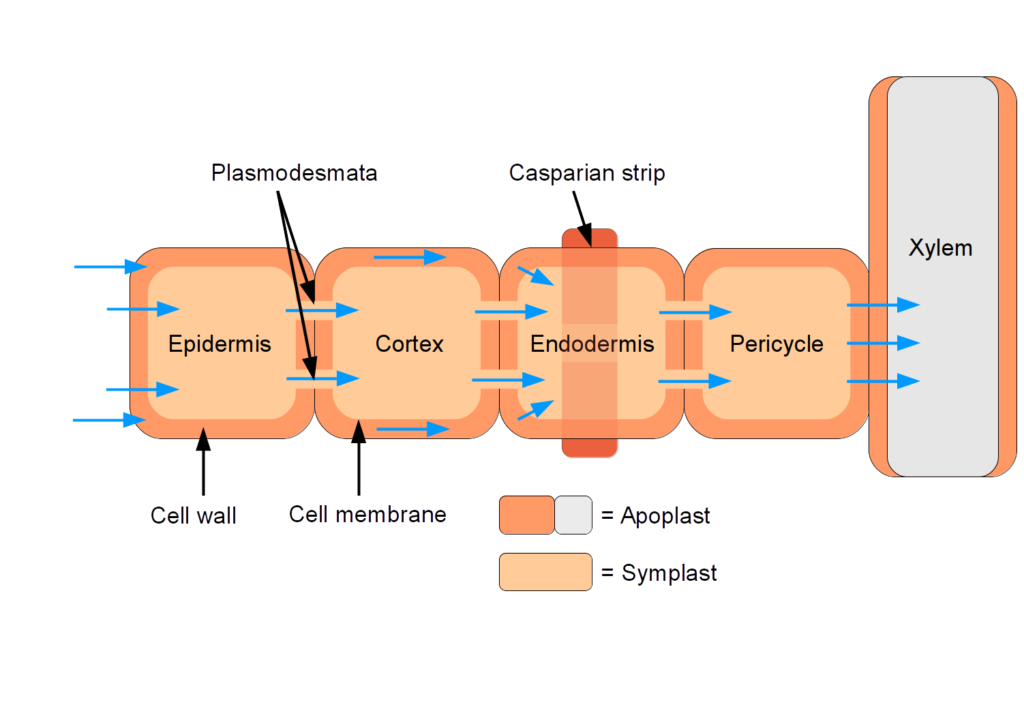
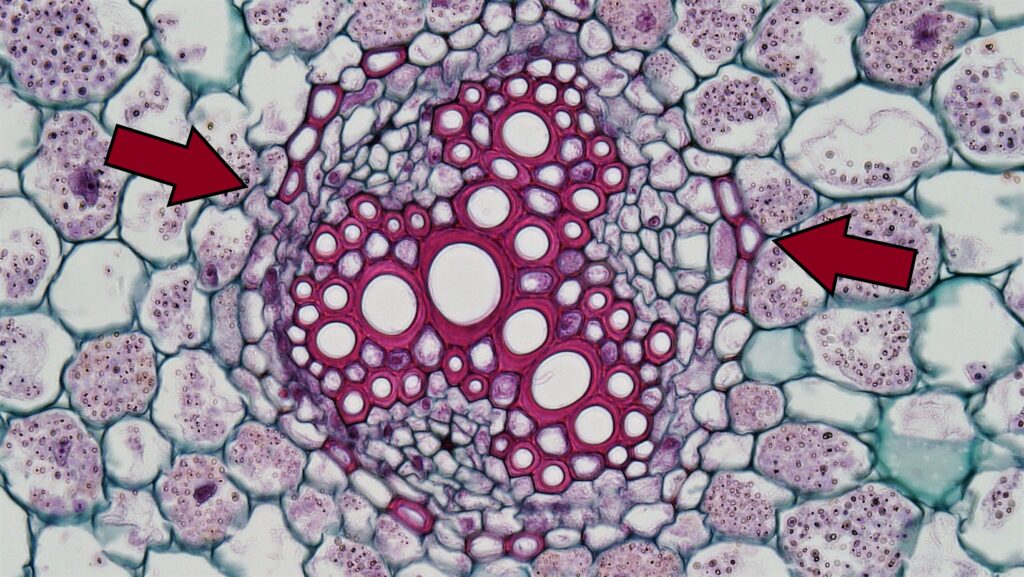
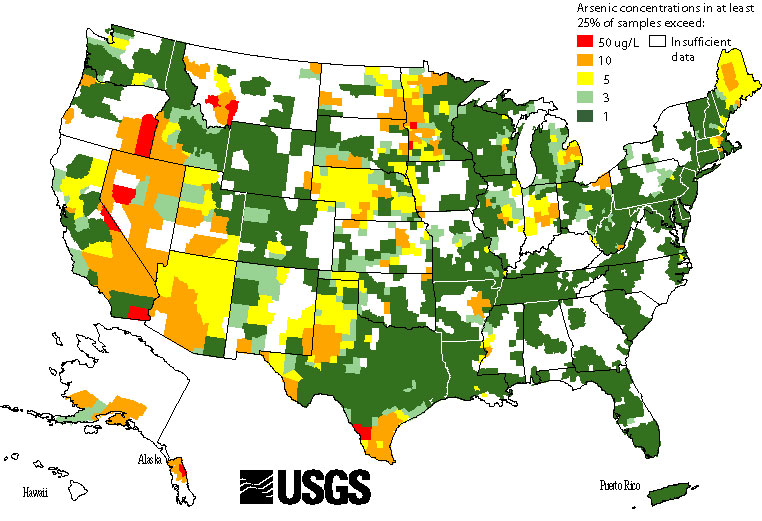
Gardeners need to think about this last caveat carefully. Plant species are highly variable in their abilities to regulate what goes into the xylem and what is left behind in the root tissue. Regulation is controlled by a barrier called the Casparian strip, which is a ring of living cells that require water (and its contents) to pass through their membranes to enter the xylem. You can think of the Casparian strip as a customs office at a country’s borders: some things are allowed in, and others are forbidden. Depending on how selective this border crossing is, soil contaminants can be left behind in the roots or carried through the plant. This is why it is so very, very, important to have your vegetable garden soils tested for heavy metals and other contaminants, and to take precautions if contaminants are found.

Arsenic is only one of many heavy metal contaminants that might be in your soils.

Another “drainage solution” that makes problems worse

Lack of surface drainage suggests problems below ground

I received an email this week from an arborist colleague who had been sent an “engineering solution” which claims to help with rooting issues in clayey soils or areas where root area is reduced. There was a spiffy diagram accompanying this which I’ve reproduced below.

I could dissect this for you and point out all the problems right now, but instead I’d rather supply you with some factual information and let you apply it to this “engineering solution.”

  1. Planting hole material that is not the same as the surrounding soil will have reduced water, air, and root movement due to the abrupt changes in texture. The hatched material in the pit appears to be different from the surrounding soil, leading to the assumption we’ve got modified backfill. Here’s a peer-reviewed journal article that discusses the fallacy of soil amendment.
  2. “Augured sump drain/root channel bores” are simply modified French drains. French drains serve to move free water (i.e., water that is not in soil pores) somewhere. Where “somewhere” is in this case is unclear.
  3. French drains and other drainage systems do NOT reduce the amount of water that soil holds. Field capacity is the term used to describe a saturated soil. A sandy soil has a low field capacity and drains quickly. The higher the clay content of a soil, the higher the field capacity and the slower the drainage.
  4. “Drainage material” placed beneath the root zone will slow water movement and create a perched water table above the “drainage material.”
  5. Drains as well as soils that are full of standing water have no oxygen. Roots will not grow where oxygen is unavailable.
Stop. Just…stop.

I don’t think I need to belabor these points any further. The bottom line is that you are going to create textural discontinuity problems in the planting pit if you follow these guidelines.  

“This one secret hack will save you time and money!”

I’m resorting to clickbait tactics to get your attention. Here’s another – “Warning! Graphic photos follow!”

Uncorrected roots in containers or landscapes will create chronic water stress problems for trees.

If you have failing trees on your own property or on property you manage, you need to do one simple thing before you assume that pests or disease are responsible: you need to determine whether the root system is healthy and functional.

Now, I know you can’t see underground, but you can draw some informed conclusions based on whether you can see the root flare. To find the root flare, pull away any mulch or groundcover that’s obstructing your view. Once you can see soil, you should be able to see the root flare. If your tree looks like a utility pole (meaning you can’t see the flare), then it’s been planted incorrectly. This single mistake will have myriad consequences:

No flare = no chance

  1. It’s buried too deeply – the flare needs to be at the surface.
  2. If it’s buried too deeply, it’s likely the tree was planted without removing the materials surrounding the roots. Bare–rooting woody plants before planting is crucial to their survival.
  3. Roots that are buried too deeply will not have sufficient oxygen to establish a fine root system for water and nutrient uptake, much less develop any structural roots.
  4. Moreover, without removing the materials around the root, the roots are less likely to establish into the surrounding native soil. Neither are you able to remove poor structural roots. Check out this post for more information.
  5. A structurally flawed root system, stressed for oxygen and encased in layers of clay (or potting media) and various combinations of burlap, twine, and wire baskets, is not going to establish quickly or well. Increasingly, it’s not able to supply sufficient water to the growing crown.
  6. Oxygen-stressed roots will die, compounding the reduced water uptake problem.
  7. As the crown experiences chronic water stress, it will experience dieback while opportunistic pests and disease take advantage of a tree unable to chemically defend itself.
  8. Opportunistic pests and diseases are not the cause of tree failure – they are simply indicators of an environmental problem. Proper diagnosis is discussed here and here.

Bare-rooting plants allows you to correct defective structural roots before planting.

You should be able to confirm lack of root establishment by performing the wiggle test (that’s the secret hack). This will allow you to see whether the soil around the roots moves. If it does, that means the roots are not established. If the tree has been in the ground for more than 6 months, it’s probably not going to establish. The sooner you can dig up and correctly replant a relatively newly planted tree the better your chances that will recover and establish.

The wiggle test!

Understanding how weird weather affects our plants

Nutrient deficiency? Or something else?

I’d intended to write the column earlier in the year, but it’s as relevant now as it was in the spring. This post will familiarize you with how unseasonable weather can affect your plants. Though I’ll be focusing on my own location in Tacoma, the phenomena are global. You just have to pay attention to what happened last week, last month, last year in your own location.

Our two potted Japanese maples

Our spring started out wet and cool, which is nothing new. But it was REALLY wet and REALLY cool compared to normal. This meant that our trees and shrubs had plenty of water to fill their expanding leaves and blossoms – but the lower than normal temperatures affected leaf growth. These dwarf Japanese maples had lots of leaves, but they were tiny! And they stayed that way, because once the leaves begin to lay down cuticle, they don’t expand any longer, even when it gets warmer. These maples put on a second flush of growth in the summer. Look at the difference in leaf size, determined solely by ambient temperature.

We had an abundance of flowers on our fruit trees – so dense that I put off pruning some of our heritage apple trees so we could get an even bigger crop (our black Angus love apples). But summer rolled around and…virtually no apples on ANY of the trees. What happened?

Normally, our apple blossoms are opening when there is lots of insect activity

Well, that cool spring ensured that most of our pollinators were late to emerge from overwintering. I had wondered about them in the spring, as I could only see a few pollinating flies and no bees. But sure enough, we had almost zero pollination. No apples this year. Next year if the weather is similar I’m going to try using my battery-powered leaf blower to pollinate these trees. I’ll take pictures.

This chart only goes through August 28. We had no rain until October 20th.

Fast forward to summer – for us, a record-breaking drought (again). Our temperatures weren’t as high as last year, but we still had very hot weather and no rain. For our landscape it’s not a problem, as we have well water for irrigation. But those gardeners who have little or no supplemental irrigation may very well find that their woody plants and perennials don’t perform very well next year: perhaps fewer flowers or branch dieback will appear. This is due to root dieback that happened all summer in unirrigated conditions. The damage is only seen in the following spring, when there aren’t enough roots to supply water to emerging buds.

Crown dieback from water-stressed roots.

Being able to predict the impact of specific weather events on your landscape plants is key to avoiding misdiagnosis and subsequent misuse pesticides or fertilizer in a futile attempt to rescue them.

Oh, and if you are wondering about the photo at the top, you’ll have to look at a post from 2009 to see what’s going on.