We’ve discussed barerooting/rootwashing trees before, and research on this controversial topic continues. But what about smaller shrubs and woody perennials? What about herbaceous perennials? Basically, what about PERENNIALS???
I’ve always made a practice of rootwashing everything except for annuals. They don’t last long enough to suffer the perils of potbound plants. But many gardeners are nervous about disrupting more fragile root systems. Let’s see what happens when we do.
A little context: we’ve just moved to our family farm, which has AMAZING spring flowers that the bees love. But once those are gone…there’s nothing. I was desperate to provide some food for bees and butterflies, so it was off to the nursery to shell out a few hundred bucks for the beginnings of our south-facing pollinator garden – a previously barren spot left after construction of our porch.
So I bought Lavandula stoechas ‘Bandera Purple’ and ‘Winter Bee’, Salvia ‘Caradonna’, Agastache ‘Acapulco Deluxe Red’ and ‘Blue Boa’, Erysimum ‘Winter Passion’, Verbena ‘Homestead Purple’, and Lobelia laxiflora. I depotted and soaked them in a water bath, using a gentle hose setting to loosen up media in the center. For most of these plants, a massive root disk at the bottom of the pot had to be cut off like a giant slice of salami. If necessary, I “tickled” the remaining rootball to work out the rest of the media.
Here is Erysimum ‘Winter Passion’ potted, depotted, and washed.
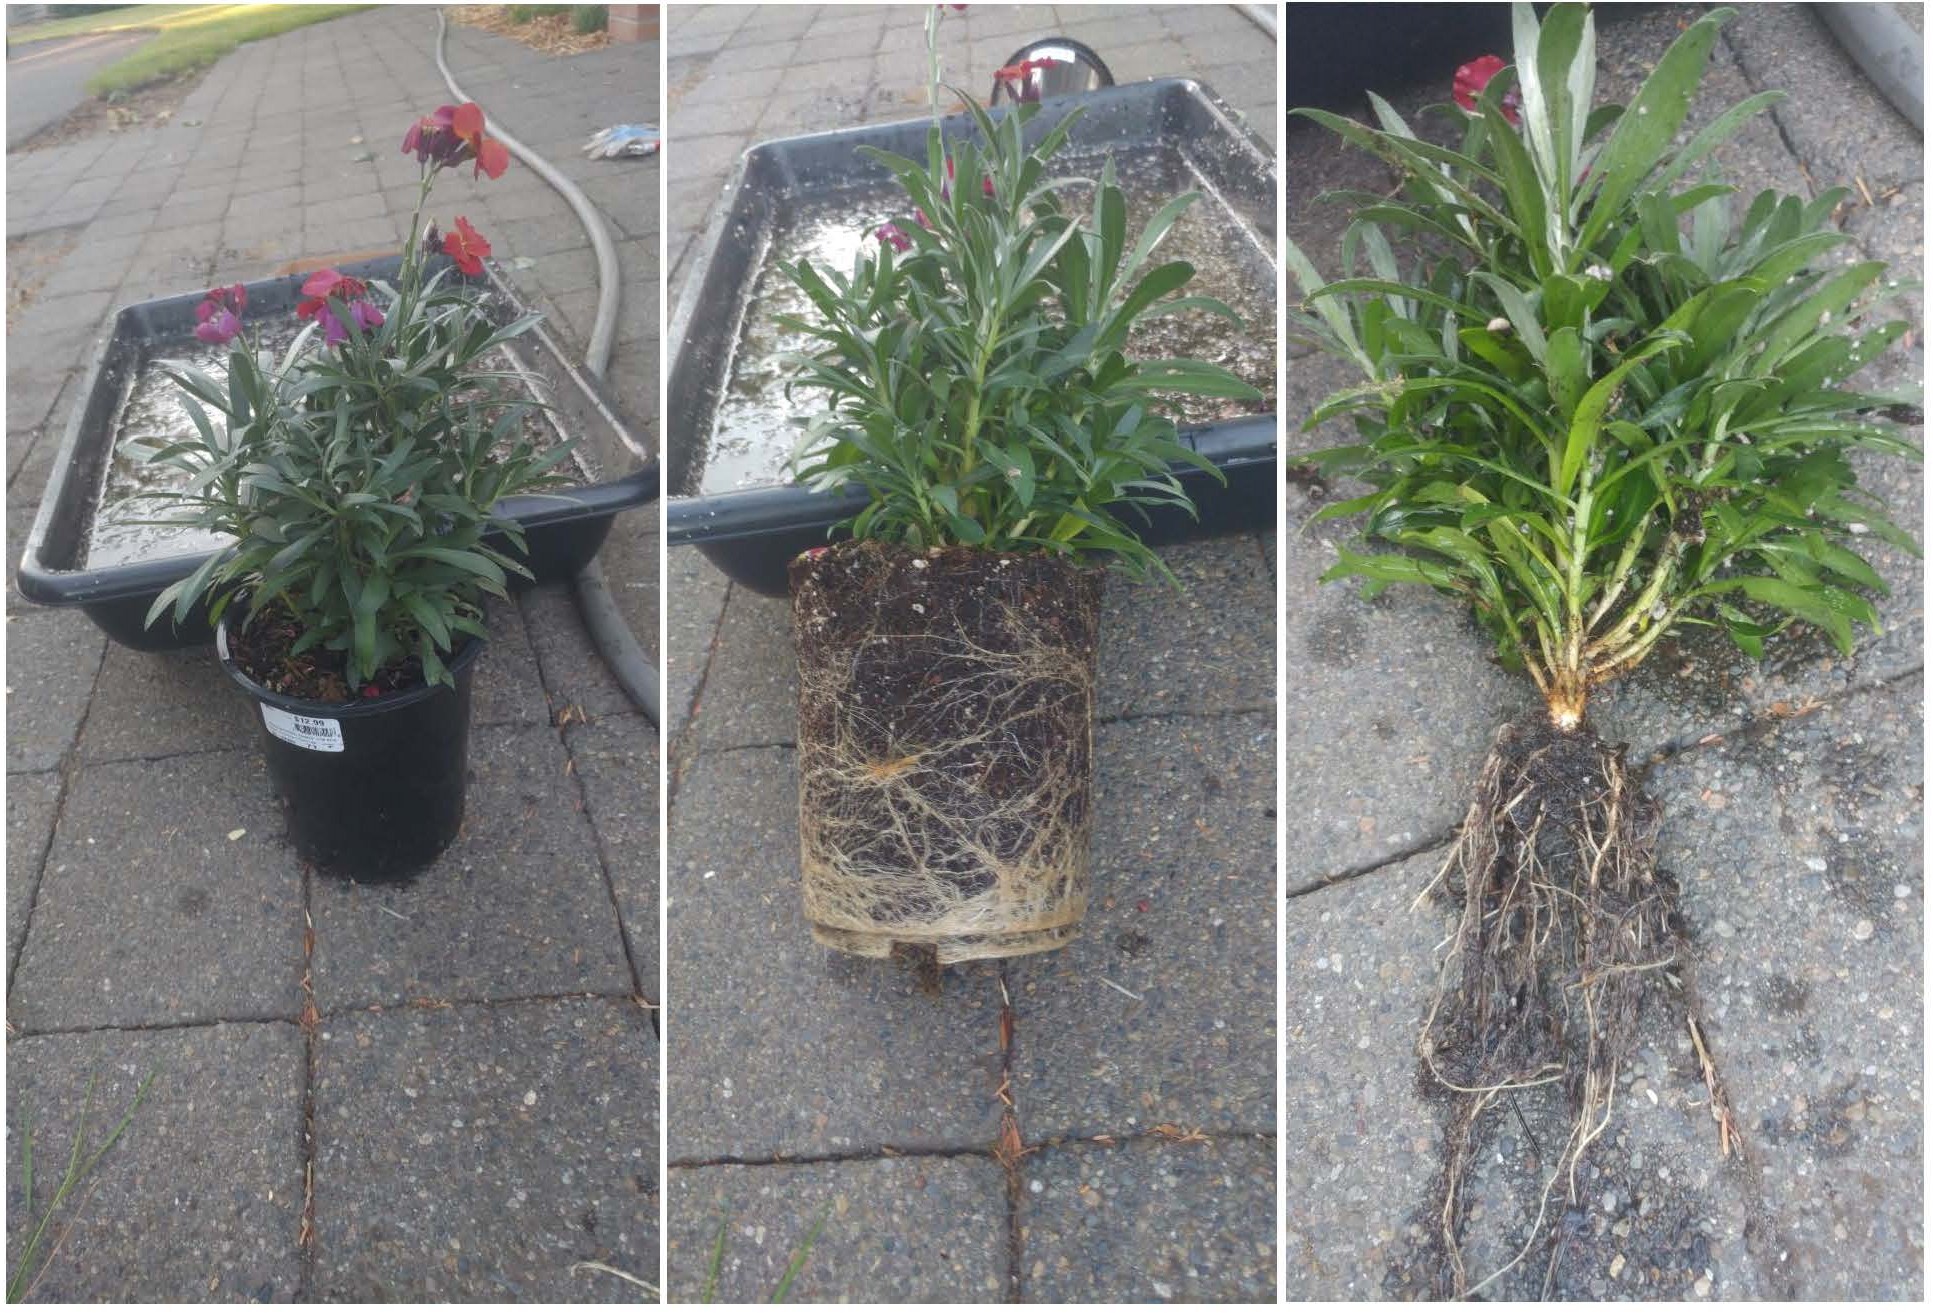
The Agastache and Verbena cultivars were also in pretty good shape, much like the Erysimum. Just a gentle washing and tickling was enough to remove all the media and reveal the roots.
Here is Salvia ‘Caradonna’ potted, depotted, and washed, and Lobelia laxiflora potted, depotted, and washed.
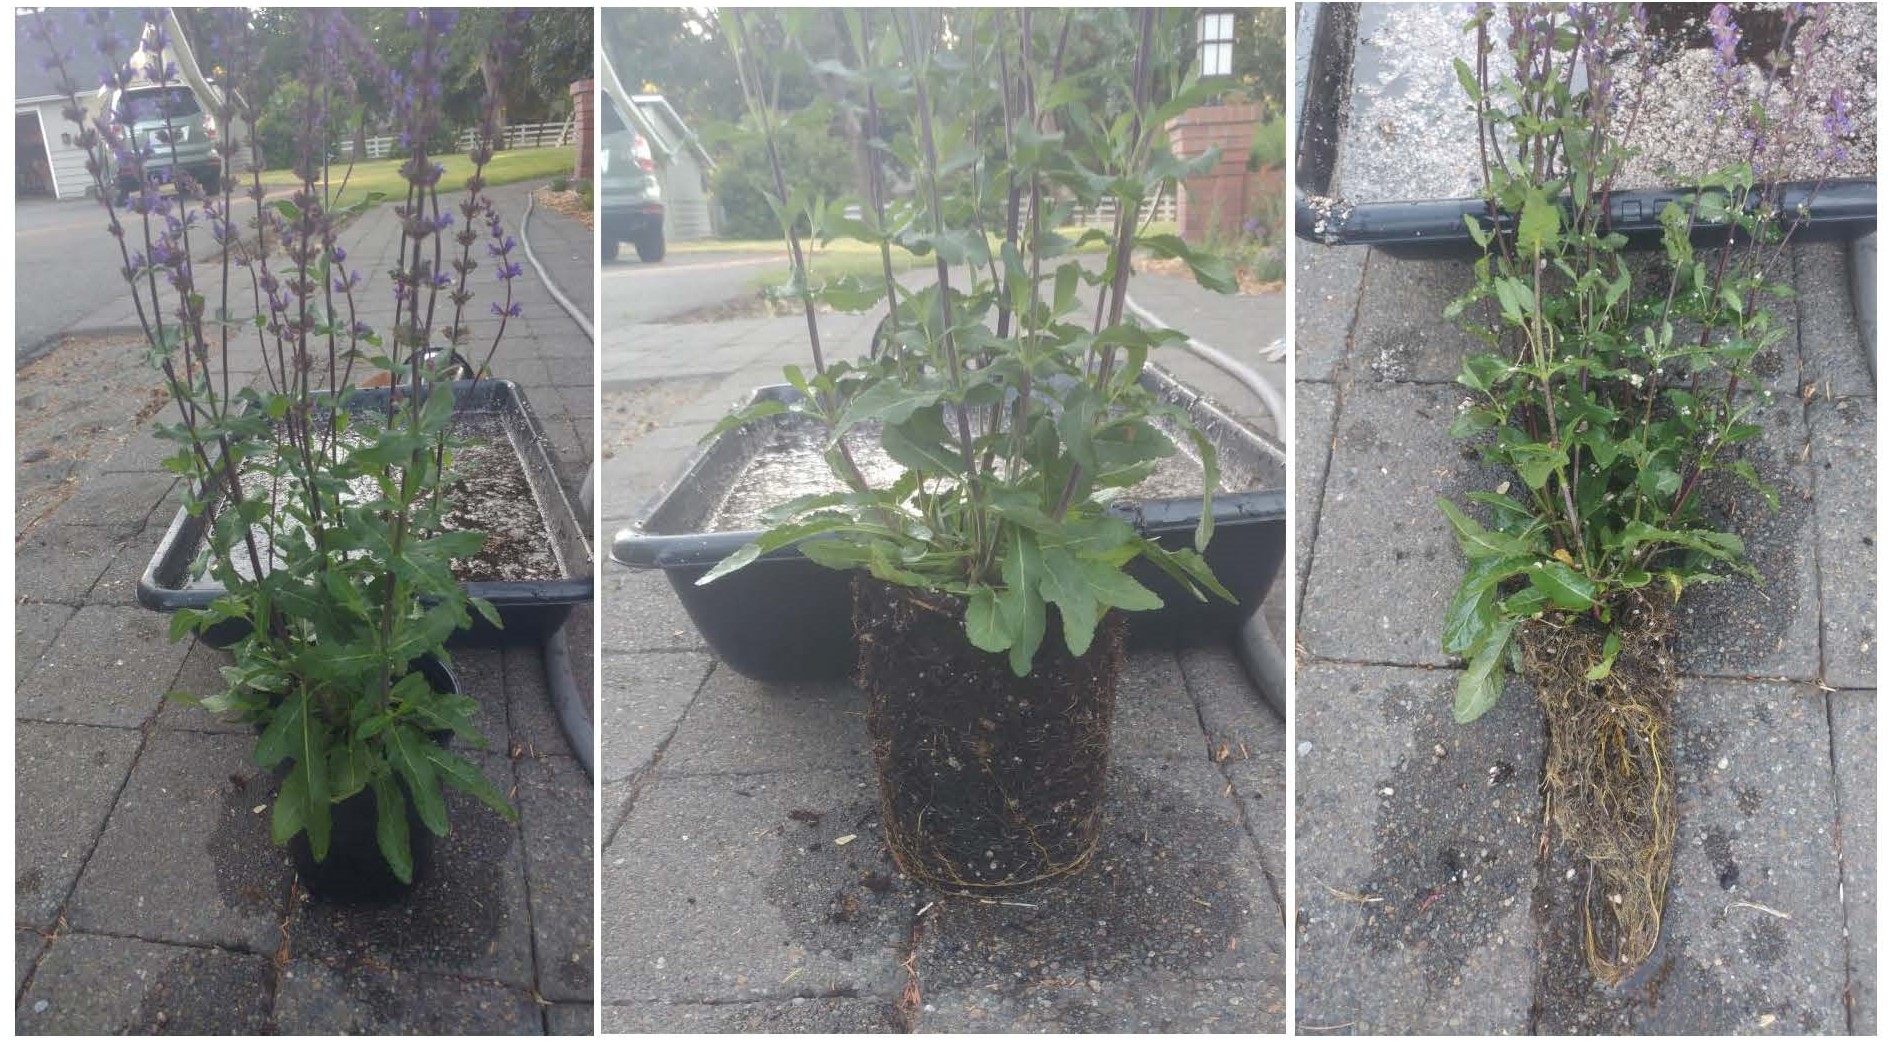
 Apart from the root Frisbee on the bottom of each pot, the roots were confined to the center of the pot, pretty much where they had been in their previous container. So question number one for all of you gardeners – why would you want to dig a hole to plant all of that media (which is nothing like your soil)? My answer – you don’t! Keep that good organic material as part of your topdressing.
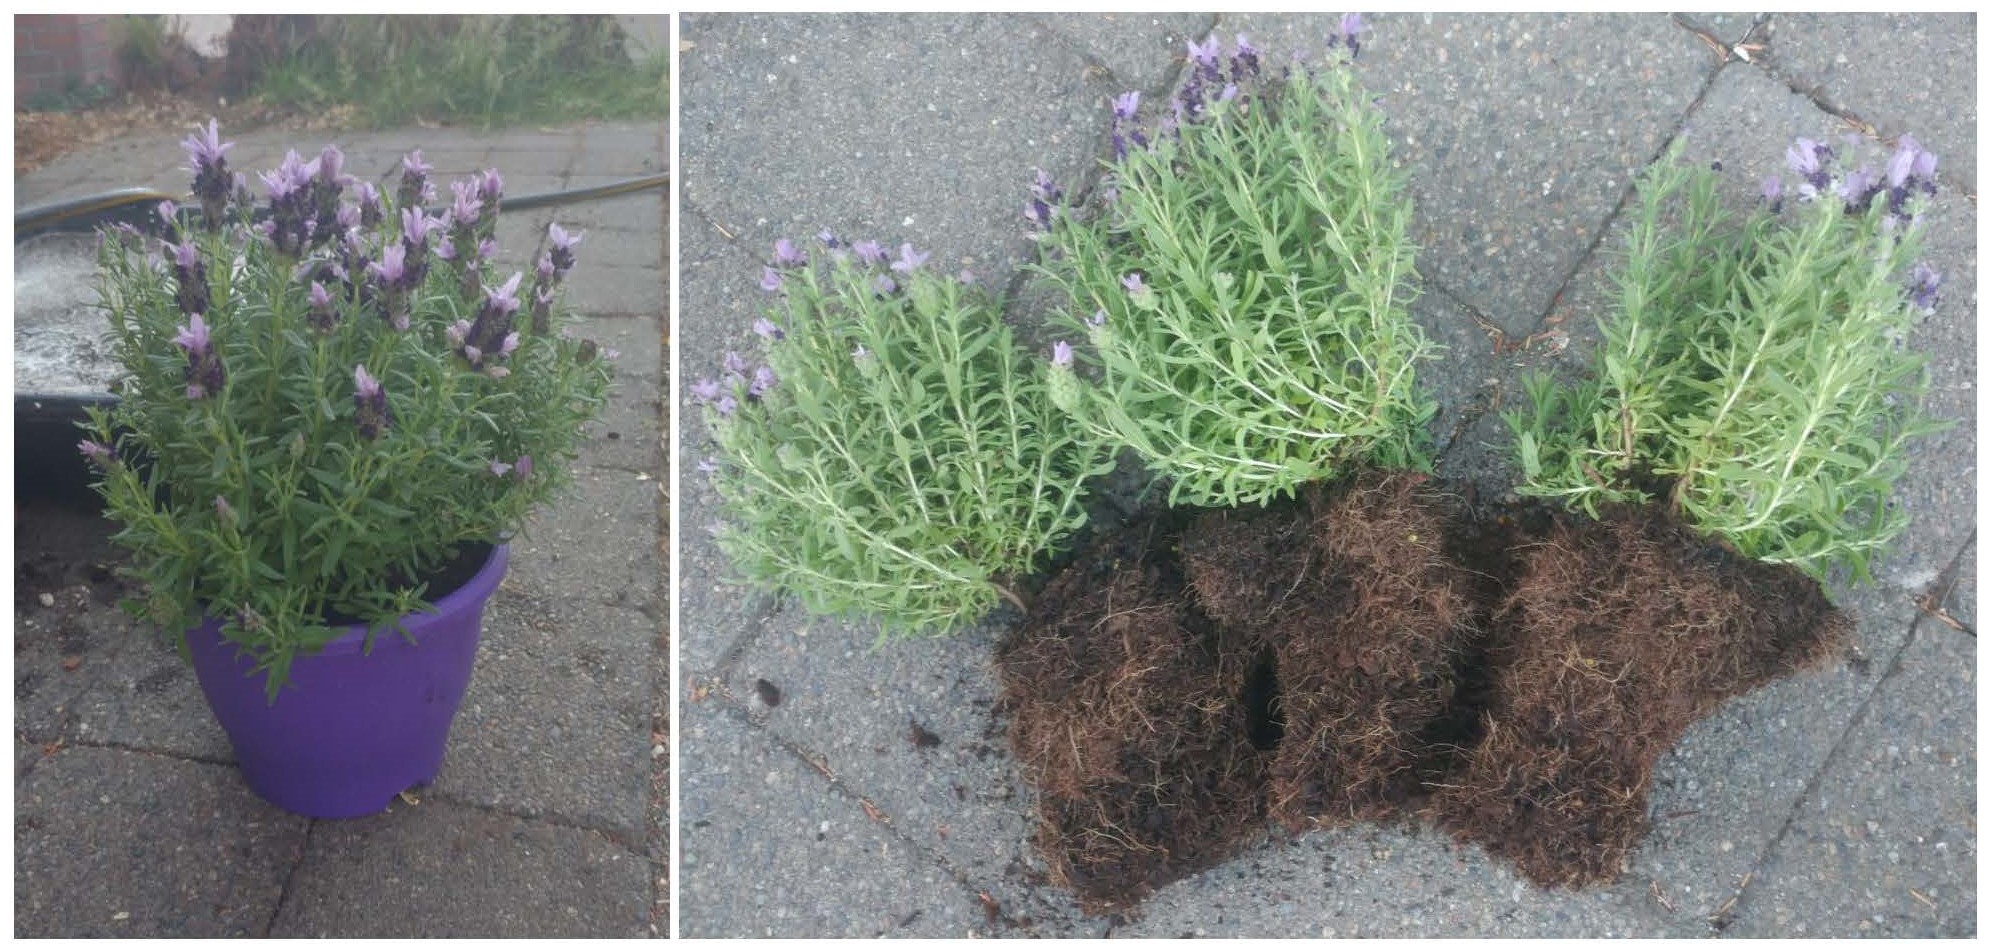
Here is Lavandula stoechas ‘Bandera Purple’ potted, depotted, and washed;
 and here is Lavandula stoechas ‘Winter Bee’ potted, depotted, and washed.
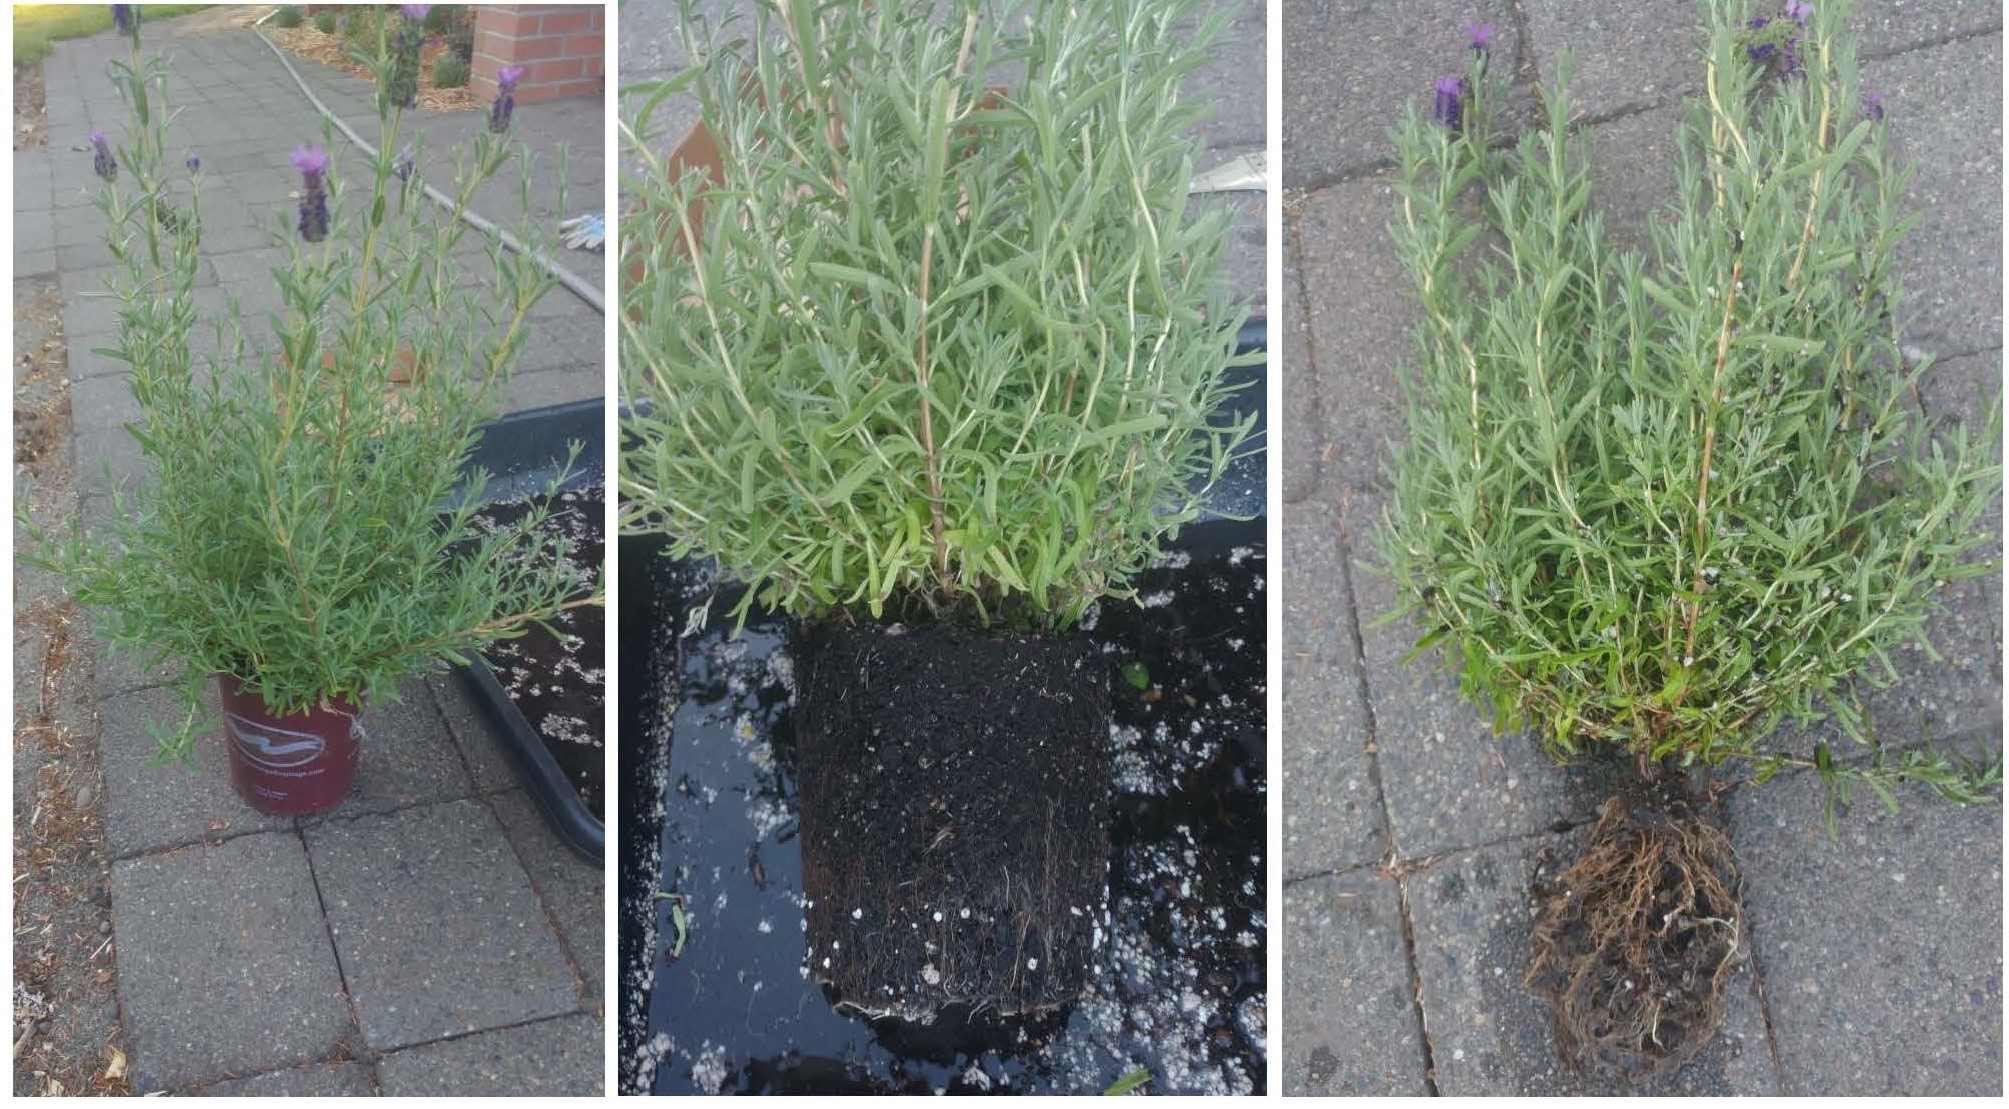 I have to take time out for a special rant about the lavenders (retailing at $19.99 and $12.99). Look at the root mass of the ‘Winter Bee’. It’s entirely unacceptable. The woody roots are in the shape of the liner pot from transplants past. News alert: these systems do NOT self-correct. They must be straightened or pruned to regain a natural structure. The ‘Bandera Purple’ – the more expensive of the two – was actually three plants in one color-coordinated bowl (“Go ‘Colour Crazy’ with matching pots and flowers”!). Fine by me – I just got 2 free plants. (By the way, this is nothing new for me – I’ve written about it previously here and here.)
Another upside is that hole digging was short and sweet. Holes were just deep enough to accommodate the root mass and wide enough to allow roots to be spread. Soil was added and watered in. The leftover organic media was used as the first layer of topdressing, followed by a fresh woodchip mulch. And then irrigation to soak the mulch well.
It’s important when you rootwash plants to provide optimal soil water every day, particularly when it’s hot and sunny (as this south-facing garden is). Even with the gentlest root washing there will be a loss of fine roots. But the continuity of the soil system means that the soil around the roots will be just as moist as the rest of the bed. Roots left in soilless media quickly dry out. Yes, I had afternoon wilt on many of the taller plants during the first week or so, but they recovered every evening. The wilt has become less noticeable since then.
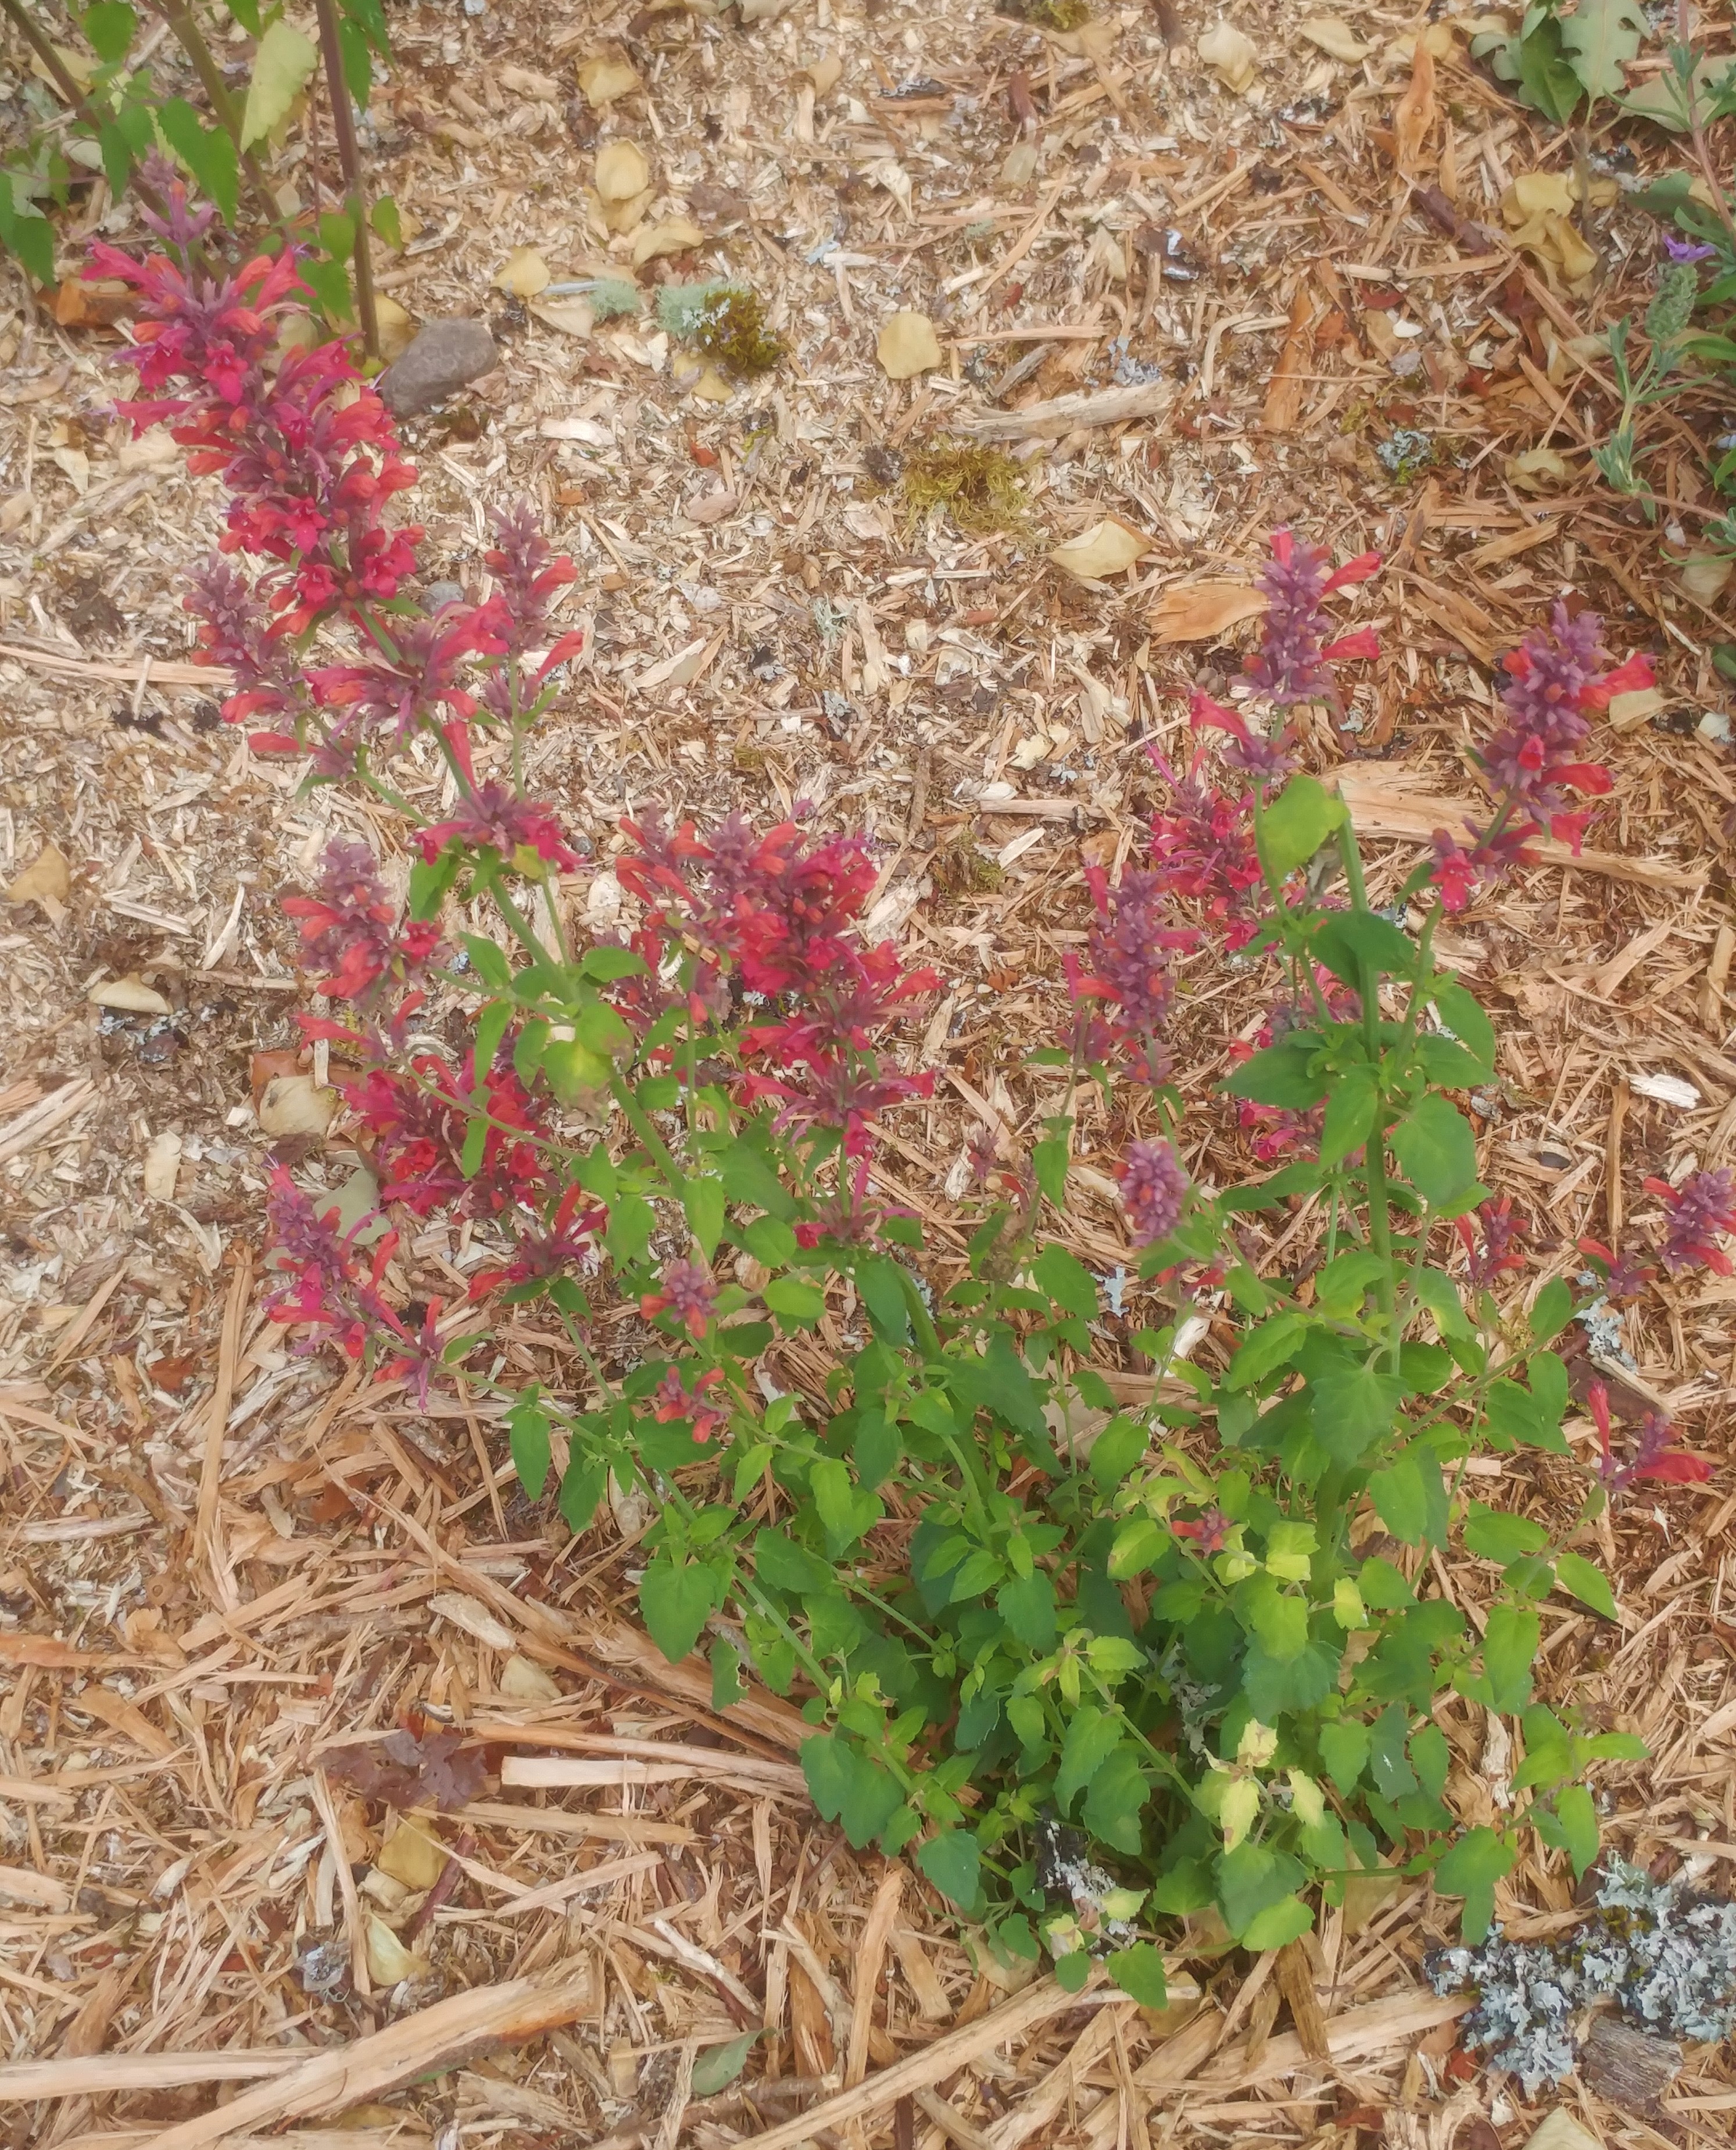
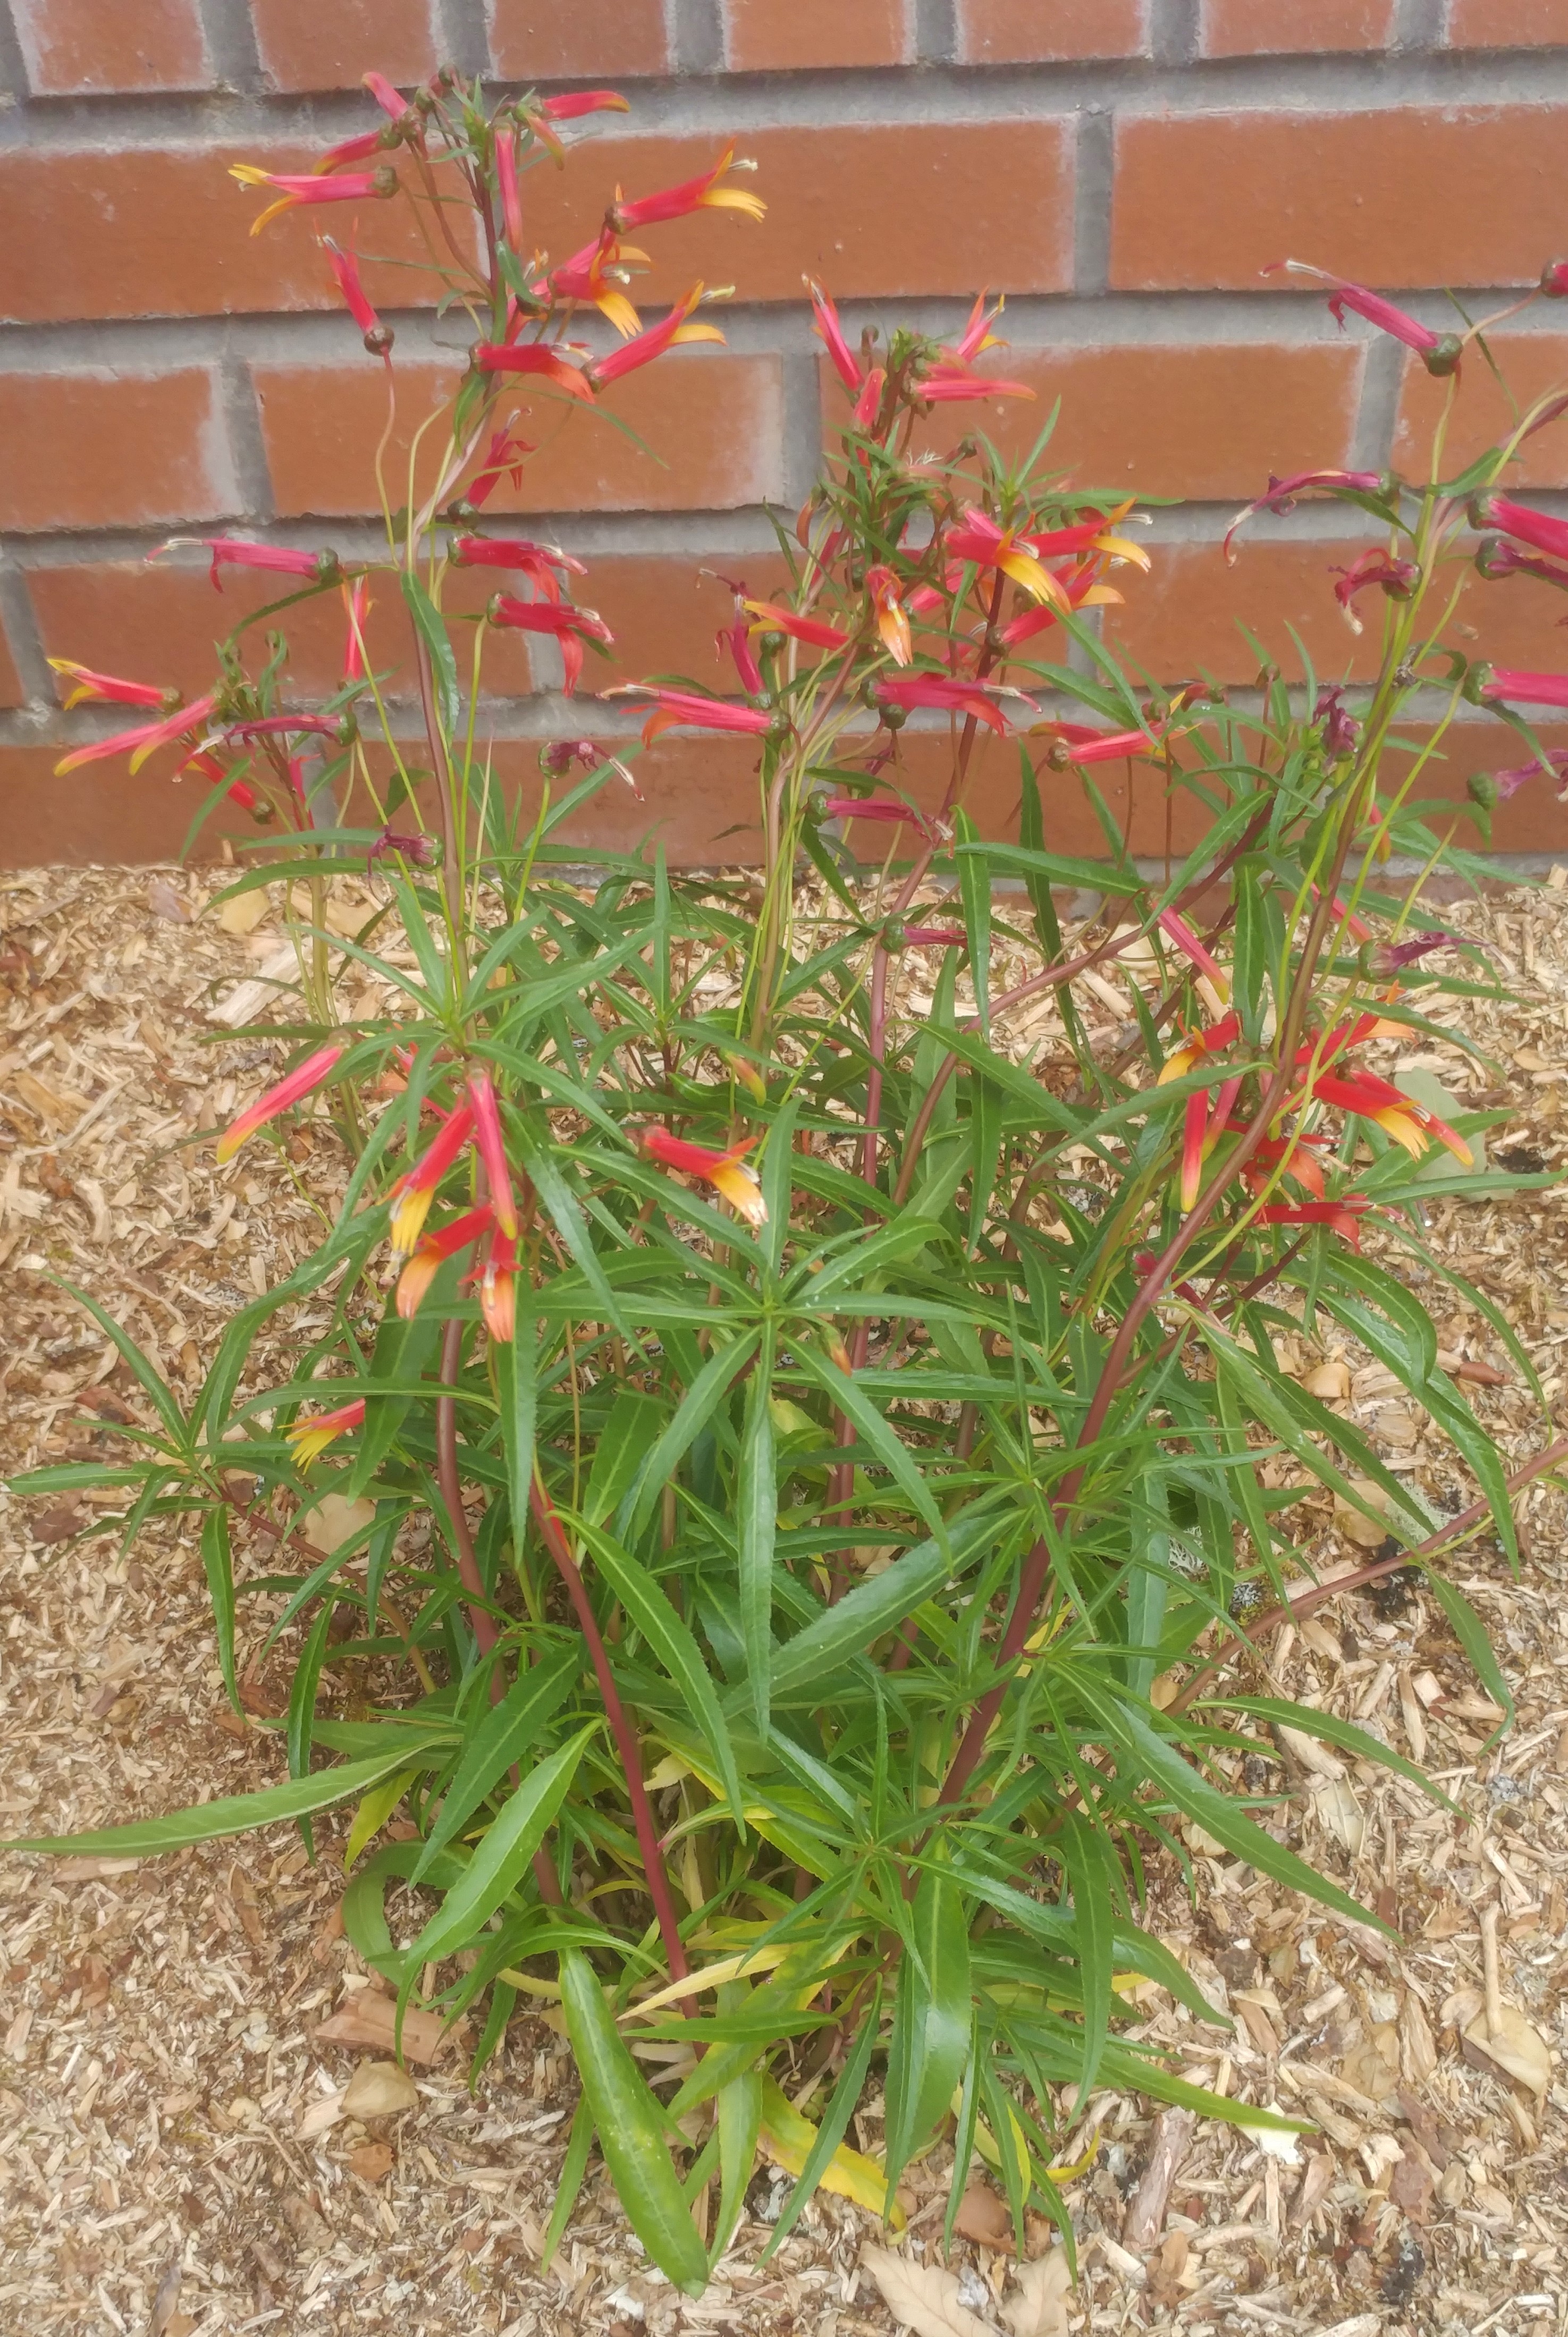
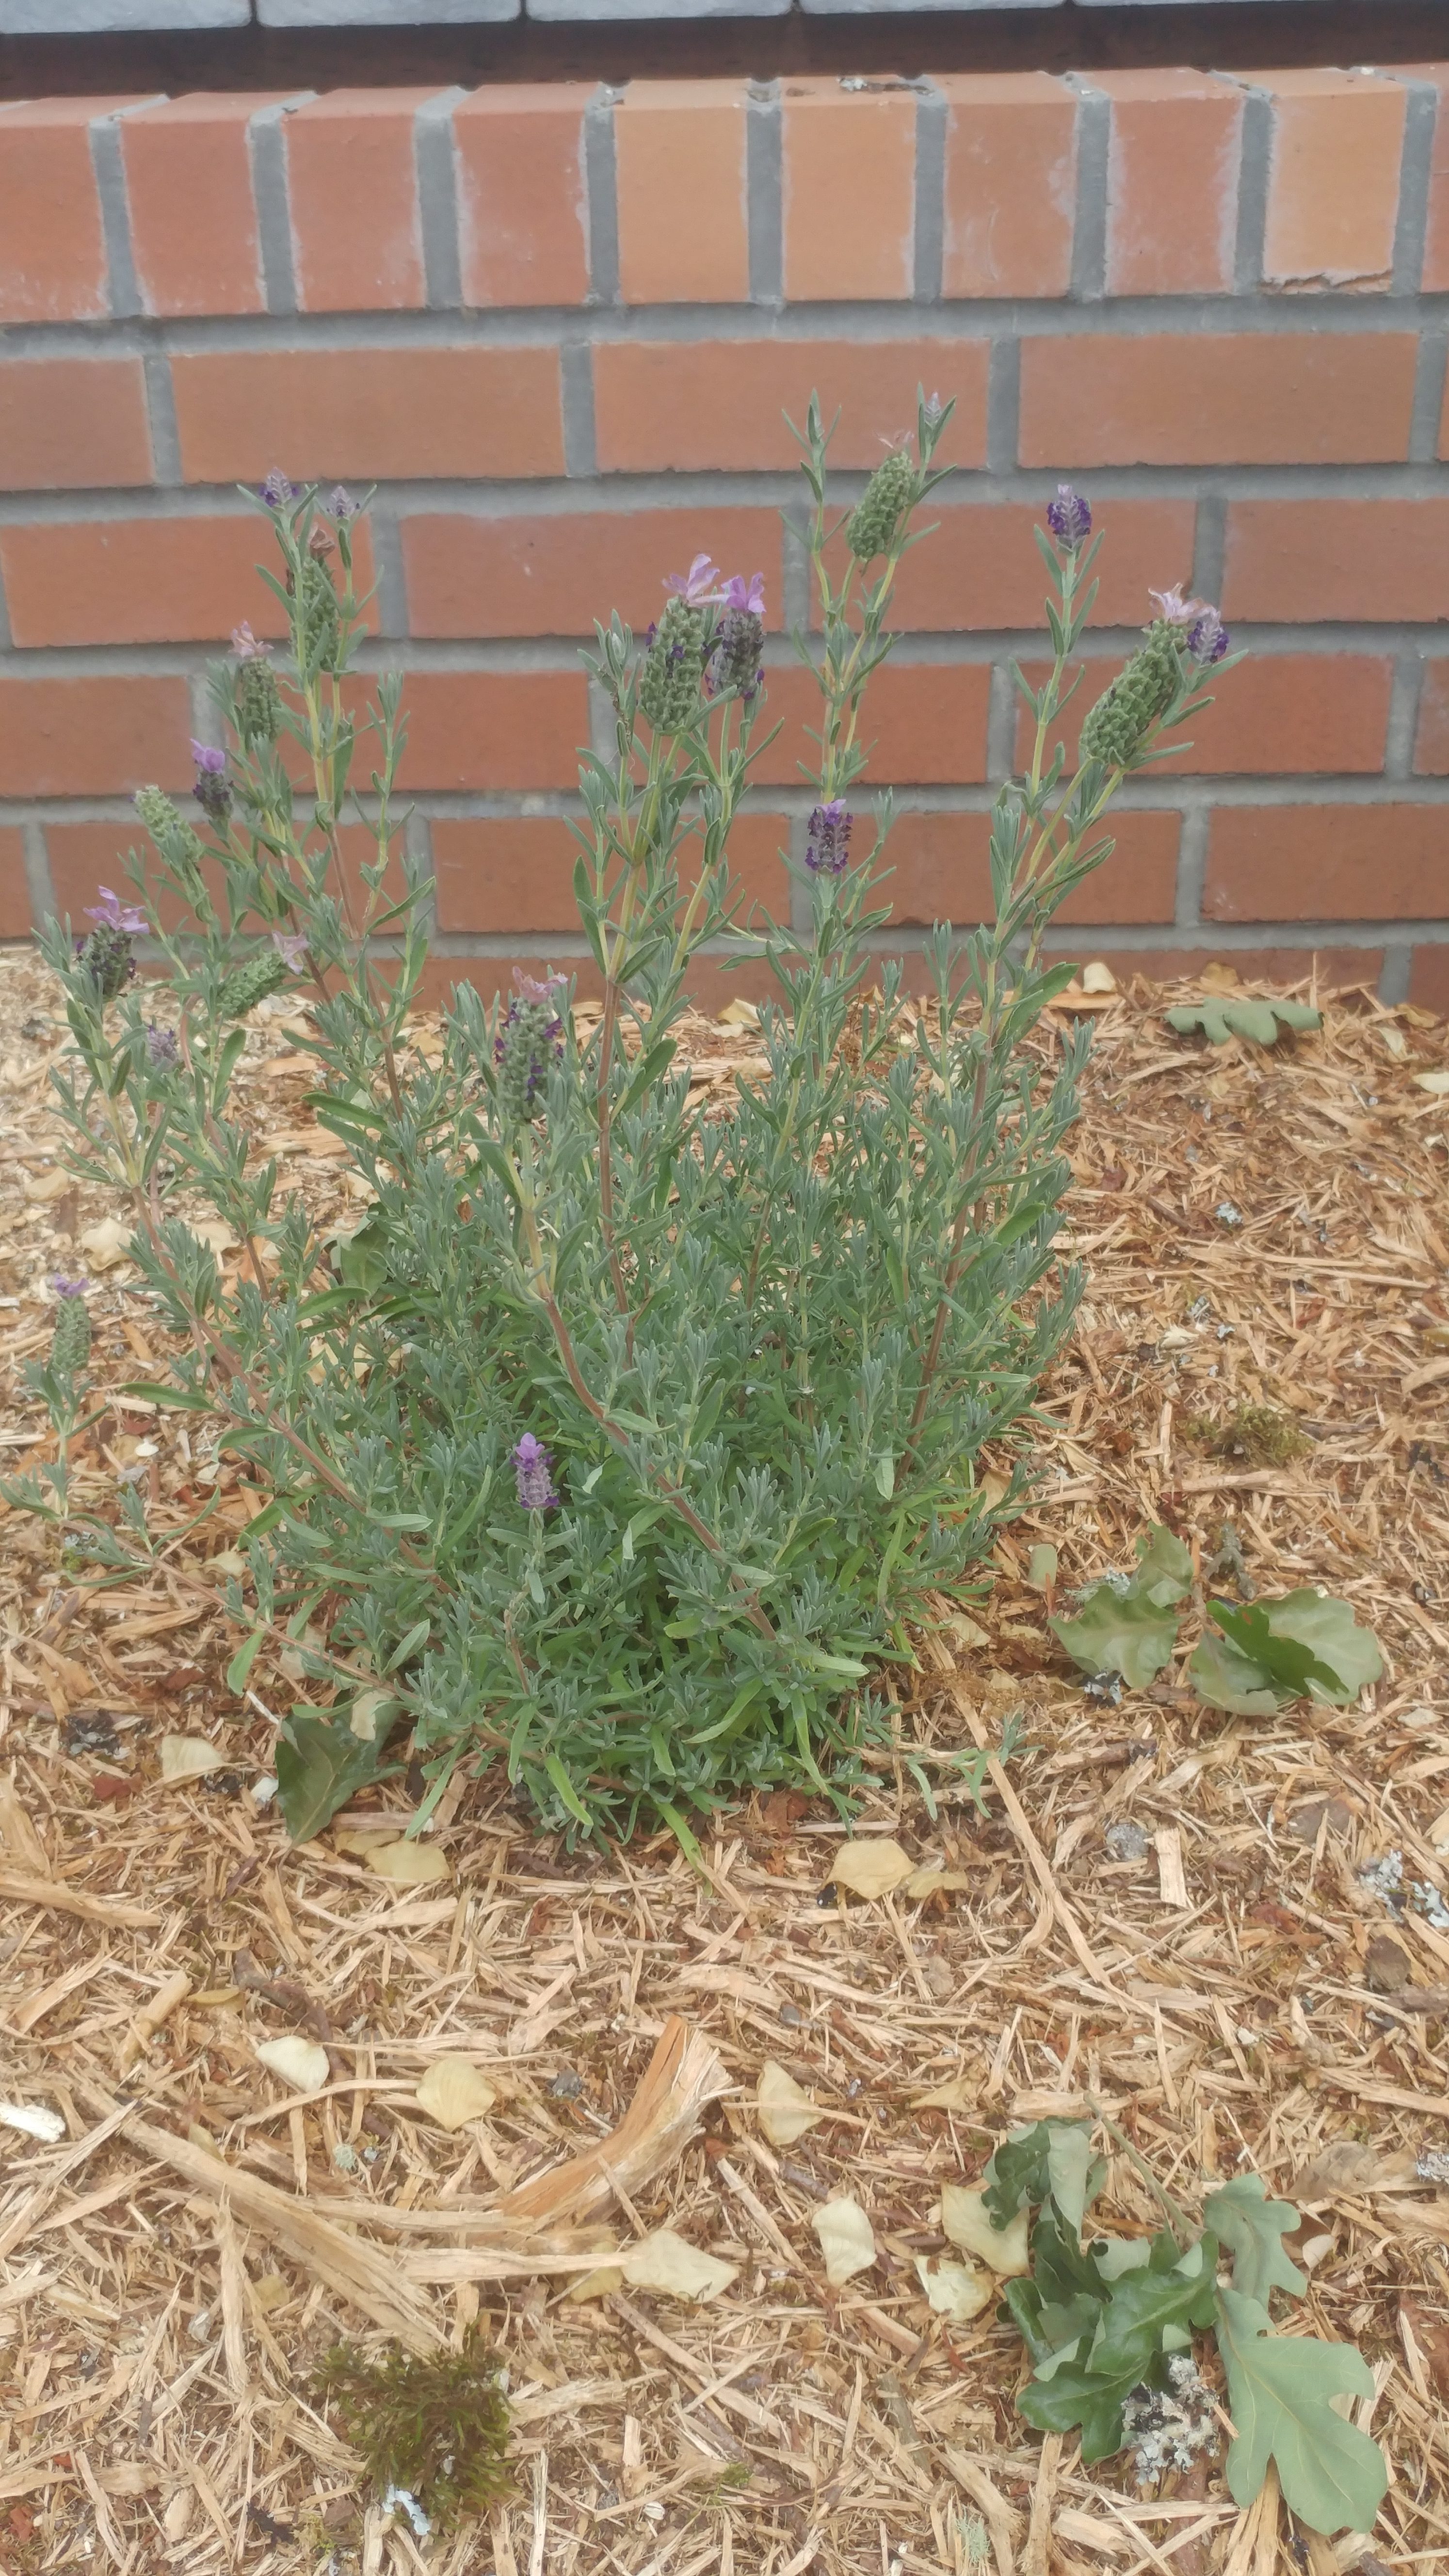
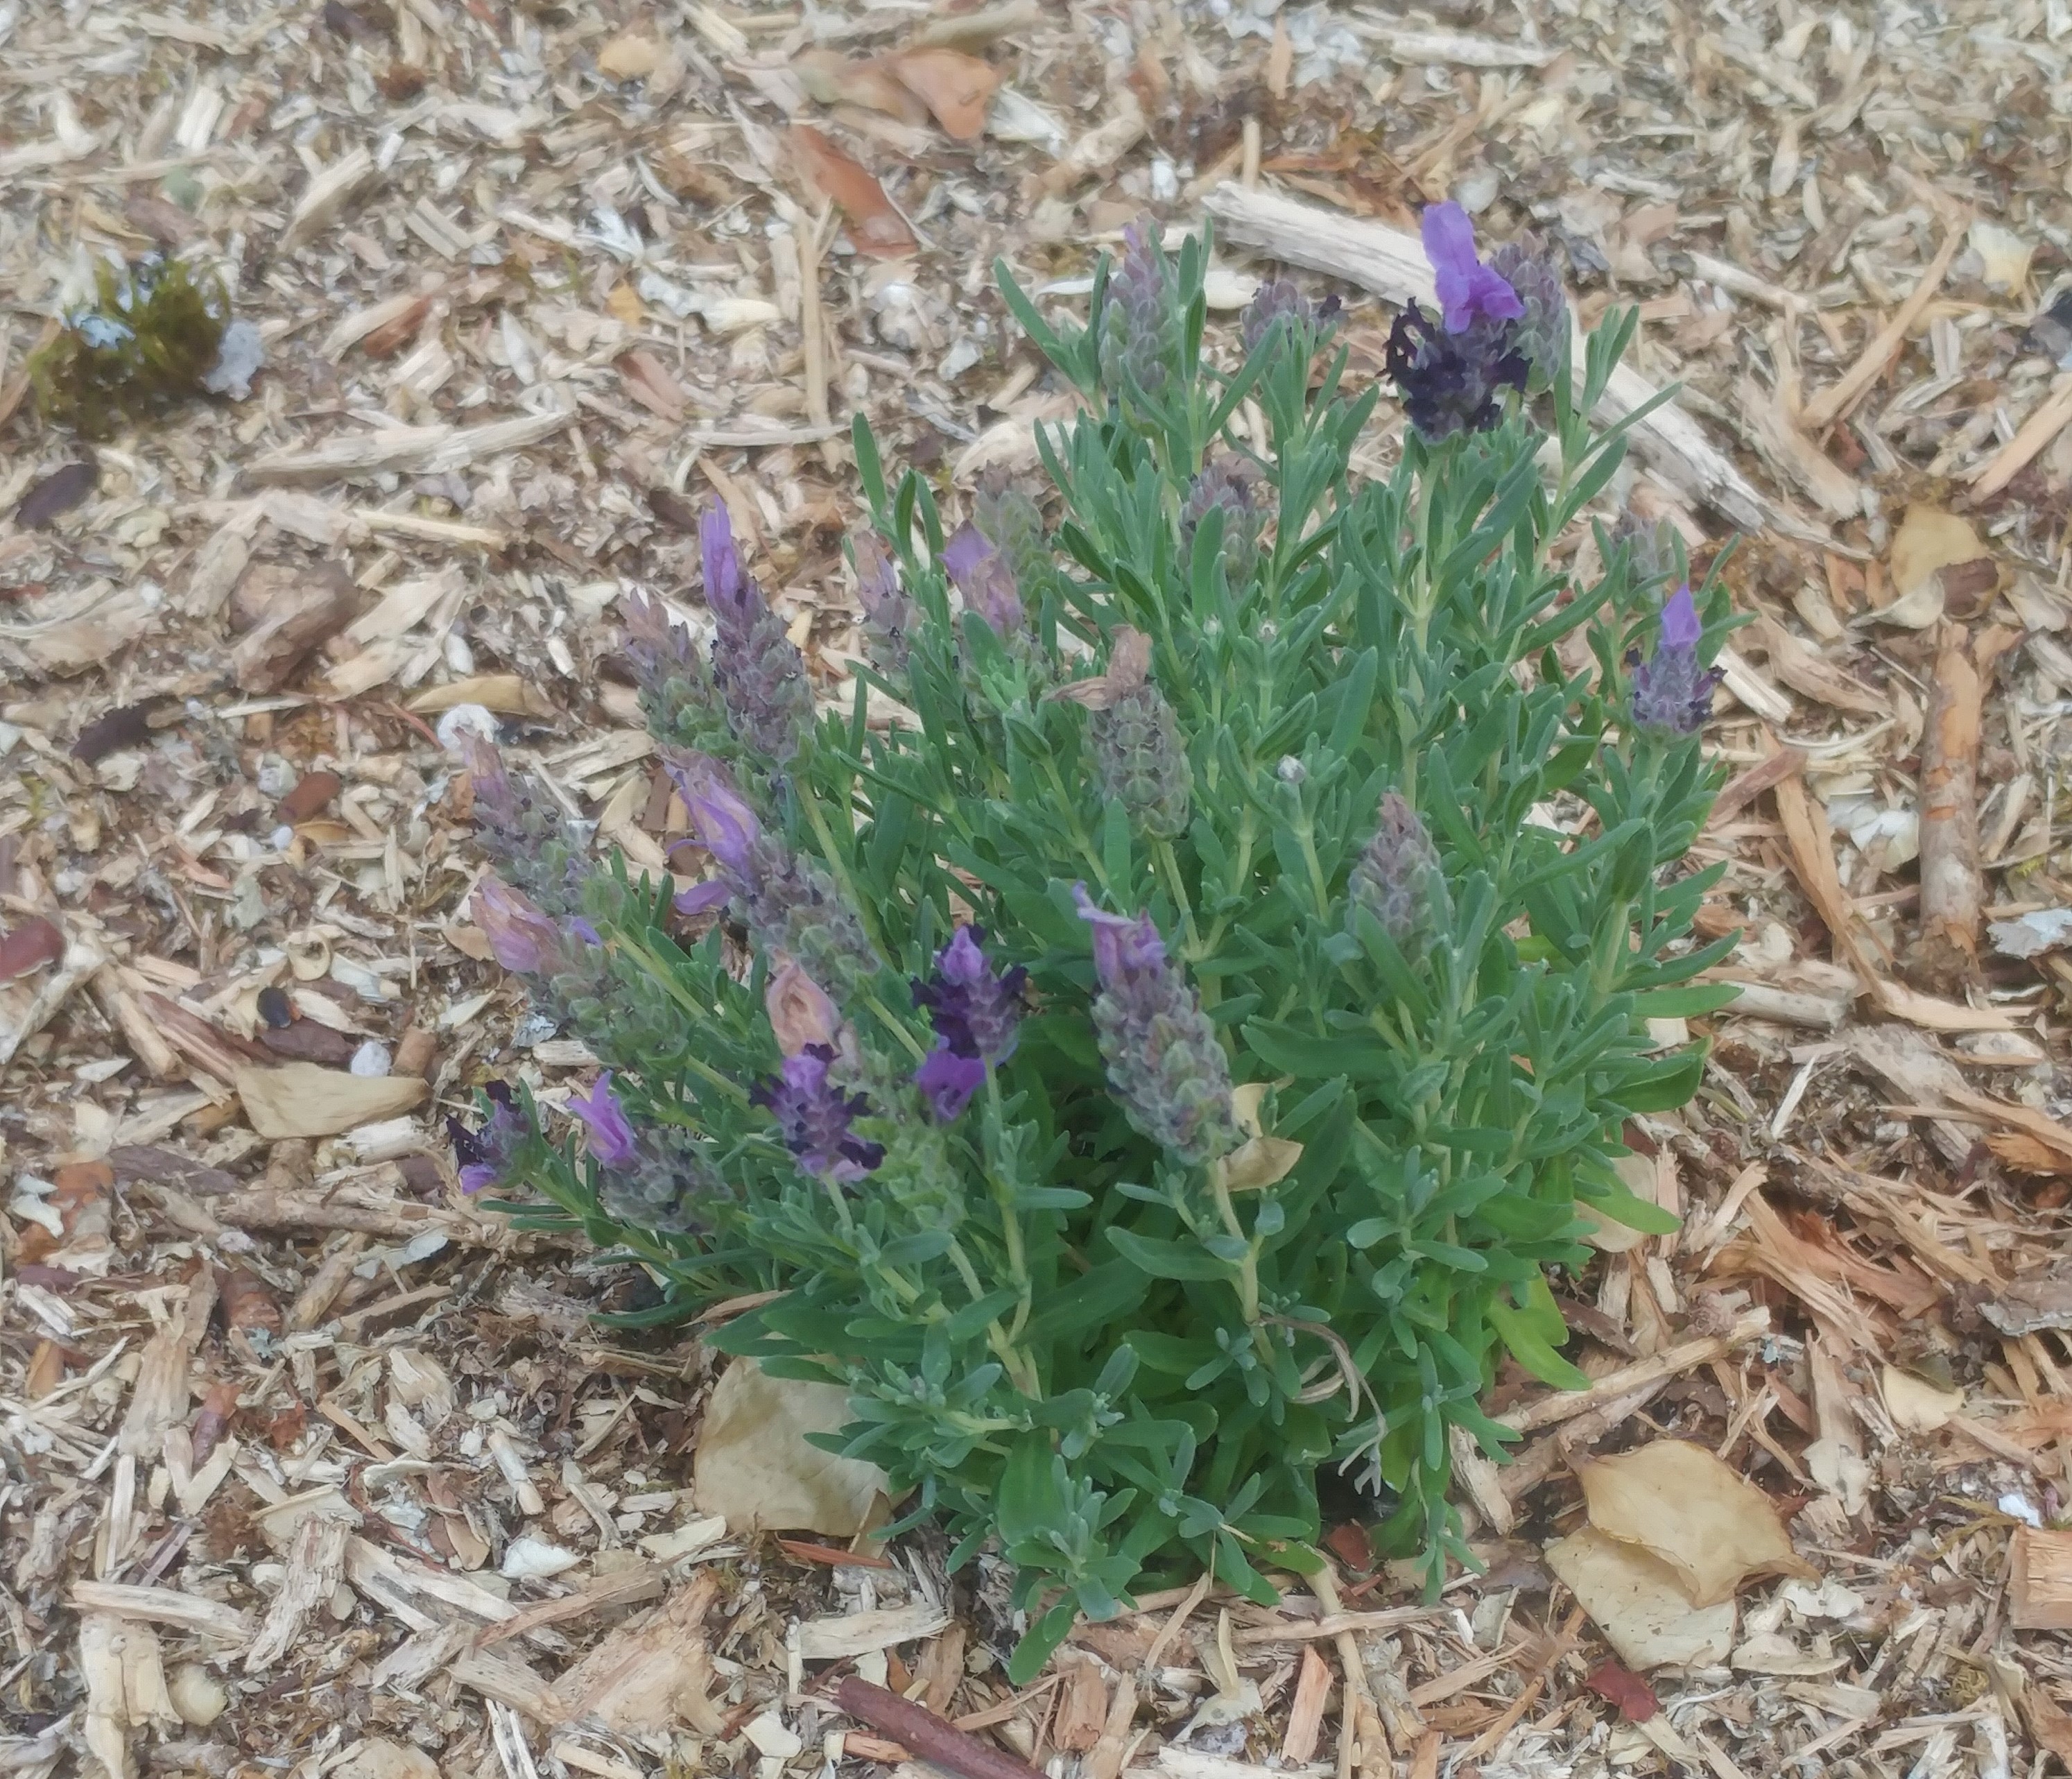
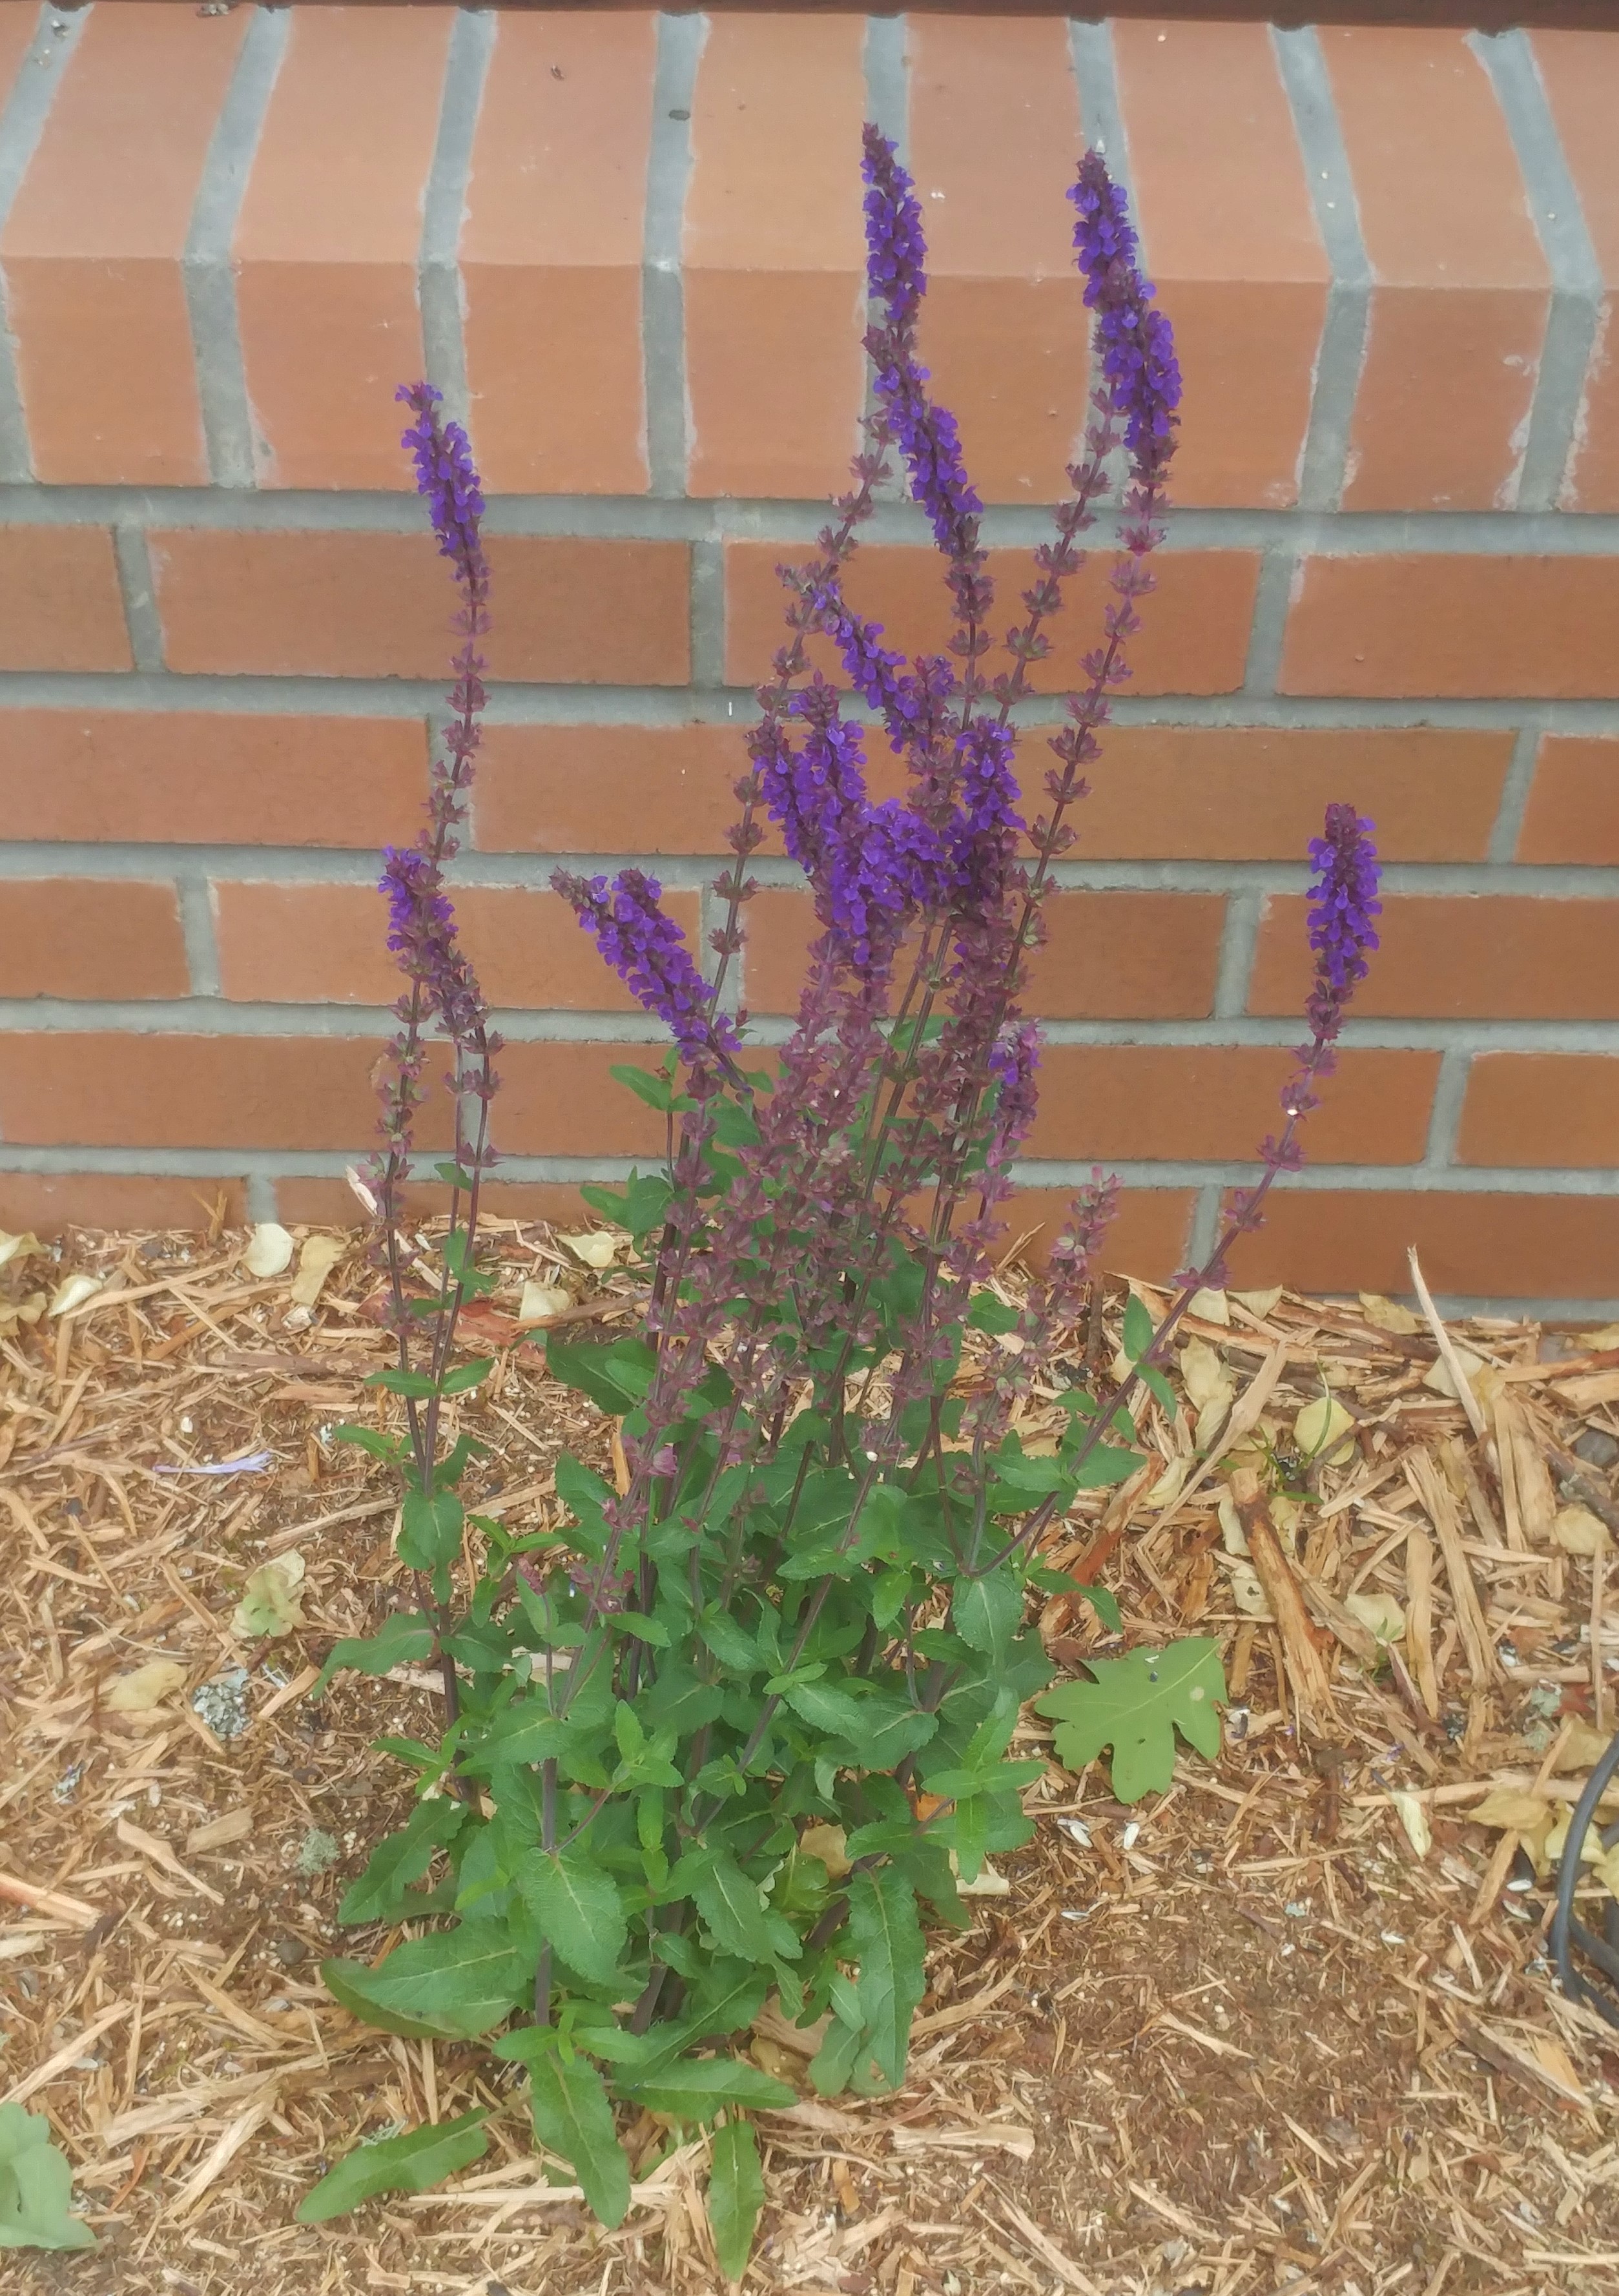
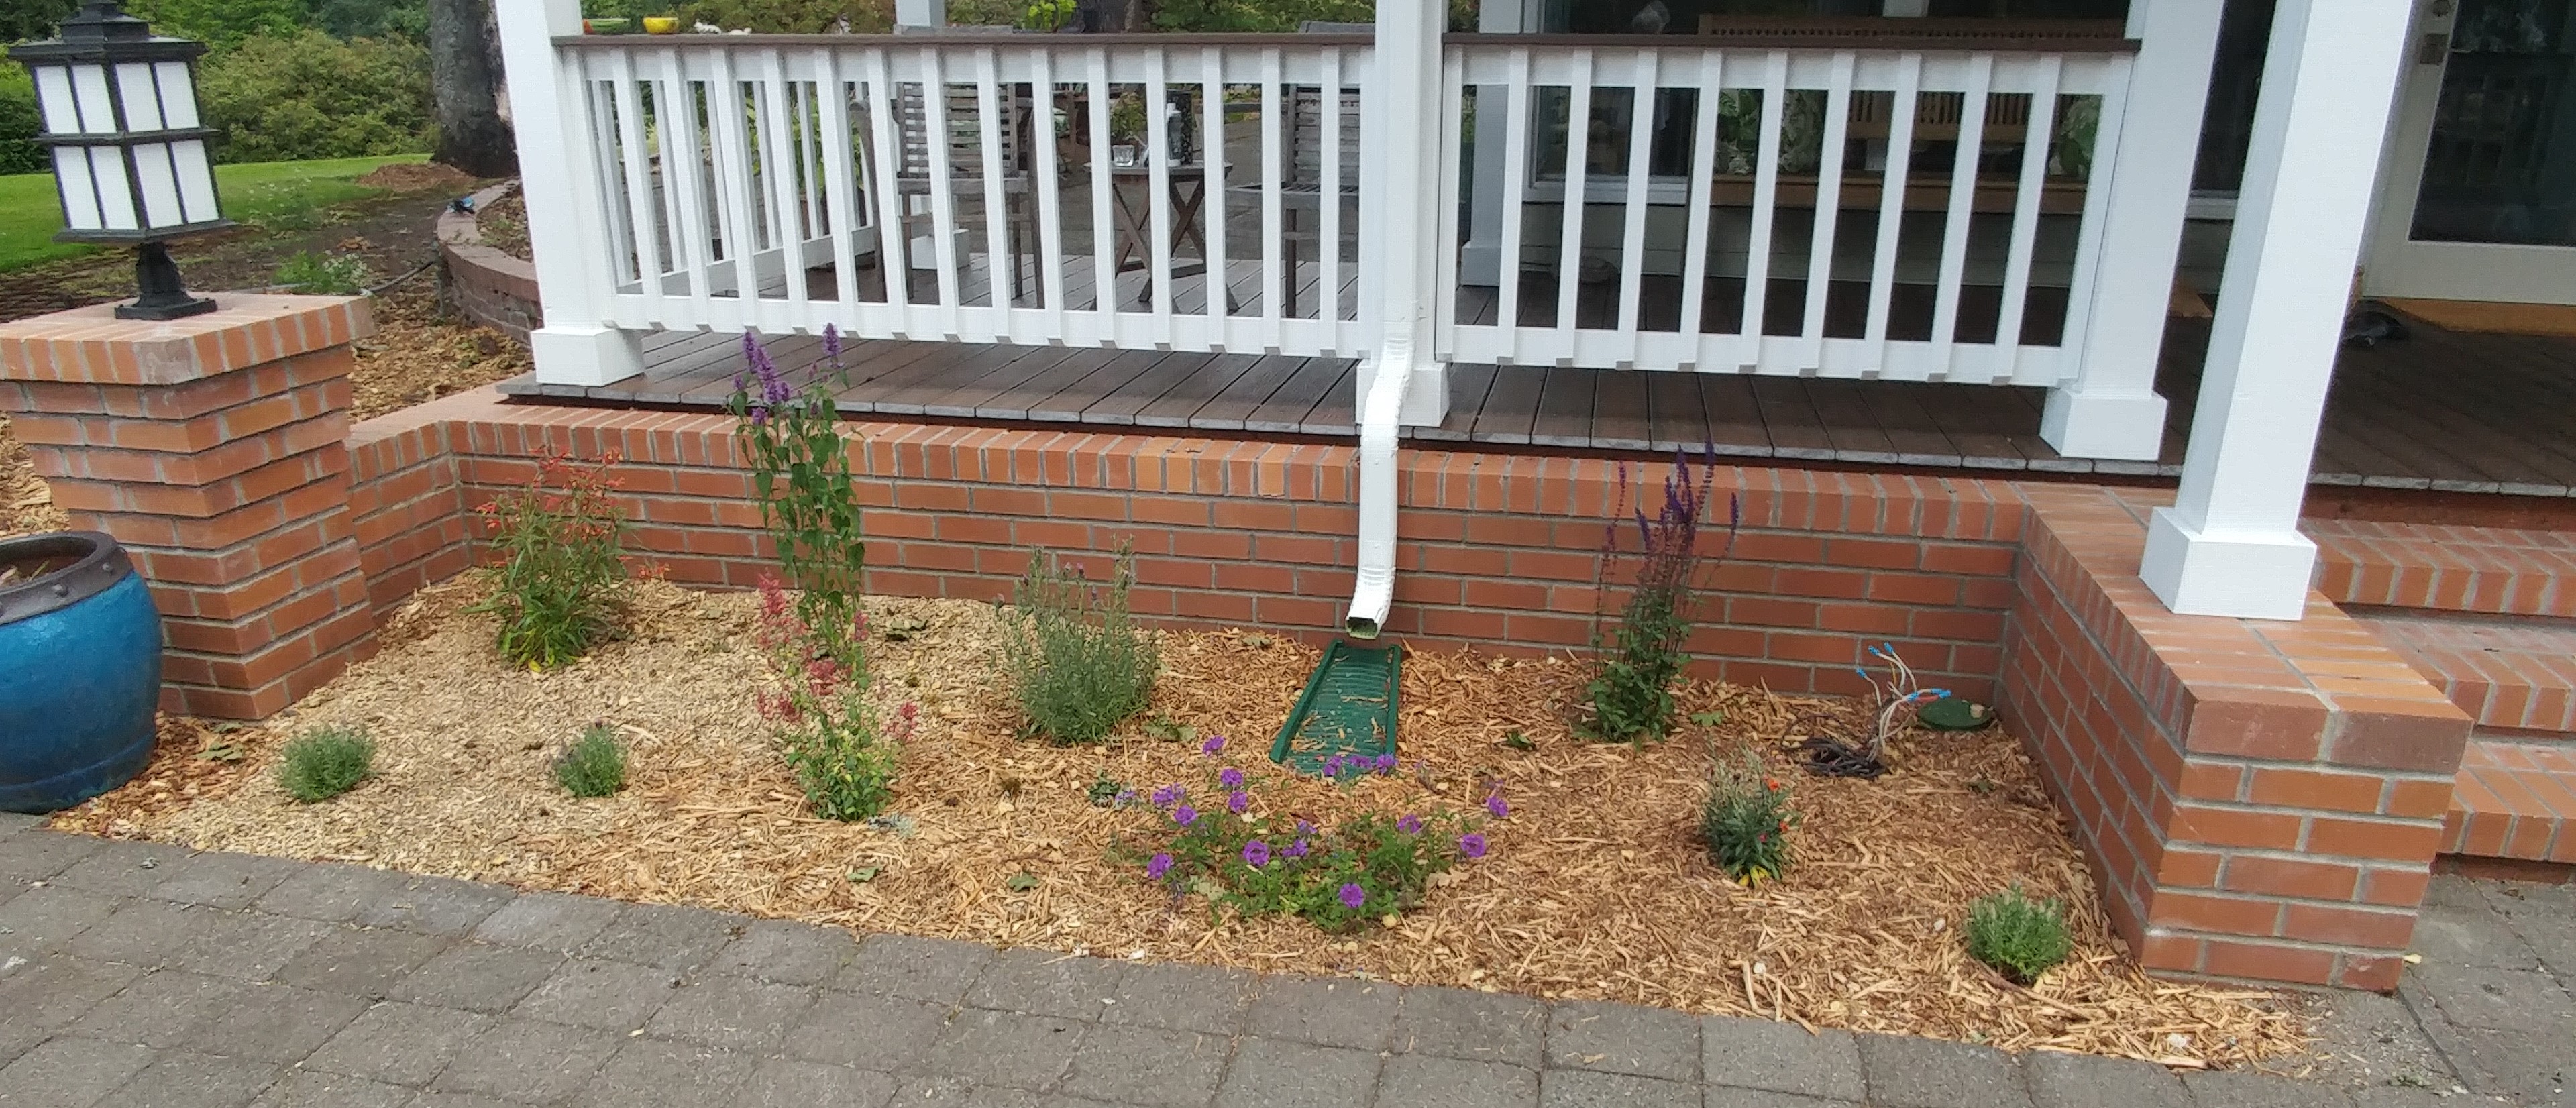
So here’s how they look 3 weeks after planting (sunny day, about 80°F). And I’m happy to report that not only birds and butterflies but hummingbirds have been visiting our pollinator oasis garden. And all those single photos scattered through the post? They are all close-ups from this garden – taken just minutes ago.
(Question number two for gardeners – what are you waiting for?)
Does lavender survive the Northwest winter? I’m in a Zone 6 Northeast region and have not been successful yet. This year I am trying Phenomenal, which was recommended as more winter hardy.
I am almost convinced in the case of correcting the harm done by the garden centre’s potting but do not feel tempted to wash roots when just dividing plants in the garden
My aged eyes would pick up more detail if your pictures were bigger. I realise clicking on them will help
PS Lobelia laxiflora is pretty rare over here in England but I am pleased to report it does well for me in York
Unfortunately I’m technologically limited when it comes to adjusting the code to make the photos larger in the post – this is the default size. You can, as you note, click on them to see them better.
This article doesn’t address what are the advantages of doing this method. I love to see pictures of the root ball system 2, 4, and 6 weeks between using this rootwashing method and the regular loosening method.
I added some links to previous posts for on the topic. You can also use the search box to find yet more posts on the method.
I received a gorgeous lavender from my son for Mother’s Day, that looked similar to the one in your picture. It was large and full of beautiful blooms. Within 3 days it began wilting rapidly. I had already removed the decorative foil, so I slid it out of the pot – horribly rootbound. I clipped around the bottom edge (the “frisbee”), and teased roots from the sides and bottom. The medium that was left – small bark chips and gravel – fell away. I transplanted it into a slightly bigger pot of potting soil, spreading what roots I had loosened, and gingerly watered it. I also clipped most of the blooms off. Within 2 more days, half of the lavender was dead. As it wasn’t near as full, so closer inspection showed that there had been two large lavenders planted in that original 6″ pot. I took it from the pot, removed the dead plant and repotted the remaining wilted lavender again. I left it in a protected area where it received only morning sun. The first few days were encouraging, but within the next 10 days, it too was completely dead.
If I had known about root washing when I received my gift, I certainly would have tried that method first. It hurt loosing a Mother’s Day gift from my son, especially since I call myself a gardener.
I did try the method with a Holly purchased a month ago. It was horribly root bound, and I am pleased to report that it is alive and is putting on new growth. I would say the difference between root washing and not root washing would be a living plant vs a dead plant.
I’m going to try your method on Shasta daisies (1 gal. newly purchased at my big box store.) I’ve slashed and teased the heck out of them after I pried them from the container, they still die no matter how much I water after I repot them. ( same thing happens with the ones I try to keep saleable at my big box.) They come in extremely potbound with no room for water.
I’ll take pictures and post them if possible. love the website!
Good luck! Be sure to do this in a cool, shady environment and keep those roots soaked until you get them planted. Water, water, water!
Do you trim the roots before planting? The roots look mighty long after washing, I wouldn’t want to dig a hole that deep in our pennsylvania clay soil.
The roots are spread out, like spokes on a wheel. The hole itself is relatively shallow.
awesome, thank you. By the way, i recently purchased your course “The Science of Gardening” from The Great Courses. My husband and I are loving it – learning a lot.
So glad to hear you are enjoying the course as well as our blog! I was honored to be invited to make the series.
Thank you for a well explained method of transplanting plants. It took me too long to understand that most plants are root bound when you buy them and will die if you leave them in the pot.
Awesome article and I love your method. I bought some rhododendrons online which were in a soilless medium and I knew that my Georgia Clay would constantly pull water from the root ball so I root washed just by instinct before I found your article. I was expecting them to die and then I read your article and I kept my fingers crossed and so far they are doing fantastic. I did buy 4 jap maples from a local wholesale nursery in which I pulled the root ball out of the container to inspect and they looked ok. Once I got them home and root washed, it was a totally different story. Girdling roots galore. With one of them I had to remove about 80% of the root system so I’ll see what happens. My thought was, with the severe girdling, it was going to die eventually so at least I was giving it its best chance to survive. Thanks again for the article and I will continue to check back and utilize your methods!
Leslie, it’s great to hear about your success, and your revelations about what’s going on inside those root balls. Do be sure to keep things mulched well with coarse wood chips (not bark) and keep the area irrigated. They may take some time to leaf out in the spring. But you can do the wiggle test to reassure yourself that roots are establishing.
A interesting thing I noticed is, before I root pruned the girdling roots of four Japanese maples and re-planted them, all of them were having branch tip die back consistently. They were actually showing tip dieback when I initially put them in the ground. They had been in the ground for about 4 weeks before I replanted them and now they’ve been back in the ground for about 3 weeks and so far not one of them has had any die back. I will continue to keep them irrigated and monitor them but I’m hoping that it’s an indication that the trees are a little happier despite pruning away some of their root system!
Chronic tip dieback is a good indicator of root failure or lack of establishment. You should not have this problem in the future!
That is so great to know. Thank you for the info. Cheers to you and your brilliant knowledge!
I most definitely will! Thank you!